It wasn't that long ago that we installed programs on our computers using floppy disks, CDs, and DVDs. However, nowadays, most programs that we install are simply downloaded from the Internet, making CDs and other installation methods more of a thing of the past.
Apple likes to call its programs applications. You can download applications from the App Store. You can use the App Store to find a specific application you want to download or search for a type of application (for example, photo editing programs, productivity tools, or even games.) You can also read about each application, as well as browse user reviews. Once you find the application you want, you can download it to your computer. Some applications are free, but some you will have to pay to be able to download or use.
The App Store is located in the Dock by default. Its icon looks like this:

You can also go to Launchpad to open the App Store.
About the App Store
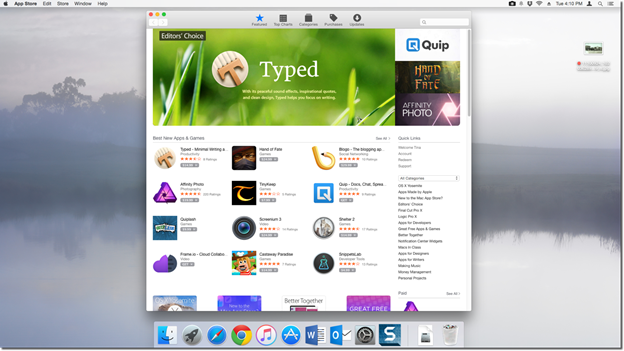
The App Store is pictured below.
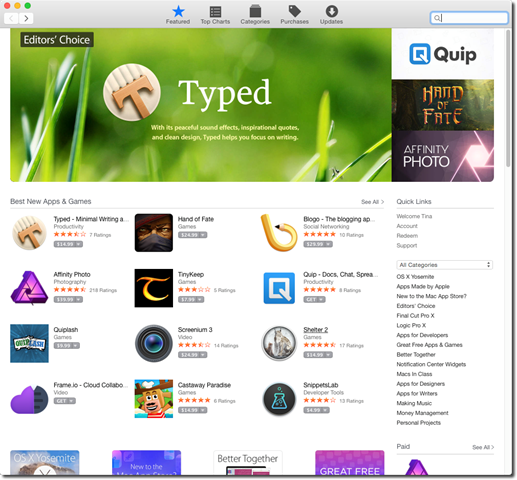
At the top, you will see five tabs: Featured, Top Charts, Categories, Purchases, and Updates.
-
The Featured tab shows apps that have been handpicked by the Apple App Store Staff.
-
Top Charts shows the most popular apps.
-
Categories shows apps divided into categories, such as Business, Developer Tools, and Education.
-
Purchases shows all apps that you have downloaded. This includes one you purchased and ones you received for free.
-
Updates contains updates to your apps, as well as to OS X Yosemite.
To find an app, simply type the name or type of app in the search box in the upper right hand corner of the App Store.
How to get Mac Software Not Found in the App Store
There may be some applications or programs that you can't get in the App Store. That doesn't mean you can't install them on your Mac, and it also doesn't mean you need a CD or DVD drive to do so.
Some programs and applications have encoded, compressed files that you download to your Mac from the Internet. Once you download the compressed file, it will appear in your Downloads folder on the right side of the Dock.
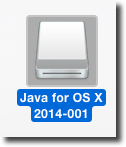
In the example below, you can see the download files for Java for Mac in our Downloads folder.
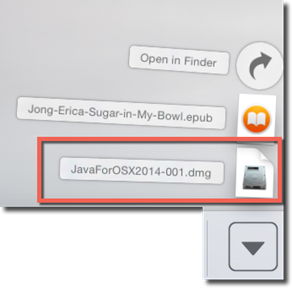
Note that the file is a .dmg file or a disk image file. Most files you download will have this extension, although you might see .zip or .tar sometimes.
To install the file, double click on the icon in the Downloads folder.
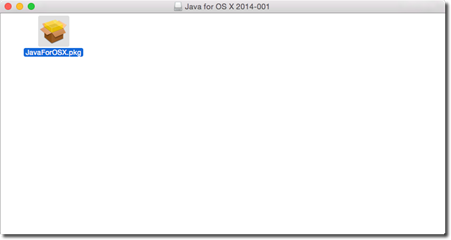
A window will appear on your desktop. Sometimes to install a program, you will have to drag an icon to another icon to start the installation process. In cases like these, there will be instruction in the window. However, in this instance, for Java, all we need to do is double click on it.
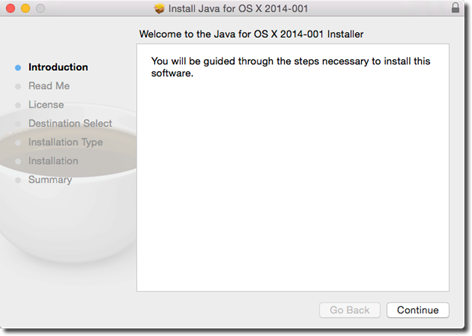
We then see the Install window. Both Windows-based computers and Apple have install windows, so by now you should know how to follow the instructions to install a program.
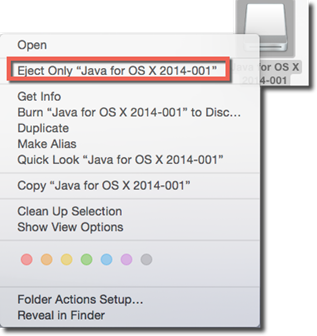
Once you've finished installing the program, go to your Desktop.
You will see a disk image for the program you installed.
Right click on it, and select Eject.
To uninstall an application downloaded from the App Store, go to the Launchpad and drag it to the Trash.
To uninstall any program or application, you can also find he program or application in the Finder window. Right click, then select Move to Trash.
NOTE: Deleting a program or app doesn't always delete every tiny bit of the program. Sometimes "scraps" are left behind. To get rid of these scraps, look for preference files or folders that have the program's names in the Library folders and also by going to Home>Library>Preference folder.
To open an application or program you've installed, single click the icon in the Launchpad or dock or double click the application or program's icon in the Finder window.
About Launchpad
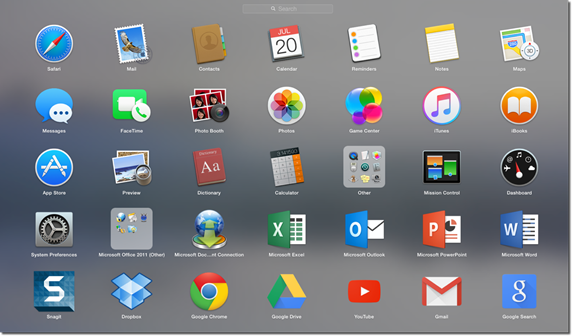
The icons that represent all of programs and applications you have installed on your Mac are displayed in Launchpad.
You can single click on any icon to open the program.
You can also search for your programs and applications by using the search box at the top of the Launchpad screen.
If you have more applications and programs than will fit on the screen, Apple creates another Launchpad "page." To see this page, scroll down (or to the right) with your mouse or swipe to the left to see the screen on the right.
The Launchpad appears by default in the Dock. Its icon looks like this:

Organizing Apps into Folders in the Launchpad
To free up space and better organize all those apps that appear in Launchpad, you can organize them into folders. To do so, simply drag one app on top of the other. If they are the same type of app, Mac will try to determine a category for them, then name the folder with the category. For example, music. You can edit the name of the folder to anything that you want.
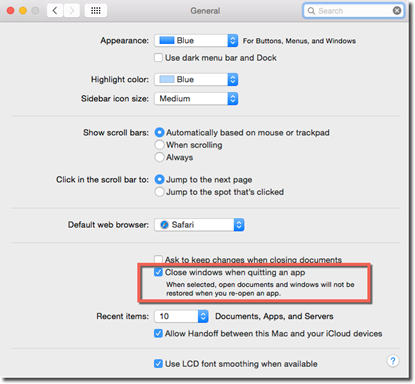
Auto-Reopen Windows
Whenever you close a program, the documents you had open in that program when you shut it down will automatically reopen when you open that program again. In other words, everything will be the same when you reopen the program, including the window position and even selected text.
To turn off auto-reopen, go to System Preferences>General.
Uncheck the box before "Restore windows when quitting and reopening apps" or "Close windows when quitting an app" -- whichever appears in the General window under System Preferences.
Quitting Programs
If you have a document or a web browser open, simply clicking the red circle at the top left of the window will close � or X out of -- the document or web page you were looking at.

However, it will not close the program, such as Safari, Chrome, Pages, MS Word, etc.
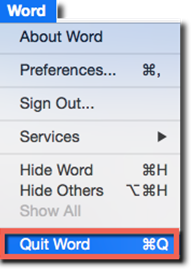
To close the program, you have to quit the program.
To quit the program, you can go to the Menu Bar. Go to the program name, then Quit <Program Name>.
You can also go to the program's icon in the Dock. Click and hold until a pop up menu appears.
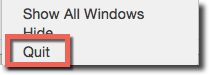
Select Quit.
If a program or app freezes, you can force quit the program by clicking and holding, then selecting Force Quit from the pop up menu.
Heads-Up Program Switcher
To switch between programs you have on your Mac, you can click the program's icon in the Dock. For example, if you have the App Store and iTunes both open, but you want to switch the active window from iTunes to the App Store, you can simply click on the App Store icon in the Dock.
You can also use the heads-up program switcher by pressing Command+Tab. You will see an enlarged version of your Dock on your Desktop. As you press Command+Tab, Mac will highlight the next open program in the Dock from left to right. Keep pressing Command+Tab until you reach the program you want.
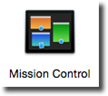
About Mission Control
To reach Mission Control, either go to the Launchpad or to the Finder window and click Applications in the Sidebar.
The Mission Control icon looks like this:
You can also reach it by pressing the Mission Control key on the Apple keyboard or the former Expose Key. If you don't have either of those, you can press Control plus the up arrow on your keyboard.
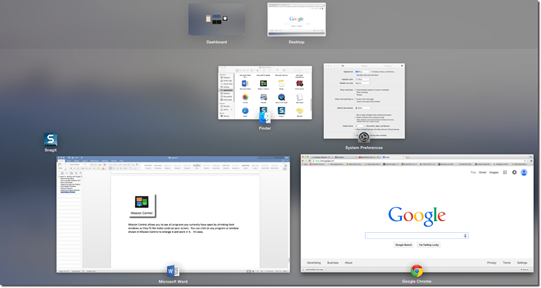
Mission Control allows you to see all programs you currently have open by shrinking their windows so they fit like notes tacked to a bulletin board. You can click on any program or window shown in Mission Control to enlarge it and work in it.
However, if that's all you could do in Mission Control, it would be an almost worthless feature. Luckily, it's not.
Mission Control also lets you create different desktops � or spaces. For example, you can have email open in one desktop, then a photo editing program open in another.
Let's see how it works.
Go to Mission Control. At the top of the Mission Control screen, you can see your desktop in the darker-shaded grey area:

This contains a thumbnail view of our current desktop. This includes all programs we currently have open on the Desktop.
What we can do now is add additional desktops. Let's say we're working on creating this article in our current desktop, named Desktop 1.
Let's also say we want to work on editing our pictures from vacation and organizing them into an online scrapbook, but we don't want to open additional programs or websites because it will make it too cumbersome � and even confusing.
What we can do is create two different desktops using Mission Control. We can create one desktop that has all of our programs, files, and folders open that relate to this article (Desktop 1). Then, we can create a second desktop that has all our files, folders, and programs open that relate to our vacation photos and online scrapbook.
If we do that, we can go to Desktop 1 when we want to work on the article, then Desktop 2 when we want to work on the vacation photos.
The first desktop is created for us by default. To create the second desktop, click the upper right corner of the screen. If you have your Dock on the right side, click the upper left corner of the screen. You will see a plus sign, as highlighted in red below.

This plus sign allows you add a new space. You can create up to 16 spaces.
Let's click the plus sign.
As you can see, a second desktop is added:

Click on the new desktop, named Desktop 2, to open it.
You will now see your OS X Yosemite desktop as it looks when you start up your Mac. No programs, files, or folders are open on it.
Now, you can open any programs, folders, or documents that you want in this new desktop. We've opened the App Store to look for a free photo editing program.
We can now go back to Mission Control if we want to switch back to our other desktop.

NOTE: Mission Control combines three features used in prior versions of OS X: Expose, Spaces, and Dashboard.
To delete a desktop � or a space � hover your mouse over it. You will see an X appear in the upper left hand corner. Click on the X to delete the space.
The Dashboard
You might have noticed the Dashboard that appeared to the left of our desktops in Mission Control as its own space. You can also reach it by going to Launchpad. Its icon looks like this:
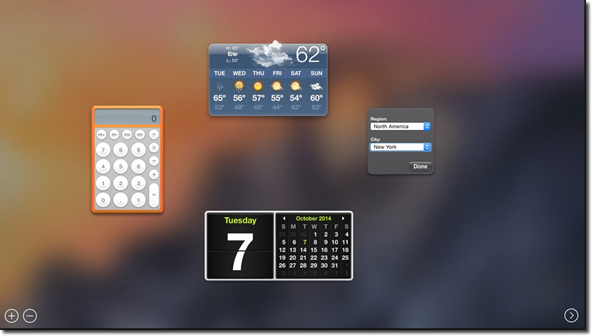
The Dashboard contains widgets that allow you to complete tasks, such as checking weather, stock prices, et cetera.
Our Dashboard is pictured below.
NOTE: If you don't see the Dashboard in Mission Control, you can turn it on by going to System Preferences, then Mission Control. Click the Dashboard pop up menu, and select As Space or As Overlay. If you choose As Overlay, the Dashboard will appear over your Desktop.
-
To move a widget on the Dashboard, drag it.
-
To close a widget, click Option as you move the mouse across the widget.
-
To open a closed widget, click the plus sign that you see at the bottom left on the screen. This opens the Widget Browser. Click on the icon of the widget that you want to open.
-
To hide one of the Apple widgets or delete on you installed, use the Widget Browser.
The Widget Browser is pictured below:

Click on an icon to install the widget on the Desktop.
Listed below are the widget that come pre-installed with OS X Yosemite:
-
Calculator
-
Calendar
-
Contacts
-
Dictionary
-
ESPN
-
Flight Tracker
-
Movies
-
Stickies (A virtual Post-it note widget)
-
Stocks
-
Tile game
-
Translation
-
Unit Converter
-
Weather
-
Web clip
-
World Clock
To install more widgets, click the More Widgets button at the bottom left of the Widget Browser.
Cocoa and Carbon
OS X is able to run two different types of programs. These types of programs are called Cocoa and Carbon.
Carbon programs are programs that can run on OS X, but not designed exclusively for OS X.
Cocoa programs are programs that software companies created exclusively for Mac devices. For example, Microsoft now has Microsoft Office for Mac. Adobe created Mac versions of its software programs as well.
Cocoa programs offer features that you can't get with Carbon programs on the Mac, such as:
-
Retina friendliness. If you're a Windows user as well as a Mac user, you know the text is sharper on Mac. If you're running a Carbon program on the Mac, this will not be the case, however.
-
Fonts pane. With a Carbon program, you can access fonts through the font menu. In a Cocoa program, you can access it through the Fonts pane.
OS X Yosemite's Free Programs
If you look in your Application folder, you will see all sorts of programs that came pre-loaded on your Mac. These are all apps that you might enjoy and find useful. What you won't find is promotional icons like come loaded on Windows-based computers. Listed below is a run-down of these free programs and a very brief description when necessary.
- App Store. Buy and download applications.
- Automator is a software-robot program.
- Calculator. This isn't just a basic calculator. It's also a scientific calculator and conversion tool.
- Calendar. Calendar used to be called iCal. You can enter events, appointments, and set reminders.
- Chess. This is the only game that comes with OS X.
- Contacts is your address book.
- Dashboard.
- Dictionary. The dictionary used is the "New Oxford American Dictionary, 3rd Ed."
- DVD Player.
- FaceTime for video chats.
- Font Book.
- Game Center if you want to play games with other people.
- iBooks. This is Apple's eBook program. You can buy and read eBooks.
- Messages is used for sending and receiving instant messages. It used to be known as iChat.
- Image Capture and Preview. Image Capture works with your scanner. Preview lets you preview images and also serves as a PDF viewer and editor.
- Photos, formerly iPhotos.
- iMovie is a video-editing program.
- iTunes is a digital music library. You can also purchase and download music.
- Launchpad.
- Mail is Apple's email program.
- Maps.
- Mission Control.
- Notes. Write down things you want to remember.
- iWorks which includes Pages (word processing) and Numbers (spreadsheet) comes preloaded on some Macs.
- Photo Booth. Take pictures using your web cam, then add special effects.
- Reminders is a to-do list program.
- QuickTime Player.
- Safari is Apple's web browser.
- Stickies creates virtual Post-it notes that can be stuck to your screen.
- TextEdit is a basic word processor.
- Time Machine.
Wallpaper and Screensavers
To change the background of your desktop � or your wallpaper � go to  > System Preferences>Desktop & Screensaver.
Click the Desktop tab at the top.
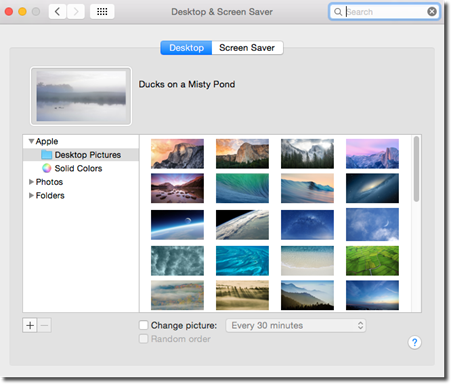
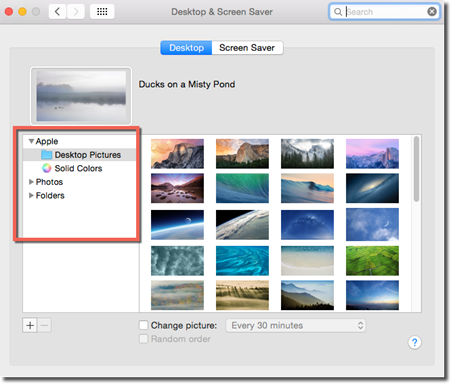
On the left, decide where you want to look for pictures to use as your wallpaper. You can use Apple's Desktop Pictures or choose a solid color. You can also use your own photos.
Click the plus sign (+) to search your computer.
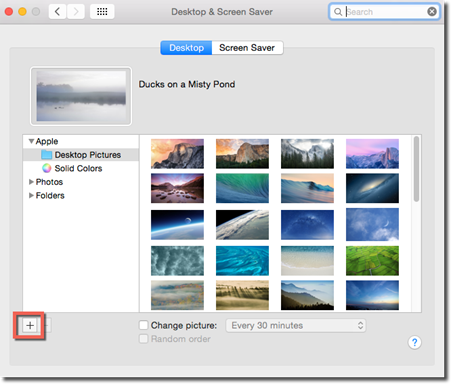
Next, select the image you want to use.

You an also choose to have the desktop picture change every so often. We have ours set to change every thirty minutes. The pictures can change in the order that they appear, or you can put a checkmark beside "Random Order."
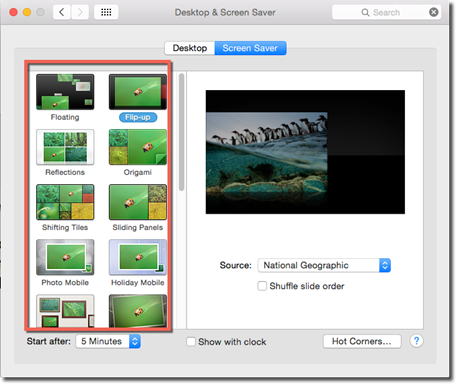
Click on the Screen Saver tab at the top of the window to apply or change a screen saver.
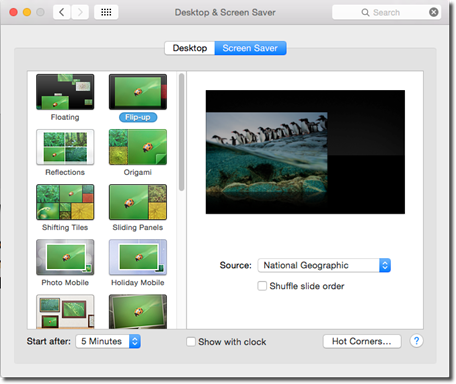
On the left hand side, choose what type of screen saver you want to use.
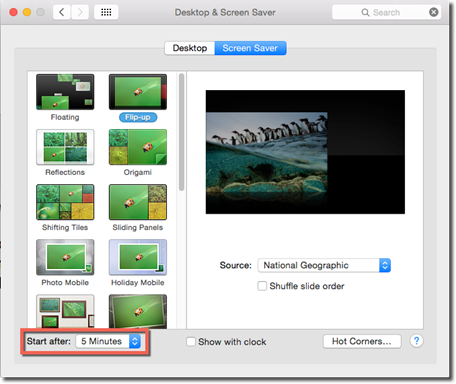
Go to "Start After" and let your Mac know when the screensaver should start. Ours is set to start after five minutes of the Mac not being used.
Next, on the right, you can specify a source for the screen saver images. You can also tell the Mac to shuffle the images instead of displaying them in the order they appear.
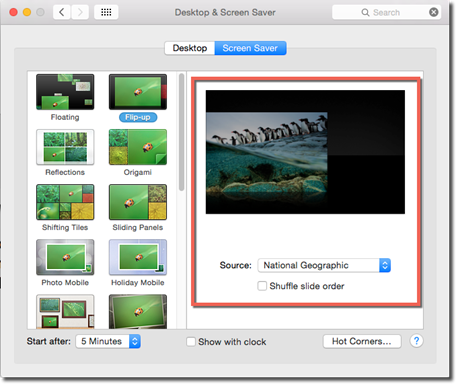
If you want the clock to be displayed with your screensaver, put a checkmark beside "Show with clock."
Click the Hot Corners button to stop or start the screen saver whenever you move your mouse to a corner of the screen. Simply select Start Screen Saver or Disable Screen Saver for the corner you want, then click OK.
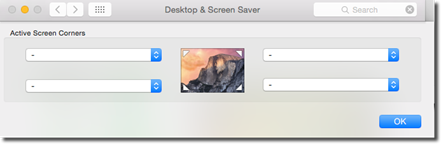
As you can see above, there are four fields for each of the four corners.
Let's look at the top left field, which is for the top left corner.
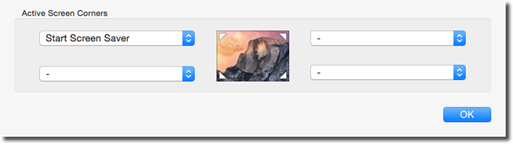
When we click on the field, we see this pop up menu:
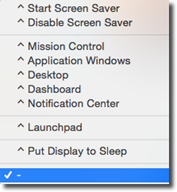
We made it so that clicking in the top left corner will start the screen saver. However, we can also make it so that clicking in a corner will take us to Dashboard, Launchpad, etc.
iTunes
Most people are very familiar with the iTunes app, because it's where you can buy, store, and play music, movies, TV shows, podcasts, audio books, and other files.
By default, iTunes appears on the Dock. Its icon looks like this:

The iTunes app is pictured below.
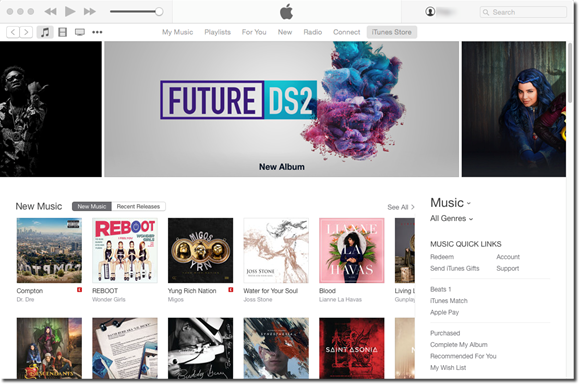
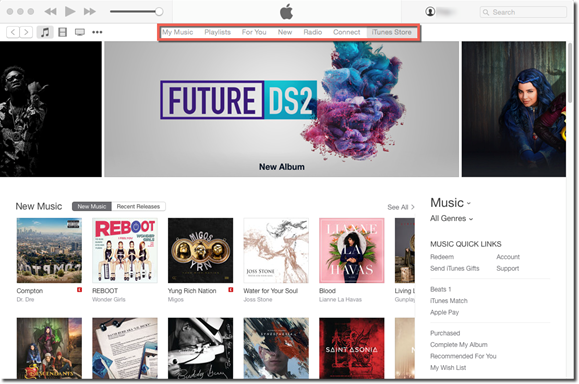
The tabs at the top of the app make it easy to navigate.
We have highlighted the tabs below.
To purchase music, go to the iTunes store. You can use the search box in the upper right corner to search for songs, artists, etc. You can also search for TV shows, movies, podcasts, audio books, tones, and apps.
You can also search iTunes by clicking one of the icons highlighted below:
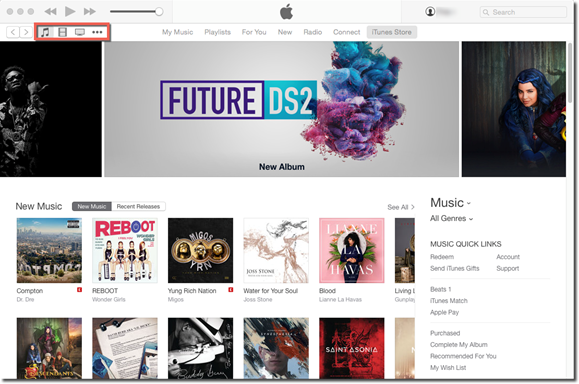
From left to right, you can search for music, movies, and TV shows.
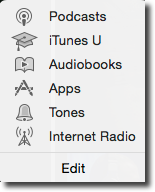
If you click the ellipse, you can search podcasts, iTunes U, audio books, apps, tones, and Internet radio.
To import music and other files from your computer into iTunes, go to the Menu Bar, then File>Import.
You will this pop up dialogue box:
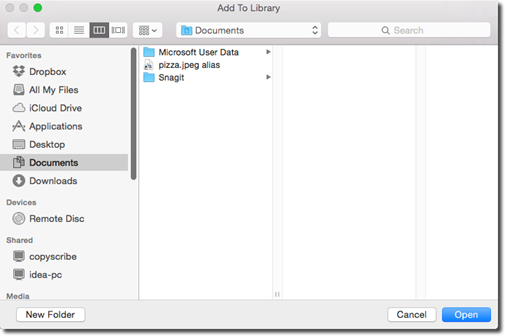
Locate, then select the files you want to import into iTunes, then click the Open button.