OS X Yosemite is the latest version of the OS X operating system released by Apple on June 2, 2014. It can be installed on any Mac device that meets the general specification requirements and can be installed for free by going to the Apple App Store. With a redesigned interface, OS X Yosemite gives users a refreshed, modern look, but also more power and ease-of-use than ever before.
What's New in OS X Yosemite
OS X Yosemite follows OS X Maverick in Apple's long line of the OS X operating system. Although each new version of OS X contains updates and changes, OS X Yosemite boasts of improvements that add beauty and power, but also increase functionality or usability of your Apple device.
Improvements and updates include:
-
An updated, redesigned interface. When you first look at Yosemite, you'll see it looks a lot simpler and flatter. The windows are either white or shaded black. They're also semi-translucent.
-
Make calls and write texts from your Mac. If you're an iPhone owner in addition to being a Mac owner, you can now use the Mac as a speakerphone and make calls. You can also send and receive text messages from your Mac that will be relayed by the iPhone. You can also use Handoff to pass documents been iPad or iPhone and your Mac. For example, if you write an email on your phone, you can click an icon in Mac's dock and open the email on the Mac. You can also use Handoff with Safari, Maps, Reminders, Calendar, Messages, Pages, Numbers, Notes, Contacts, and Keynote.
-
AirDrop. AirDrop allows you to transfer files between Macs and phones. You don't need passwords or permissions. You also don't need to set it up.
-
MailDrop. With MailDrop you can attach files that are up to 5 GB to any email in the Yosemite's mail program. The attachment will be with the message if the recipient has Yosemite. Otherwise, the message will contain a link to download the file.
-
Messages. The app has been improved so you can name group conversations, see photos shared in the thread, and share screens.
-
iCloud Drive. Meet iCloud Drive, the Apple's answer to Dropbox. Store up to 5 GB for free in your online drive, and enjoy easy access from the iCloud Drive folder found in every desktop window.
-
Spotlight has been improved too. It's now in the center of the screen and includes an automatic preview of whatever it finds.
And more!
System Requirements for OS X Yosemite
OS X Yosemite can be installed for free on any compatible Mac device. Whether or not your Mac device will be compatible with Yosemite will depend on the type of device, as well as the release date.
The following devices are compatible with Yosemite, meaning you should be able to install and run Yosemite without a problem.
|
Device |
Release Date |
|
MacBook |
Late 2008 Aluminum. Early 2009 or newer |
|
MacBook Pro |
Mid/Late 2007 or newer |
|
MacBook Air |
Late 2008 or newer |
|
Mac Mini |
Early 2009 or newer |
|
Mac Pro |
Early 2008 or newer |
|
iMac |
Mid 2007 or newer |
|
Xserve |
Early 2009 |
If your device meets the hardware requirements, you can then upgrade to Yosemite from any of these past versions of OS X.
-
OS X Snow Leopard v10.6.8
-
OS X Lion v10.7
-
OS X Mountain Lion v10.8
-
OS X Mavericks v10.9
To upgrade your device to OS X Yosemite, go to the Apple App Store.
Type Yosemite in the search box in the top right corner (labeled "1" below.)
Hit Return on your keyboard.
Click the Download button to download Yosemite (labeled "2" below.)
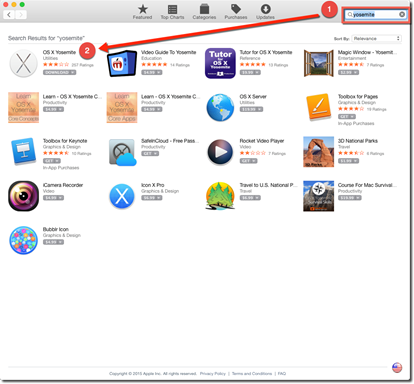
Follow the instructions on your screen.
Logging out and Shutting Down
One of the most basic functions required to using a Mac � or any computer � is knowing how to turn it on and shut it down. Turning on your Mac is as easy as pushing a power button. However, you have several options when you've finished a session on your Mac and either want to shut it off, or leave it on and let it "sleep."
If you don't want to shut your Mac down, but want to reduce the amount of power it consumers while it's left running, you can put it to sleep.
You make your Mac sleep by:
-
Closing the lid if it's a laptop.
-
Press the power button on the Mac for a half second.
-
Go to
 >Sleep. The icon is located in the top left hand corner of your screen.
-
Just walk away from the computer. The Energy Saver setting found in System Preferences will make your computer go to sleep after a specified period of non-activity.
If you want to wake your Mac up, just move and click the mouse � or press a key on the keyboard.
However, when you make your Mac simply sleep, anyone who has access to the computer can wake up your Mac. For that reason, you can also log out of your user name. Your Mac will still go to sleep on its own, but when you wake it up you will have to log in using your Apple ID.
To logout, go to >Logout.
You will then see a confirmation box that looks like this:
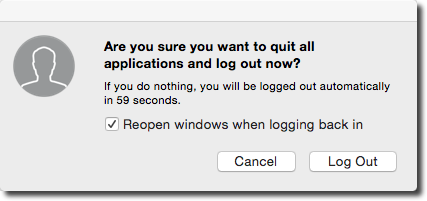
If you leave the checkmark beside "Reopen windows when logging back in," every program you have running and every window you have open will open again when you log back into your Mac. Uncheck the box if you do not want this to happen, then click the Log Out button.
If you want to shut down your Mac instead, which means turning it off completely, go to >Shutdown.
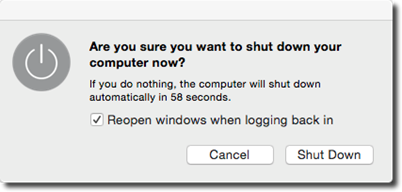
Decide if you want all programs and windows to reopen when you turn your Mac back on, then click the Shut Down button.
Click the Shut Down button to shut down your Mac.
If you want to restart your Mac, go to Apple >Restart.
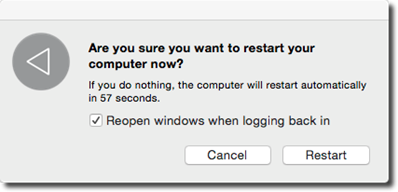
Once again, decide if you want all programs and windows to reopen after your Mac restarts, then click the Restart button.
Finding Help in OS X Yosemite
Apple doesn't offer many resources to answer your questions and solve your problems. In fact, the only help you will find is in the Help menu at the top of your desktop screen.
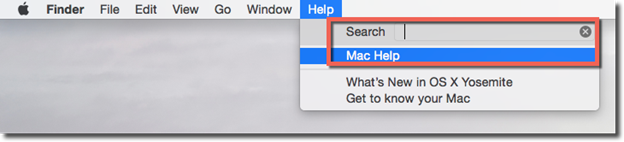
From here, you have a few options to find the topic for which you need help.
You can type the topic in the search bar.
When you do, you will see the results appear below the search bar.
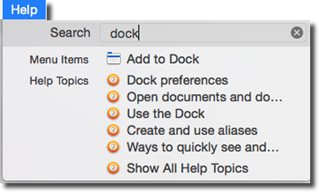
You can click on any of the results to be taken to the Help browser.
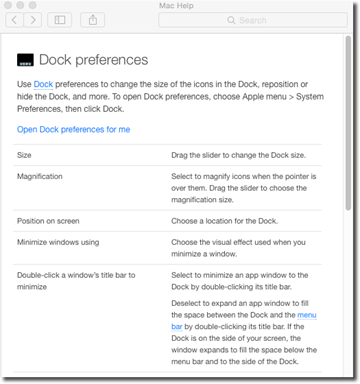
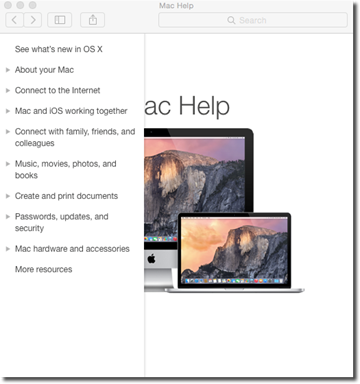
In addition, you can also to go Help>Mac Help.
This too opens the Help browser.
Navigating OS X Yosemite
Whenever you start up your Mac running OS X Yosemite, you will see an Apple logo greet you as the operating system loads. You will also see a progress bar that lets you know how much longer before you're up and running.
Once your Mac is ready, one of two things will happen. If you're the only one who uses your computer, and there aren't multiple users, you will see the OS X desktop, as pictured below.

However, if it's a shared Mac, and you have several users, you will see a login screen like the one shown below.
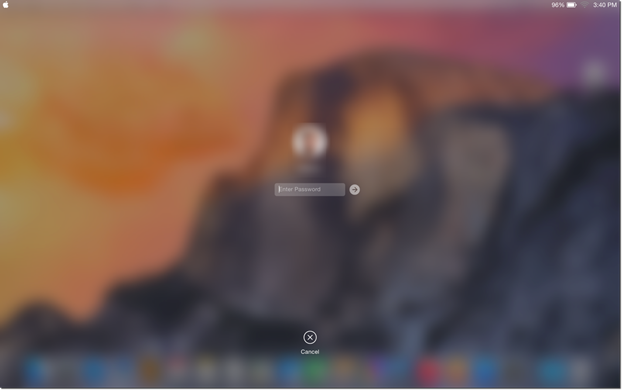
If there is more than one icon, click the one that is yours for your user account, then enter the password. Hit Return on the keyboard.
Once you're logged in, you will see the OS X Yosemite desktop.

We have labeled the elements of the desktop in the snapshot below.
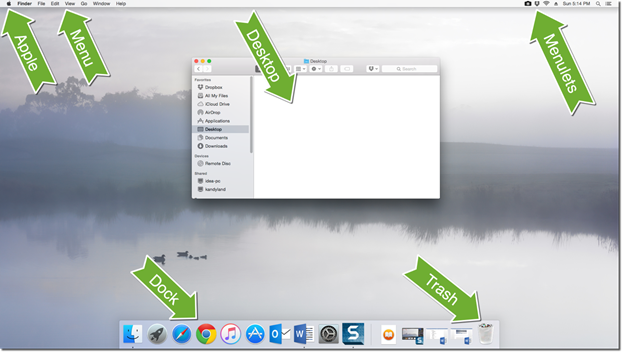
If you've used Mac before, the desktop probably looks like nothing more than an updated version of past operating systems. However, let's take a quick tour of the elements on the desktop for those who are new to Mac.
The Dock
The dock is found at the bottom of the desktop. In OS X Yosemite, it is translucent. The dock is where you will go to launch files, folders, programs, and disks. It's also where you can go to see what files, folders, and programs are currently open.
Our dock is pictured below.

The files and programs we have open have a dot beneath them.

If you've used previous versions of OS X, you'll notice that the program icons in OS X Yosemite's dock have been redesigned.
The dock is organized into programs, documents, folders, and disks.
Programs, including Internet browsers appear on the left side of the dock. Documents, folders, disks, and even the trash appear on the right.
You can rearrange the icons by dragging and dropping them.

In addition, you can remove an icon from the dock by simply dragging it away from the dock, then releasing your mouse button. When you do, you'll see an animated puff of smoke when you release your mouse.
You can open any program or file in the dock by clicking on it once.
Click and hold on any icon in the Dock to see its pop-up menu.

To pin an icon to the dock so that the program, file, document, etc. always appears in the dock, even when it's not open, select Options>Keep in Dock from the program or file's icon in the Dock.
The Apple Menu
The Apple menu is where you will find Mac commands, including Sleep, Restart, Shut Down, and Log Out.
The Menu Bar
The Menu Bar always appears at the top of your desktop. Even if you do not have a program open, you will still see the Menu Bar.
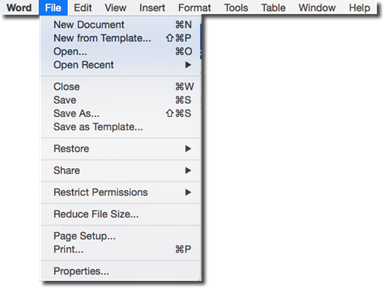
If you're new to Mac, the Menu Bar that you see on the desktop is similar to the Menu Bar that you see in Windows-based programs such as MS Word, Adobe Photoshop, etc. The Menu Bar in Mac also contains commands and shortcuts just as the Menu Bar does with the programs we just named.
There are just a few differences.
1. As we said, the Mac's Menu Bar is always at the top of the desktop. It never closes or disappears.
2. The Menu Bar changes based on the currently open and active program. For example, we are currently using Microsoft Word. The Menu Bar changes to reflect that MS Word is the open and active program. It also contains the commands and shortcuts for MS Word.

3. Unlike Menu Bars that open with Windows-based programs, the dropdown menus on the Menu Bar stay open until click your mouse.
OS X Yosemite Windows
Each window that you open in OS X Yosemite, such as the Finder window, is divided into sections to eliminate clutter and help you to navigate to what you need on your Mac.
Below is a picture of the Finder window.

Each window is divided into at least four sections.
The Sidebar
On the left side of the window, you'll see the Sidebar. In the Sidebar, you will see the following headings:
-
Favorites. Under this heading, you'll find the locations where you store files and programs that you have on your Mac. You'll see the icon and then the name of each of your favorites, as shown above. To view the contents of Applications, for example, click on Applications in the Sidebar. The contents of the Application folder are then shown the main part of the window.
-
Shared. You'll find all computers in your network that have File
-
Devices. Under this heading, you will see all storage devices that are either connected to or installed on your Mac computer.
-
Tags. This lists your finder tags, which we will talk about later in this article.
If you want to remove an icon, drag if off the Sidebar. You can rearrange the order of the icons in the Sidebar by dragging them up or down the list. You can also reorder the headings by dragging them. To hide the sidebar, go to View>Hide Sidebar.
To change what appears in the Sidebar under the different headings, go to the Menu Bar.
Next, go to Finder>Preferences.
Click on Sidebar at the top.
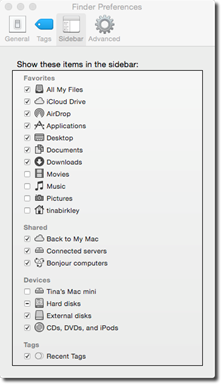
In the Preferences window for the Sidebar, you can see each heading that appears in Sidebar of the Finder window, along with items that you can include under each heading.
Everything that currently appears under the various headings in the Sidebar appears with a checkmark beside it. If you no longer want it to appear, click to remove the checkmark. You can also click to put a checkmark beside anything you want to appear under the various headings.
The Title Bar
The Title Bar appears at the top of each window. We've highlighted it in red below.
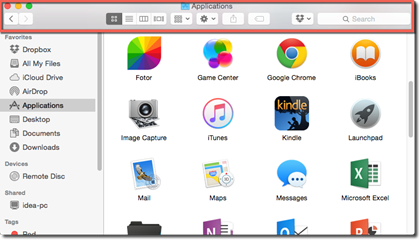
The Title Bar contains the name of the open window. Ours is Applications.
Directly to the left of the name of the window, you will see a tiny icon. This is the folder proxy icon. You can drag this icon to move or copy the folder to a different folder or disk. You can also drag it to the Sidebar, Trash, or Dock.

You can use the Title Bar to close, minimize, or maximize the window:

You can also move the window around your desktop by clicking in the Title Bar, then dragging and dropping the window. Red closes the window, yellow minimizes it, and green puts the window in full screen.
Click the arrows to go back to the last window you viewed � or forward to the next one.

You can also use the toolbar to help you navigate through files and folders.

You can double click in the Title Bar to zoom and enlarge the window so that you can see all the icons.

The window expands just enough so all icons in the main part of the window are displayed.
Double click again to return the window to its original size.
Old Finder Mode
Older versions of OS X had a button in the Finder window that took you into Old Finder Mode. Old Finder Mode was for those of you who were new to the latest operating system.
Although the Old Finder Mode button is no longer available in OS X Yosemite, you can still access it by clicking Option+Command+T.
In Old Finder Mode, the Sidebar and toolbar will be out of sigh. In addition, when you double click a folder, a new window will open for that folder.
Resizing Windows
You can resize any window by dragging any edge of the window.
Hover your mouse over an edge. Your mouse cursor will then change to a double-headed arrow.
Drag to resize the window.
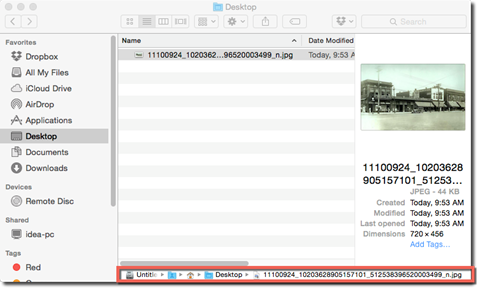
The Path and Status Bars
The Path Bar shows you where you're at inside a folder � or the folder hierarchy. To see the Path Bar, go to View>Path Bar.
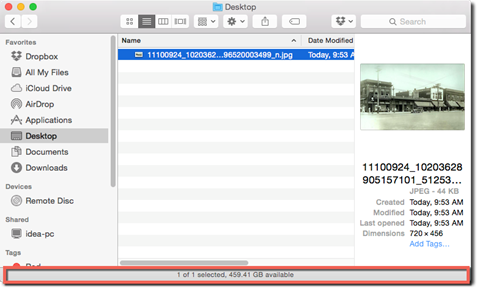
The Status Bar lets you know how many icons are in a window, as well as the amount of free space on the disk. To see the Status Bar, go to View>Status Bar.
Window Views
For now, let's talk about the four window views that you can access from the Finder toolbar.
The four view buttons are shown below.

Again, these are located in the Finder toolbar.
From left to right, the are the:
-
Icon View. Every file, disk, and folder is represented by an icon.
-
List View. Shows the contents of a folder in a list that's organized by file names, dates, sizes, etc.
-
Column View. Column view is list view that's divided into vertical planes.
-
Cover Flow View. Cover Flow View allows you to flip through your files and folders much as you would flip through pages in a jukebox.

Simply click on a view button to switch to that view.
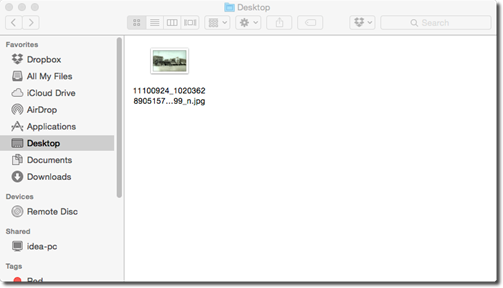
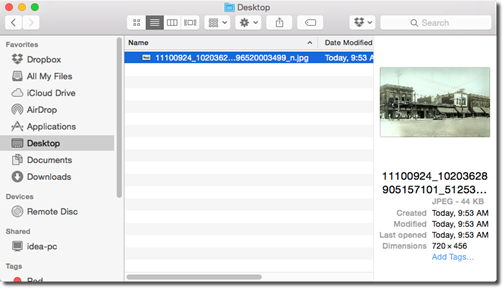
The Preview Pane
The Preview Pane has been improved in OS X Yosemite. In previous versions of OS X, the Preview Pane showed you previews of images and words in documents whenever you were in Column or Cover Flow view. In OS X Yosemite, you can also see a preview for the Icon and List views by going to View>Show Preview.
Here is the Preview Pane for List view.
About Quick Look
Quick Look allows you to open and browse documents without actually opening the program or new windows.
Let's go to our Finder window.

To use Quick Look, highlight an icon or file name (depending what view you're using in the Finder window), then hit the spacebar for a preview.
The Quick Look window then opens.
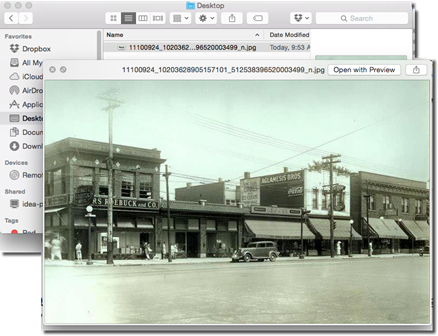
Hit the spacebar again to exit Quick Look.
Finder Tabs
Years back, web browsers started to employ the use of tabs. Tabs allow you to have several web pages open at once, but have them all in a single window. It reminds you of file folders in a filing drawer. Each file folder has a tab that sticks up. The tab is labeled with the contents of the folder. Tabs in web browsers work the same way, as do tabs in Finder windows.
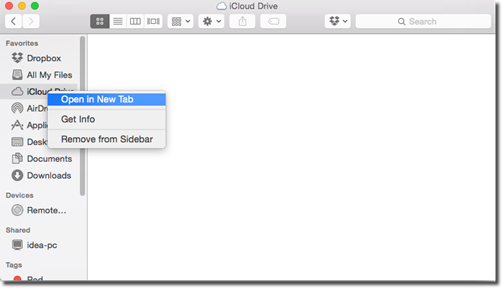
To create a new tab in a Finder window, right click on any file or disk, then select Open in New Tab.
You can also open the names of places in the Sidebar in a new tab, as shown below.
As you can see in the snapshot below, we have opened two tabs for Dropbox and iCloud.
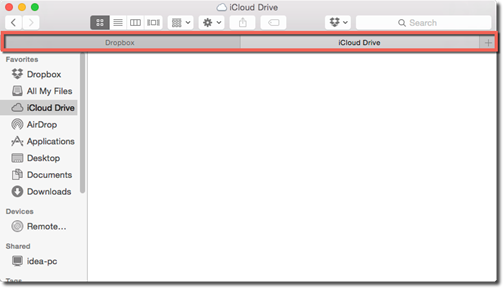
To delete a tab, hover your mouse over it. An X will appear on the left hand side. Click the X to close and delete the tab.

To switch between tabs, click on the the name of the tab you want to view.