
As much as you need to think about your data, your data sources, and how you want the data to appear in your report, it's also important to think about the appearance of your report � or the design � before we start adding data to it. The design of your report begins with the way you set up your page. The way you set up your page will define the paper size, the orientation, the units of measurement, and the margins.
To set up your report page, go to File>Page Setup.
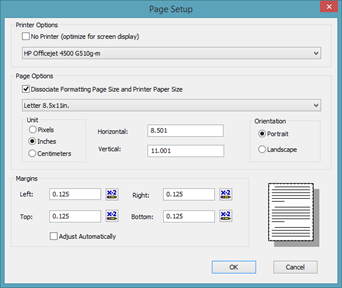
Under Printer Options, choose the printer that will be used to print the report.
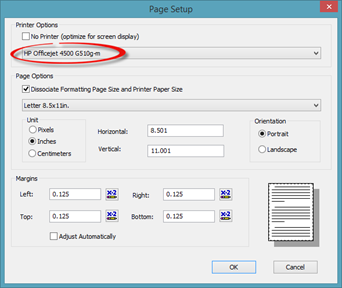
If you don't want to print the report, you can put a checkmark beside "No Printer (Optimize for screen display)".
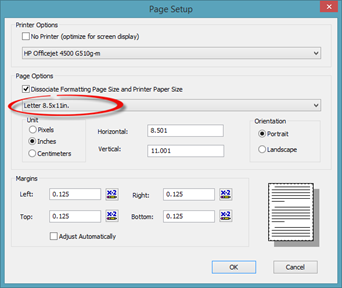
Under Page Options, you can choose the paper size you want to use for the report.
You can also select your unit of measurement for the ruler, as well as anywhere else where you'll need to use measurements. You can choose pixels, inches, or centimeters.
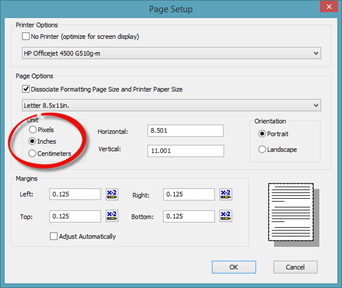
You can also choose the orientation of your report: portrait or landscape.
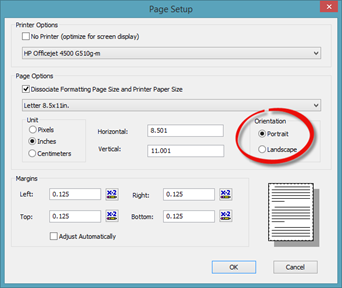
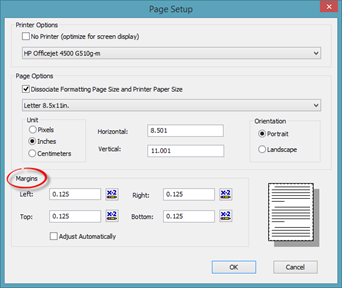
Next, you can set the margins for the report. This is the white space that appears on the top, bottom, left side, and right side of the report.
Click OK when you're finished.
About the Field Explorer
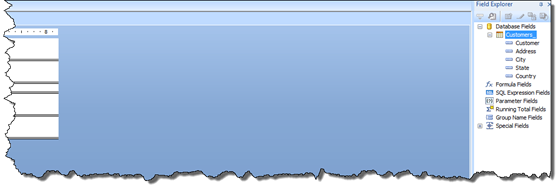
Once you click OK in the Database Expert dialogue box, you will then see the table(s) and view(s) you selected appear in the Field Explorer panel on the right hand side of the Crystal Reports window.
To view your tables and views, expand Database Fields by clicking the plus (+) sign.
Click the plus signs (+) beside the tables(s) and views(s) to see the fields.
If you do not see the Field Explorer panel, go to the standard toolbar and click on the Field Explorer icon.

You can use this icon to display or close the Field Explorer panel.
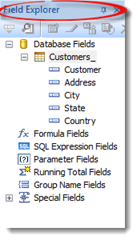
You can dock the Field Explorer panel so it's easier to access, but not visible until you need it.
To do this, click the pin icon at the top of the Field Explorer panel.
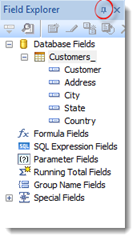
When you click the pin, the Field Explorer panel is minimized to the right side of the screen.
To view or work in the Field Explorer panel, simply move your mouse over it. The Field Explorer panel is then expanded.
You can also move the Field Explorer panel so it snaps to the left side or bottom of the Crystal Reports window.
To do this, click and hold the left mouse button at the top of the Field Explorer panel.
Drag the mouse. You will see an outline of the panel as you do.
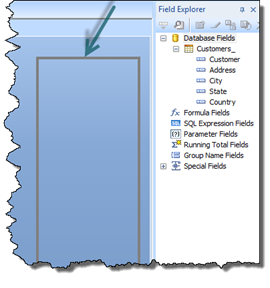
Drag it to the left side or bottom of the window. The panel will snap into place.
Follow the same steps to move the Field Explorer panel back to the right side of the window.
Understanding the Sections of a Report
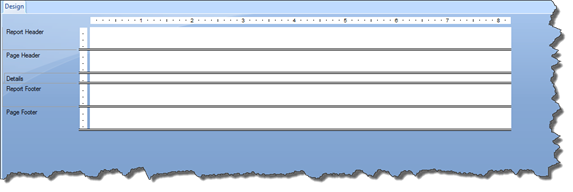
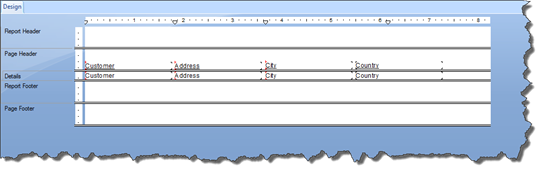
If you look at a blank report in Crystal Reports, you will see four default report sections.
These sections are Report Header, Page Header, Details, Report Footer, and Page Footer.
Whatever you put in the Report Header section will appear at the very beginning of the report. You can adjust the size of the Report Header section by dragging the double line downward to add more space or downward to decrease space.
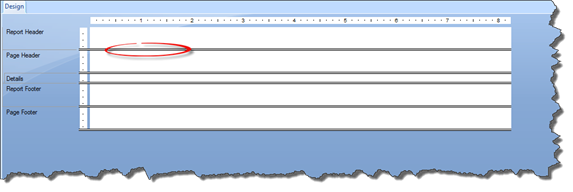
The Page Header section appears at the top of every page in your report. You might put a logo, page numbers, or column headings in the Page Header Section. Just as with the Report Header section, you can drag the double line at the bottom of the Page Header section to increase or decrease space.
The Details section repeats for every row of data you have in your report. For example, if you have 300 rows of data in your report, there will be 300 Detail sections in your report.
Anything you put in the Report Footer section will appear at the end of your report. It follows the last bit of data. It is, essentially, the end of the report.
On the other hand, anything you put in the Page Footer section will appear at the bottom of every page in your report.
You cannot delete any of the four default sections; however, you can hide them by clicking on the name of the section, then choosing Suppress (No Drill-Down) from the context menu. You can also chose Hide (Drill-Down OK).
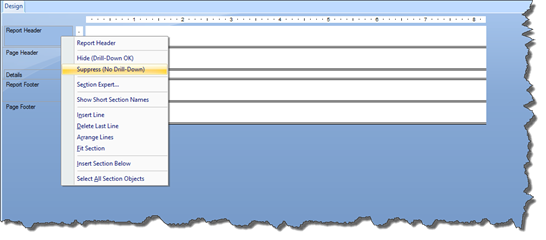
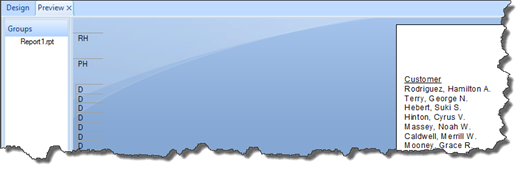
When a section is hidden on a report, you will see diagonal lines through it, like shown below.
![]()
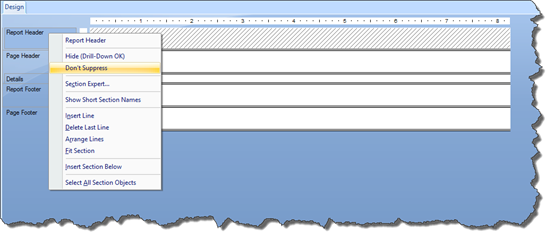
To unhide a section, right click on the name of the section again, then choose Don't Suppress from the context menu. You can also choose Show.
These sections may seem like a way to simply guide you on where to place information and data; however, they are much more than that. As we continue to learn how to use Crystal Reports, you will see how the size of the sections affects the number of pages in your report, how to add more sections, and et cetera.
Working with Data Fields
Now that we've learned the basics of setting up a new, blank report, let's begin to learn how to add the data to our report.
To start with, go to the Field Explorer panel.
![]()
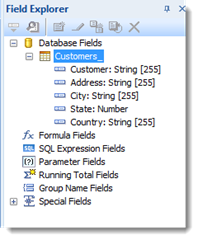
In the Field Explorer, you can see your data fields. Our fields are Customer, Address, City, State, Country.
These fields are essentially data labels. We know that Country, for example, contains the name of the country. However, the country could be a country code � or a number � or it could be the name of a country.
To see what type of data is contained in a data field, right click on the name of the table. Choose Show Field Type from the context menu.
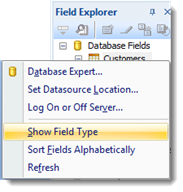
Now you can see what type of data is in the field.
The numbers that appear to the right of string fields indicate the maximum value of the string � or the maximum number of characters.
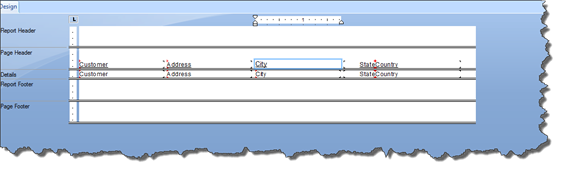
To place some of the fields in the Field Explorer panel into the report, drag a field from the Field Explorer panel to the Details section.
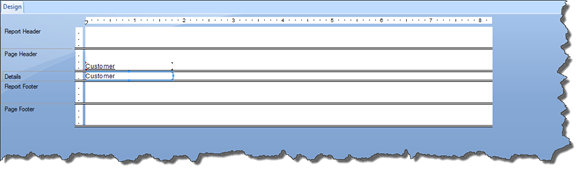
As you can see, the field name appears in the Details section. The label appears in the Page Header section.
Now, if you look in the Field Explorer panel, you will see a checkmark beside the field you've just added to let you know that it has been added to the report.
![]()
Now you can add other fields.
Once you place a field, you can rename the labels if you want. Remember, labels appear in the Page Header section. To rename a label, simply double click on the label. You will then see the cursor so you can type.
NOTE: You cannot rename field names that appear in the Details section.
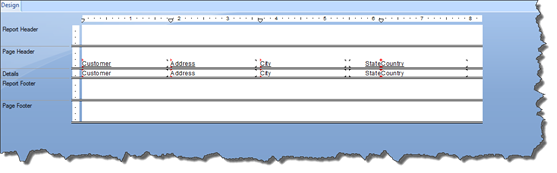
In the example above, we added one field at a time to the Details section. However, you can also add multiple fields at a time.
To do this, press CTRL+ Click to select the fields in Field Explorer, then drag them to the Details section of the report.
To remove a field from the Details section, click to select the field, then press Delete on your keyboard. Make sure you click on the field. If you click on the label, it will only delete the label and not the entire field.
Hiding Labels and Field Names
As you start to design your report and add data to it, you may decide that you don't want the data labels to appear in the Page Header section, or you may decide that you don't want the field names to appear in the Details section. You can hide the labels and the field names in Crystal Reports by applying masks.
To apply masks to labels and field names, go to File>Options.
Go to the Field Options section, as circled below.
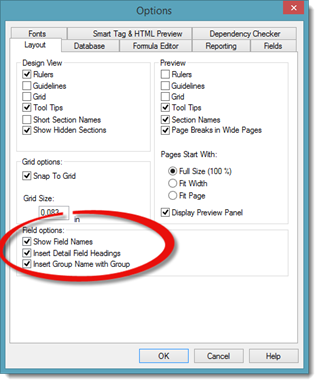
If you don't want field names to appear, uncheck the box beside "Show Field Names."
If you don't want labels to appear, uncheck the box beside "Insert Detail Field Headings."
Click OK.
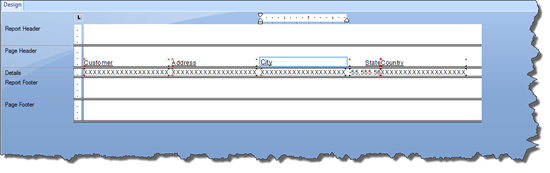
If you choose to mask labels, the masking will apply to any new fields that you add to your report.
If you choose to mask field names, the changes will be made immediately, even to field names already in your report. Instead of the field name, you will see the type of data that was in the field. For strings, you will see a series of X's. If the field contains numeric data, you will see a series of numbers.
Viewing Data before Inserting It into a Report
If you want to see which data is contained in a field before inserting it into a report, you can do so by going to the Field Explorer.
Let's say, for example, that we aren't sure what's in the Address field. We're not sure if it contains the complete address with city, state, and country � or if it just contains the street address. This is something we need to know in order to decide what fields to add to our report.
To preview the data before inserting it into our report, right click on the field in Field Explorer, and choose Browse Data from the context menu.
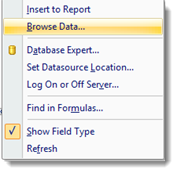
You will then see the data appear in a little dialogue box on your screen.
![]()
Click Close when you are finished previewing the data.
Previewing New Reports for the First Time
Once you've created a new report, you will want to preview that report for the first time.
If you look at our new report below, you will notice that there is not a Preview tab. There is only a Design tab.
To preview a report for the first time, go to View>Print Preview.
This displays the preview of your report in the Crystal Reports window.
In addition, if you look to the right of the Design tab, the Preview tab appears.
Refreshing Data in a Report
In the last section, you learned how to effectively activate the Preview tab. Once you preview a report for the first time, the Preview tab will appear for the report. You can preview the report whenever you want.
However, if you change the data in the report, the changes that you make will not show in Preview unless you refresh the data.
To refresh the data, click the Refresh button in the Navigation pane.
![]()
You can have either the Design or Preview tab active when you refresh data.
Saving a Report
Saving a report in Crystal Reports is just like saving files in MS Word, MS Excel, and numerous other programs.
To save a report, go to File>Save. This will save the report using the current file name. It will save the report in its current location on your computer.
If you want to name or rename the report or change the location of the report, go to File>Save As.
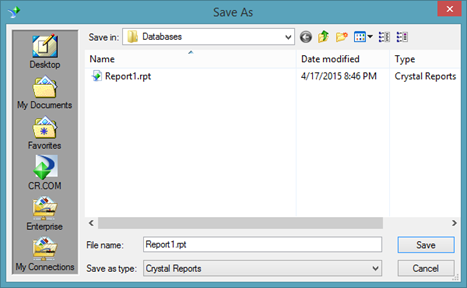
Choose the location where you want to save the report. We are saving the report in our Databases folder.
Next, enter a name for the report in the File Name field.
In the Save as Type field, you want to be sure it says Crystal Reports.
Click the Save button when you are finished.
Saving a Report without the Data
Whenever you save a report, the data in the report is saved with it. The data becomes part of the report. When you open the report, you do not need to connect to a database or refresh the data. The data is part of the report. The data is stored in the report.
However, you can also save a report without the data. To do this, go to File>Save Data with Report. You want to uncheck "Save Data with Report."
Once you do that, save the report using the steps in the last section.
When you close, then reopen the report, the data will not appear in the report. You also won't see the Preview tab, because there will be no data to display.
To be able to see the data, click Refresh in the Navigation toolbar.
Crystal Reports then pulls the data from the databases to which you're connected.
The Preview tab appears again, displaying the data that's now in the report.
If you want to save the report with the data, go to File>Save Data with Report. Put a checkmark beside "Save Data with Report."
Save the report.
Navigating a Report
Whenever you preview a report under the Preview tab, you can see exactly how your report will look when you print it. However, the one thing it does not show you is how many printed pages that report will actually be.
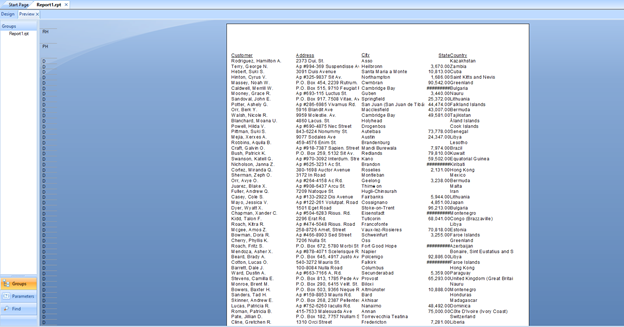
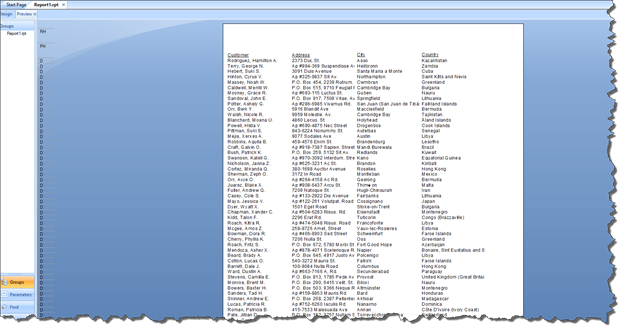
Take a look at our report below.
This is the preview of our report.
If we go to the Status Bar at the bottom of the Crystal Reports window, we can see that this report contains 100 records.

That seems like a lot of records for one printed page.
However, if we look at the Navigation toolbar, Crystal Reports lets us know that we are viewing page 1 of 1+ pages.
![]()
This means that Crystal Reports knows there will be more than one page.
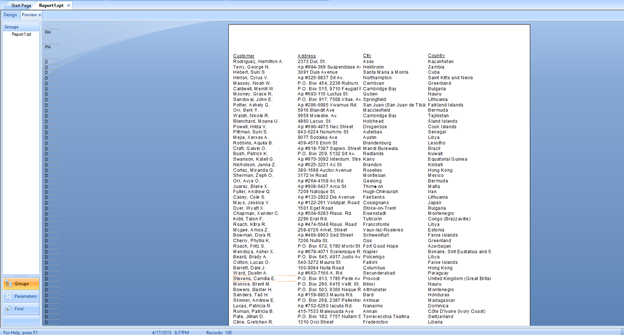
To make Crystal Reports calculate how many pages are in the report, go to the end of the report by clicking the Show Last Page button.

We now see that there are two pages in our report.

Click the Show Previous Page button to go back one page in the report.

To advance one page, click the Show Next Page button.

Finding Text in a Report
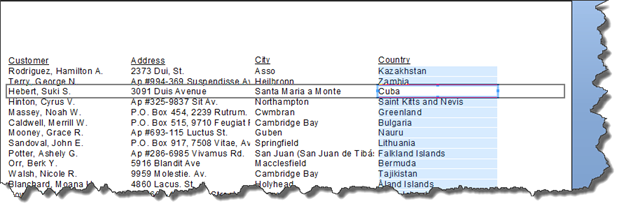
Let's say that you need to find a specific piece of data in a report. Perhaps you want to find a customer who lives in Cuba.
Rather than manually scanning rows upon rows of data yourself, you can have Crystal Reports search for it for you. This makes searching for the data you need quick and easy.
To search for particular data, you can do one of two things.
First, go to the Preview tab.
You can use the search box by going to Edit>Find.
You will then see the Find dialogue box.
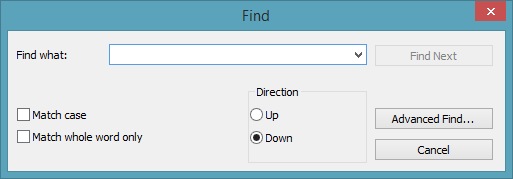
Enter the search criteria.
We are going to search for Cuba.
-
We can also choose to match case, which will match the case as we typed it.
-
We can also match whole word only, which means part of the data value must be Cuba.
-
We can also search up or down the report. If you're at the end of a report, you will want to search up. If you're at the beginning of the report, you'll want to search down.
Click the Find Next button.
Crystal Reports will find the first occurrence of the word that it finds.
Click Find Next in the Find dialogue box to find the next occurrence. You can click the Find Next button until you find all occurrences in the report.
Another way to search for data is to use the Find pane on the left side of the Crystal Reports Window.
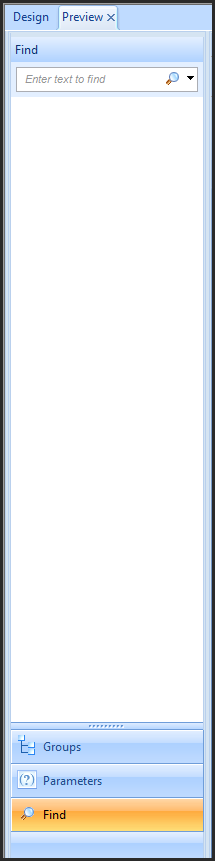
Enter the text you want to find in the search box.
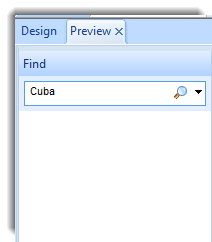
Hit Enter in your keyboard.
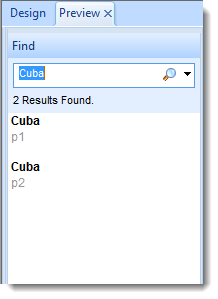
The search results appear. You can see all the instances, along with the page they occur on.
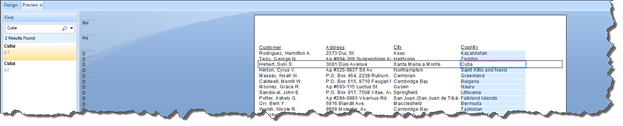
To view the instance in the report, double click the instance in the Find panel. As you can see below, the instance is then selected in the report.
Using Zoom
You can zoom in or out of the Preview or Design view.
Choose the view you want to zoom in or out on.
Next, go to the far right side of the Status bar.

You can click the Plus (+) button to zoom in. Keep clicking it to zoom in even more.
Click the Minus (-) button to zoom out.
You can also use the slider between the buttons to increase or decrease zoom.
In addition, you can go to View>Zoom.
You will then see the Zoom dialogue box.
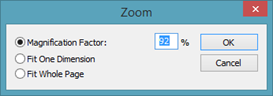
Enter the magnification percentage you want, or choose to fit on dimension or fit one page.
Click OK.


