Format and Use Tables in Publisher 2010
A table is essentially a grid made up of boxes that are called "cells." The cells along the top of a table (but grouped vertically) are called columns, while the cells that go down the side (but are arranged horizontally) are called rows. Take a look at the example below.
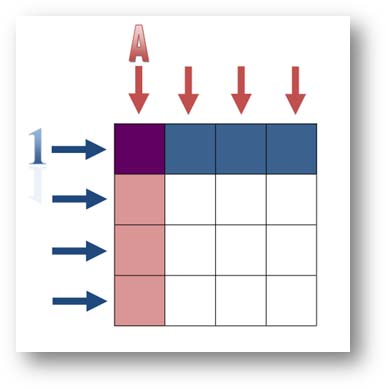
This is a basic table. The red arrows across the top of the table represent the columns, while the blue arrows represent the rows. The rows are typically represented by a number; the columns a letter. This may at first seem complicated, but it's really just a simple way to communicate where something is. For instance, if the two of us were both looking at a very large table, and I said, "Look at the information in cell 36c," you could easily run your finger down thirty-six rows, then over three columns, and see what I was talking about. In the example above, the cell 1a is the box that's colored purple.
Don't dwell too much on the numbering system of cells, though. That's more important when you're working in a spreadsheet program like Excel. In Publisher, your tables will most likely be design elements rather than spreadsheets.
Create a Table
If you've ever used the Table feature in Microsoft Word, this process will seem very familiar to you. Not only can the Table buttons be found on the same tab, but they look and operate identically.
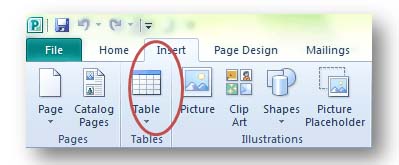
To find the Table button, click on the Insert tab. In the following example, the Table button is circled in red.
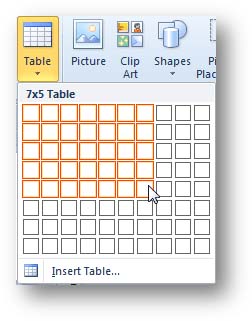
There are two ways to create a table into your document. The first, and easiest, way is by clicking the button and dragging your mouse over the squares in the pop-up window, as in the example below.
Here we have selected to insert a table that is 7 columns wide and 5 rows high. That will give us 35 cells--plenty for our purposes. When you're satisfied with size of your table, click the left mouse button and your table will automatically appear in your document.
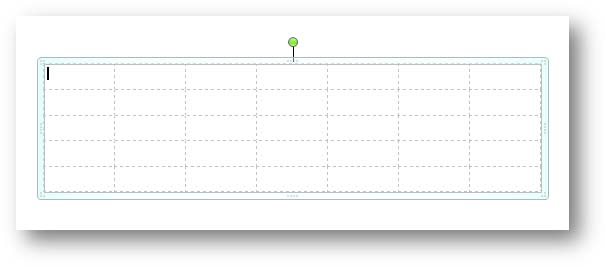
As you can see, the table that appears in your document is pretty basic, but that's okay, because we can easily customize it once it's there.
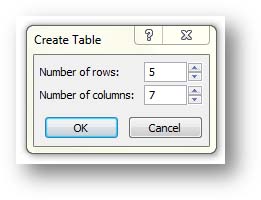
The second way to create a table is by clicking the Table button and choosing Insert Table. This way you can create the same basic table, but you aren't as limited by the number of rows and columns you can create. Let's take another look at the first method. In the following example, you can see that we can only create a table that is 10 columns wide by 8 rows high.
The Insert Table command allows us to use up to 128 rows and columns.
Let's use this method to create our table. Go to the Insert tab, click the Table button and select insert table. In the floating window that opens, enter the number of rows and columns you'd like in your table, then click okay. In this example, we're going to select 7 columns and 5 rows.
Formatting a Table
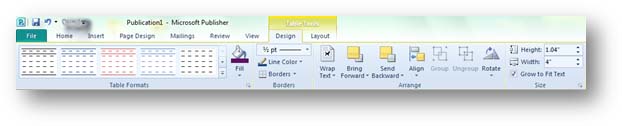
Whenever a table is selected in Publisher, Table Tools automatically opens. It consists of two new tabs in the ribbon. One is called Design, and the other Layout. Let's take a look.
From these two tabs, we can easily customize the look and feel of our table.
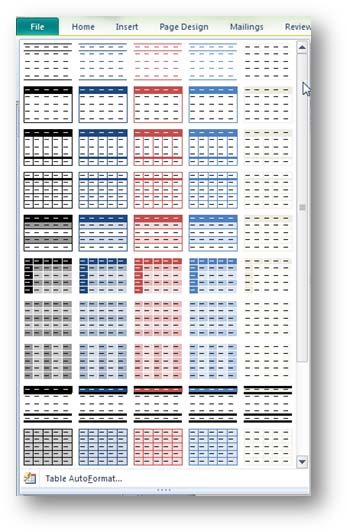
The Table Formats group gives you a series of predefined quick styles that you can apply to your tables. Click the down arrow with the line over it to expand and scroll through them.
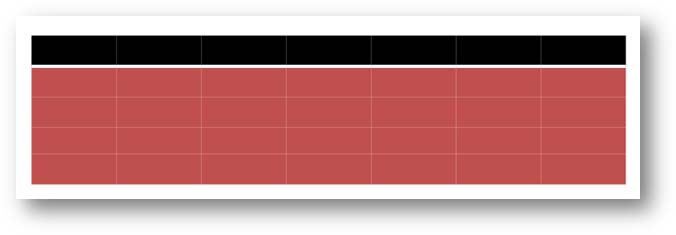
To apply a style, simply click on it. In the following example, we've applied a style to our calendar.
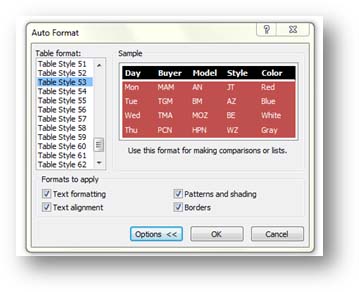
You may have noticed the Table AutoFormat button at the bottom of the quick style catalog. You can click on this to fine tune the quick style or choose which attributes of it to apply.
Select a style from the Table format box, and a sample of how it will look in your document shows up on the right. A brief description below the sample box explains the best application for this quick style. In this case, we've selected Table Style 53, and we're told it's best for making comparisons or lists.
Below this, you'll see Formats to apply. These Options are only available when you click the Options button. They are hidden by default. You can use these to choose which attributes of the quick style you'd like to apply to your table. For instance, you may want the borders, but not the text alignment. Click OK when finished.
Changing the Fill Color of a Table
To the right of the table quick styles, you'll find the Fill button. It looks like this:
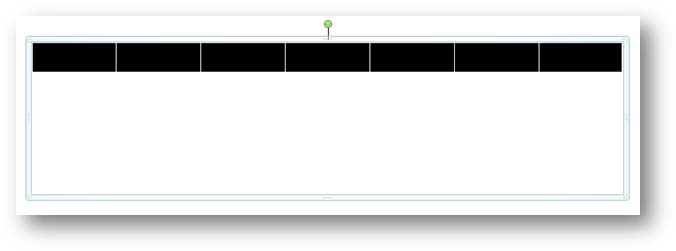
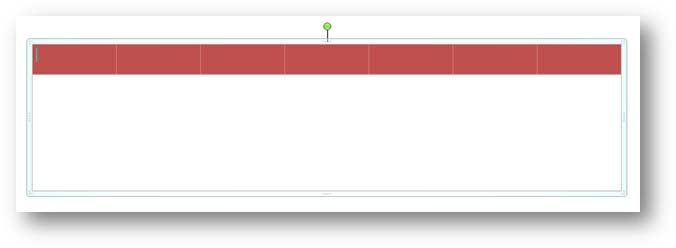
You can use this button to change the fill color of a single cell, several cells, or an entire table. To do so, select the cells you'd like to change. To select a single cell, just click anywhere inside of it. To select multiple cells, click inside a cell then drag your mouse pointer through all of the cells you want to select. In the following example, we've selected the top row of our table. The selected cells are in black.
To select an entire table, move the mouse pointed over the outer edges of a table until it turns into a four-way arrow and push the left mouse button.
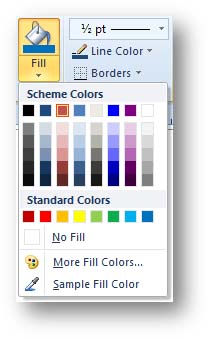
Now to change the fill color, click the fill button and select a color from the drop down menu.
You can select any one of the scheme colors, the standard colors, or create your own fill colors by clicking More Fill Colors. The Sample Fill Color option allows you to select a color from any item in your document. For instance, if you wanted to extract a color from a photograph in your document, you can easily do so with this tool. Clicking it turns your mouse pointer into an eyedropper tool. Just click the color you want to use.
We've decided to just use a simple scheme color.
Borders
To the right of the fill button, you'll find the Borders group.
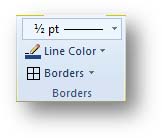
This allows you to change the stroke (thickness) of the line, its color, and choose which borders to apply it to.
Like all other changes you can make to your table, these options can be applied to a single cell, multiple cells, or the entire table. To apply them, select the cell(s), then choose a line stroke and color, then click the Borders button.
Clicking the tiny arrow to the right of the Line Color button gives you access to the same options that are available with the Fill button. You can choose a Scheme color, a standard color, create your own color, or use the eyedropper tool.
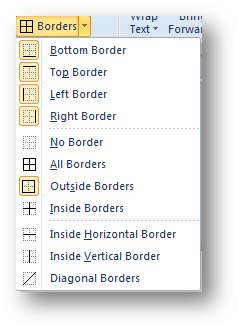
Clicking the Borders button applies whatever attributes are active to the border of a selected cell. To change which border the attributes are applied to, click the tiny arrow to the right of it.
Adjusting Columns and Rows
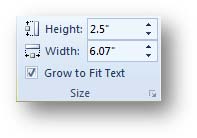
You can easily change the height or width of an entire table by using the Size group on the Design tab.
The Grow to Fit Text box allows a cell to expand as you type text into it. For example, if we were to type the Gettysburg Address into a cell, the cell will grow larger and larger so that all the text will fit into it. If this is not selected, then the cell size is fixed and the text that doesn't fit into it will not be visible.
You can also adjust entire rows or cells by positioning the mouse pointer over a cell border and dragging it. If you do this, though, you should realize that it only affects the borders that were dragged. It does not affect every cell in the table and the cells will not be of a uniform size and shape.
To resize an entire table the move the mouse pointer to any of the four corners until it turns into a double-headed arrow and then drag to the correct size.
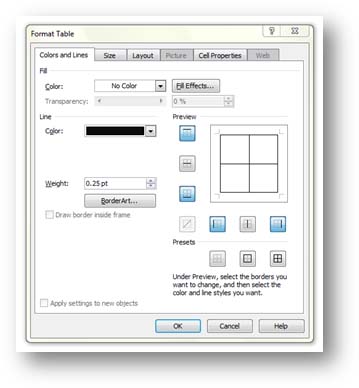
Format Table Window You can also change many of the attributes we talked about using the Format Table window. This window can be activated in a number of ways.
- Right-clicking on a table and selecting Format Table
- Clicking the tiny arrow
 in the lower right-hand corner of the Table Formats group on the Design tab
- Clicking the tiny arrow in the lower right-hand corner of the Size group on the Design tab
The Format Table window looks like this:
Since the options are identical to the ones we've already discussed, we won't go into them again here. Suffice it to say that the options that are easily available on the Design tab can also be found in this window. Click the tabs at the top to scroll through the different options available and click OK when finished.
Inserting and Deleting Columns and Rows Chances are pretty good that you won't want a basic cookie-cutter type table. You'll want to add or delete columns and rows. You may even want to merge individual cells. Doing so is incredibly easy, and remember, if you make a mistake, or you don't like the way something looks, you can just click the Undo button.
The functions for inserting and deleting portions of a table can be found on the Layout tab in the Table Tools section of the ribbon.
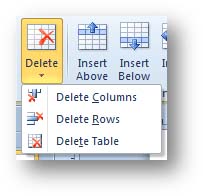
The tolls are pretty straightforward for the most part. To delete a row or column, click the Delete button. You can then choose to delete a column, a row, or an entire table.
To insert a row or column, just click into a cell, or select an entire column or row, then click one of the four insert buttons. You can choose to insert a row above or below the selected cell, and you can insert a column to the left or right of it.
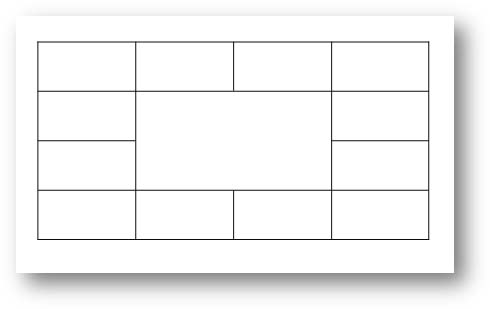
To merge cells, select any number of adjoining cells, then click the Merge Cells button. Below is an example of a table in which the center four cells were merged into a single cell.
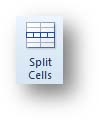
To split cells, you'll have to choose a cell that can be split. The only cells in Publisher that can be split are cells that have been merged. So this button basically just undoes a merge. You'll be able to see which cells can be split by selecting a cell. If it can be split, the Split Cells button will become active. Below is an example of an active Split Cells button.
When the button is inactive, it is dim.
So to split the cells, just click this button.
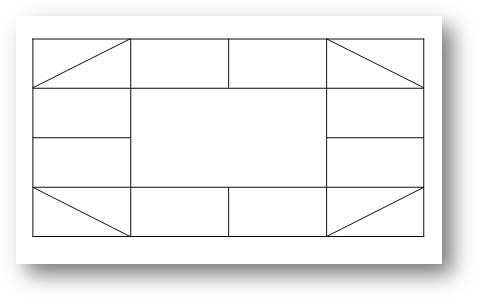
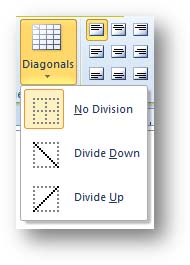
Occasionally, you will want to split a cell into a diagonal. Unlike the Split Cells button, any cell in Publisher can be split diagonally. In the example below, each of the corner cells of our table have been split diagonally.
To do this, select a cell then click the Diagonals button.
The examples to the right of each label show you how the cell will be divided.
Deleting a Table
There are two ways to delete a table in Publisher. You can select any cell in the table, then click the Delete button on the Layout tab and click Delete Table.
Another way to delete a table is by right clicking on it and selecting Delete > Delete Table. You can also right-click on it and choose Delete Object. This way removes the table from your document just as it would any other object, such as a photo or Word Art.