It is fun to create, and Lightroom gives you several ways to create. You can create slideshows, prints, photo displays for your website, and photobooks.
In this article, we are going to focus on creating photobooks using the Book module. You will learn how to:
-
Set up your photobook
-
Create a layout
-
Adding pages and page numbers
-
Add photos
-
Adjust the layout
-
Add page backgrounds
-
Add text and captions
-
Create custom page layouts
-
Save a photobook
-
Create a duplicate copy of your photobook
-
Export your photobook for printing
Getting Ready to Create a Photobook
Before you start to create a photobook, it is best if you create a standard collection and add all the photos you want in your photobook to the collection. It will save time and aggravation later on.
Once you have created the collection and made sure the collection is selected in the Catalog panel, go to the Book module. It looks like this:
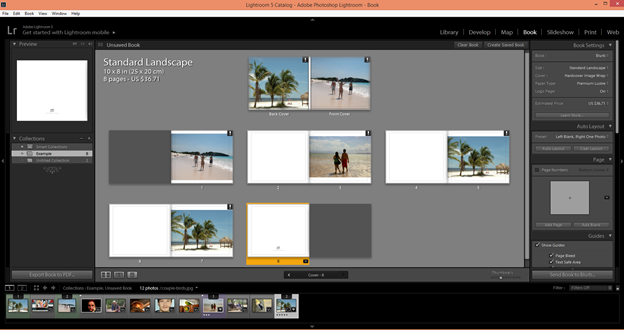
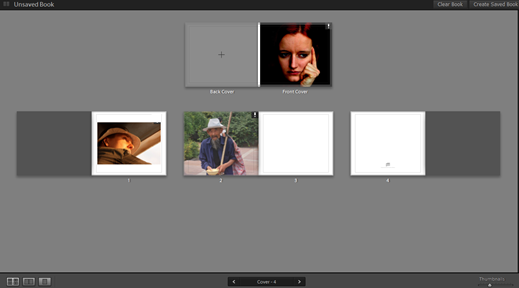
As you can see in the above snapshot, all the photos in your collection have been placed on what will become pages in your book. In the upper left hand corner of the work area, you can see the dimensions, the total number of pages, and even how much it will cost to publish the book.
Creating Layouts
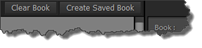
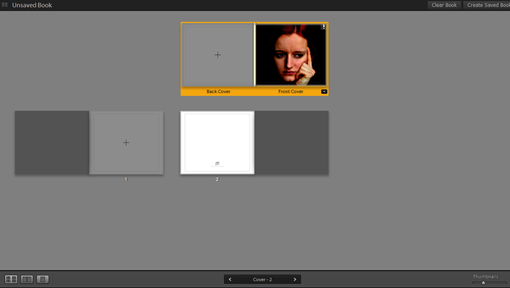
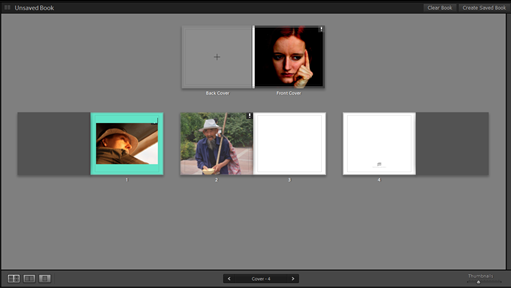
For the purpose of this article, we are going to with a blank slate so you can learn how to put a book together from scratch. That said, click the Clear Book button in the header bar. It is pictured below and is located in the upper right hand side of the work area.
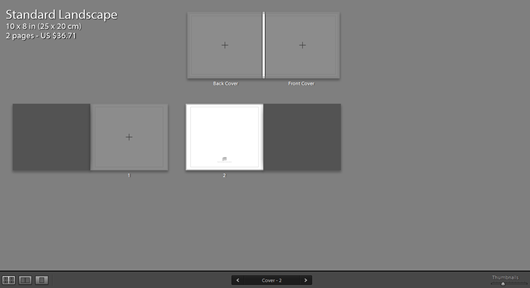
When we click the Clear Book icon, our work area looks like this:
Next, go to the Book Settings panel in the right panel group.
Select Blurb from the book menu. Blurb is a publisher that allows you to send your files directly from Lightroom.
Next, select your options for size, cover, paper type, and logo page.
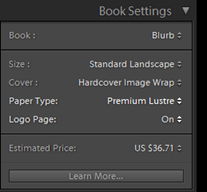
Based on your selections, Lightroom provides an estimated price, as shown at the bottom of the panel pictured above.
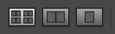
Now go to the Toolbar and select Multi-page view. It is the first view on the left.
Next, go to Book>Book Preferences to set options for your book.
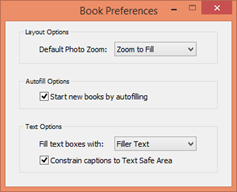
When you are finished, close out the preferences box, and go to the Auto Layout panel in the right panel group. This is where you will choose a layout from the preset menu:

You can choose to have a blank page on the left or right hand side of your book and the photo on the left or right side. You can also choose if you want a photo caption or one photo per page.
To create a custom layout, right click on the header of the Page panel.
Select Solo Mode from the context menu.
NOTE: If you can see the overlay that details the dimensions and price of your book in the work area, you need to turn that off temporarily by going to View>Show Info Overlay and clicking to remove the checkmark beside it.
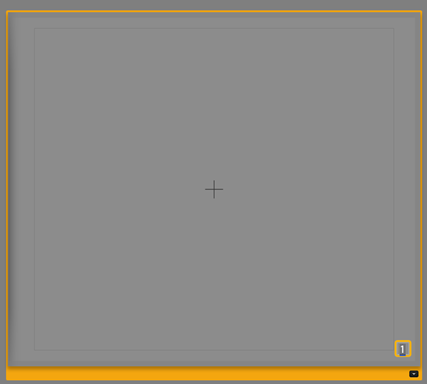
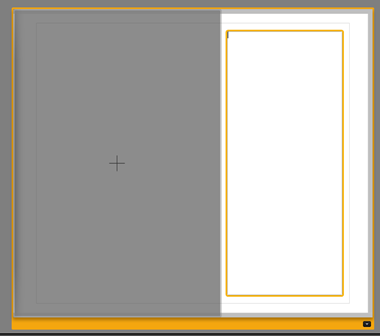
Now double click on the front cover of your book in the work area.
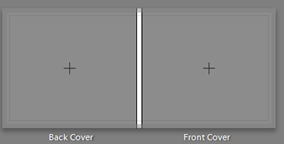
When you do that, the cover layout fills the work area, as shown below.
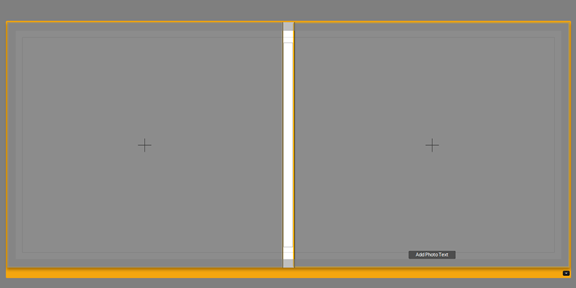
Click the arrow in the bottom right hand corner (shown above) to change the page layout.
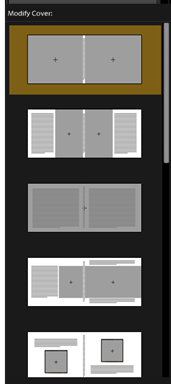
Choose the layout that you want by clicking on it. When you see grey areas with crosshairs that indicates image areas while as rectangles with lines represent text areas.
We are going to keep ours the same as it is right now.
Now go to the Guides panel.
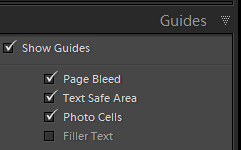
There should be a checkmark beside "Show Guides."
You can see where each guide is positioned on your page layout by unchecking, then rechecking the guide, such as Photo Cells. If you unclick Photo Cells, as an example, the grey area and crosshairs go away.
Adding Pages
To add pages to your photobook, go to Multipage view. Right click on a page, such as Page 1, then select Add Page from the context menu. You can change the layout of any of your pages by using the steps detailed for the front cover.
Adding Page Numbers
To add page numbers, double click on a page in the work area to go to single page view.
Next, go to the Page panel.
Put a checkmark in the box next to Page numbers, then select the position of the page numbers from the menu, as shown below.
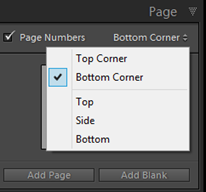
Our page number appears in the bottom corner.
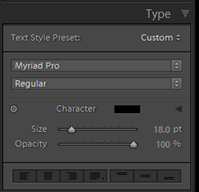
To change the font, style, size, etc. of the page number, click on the page number (shown above) to select it, then go to the Type panel.
Adding Photos to Your Book
To add photos to your book, first make sure you are in the Multi-page view.
Take a look at the Collections panel on the left. The collection you created for your photobook should be selected.
Now, select then drag an image from the Filmstrip to the cover of your photobook.
Drag other images from the Filmstrip to the other image areas in your photobook.
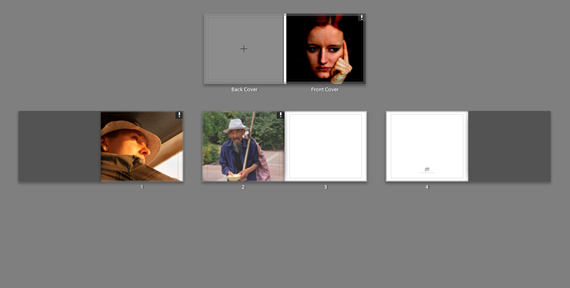
We added another page to better illustrate the pictures as they start to fill our photobook.
To remove an image from your photobook, right click on the image and select Remove Photo. However, if you want to replace an image, you can simply drag another one onto the page.
Adjust Cell Padding
Each photo in your photobook appears in a photocell. You cannot change the size of photo cells, and you cannot move them. They are fixed in place. However, you can adjust cell padding, which is the space around a photo within the photo cell.
Let's show you what we mean.
Double click on a page to take it to Single Page view.
Click on the photo to select it.
The zoom slider will then appear, as shown below.
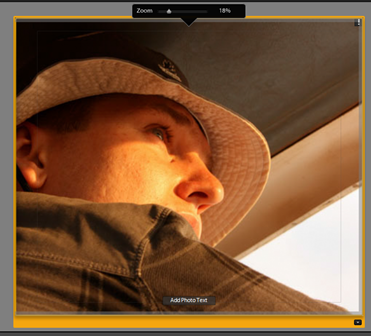
Right now, you can see an exclamation point in the top right corner of our image. This means the image is already enlarged too much. However, that could not be helped. The reason for that is when we dragged the image from the Filmstrip to the page, Lightroom resized the image to fit the photo cell.
With the zoom slider, you can reduce or increase magnification. Since we see that exclamation point, we need to reduce.
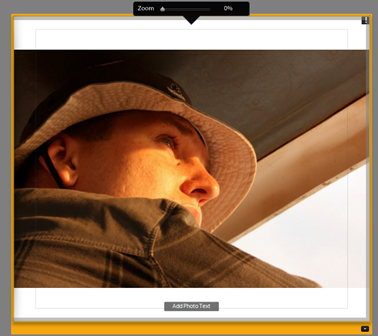
When we reduce the zoom, as we did above, we can see that it still needs to be reduced more. It would be nice if we could change the size of the photo cell to accommodate the image, but we cannot.
Instead, we go to the Cell panel in the right panel group.
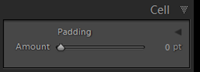
We can now increase the padding by dragging the slider.
You can also click the triangle to the right of Padding and adjust the padding by points.
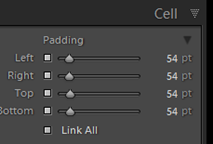
By default, if you change the Left, the Right, Top, and Bottom will change by the same number of points. If you do not want this to happen, uncheck the Link All option at the bottom.
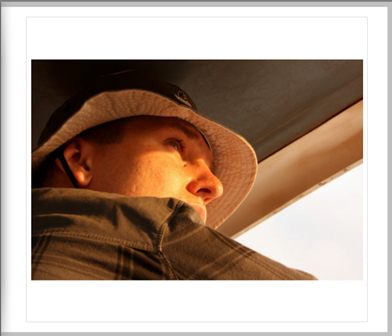
We have adjusted our cell padding. We can now go back to Multi-Page view, and see the page.
Adding a Page Background
All pages in your book will have a white background until you change it. To add a background, select the page for which you want to add a background, then click Spread View.
Expand the Background panel in the right panel group.
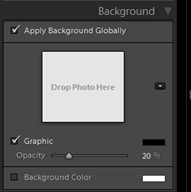
Uncheck "Apply Background Globally" unless you want to apply the background to all pages.
If you want to use a photo as the background, drag one from the Filmstrip to the preview pane in the Background panel.

Drag the Opacity slider to adjust the opacity of the image on your page.
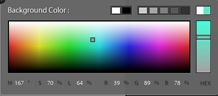
If you simply want to use a background color instead of an image (or both), put a check beside Background Color.
Click on the color swatch to the right of Background Color to use the Color Picker.
When you are finished, go back to Multi-page view. You can see the background color applied to your page.
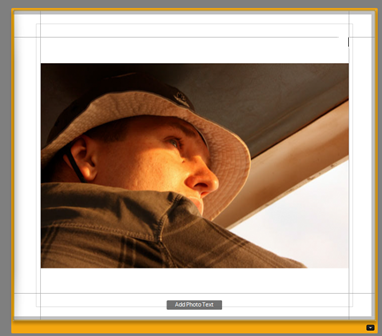
Adding Text
To add text, double click a page that contains a text cell.
In the snapshot below, you can see our text cell highlighted with a yellow border. Inside the upper left hand corner, you can see our cursor.
You can simply start typing to add text.
If you want to change the font type or font size, go to the Type panel in the right panel group. Select the text, then apply the changes.
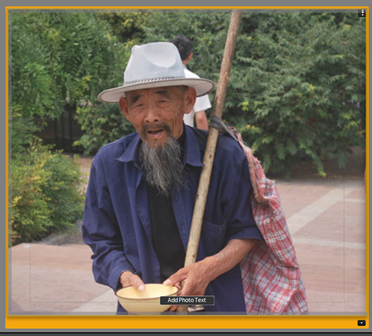
Adding Captions
Whereas text and photo cells are fixed into place, caption cells can be moved vertically. If you want to move them horizontally, you have to adjust the padding.
To add a caption, go to Multi-page view and double click on a page.
Saving Custom Page Layouts
If you have adjusted the padding on photo or text cells on a page, you may want to save the new layout you have created for future use. You can do this by saving it as a custom template. It will then be listed in the Page Layouts menu.
To save a custom page template, go to the Page panel.
Next, right click on the page thumbnail in the work area, and select Save as Custom Page.
If you look at the Page panel, the thumbnail in the panel now contains the padding we added to that custom page.
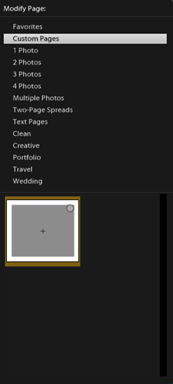
If you go back to the work area and click the arrow at the bottom right hand corner (shown above), you will see your new page layout listed under Custom Pages.
Saving a Photobook
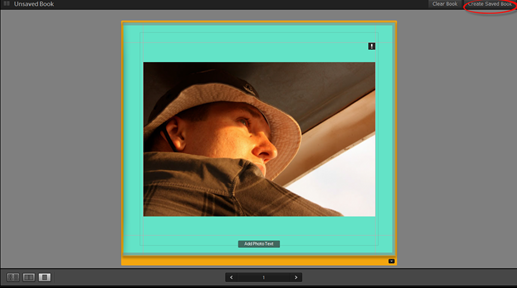
To save a photobook, click on the Create Saved Book button. This is located at the top of the preview pane, as circled in red below.
You will then see the Create Book dialogue box.
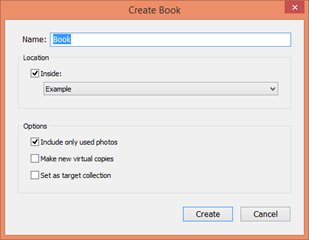
Enter a name for the book in the Name field.
Next, click the location. Ours is inside the collection named Example.
Click Create when you are finished.
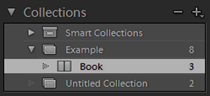
Your new book is saved in the Collection panel. It appears with a Saved Book icon beside it, as shown below.
Making a Duplicate Copy of Your Book
Let's say you have created your photobook, then saved it. After you have finished, you decide you want to try out some changes just to see if you like it. However, doing so risks destroying the book you have already created if you do not like the changes you have made after you have finished. Instead of doing that, you can make a copy of your book, then make any changes to it.
To make a copy, right click on your saved book in the Collections panel.
Select Duplicate Book from the context menu.
After you make the changes to the duplicate book, you can delete the original book if you are happy with what you have done with the duplicate. To do that, right click on the original book, then select Delete. Next, right click on the duplicate, and select Rename. Rename the duplicate.
Exporting a Book
When you are finished with your photobook, it is time to decide what you want to do with the finished product. You can either export it to PDF or print it yourself, or you can upload it to Blurb.com and have it printed.
If you want to publish it to Blurb, click the Send Book to Blurb button. This is located below the right panel group.
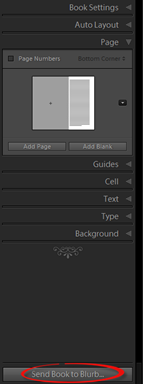
You will then see the Purchase Book dialogue box.
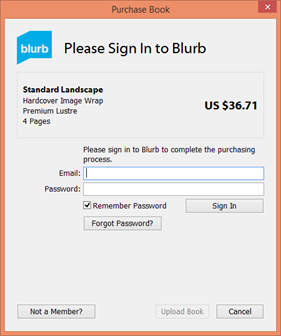
You will then have to sign into Blurb or get registered by clicking the Not a Member button.
NOTE: To publish with Blurb, you book must be at least twenty pages not including the front and back cover.
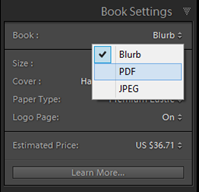
If you want to export your book to PDF, go to the Book Settings panel.
Select PDF from the Book menu.
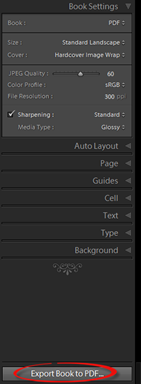
Review the settings and make sure those are correct, then click the Export Book to PDF button that appears at the bottom of the panel group.
You will then see the Save dialogue box.
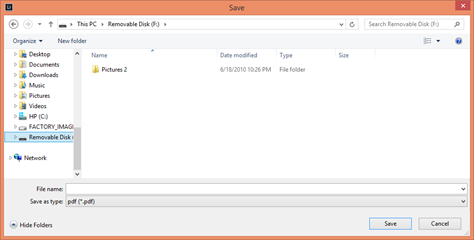
Enter a name for the file in the File Name field, then push Save.