Building Blocks
The first thing you'll notice that's different with 2010 is that it offers building block galleries. These are also offered in other Office programs. Building blocks are simply reusable pieces of content, such as headers, advertisements, and calendars. In previous versions of Publisher, you'd have had to create these yourself. However, in 2010, Publisher gives you these building blocks to easily use at any time. You can also create and save your own.
Backstage View
The Backstage View is accessible through the File tab. It is used to manage files and data that are about the files, but not IN the files. The Backstage View contain such information as creating and saving files, setting file options, and inspecting for hidden data or personal information.
Print and Print Preview
In Publisher 2010, Print and Print Preview are combined so that you get a more accurate view of what your publication will look like before you print. It's also a huge time saver! You can view multiple pages at the same time, see page boundaries, page numbers, and rules all while in print/print preview.
Save as PDF or XPS
You can now save files as a PDF or XPS file. PDF files can be password protected for extra security.
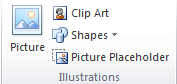
Image Tools and Styles
Here are the aspects of good design and layout:
-
Alignment. Alignment refers to the placement of text and graphics so that they line up on a page. It helps to create attractive pages. You can use alignment to group items, create order, or organize the page elements. Alignment can be horizontal, vertical, or you can line up text and objects along their top, bottom, left, or right edges.
-
Balance. Balance is achieved by making sure elements are evenly distributed on a page. You don't want to have one section with dozens of pictures, the next with none � or everything lined up on side of the page and nothing on the other.
-
White Space. White space is the space in your layout and design that has nothing in it. It's just blank space � or white space. It's important to have enough white space so the page is easy to look at and to read. You don't want to cram in pictures and text. It looks like a traffic jam for the eyes.
-
Proximity. When you place objects close together on a page, you group them together and suggest a relationship. If you place objects far apart, it suggests lack of a relationship. This is important to remember in design. Group objects that are related close together. For example, you can group pictures and text together. Put the picture near related text, not in some other section where it's out of place.
-
Contrast. If you put all square shapes in your design, not one part of your design would stand out, would it? Use big and small elements, different shapes, and even different colors of text to achieve contrast. It makes for a more attractive design.
-
Unity. All the different objects and pieces in your design should tie together and become a whole.
-
Consistency and Repetition. Repeating use of design styles, font types, and design elements helps someone to easier navigate your design and find what they need. This is especially important if you are designing monthly newsletters or brochures.
That said, let's start out by opening Publisher 2010 and becoming familiar with the screen. Being able to navigate the program is a big first step to learning to use it.
If you click Open on the left side of the screen, you can open an existing MS Publisher file.
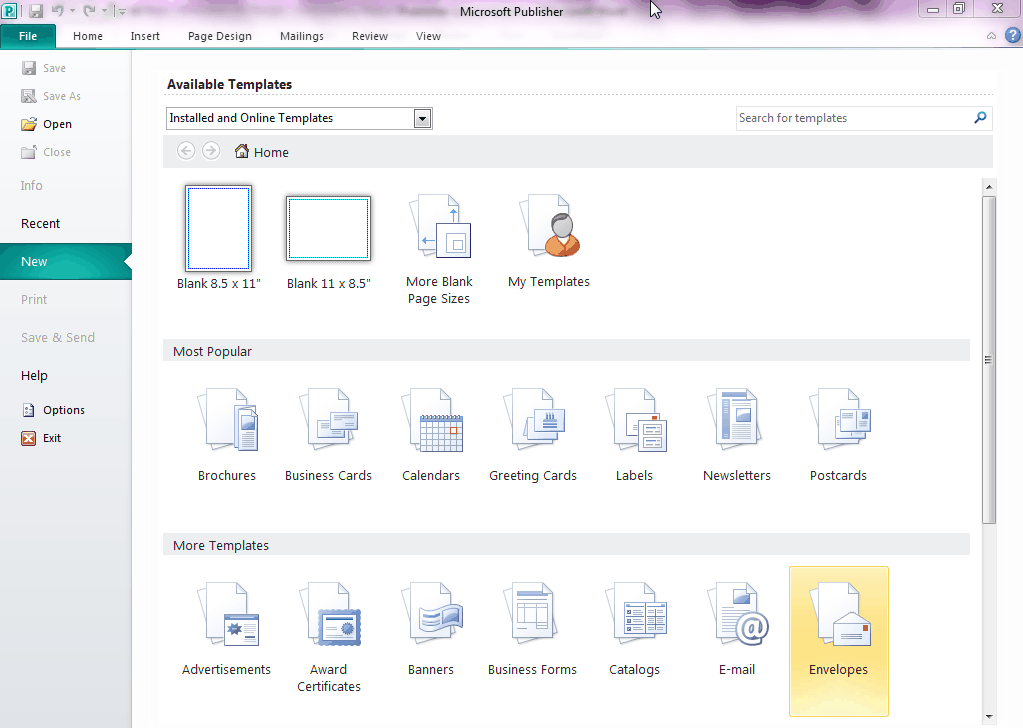
In the next section (shown above) you can select from dozens of templates. Choose the template that matches your project.

Type in the type of template you're looking for. We're going to type in "invoices."
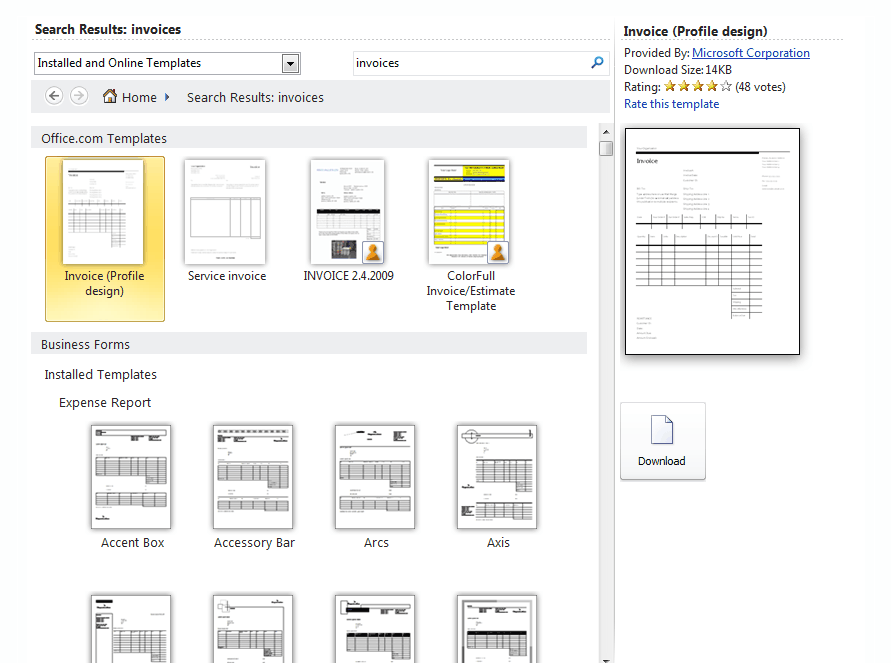
On the left, you can see all the different invoice templates available. By clicking on one of these, you will be able to see a larger version to the right. Once you find a template you want to use, click on Download.
The Ribbons and Toolbars
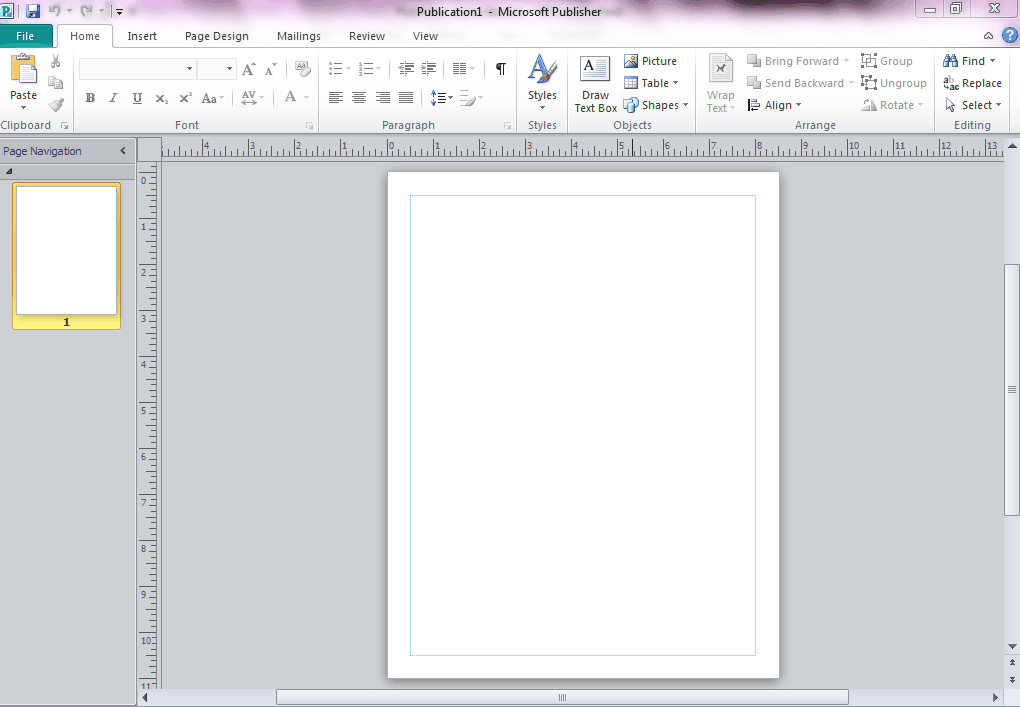

Starting with Microsoft Office 2007, Microsoft started using the ribbon to better group toolbars. If this is new to you, it may take a while to adjust, but rest assured the ribbon makes navigating and finding what you need much easier. We've shown the toolbars and ribbon above.
At the very top of the snapshot above, you'll see File, Home, Insert, Page Design, Mailings, Review, and View. These are your tabs. The ribbon appears below these tabs. Each ribbon contains toolbars that complete certain tasks. For example, the ribbon under the File tab has to do with opening and creating files. Home (as shown above) contains formatting tools for text. If you click the Insert tab, you'll see tools for inserting things into your design. All your toolbars are located on the ribbon. The toolbars you see will depend on what tab you click on.
That said, toolbars are arranged into groups in the ribbon. Look at the ribbon for the Home tab shown above. You have the Clipboard group, the Font group, the Paragraph group, etc. These all contain tools related to the name of the group. It makes finding the tools you need a lot easier.
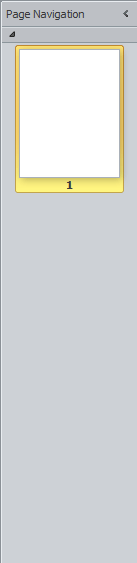
Page Navigation shows you thumbnails of all pages in your file. For example, if you had a multi-page newsletter, Page Navigation would show you thumbnails of each page. You can use this to easily navigate from page to page. You can click on a thumbnail to open it in the work space area.
You can also right click on a page to do a variety of tasks quickly and easily.
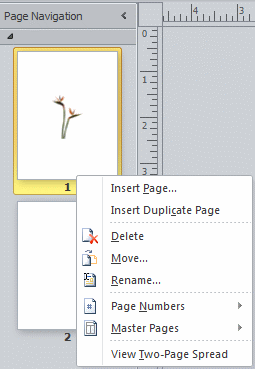
You can insert a new page, insert a duplicate page, delete the page, move the page up or down (make page 1, page 3), rename the page, work with the page numbers, or master pages (we'll discuss what this is later.) You can also view two pages at a time.
For now, click on Insert Page.
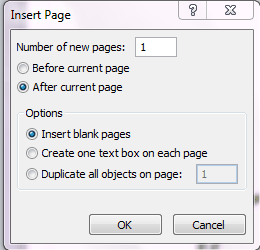
Type in the number of new pages you want to create. Then, decide if you want them to come before the current page or after.
You can also choose to insert blank pages, pages with one text box on each, or duplicate all objects on a certain page number. Make sure you type in the page number.
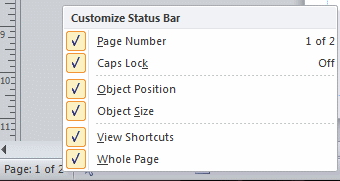
Right click on the Status Bar to set options.
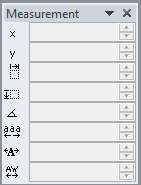
With this, you can alter image sizes and locations. You can play with these different options to get a better feel for what they do.
X and Y are the coordinates on the screen where the image or text box appears. Adjusting these will move the image.
 Adjusts the image width.
 Adjusts the height.
 Adjusts the rotation.
 Adjusts the spacing across a word, line, or column of text. The higher the percentage, the more spacing. This is called tracking.
 Allows you to shrink or stretch the width of the text characters.
 Allows you to adjust the kerning, or the space between two letters.
Working with Publisher 2010

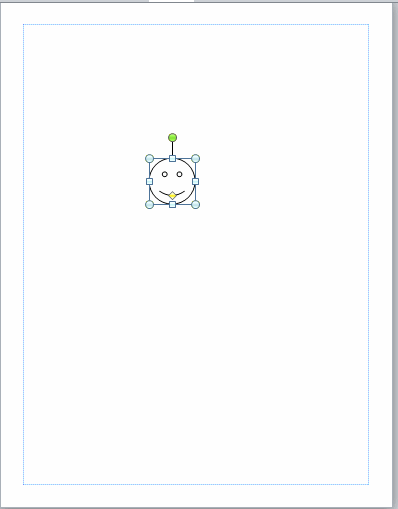
The box that appears around the shape allows us to move it, as well as to resize and rotate it. Use the green circle above the shape to rotate it. Use the square handles to expand it vertically up or down, or horizontally left to right. If you want to move the object, move your cursor inside the box. You'll see arrows that look like a plus sign. Hold in your left mouse button and drag it to its new location.

Let's cover the top row of icons in this menu from left to right.
-
The first is to wrap text around an image or graphic.
-
Next is to bring an image or graphic forward, perhaps on top of another image.
-
The last icon is to send an image back, as in behind another image or graphic.
Now, let's cover the second row.
-
The icon with the paint bucket allows you to change the fill color of the image. Our smiley face above is white. We can change it to yellow using this icon.
-

-
The next icon is to change the outline of the shape. Our smiley face has a solid black line. Using this icon, we can change it to red and dashed lines if we wanted.
-

-
The last icon is the Format Painter. This allows you to copy and paste formatting, such as alignment, indentations, etc. Select the text that you want to copy and click the icon to copy character formatting. If you want to copy alignment, indentations, etc., you'll have to go to Paragraph in the Home tab and click
 so the paragraph mark shows up after a paragraph. Copy and paste that as well as your text.


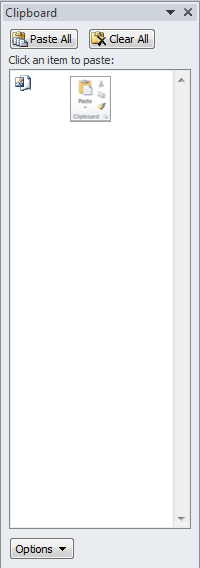
 Paste using original formatting of pasted text.
 Paste using the formatting of the majority of the text in the document.
 Allows you paste text only. Any graphics or images will not be pasted, only text

But let's say you accidently delete something or deleted it and then decided that you want it back. You grit your teeth and start to grumble, trying to remember the exact wording. It's a lost cause, right? Wrong. Microsoft anticipated this problem and supplied an easy solution. The Undo button!

The Undo button can be found in the upper left corner of the program window in what Microsoft calls the "Quick Access Toolbar." The Undo button is the blue arrow shaped like a comma. If you are not sure you've got the right button, you can move your mouse over it and wait and a small box that reads "Undo (Ctrl-z)" will appear.
The Redo button is to the right of the Undo button.  It looks like the recycle symbol you might see on trashcans at the airport. The redo button allows you redo an action that you just undid or to repeat the last action. If Publisher cannot redo the last action, the button will be faded.