In this article, we are going to focus on cutting and trimming clips.
Cutting Clips with the Blade Tool
You can use the Blade tool in the Timeline to cut clips. When you cut a clip, you can adjust the duration or cut out parts of the clip that you do not want.
Think of the Blade tool as a razor. You will use it to make a straight cut.
To use the Blade tool and make a straight cut, select the Blade tool in the toolbar.
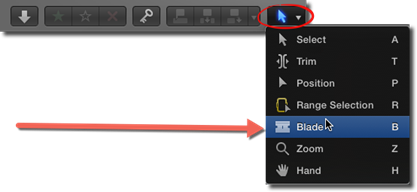
When you select the Blade tool, you will notice that your mouse pointer turns into a graphic that looks like a razor.

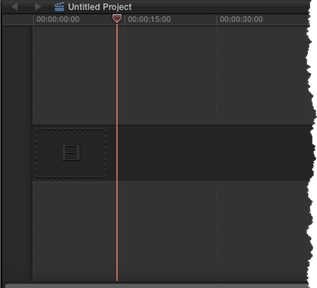
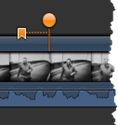
When you move the Blade tool across the Timeline, you will also see a vertical line. This is the skimmer.
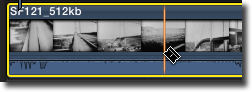
The skimmer is the vertical orange line above.
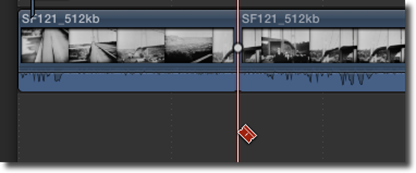
Move the skimmer to where you want to must the clip, then click your mouse.
An edit mark appears, and the clip is cut.
You can also use the Blade tool to cut clips in the primary storyline and connected clips at the same time. To do this, move the Blade tool to where you want to cut, then go to Trim>Blade All.
You can now insert another clip where you cut the clip in half.
Performing a Ripple Trim
A ripple trim is the default trim in Final Cut Pro X. You perform a ripple edit to either extend or shorten a clip by adjusting the clip's starting or editing point.
It is called a ripple trim because, when you trim a clip, the clip ripples after you change the duration and moves all other clips forward or back in the Timeline.
A ripple trim will affect the duration of the clip being edited, as well as the duration of your project.
That said, let's learn how to perform a ripple trim.
To start, go to the toolbar and switch to the Select tool.

Move your mouse pointer to the start or end point of the trim you want to trim. If you want to trim the beginning of the clip, move the pointer to the beginning.
You will see the pointer change from an arrow to a trim icon, as shown below.

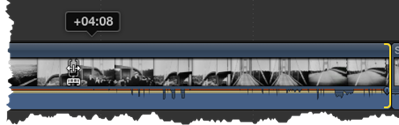
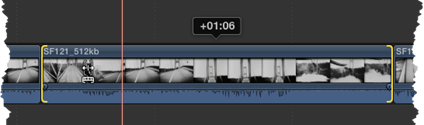
Drag inward toward the clip to trim it and shorten its duration. Drag outward to increase the duration.
A timecode will appear to let you know the amount of time you are either shortening or extending the clip.
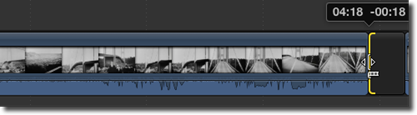
In the example above, we shortened the clip by 00:18.
If you extend a clip to its maximum length, the clip edge will turn red to let you know you cannot extend it any further.

You can also enter a duration for the clip by entering a value in the timecode. To do it, select the clip, then go to Modify>Change Duration.
You will then see the timecode field turn blue.

Enter the new duration for the clip. Final Cut Pro X moves the end point of the clip to match the duration you entered.
You can also trim a clip so that only the part of the clip that you want to keep remain after you are finished trimming.
1. Start out by selecting the part of the clip you want to keep.
2. Go to Edit>Trim to Selection.
Final Cut Pro X trims the clip so that only the part you have selected remains in the Timeline.
About Roll Edits
A roll edit will adjust the start and end points of two clips at the same time.
For example, let's say you have Clip A and Clip B which are side by side in the Timeline.
You want to shorten the length of Clip A and extend the length of Clip B so that the overall duration of your project remains unchanged. In other words, you want to take away from Clip A and give it to Clip B. You would perform a roll edit to accomplish this.
A roll edit allows you to change the end point of one clip and the beginning point of another clip.
Here is how to do it.
Choose the Trim tool from the toolbar.

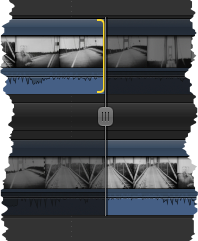
Next, click the center of the point you want to edit so that both sides of the edit are selected.
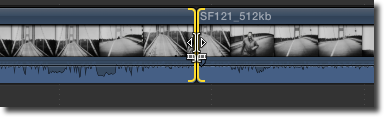
If that sounds like pig Latin, take a look at the snapshot above. You can see that both of our clips are selected. We know this because of the yellow handles.
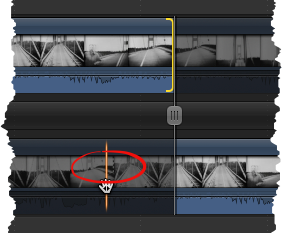
Now, drag the edit point either left or right. Dragging it left will shorten the clip to the left. Dragging it right will shorten the clip to the right.
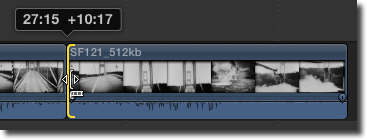
The timecode appears above the storyline, as shown above.
As you can see, we have increased "Clip A" by 10:17 and shortened "Clip B" by 10:17.
Using the Trim Tool to Make Slip Edits
A slip edit is when you change the start and end points of a clip to control what part of the clip appears in the Timeline. Even though the part of the clip that is shown in the project will change, the duration of the clip and the project will not change. Only the part of the clip that shows is changed.
That said, in order to perform a slip edit, you must have media on both sides of the clip you are editing.
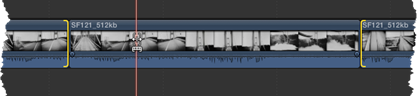
To perform a slip edit, select the Trim tool in the toolbar.

You will see yellow handles on each side of your clip, as shown below.

Drag the clip that you want to trim either left or right.
The timecode changes and shows you the amount of time you are adjusting the start point and the end point.
Using the Trim Tool for Slide Edits
A slide edit is when you move a clip in between two clips, but do not create a gap. The clip and the project remain the same duration. It is only the clip's position in the Timeline that changes. The clips on either side of the edited clip get either longer or shorter to accommodate the adjustments you make to the selected clip.
For example, if you have clips A, B, and C, and these clips appear in that order on your Timeline, you could edit clip B. Clips A and C would be adjusted to make up the difference for the changes you made to clip B.
Let's show you how it works.
To perform a slide edit, select the Trim tool in the toolbar.
Next, click Option+drag to drag the clip you want to edit to the left or right. Just remember that the clip you drag must have a clip before it, as well as a clip after it.
Notice that when you perform a slide edit, the clip to the left and right of the clip you are editing have yellow handles appear on them. This lets you know you are performing a slide edit.
The timecode field that appears above the storyline will let you know the amount of time the clip is being moved.
Using the Precision Editor
The Precision Editor allows you to get a closer look at your clips before trimming or editing them.
Before we can start using the Precision Editor, we need to adjust the settings for Final Cut Pro X. To adjust the settings, go to Final Cut Pro>Preferences>Editing.
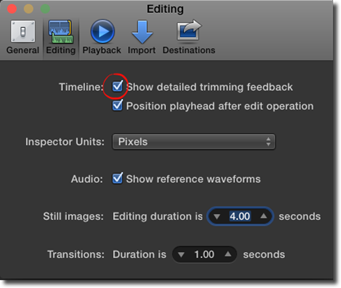
Make sure there is a checkmark before "Show detailed trimming feedback."
You can then close the Preferences window.
Now we are ready to use the Precision Edit tool.
You can use either the Select tool or the Trim tool in the toolbar.
Select the tool you want to use, then double click where you want to trim in the Timeline.
The Precision Editor appears.
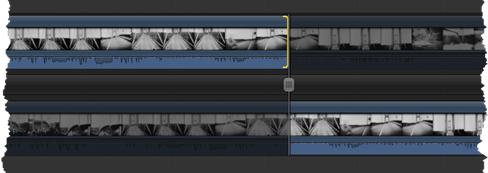
As you can see in the snapshot above, the Precision Editor gives us an expanded view of the clip that is ending at the edit point (that you just double clicked).
It also gives an expanded view of the clip that is beginning at the edit point.

The edit point is a vertical line that goes down the center of the Precision Editor. This is the point where you will edit the clips.
There are also dimmed portion of the clips. These dimmed areas are unused media that can be trimmed. They are called media handles.
You can mouse over these areas � or skim over them � to play them back. You can then decide where you want to trim.
The skim line is shown below.
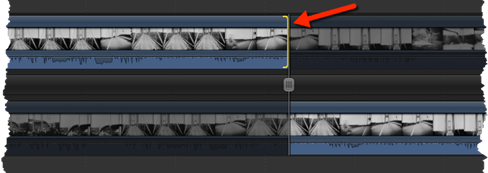
If you want to move the edit point, you can drag on the edit point's handle, as circled below.
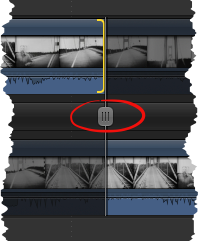
By moving the entire line, you perform a roll edit.
To do a ripple edit, drag the end point of the first clip or the beginning point of the second clip. Next, skim over then click the clip at any point.
Press the ESC key to close the Precision Editor.
Learning the Three-Point Edit
In Final Cut Pro X, you can make extremely precise edits by using a combination of edit points. Because there are typically three edit points, this is called three-point editing. The edit points for a three-point edit are made in the Event Browser and the Timeline.
To make a three-point edit easy to understand, we are going to walk you through the process.
To make a three-point edit, start out by going to the Event Browser and mark start and end points on the source media. You do this by selecting a clip of a range of clips, as shown below.
Next, position the skimmer or playhead in the Timeline.
For the third point of the edit, add the selection in the Event Browser to the Timeline by using either an overwrite, append, or connect edit.
About Auditions
Final Cut Pro X gives you the ability to "audition" related clips to determine which you want to use in your project. This is done by organizing clips into sets � which are called auditions � then choosing one clip from the set to use.
By "auditioning" clips, you can better determine the effects, music, edits, and other aspects you actually want to use in your project by trying them out to see which you like best. Think if as auditioning actors for a play. You only want the very best.
Creating Auditions in an Event and the Timeline
You can create an audition either in events or in the project itself. We will teach you both methods. First, let's learn how to create auditions in an event.
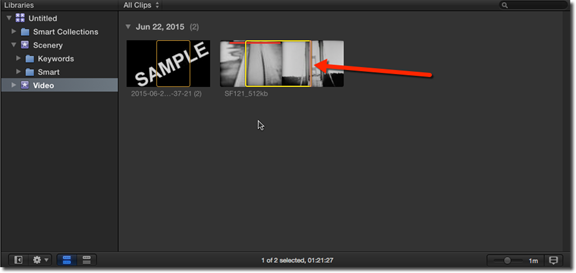
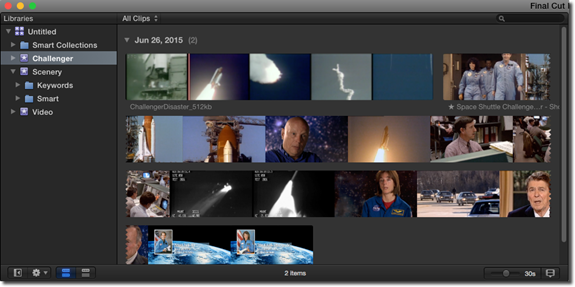
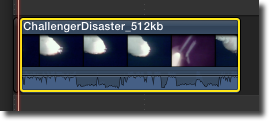
In the Event Browser, we have several clips of the Challenger disaster.
We want one shot of the explosion for our project, but we want to choose the best one.
In the Event Browser, we are going to select our ranges for the clips.
We have selected three clips, labeled in the snapshot below.
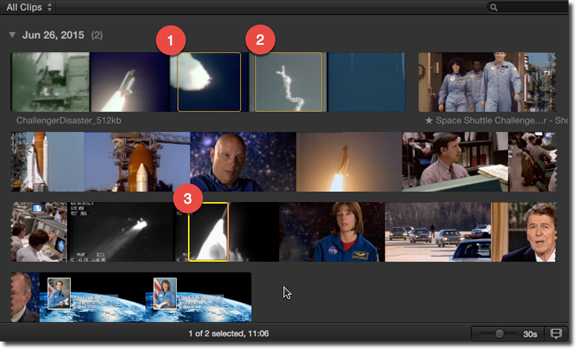
Next, select all the ranges by clicking on the first one, then Command+Click on the rest.
Go to Clip>Audition>Create.

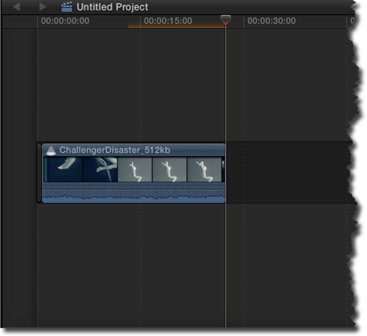
You can see an audition icon in the selected clip above.
Now we are going to use an insert edit to insert the audition clip in the Timeline. You could also use an append edit if you wanted to append the clip to the end of your project.
Click the icon in the upper left hand corner.
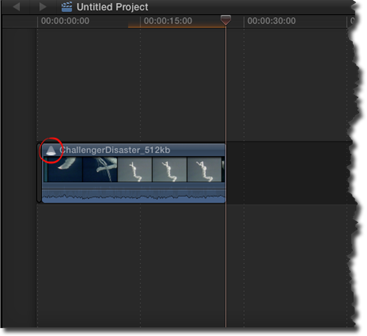
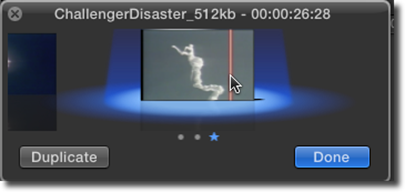
You will see the Audition window.
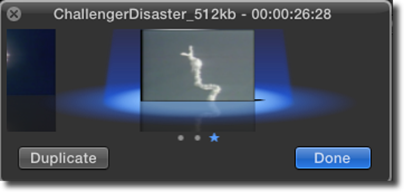
Use the left and right arrows on your keyboard to scroll through the thumbnails of the clips.
You can hover your mouse over any of the thumbnails, then use the skimmer to playback the clip, as shown below.
When you find the shot you want to use in your project, click the Done button.
Now, right click on the clip in the storyline and select Audition>Finalize Audition.
The audition is now replaced with the clip you selected.
NOTE: You can also open the Audition window from the Event Browser by clicking the audition icon that appears in the upper left corner of the clip.
Adding Markers
Markers are simply reference points that you can attach to a clip. You can use markers to create chapters in a video, but you can also use it to mark areas that you need to work on as you develop your project. For example, if you need to add a sound effect to a clip or apply an edit to a clip, you might add a marker as a reminder. You can also add text to markers so that you can recall why you used them.
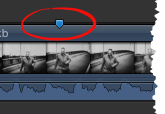
To add a marker, skim through the clip or press the spacebar to play the clip. If you are using the skimmer, stop when you reach the point where you want to add the marker. If you are playing the clip, hit the spacebar to stop playback when you reach the point where you want to add the marker.
You can either press M on your keyboard or go to Mark>Markers>Add Marker.
The marker then appears in the Timeline.
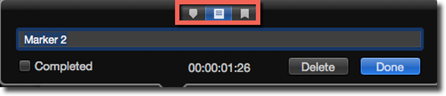
Next, select the marker, then right click on it to see the pop up menu.
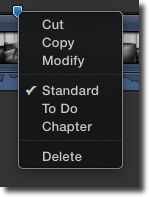
You can choose to modify the marker, and you can also choose to make it a Standard marker, a To Do marker, or a Chapter marker. You can also delete it.
Let's make ours a To Do marker.
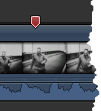
As you can see, the color of the marker changes to red. To Do markers appear in red to help you identify them.
When you complete the task, right click on the marker again, then select Completed.
The marker color then changes to green.
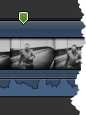
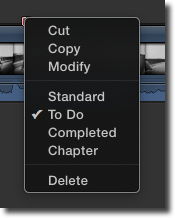
Below is a Chapter marker.
If you right click on the marker, then select Modify from the pop up menu, you can add a name for the chapter.
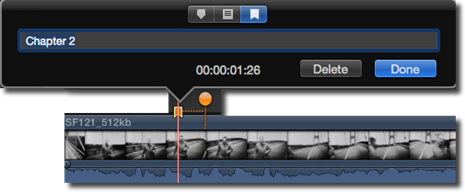
You can also change the marker type to Standard, To Do, or leave it at Chapter.
Click Done when you are finished.