Inserting graphics and items is one of the biggest parts to using MS Publisher 2010. It's what turns a page full of words and text into a publication. That said, this article may seem simple in the topics it covers, but it's very important. Take your time going through it because it will make using Publisher 2010 so much easier for you.
Insert Graphics Graphics are defined as pictures, clipart, and any image type file that you insert into your publication. Inserting graphics is as easy as it gets.
Click on the Insert tab on the ribbon.
From here, you have two options. You can choose to click on Picture to add a picture that you have saved on your computer.
Go to the place on your computer where the picture you want is located, then select the picture. Click Insert.
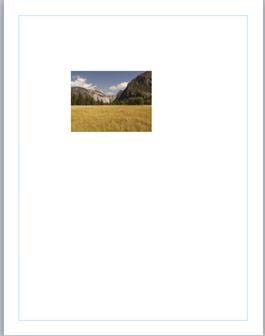
The picture will then be inserted into your publication.
Now you can resize, format, and/or move the picture.
To resize or format the picture, click on it to select it, then right click. Choose Format Picture from the menu.
Under the Picture tab, you can crop the picture by subtracting inches off the left, top, right, and bottom of the picture. You can also adjust the color, brightness, and contrast.
By clicking on the Colors and Lines tab, you can add a fill color. You can also add a border under the Lines section.
If you click on Size, you can resize the picture. Just make sure Lock Proportions is checked so the picture doesn't appear stretched. The current size of the picture is shown in inches. You can enlarge it or shrink it by changing the measurements.
If you click the Layout tab (pictured below), you can adjust the layout and how your picture appears with text.
Under the Position on Page tab, you can position your picture on the page. Again, you use inches as measurements. You can also just click on your picture to select it, then drag and drop. That can be much easier.
Under the Wrapping Style section, you can decide how your picture will line up with text. MS Publisher 2010 shows you how it will look.
In the Wrap Text section, choose if you want to have the text wrap around the picture on both sides, the left side only, or the right side only. You can also choose In the largest space available.
When you're finished, click OK.
If you double click on your picture, you'll see the Picture Tools Format tab appear in the ribbon.
You can use this to adjust the color of your picture, or add a style or shadow. This is fun to play with.
This is our regular picture.
We can apply a picture style:
Then add a shadow effect:
By clicking  in the Picture Tools Format ribbon, you can also add a caption for your picture.
Insert Clip Art
To insert clip art, go to the Insert tab and select Clip Art.
You'll then see the Clip Art pane open on the right side of your page.
The easiest way to find and insert clip art is to first tell Publisher what types of files you want. Go to the Results Should Be field and let Publisher know if you want pictures, illustrations, audio, or video. You can also choose a combination by checking all appropriate boxes.
Then, in the Search For field, enter keywords that describe what type of clip art you want to find. We're going to type in Publication.
Double click on the clip art that you want to use to insert it into your publication. You can also select the clip art you want to use, then click the downward arrow that will appear to the right of the image. Choose Insert.
Now you can reformat and resize the clip art just as you did with the pictures.
Insert Placeholders There may be a time when you're designing the layout for a publication and want to save space for graphics, but don't know exactly what graphics you're going to use yet. When this happens, you can use a picture placeholder. A picture placeholder is basically an empty box where your picture will appear. It does just as its name implies. It holds the place for your picture or graphic until you're ready to insert it.
Before you create a publication in which you're going to add picture placeholders, go to the View tab and click Master Page.
Click the Insert tab and then Picture Placeholder.
You'll then see this appear on your publication:
You can drag and drop the box to move it to the location you want it to be in. This is where your picture will go when you're ready to insert it. You can also right click on it just as you did with pictures to resize it.
Insert Calendars You can also insert calendars into your publications.
To do this, click the Insert tab and click on Calendars.
You'll see different types of calendars displayed in the dropdown menu. Select one of those or click More Calendars.
You can insert a day or a month calendar. If you choose to insert a month calendar, you can select which month you want to display on the right. Click Insert when you're finished.
You can right click on the calendar and select Change Text from the dropdown box to change the font used in the calendar. You can also use the selections in the drop down menu to add or delete rows or columns in the calendar. If you want to resize the calendar, click to select it and use the handles to push in (to make it smaller) or pull out (to make it bigger).
Insert Advertisements
If you want to insert advertisements into your publication, go to the Insert tab and click Advertisements.
You'll see a dropdown menu that contains advertisements. Click on More Advertisements to see more than Publisher 2010 offers.
Select if you want to insert the logo or not, then click Insert to insert the ad.
Resize the ad to the size you want for your publication by dragging the handles.
You can click on the text to replace the text. If you want to replace the log, you can click on it to select it, delete it, and then insert your own by inserting an image.
Insert Page Parts
You can also insert different parts of a page, such as headers, accessory bars, and response forms. To do this, go to the Insert ribbon and click on Page Parts. Select More Page Parts.
Choose the page part you want to insert, then click Insert. We choose a heading.
You can now move the box, click on the text to change it, and resize it if you want.
Customize Pages
Publisher is a powerful page layout program. As such, it has many tools to help you create great, professional-looking documents, even if you are complete novice.
In this article, we're going to show you some of the more advanced features. But don't let that intimidate you. They are incredibly easy to use.
Create and Use Headers and Footers We talked briefly about headers and footers in the section on Master Pages, but now we'll be a bit more specific. If you've used the header and footer feature in Microsoft Word, this process should be familiar to you; the process is pretty much the same. The difference is that in Publisher, you can only add headers and footers to a master page. If you think about it, though, that makes a lot of sense, since headers and footers typically appear throughout a document.
You can, of course, add a header or footer of sorts to an individual page just by drawing a text box and typing in it. Just beware though, that if you do this and a master page with a header is applied, you might create a conflict between the two.
There are a few ways to access the header and footer options. The first is to activate master page view and locating the header and footer tools on the ribbon. They look like this:
Another way to gain quick and easy access to these features is by going to the Insert tab. The header and footer buttons can be found on the far right. They look like this:
Clicking the header or footer button will automatically open the master page tab.
The Page Number button can be added easily to a master page without opening the master page tab. We'll talk more about that in a minute. For now, though, let's take a look at the header and footer.
The third and final way to access the header and footer functions is to double-click on the header or footer of any document page. This will automatically open the master pages tab.
When the tab opens, the header or footer that you selected will be active. Being "active" simply means that you can edit it. An active header looks like any other active text box.
You can use the Show Header/Footer button to toggle between them, or you can scroll up or down the page and double-click the header or footer area to make it active.
Text can be entered into, formatted, and edited just like with any text box.
Use Page Numbering
There are a couple of different ways to add page numbers to your document. We talked a little bit about the button on the Insert tab, but let's stay on the master pages for a minute.
Take another look at the Header & Footer group on the ribbon of the Master Page tab. The three buttons (Insert Page Number, Insert Date, Insert Time) all work identically, so we'll cover them all at once.
Unlike the Page Number button on the Insert tab, these buttons will only insert information at the cursor's current location. When a page number is entered, it shows up as a pound sign (#), but the date and time show up as the date and time they were added.
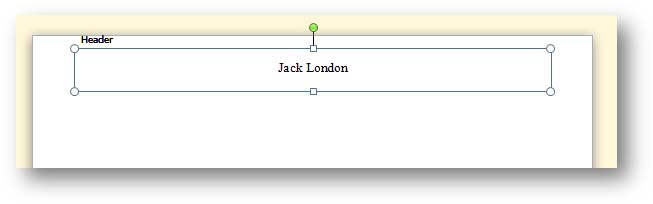
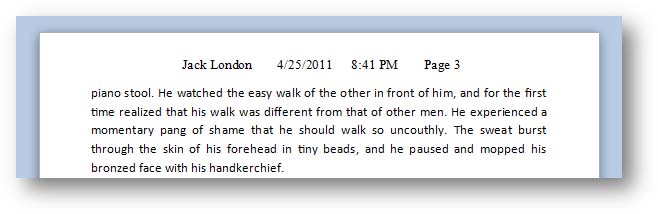
Below is an example of how the header looks on the master page (top) and how an ordinary page looks when the master is applied (bottom).

Now we will talk about adding page numbers from the button on the Insert tab.
You can use this button at any location in your document, or at any time. The location of the cursor is only important if you want to insert a page number there. Clicking the button activates a dropdown menu.
From here, you can choose where you'd like the page number to appear. Just be aware though that if you select any of the buttons that put a page number at the top or bottom of a page, the page number will automatically be entered into the header or footer of the master page.
You might have noticed that in the above illustration the "Insert in Current Text Box" button is faint. That is because no text box has been selected. To use this button, return to your document, click into a text box, then press the Page Number button again. This places a page number at the cursor's location in the selected text box.
Now take a look at the Show Page Number on First Page button at the bottom of the dropdown menu. This item has been selected, which is indicated by the check mark next to it. You might want to uncheck it if you have a title page you don't want a page number appearing on. It is on by default.
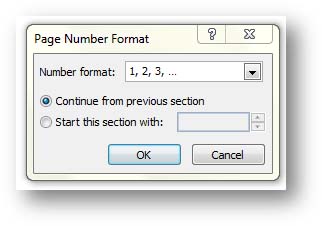
Clicking the Format Page Numbers button opens a floating window.
Here you can choose a number format such as ordinary numbers, roman numerals, ABC, first, second, third, etc.
To start with a numeral other than "1", select the "Start this section with:" button then enter a value to start with. When you are finished, click OK.
Use and Create Color Schemes
Color schemes are just a bunch of colors you can choose for your document to keep it consistent. You can find the Schemes palette on the Page Design tab. It looks like this:
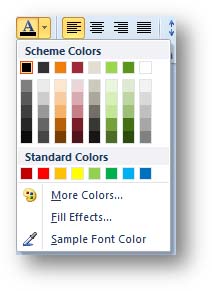
When you select a color scheme, those colors are readily available in the colors palette. You can apply them to text, borders, and other objects. Below we have a sample of the text color palette.
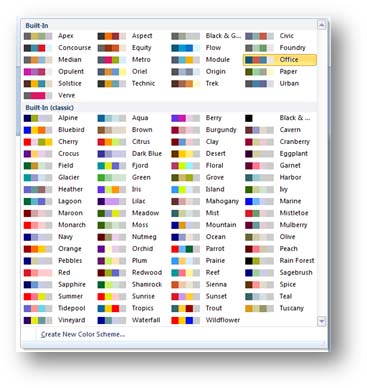
As you can see in the next example, Publisher provides an extensive catalog of color schemes. These are colors that tend to complement each other.
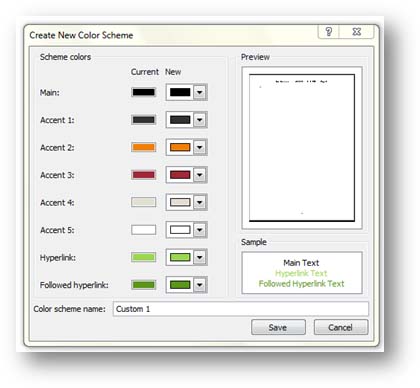
However, you might want to create your own color schemes. If that's the case, click "Create New Color Scheme."
In the window that opens, you can choose your colors, and name your scheme.
When you are finished, click Save.
To apply any color scheme, simply navigate to the Page Design tab and select it. You should be aware though that all of the objects that you have applied a color scheme color to will change to the corresponding color of the new scheme.
Set Indents, Bullets & Numbering
You can set indents, create bullet points or numbered lists in any text box, on any page in Publisher, including headers, footers, and master pages.
If you use Microsoft Word, you may already be familiar with these functions, how they work, and where they can be found. If you are not familiar with Word, these tools can be found on the Home tab, in the Paragraph group. It looks like this:
To create a bulleted list, just click the Bullet List button  . A small dot is the default bullet type, as in the following example.
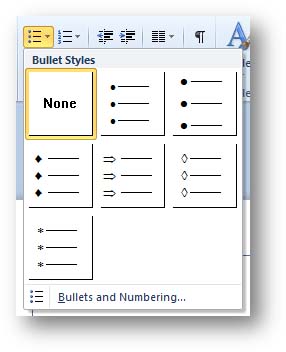
To choose a custom bullet, click the small arrow on the left, then select another option in the dropdown menu. You can use dots, diamonds, arrows, etc.
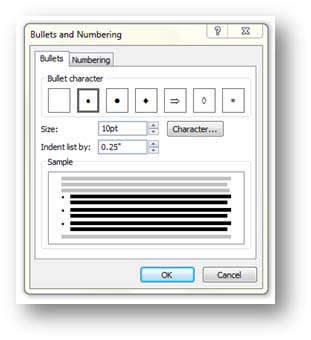
For more options, click the Bullets and Numbering button at the bottom of the dropdown menu.
Here you can choose the size, specify a special character to use as a bullet, and the length of indention. A bullet can be any character in the publisher character set, including any letter or symbol.
Click OK when finished.
The numbered list button works the same--click it to apply a numbered list or click the tiny arrow to the right to see your options in the dropdown menu.
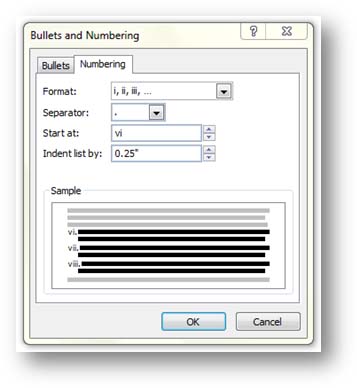
Clicking Bullets and Numbering at the bottom of the dropdown opens the Numbering window where you can choose what type of numbering system you want to use, and where you want the list to start. For instance, in the following illustration, we've chosen to go with lowercase roman numerals, and we want it to start at "vi."
A numbered list formatted in this way would look like this:
To the right of the Numbered List button are the Decrease Tab button  and the Increase Tab
  buttons. Be aware, though, that these buttons don't just change the tab position of the first line of a paragraph, or even just the currently selected line; they change the tab position of the entire paragraph.
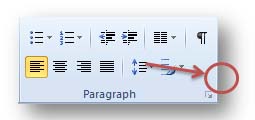
To change the tab position of a single line (or even an object) you can use the tab key on your keyboard. By default, these tab positions are set every .5 inches. You can change this value, and even create your own custom tab stops (just like on the old electric typewriters) by clicking the arrow in the lower right corner of the Paragraph group, as shown in the next illustration.
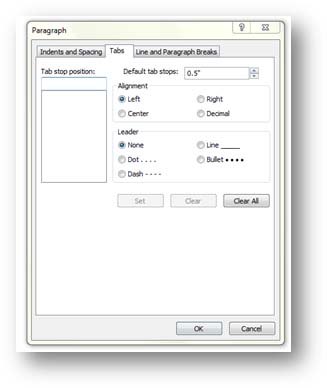
In the window that opens, click the Tabs tab.
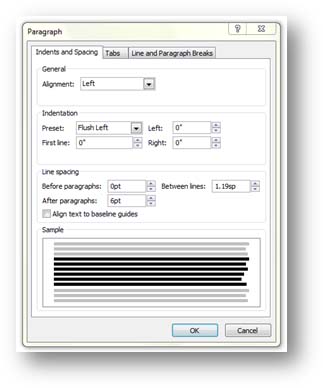
You can also have Publisher automatically indent your text. To do this, launch the Paragraph window (like the one above) and select the Indents and Spacing tab.
In the Indentation section, you can choose a preset (in this instance it's Flush Left), then enter an indent value in any of the three remaining boxes. If you'd like only the first line of a paragraph to be indented, enter a value in the First line box.
Click OK when finished.