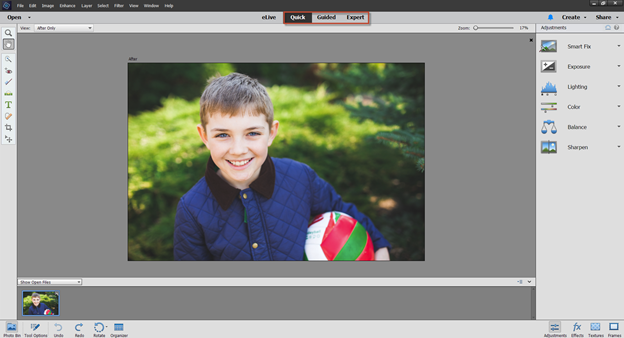
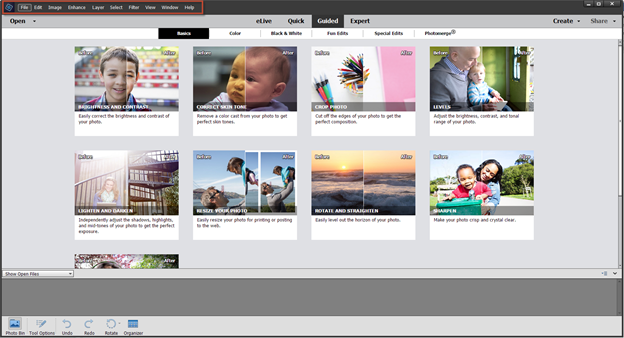
Elements offers you three ways to edit and make changes to your images. You have the option of using Quick, Guided, or Expert. You'll see the tabs for these at the top of the Elements window, as pictured below.
In this article, we'll explore each editing mode, as well as have some fun using the Quick editing mode.
About the Quick Edit Mode
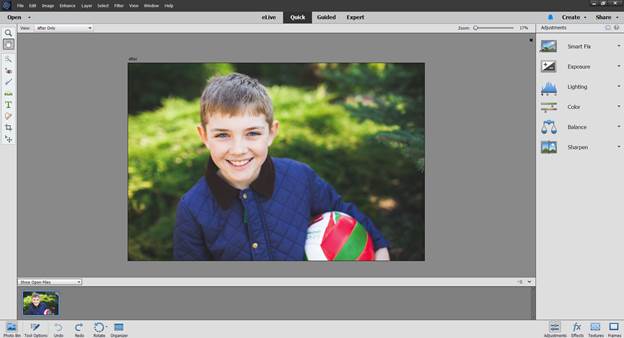
The Quick editing mode is pictured in the snapshot below.

Quick editing mode is more for the novice image editor. Its ease-of-use and features caters to those who want to edit personal photos and make the most basic of edits. Only a limited number of tools are available in the Quick editing mode. The Tools panel for the Quick editing mode is pictured below.

The tools offered in the Quick editing mode are (from top to bottom in the Tools panel):
-
Zoom
-
Hand
-
Quick Selection
-
Red Eye Removal
-
Whiten Teeth
-
Horizontal Type
-
Spot Healing Brush
-
Crop
Using the Quick Edit Mode
The Expert editing mode contains all of the photo editing tools that Elements has to offer. That said, the tools that you see in the Quick editing mode are the same tools found in the Expert editing mode. We're not going to take the time to cover all of the tools found in Quick editing mode at this time.
For now, let's explore a few of the basic edits you can make to images in the Quick editing mode so that you get familiar with the options this editing mode has to offer.
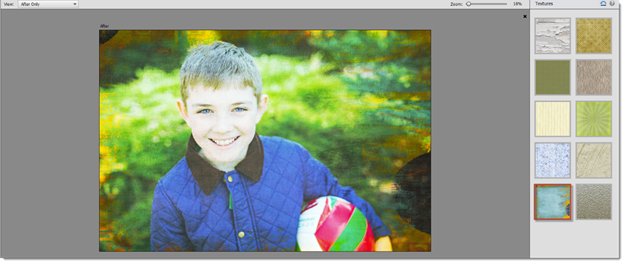
As you can see in the snapshot below, we have an image open in Photo Editor. We've also selected the Quick editing mode.
Making Adjustments in Quick Edit Mode
In the Panel Bin to the right, you have a list of adjustments you can make to the image, such as Smart Fix, Exposure, Lighting, etc. These are all auto fixes, meaning that fixes will be applied for you automatically.
Smart Fix is the all-in-one automatic adjustment that includes all the other adjustments listed in the Panel Bin: Exposure, Lighting, Color, Balance, and Sharpen.
To apply a smart fix, click the downward arrow to the right of the Smart Fix adjustment.
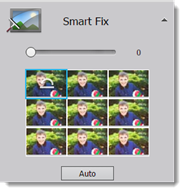
The slider pictured above lets you control the intensity of the adjustments. By default, it's set to zero.
If you look at the thumbnails below the slider, you will see a blue border around the first thumbnail. This is how the adjustment will affect your image with the slider at zero.
If you drag the slider, you will see the blue border appear around the thumbnail that corresponds to the position of the slider, as shown below.
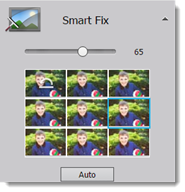
You can select an adjustment, or you can click the Auto button. Elements will make adjustments for you.
Adding Frames to Images in Quick Edit Mode
Next, click the Frames button below the Panel Bin.
You will then see the Frames panel in the Panel Bin, as pictured below.
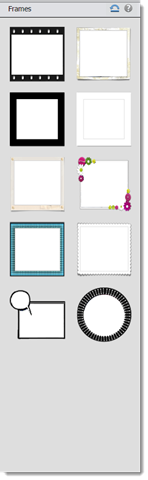
Select a frame to apply to your image by clicking on it.
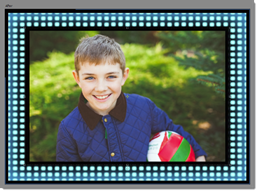
The frame is then placed around your image.
Applying Textures in Quick Edit Mode
Click the Textures button below the Panel Bin to view the Textures panel.
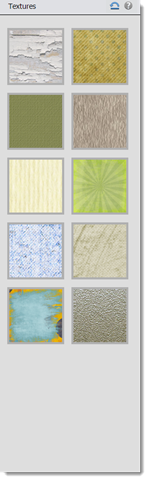
Click on a texture to apply it to your image.
Applying Effects in Quick Edit Mode
Click on the Effects button below the Panel bin to view the Effects panel.
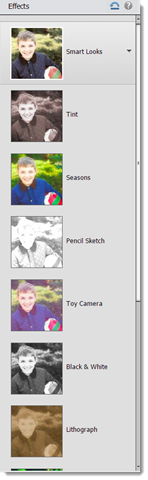
As you can see in the Effects panel pictured above, Elements displays a list of effects. It also displays a thumbnail of how your image will look once that particular effect is applied.
Click on a thumbnail to apply that effect to your image.
We chose Pencil Sketch. When we clicked on the thumbnail, we were provided additional thumbnails that present different options for that effect.
Choose your option by clicking on a thumbnail.

The effect is automatically applied to your image.
About the Guided Edit Mode
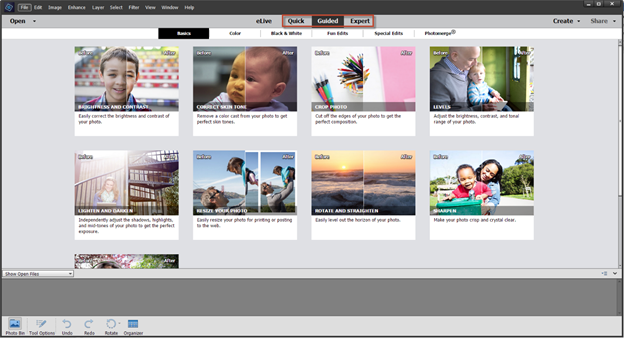
Guided Edit makes editing your images even simpler because Elements does just as it suggests: it guides you through the edit. To use the Guided mode, click Guided at the top of the Photo Editor window.
The Guided editing mode is not new to Photoshop Elements. However, its interface got a new look with Photoshop Elements 15.
About the Expert Editing Mode
The Expert editing mode is pictured below.
In Expert mode, you basically have a mini Photoshop program at your fingertips. You can edit pictures in multiple ways, improve the appearance of images, work with layers, and use all the tools that Elements offers. Although you can do basic edits in the Expert editing mode, you can also complete advanced edits and changes using the plethora of tools and features available.
The History Panel
The History panel lets you restore your images to undo previous changes. Each time you change or edit an image, a copy of the new image is saved in the History panel. You do not need to save your file for Elements to save a copy in the History panel. However, please remember that you must save the file if you want the version to remain after you exit out of Elements.
To open the History panel, go to Windows> History in Expert editing mode.
The History panel lists all changes made to an image.
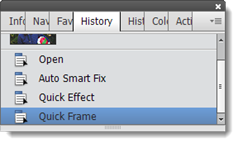
These changes are called states, because they are different states (versions) of the image.
The oldest state (or the oldest version of the image) is always shown at the top of the list. All new changes are listed in chronological order below it.
The tool or command that you used to make changes to the image is also listed with the state.
You can revert to an older state simply by clicking on it. You can use this feature to compare versions to decide which one you like best or what other changes you might want to make.
WARNING: If you select a previous state, then make changes to it, it eliminates all the states that came after it. Also, deleting a state deletes all states that came after the one that you deleted.
To delete a state, right click on the state and select Delete. Just remember that all states that came after it will also be deleted.
History automatically saves the past 50 states. If you want to change the amount of states that it saves, go to Edit>Preferences>Performance. The maximum amount of states that you can save is 1000.
Undo All Changes to an Image
Whenever you're editing an image in any of the three modes, you can undo the changes and revert to the last saved version by going to Edit>Revert.
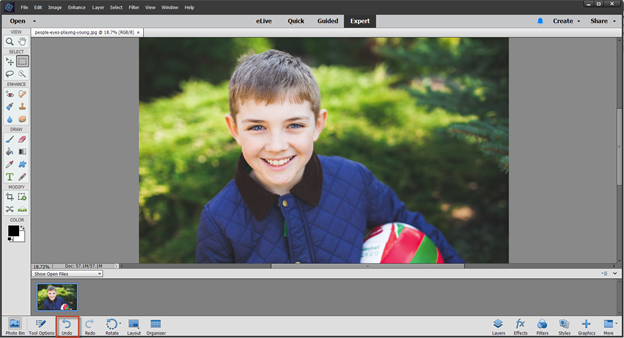
Undo or Redo a Command
Let's say that you brighten an image only to decide that you liked it better before you lightened it. You can undo the Lighten command easily enough by clicking the Undo button below the Photo Bin.
Using the Guided Edit Mode
Unlike the Quick and Expert editing modes, the Guided editing mode does not offer tools to make edits or adjustments to your images. Instead, the Guided editing mode offers different types of adjustments and effects that you can apply to your images. You select the adjustment or effect you want. Elements then guides you through the process of applying the effect to your image.
The Guided editing mode in Elements 15 is pictured below.
Although the Guided editing mode is not new to Photoshop Elements, it does have a new look, as well as some new features. In this section, we are going to explore the Guided editing mode by applying some adjustments and effects to images.
Navigating the Guided Edit Mode
The Guided editing mode is perhaps the easiest to use. It's also the easiest to navigate. As with the other modes, the Menu Bar is located at the top of the Guided editing mode.
To open an image in Guided editing mode, click the Open dropdown menu.

You can choose to open a recent image, an image from the clipboard, or a new blank image.
If you're not already in the Guided editing mode, click Guided to select this mode.
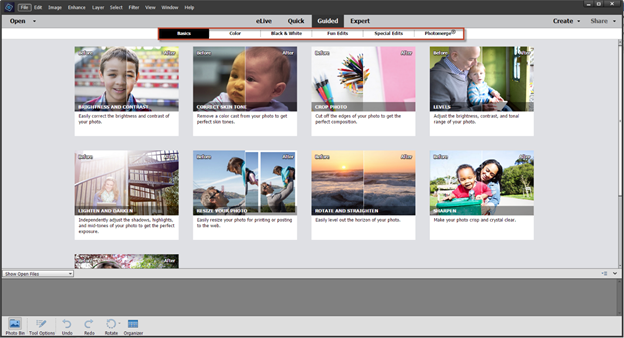
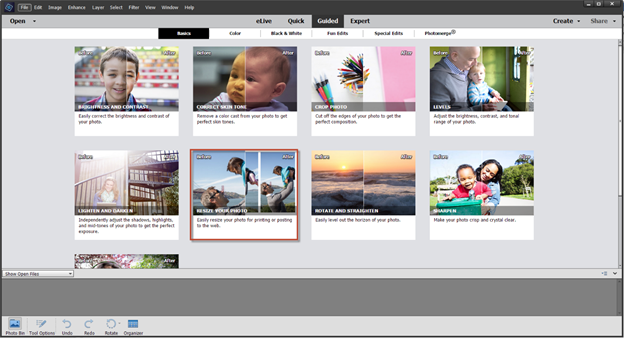
Below the Photo Editor modes, you will see the Guided editing mode's categories. These categories represent the different types of adjustments, edits, and effects that you can apply to your images.
Let's explore some of the adjustments, edits, and effects from each of the Guided editing mode's categories.
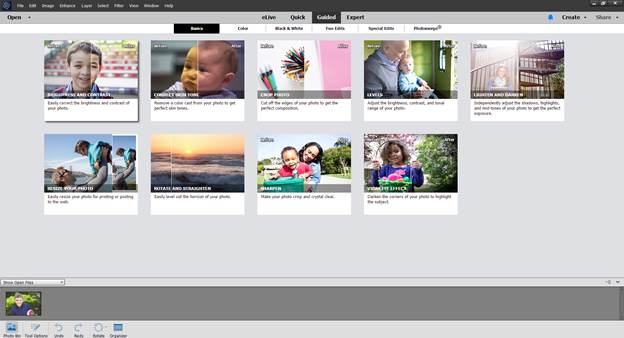
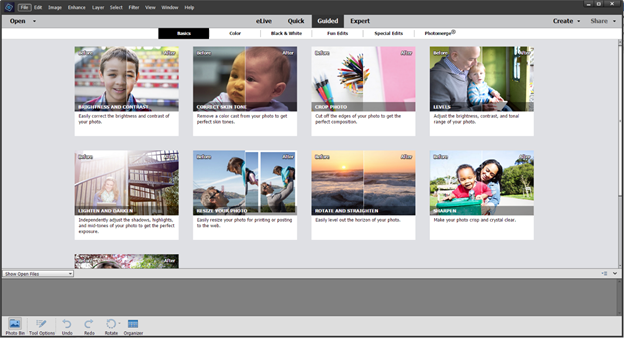
The Basics Category
The Basics category offers basic edits and adjustments that you can apply to images, such as adjusting brightness and contrast, cropping, rotating, and resizing. Unlike the other editing modes in which you'd use a tool to make these adjustments and edits yourself, the Guided editing mode will guide you through and do all the "heavy lifting" for you.
Crop Photo
To crop a photo in the Guided editing mode, click "Crop Photo" under the Basics category.
As you can see in the snapshot below, you will then see your photo open in the Photo Editor window. You will also see the Crop Photo panel open on the right side of the window.
NOTE: You will work with the Panel Bin in the Guided editing mode.

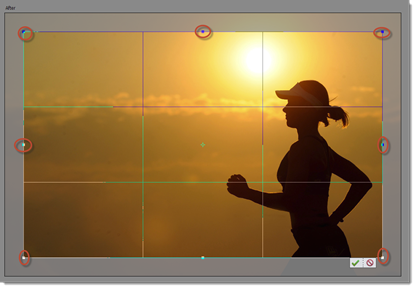
To crop the photo, click on any of the handles that appear on the outside of your image. The handles are the little squares you see in each of the four corners, as well as along the slides.
Remember, when you crop an image, you "cut away" the edges. This reduces the file size in addition to removing outer aspects of the image.
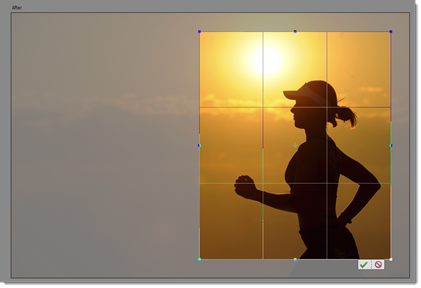
We used the center handle on the left side of the image and dragged the handle to the right. In the snapshot above, you can see our crop.
Click the green checkmark when you've finished cropping the image.

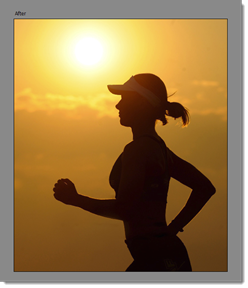
You can see our cropped image below.
Click the Next button below the Crop Photo panel.
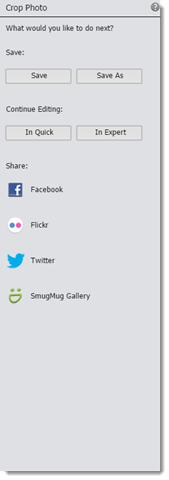
As you can see in the snapshot above, you can now save the edited image or continue to edit it. You can also choose to share it to social media. We will cover these options later in this section.
When you're finished, click the Done button below the Crop Photo panel.
Resize Your Photo
You can also resize an image under the Basics category in the Guided editing mode, as shown below.
To resize an image, click on the Resize Your Photo option. You will then see your image open in the Photo Editor window.
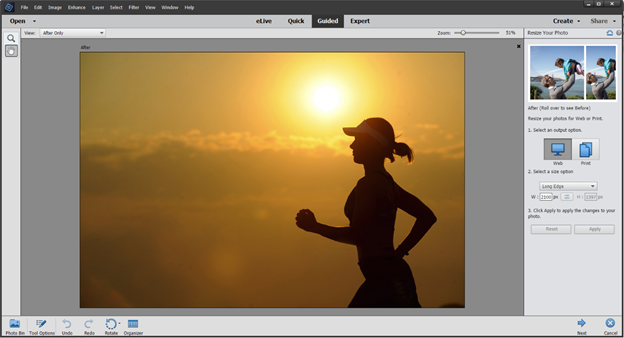
Take a look at the Resize Your Photo panel on the right side of the Photo Editor window.
At the top of the panel, you can mouse over the displayed image to see the before and after effect for the chosen guided edit.
Next, choose your options.
1. Select if you will be using the image for web or print. We've selected Web.
2. Enter the desired new size for the image. You can enter the size (in pixels) for the long edge, short edge, or width & height. You can also enter a file size.
If you want to constrain proportions so that any change you make to the height is also made to the width (and vice versa), use Long Edge or Short Edge to resize the image. If you use "width & height", any change you make to the height will not be applied to the width (and vice versa).
Entering a file size might be the best option if you're resizing for the web. Using this option, you don't control the actual dimensions of the image, but the size of the file. Elements will resize the image so the outcome is the desired file size.
We are going to choose "Width & Height" from the dropdown menu, then add the new measurements for width and height.
3. Click the "Preview" button to preview the changes. If you're not happy with the changes, click the "Reset" button to return to the original image.
Click Next below the Resize Your Photo panel when you've successfully resized the image.

Click the Done button below the panel when you're finished.
The Color Category
The Color Category contains four different adjustments related to the colors in your image. Simply click on an adjustment, and Elements will guide you through the process. We are going to click on Enhance Color.

Enhance Color
This guided edit will enhance the colors in your photos. When you click on Enhance Color in the Guided editing mode, your image will appear in the Photo Editor window, as shown below.
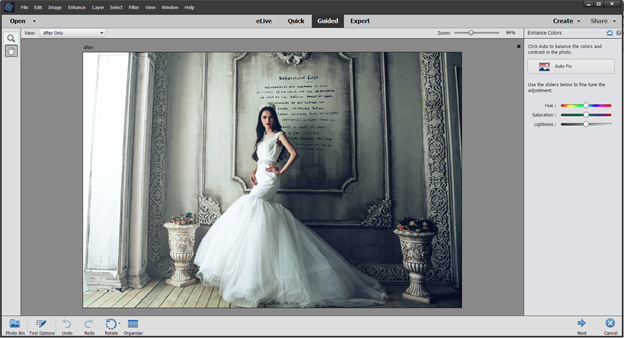
Go to the Enhance Colors panel on the right side of the window.
You can click the Auto Fix button, and Elements will automatically adjust and enhance the colors in your image.
You can also make the adjustments yourself by using the sliders for hue, saturation, and lightness.
We are going to click the Auto Fix button.
The before and after shots are pictured below.
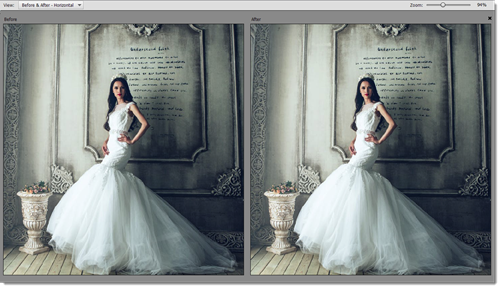
Click Next below the Enhance Colors panel.
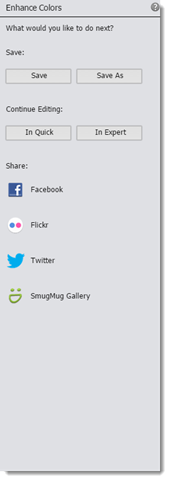
You can then save, share, or continue to edit the image.
Click the Done button below the panel when you're finished.
The Black & White Category
The Black & White category gives you options to turn images to black and white. We are going to apply the B&W Color Pop to our image.
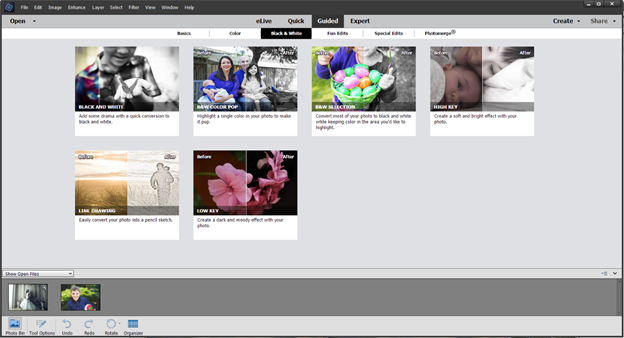
B&W Color Pop
This effect lets you convert an image to black and white, except for a single color in the image.
Let's see how it works.

The B&W Color Pop panel displays a before and after thumbnail that shows you the affect the adjustment will have on your image. As you can see, you will be able to select one color in your image that will remain that color. The rest of your image will be black and white.
Here's how to do it.
In the B&W Color Pop panel:
1. Select a color that you want to highlight in your image. If you don't see the color, click the Select Custom Color button. Your cursor will turn into an eyedropper. Click on the color in the image that you want to highlight. Use the Fuzziness slider to add more tones of the color.
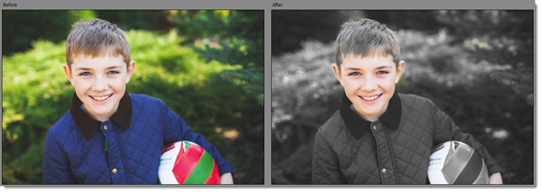
We chose the color in the boy's face.
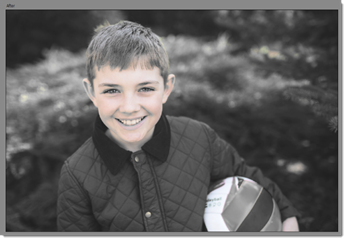
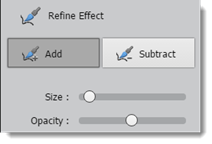
2. Click the Refine Effect button to add or subtract areas where the color is highlighted. Click either the Add or Subtract button, as shown below. You can also adjust the opacity and the brush size. Take your time refining the effect. Get it just the way you want it.
Click the Increase Saturation button to boost the color.
You can see the before and after versions of our image below.
When you're ready, click the Next button below the Enhance Colors panel to save, share, or edit the image.
Click the Done button below the Enhance Colors panel when you're finished.
The Fun Edits Category
The Fun Edits category helps you add cool effects to your images, such as 3D, puzzle, and speed effects. The Fun Edits category is displayed in the snapshot below.
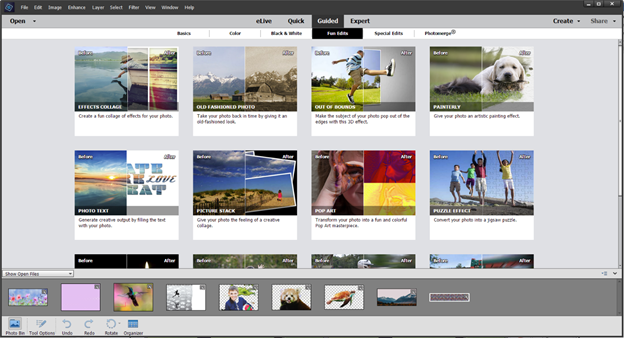
We are going to add the Speed Effect and Speed Pan edits to show you how easy it is to apply Fun Edits to images.
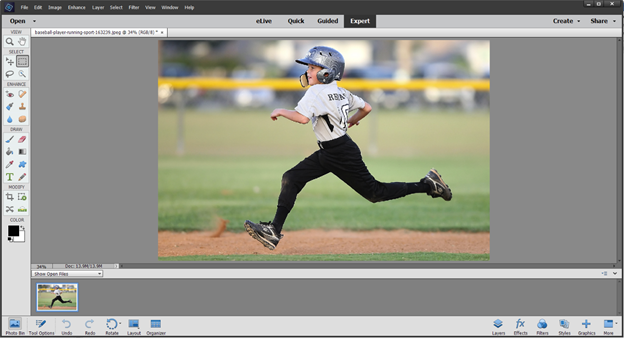
Speed Effect
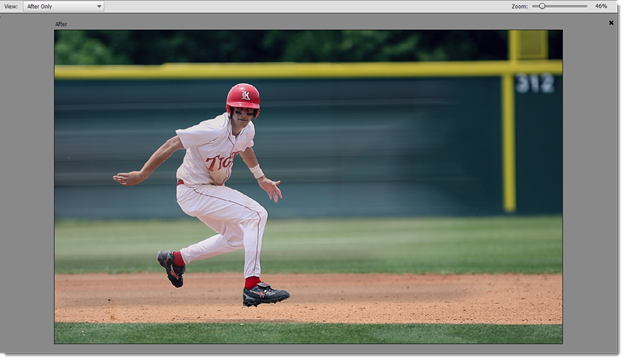
The Speed Effect edit adds action by giving the subject of the image a slight motion blur. This edit is perfect for images where the subject of the photo is in motion.
To add the Speed Effect edit to an image, click on Speed Effect in the Fun Edits category.
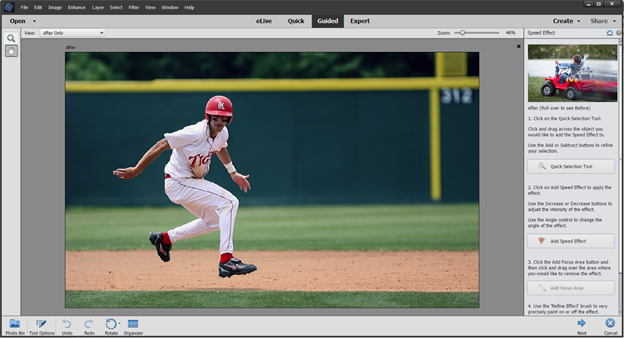
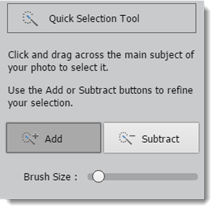
Go to Speed Effect panel. The thumbnail at the top of the panel shows the effect the edit will have on your image.
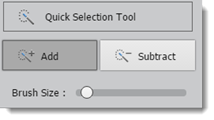
Next, click on the Quick Selection Tool button in the Speed Effect panel. Click the Add button, then drag the tool across the object for which you want to apply the effect.
To expand the selection, click outside the selection area in a part of the image that you want to include in the selection.
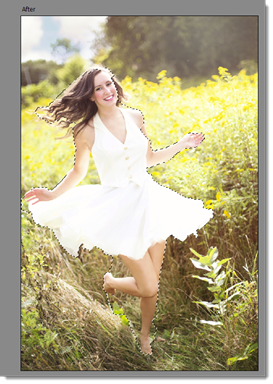
You can see that we've selected the subject of the image.
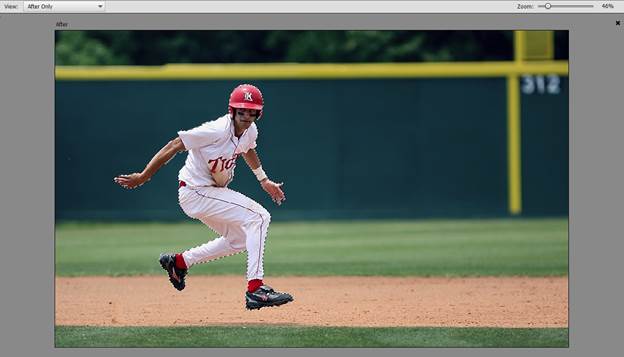
Next, click the Add Speed Effect button.
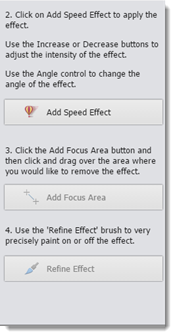
The effect is then added to your image.
Use the Speed Effect panel to make adjustments and refine the effect.
Click the Next button below the Speed Effect panel when you're finished.

To save the edited image under the current file name, click the Save button (pictured above). If you want to save the image under a different file name, click the Save As button.
You will then see the Save As dialogue box, as shown below.
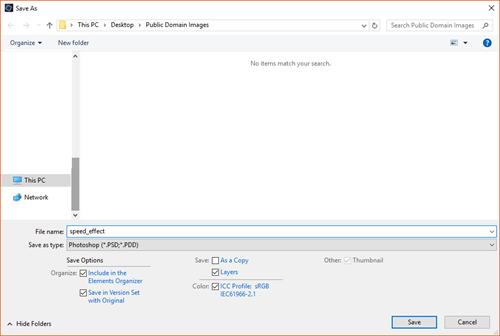
· In the File Name field, enter a name for the image file.
· In the Save As Type field, select a file format.
Click the Save button when you're finished. This returns you to the Speed Effect Panel.
Click the Done button at the bottom of the panel.
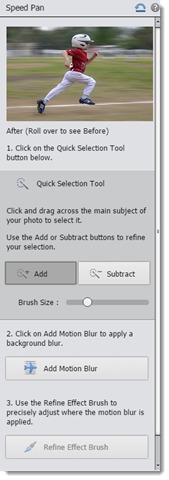
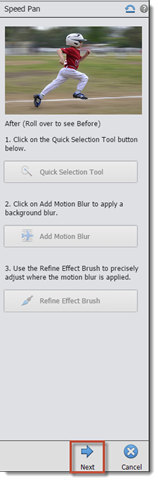
Speed Pan
The Speed Pan edit blurs the background of an image to give the subject some speed.
We are going to apply the Speed Pan edit to the image below.
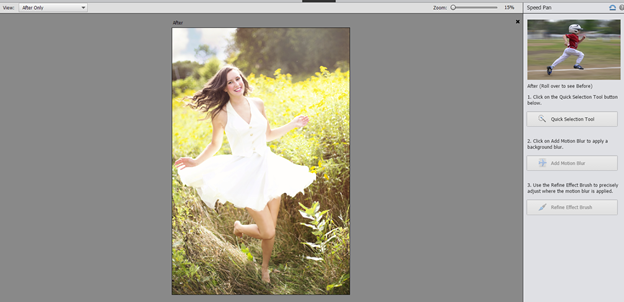
Just as with the Speed Effect, we are going to use the Quick Selection tool to select the subject of the image.
In the snapshot below, we've selected the image subject.
Next, click the Motion Blur button in the Speed Pan panel.
You can then adjust the intensity of the effect, as well as the angle.
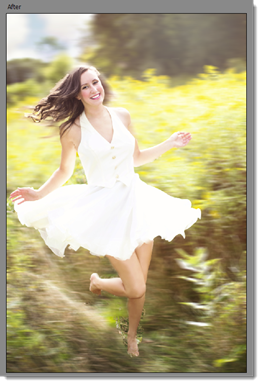
The effect is applied to the image. In the snapshot below, you can see that the background is blurred.
Click the Next button at the bottom of the Speed Pan panel.
Once the effect is applied, you can switch to either the Quick or Expert editing mode to make further adjustments or changes to the image, as illustrated below.

Click the Done button below the Speed Pan panel when you're finished.
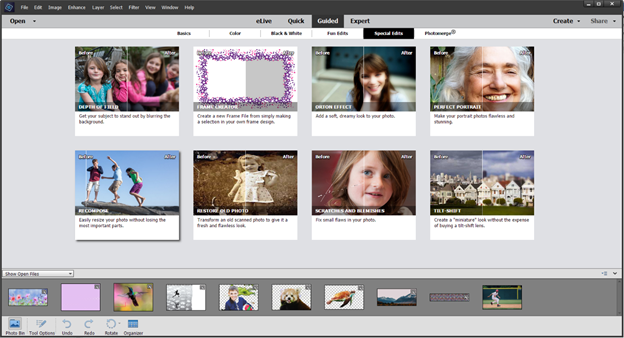
The Special Edits and Photomerge Categories
The Special Edits and Photomerge categories contain more guided edits that are as simple to make as they ones we've already discussed.
The Special Edits category is pictured below.
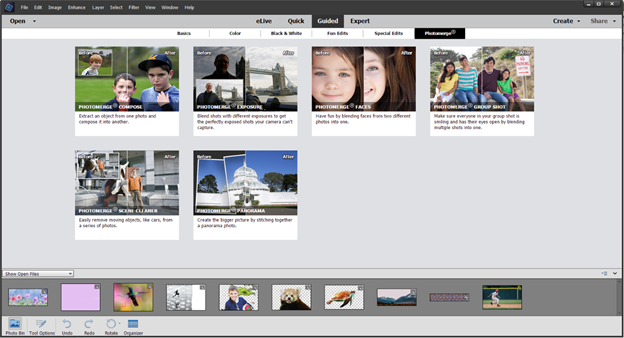
In the following snapshot, you can see the Photomerge category.
Let's walk through one edit from each category.
Perfect Portrait
The Perfect Portrait edit can remove wrinkles and other blemishes from a subject in an image.
To use the Perfect Portrait edit, go to the Special Edits category, then click on Perfect Portrait.
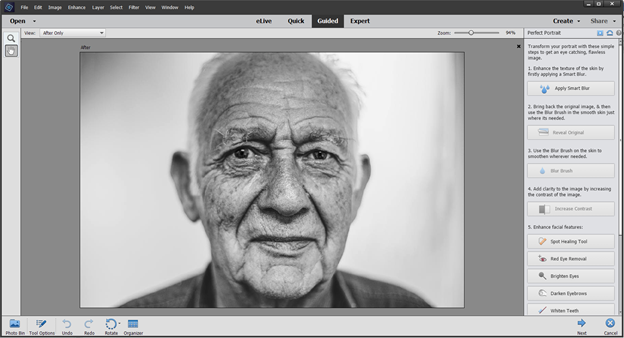
Go to the Perfect Portrait panel on the right side of the window.
Click the Apply Smart Blur button and apply a blur to the subject's skin.
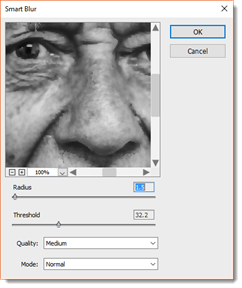
The idea is to blur blemishes to make them less noticeable. You can adjust the Radius and Threshold sliders to accomplish this.
Click the OK button when you're finished.

Alternatively, click the Reveal Original button, then click the Blur Brush button. Paint over the subject's blemishes and wrinkles. The Blur Brush will blur them to make them less noticeable.
You can increase contrast by clicking the Increase Contrast button, then enhance facial features by using the other tools provided.
Below is our subject in before and after images.
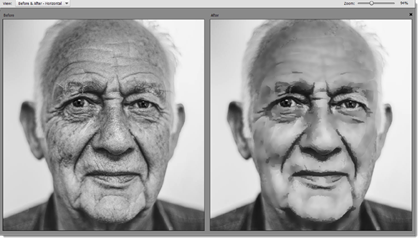
This effect takes a little more practice than some other Guided Edits, but the wizard-like interface on the Perfect Portrait panel makes it easier to know what to do next.
Photomerge Compose
The Photomerge Compose edit removes a subject from an image, then places it in another image. This means you need two images to use Photomerge Compose.
To use the Photomerge Compose edit, CTRL+Click the two images in the Photo Bin at the bottom of the Elements window, then click the Photomerge Compose edit.
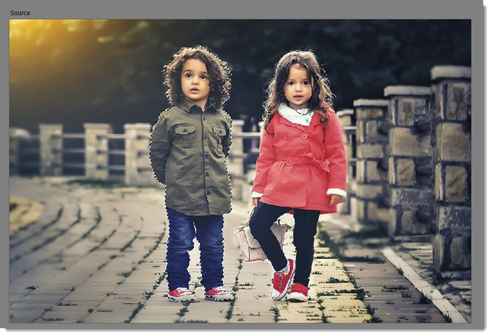
The two images then appear in the Photo Bin. In the workspace area, you'll be asked to drag and drop the image from which you want to extract a subject.
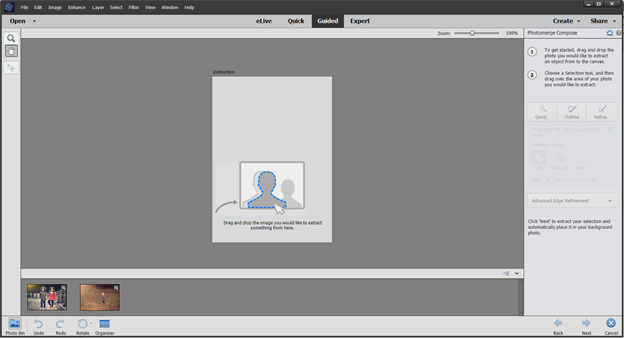
We dragged a photo to the workspace area.
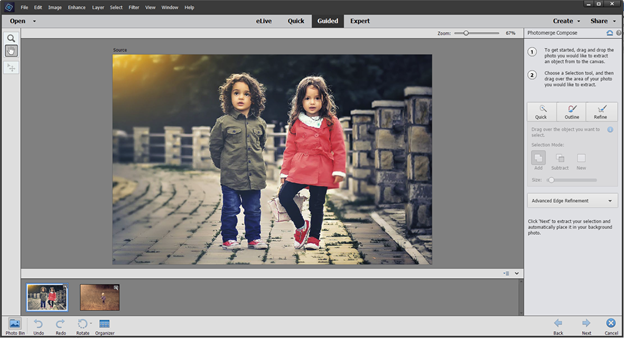
Next, go to the Photomerge Compose panel.
Use one of the selection tools to drag over the object you want to extract. We are going to use the Quick Selection tool.
When you are finished, click the Next button beneath the Photomerge Compose panel.
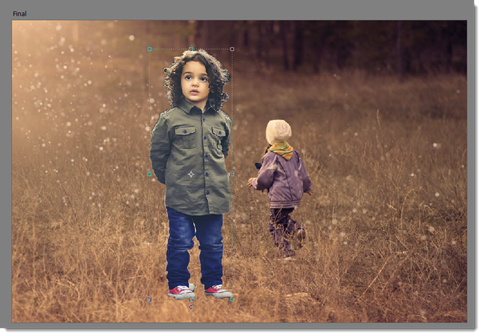
As you can see in the above snapshot, the subject you extracted is placed into the second image you chose.
Click and drag on the extracted object to move it to a different location in the image. You can also resize the object by dragging on the handles that appear in the corners and sides of the bounding box.
We circled two of the handles in the snapshot below.
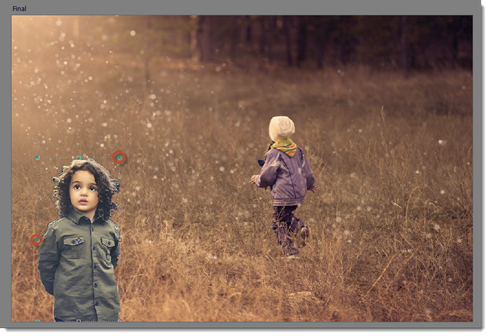
You can also hide or reveal parts of the extracted object.
Click the Next button at the bottom of the Photomerge Compose panel when you're finished.
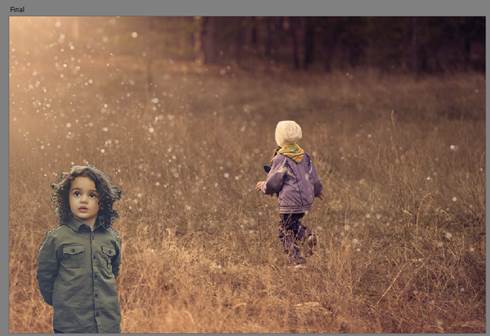
Click the Auto Match Color Tone button to blend the object with the background of the image. This makes it so nobody can tell you added an object to the image.
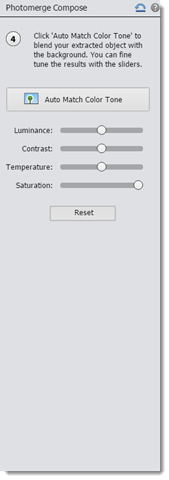
You can see the results in the following snapshot.
Click the Next button again.
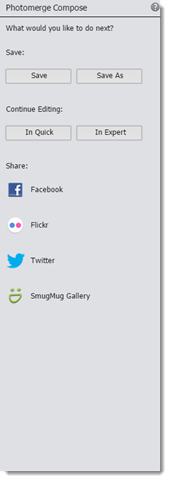
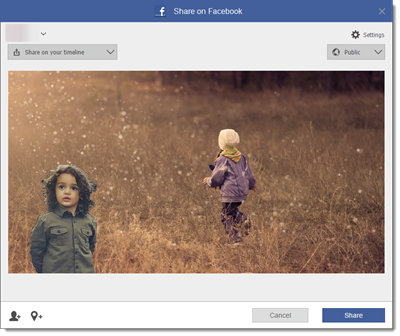
You can then share the image to social media.
We are going to click on Facebook and share the image with our friends.
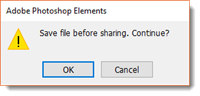
Elements will prompt you to save the image if you haven't already.
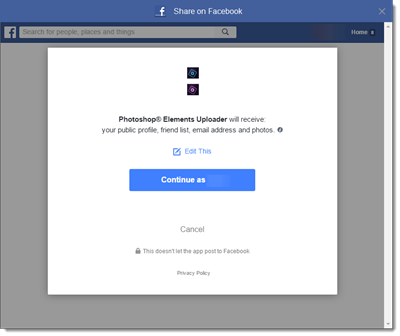
Next, log in to Facebook.
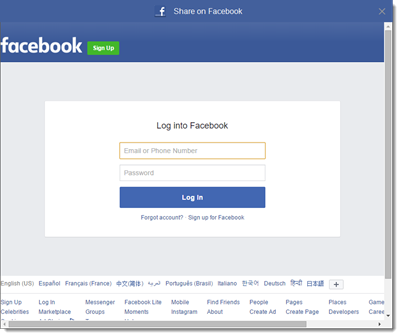
Click the blue Continue button, as pictured below.
In the next screen, decide who you want to share the image with on Facebook.
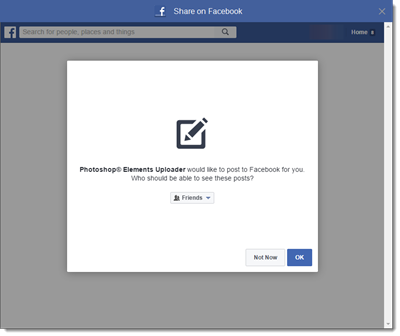
Click OK when you're finished.