In InDesign, documents contain pages. Pages are where you put your text and graphics to create your project, whether it's a book, brochure, or flyer. In this article we're going to show you how to work with the pages within the document.
The Pages Panel
Working with pages starts with the Pages panel. You don't have to use the Pages panel if you don't want; however, it's the easiest way to work within InDesign.
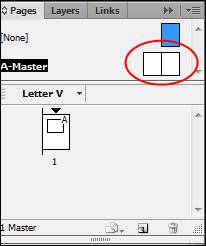
The summary of the Pages panel is this: the Pages panel is where you can go to see thumbnails for all the pages in your document. The master pages for the document will be at the top of the panel. We'll learn about master pages later in this article. The thumbnails will be located in the bottom half. This is the basic use for the Pages panel. However, that's just the beginning of what this panel is used for. You can use the Pages panel to navigate to pages, remove pages, and even add pages. The Options menu in the Page panel gives you access to more comands and display options.
If you're working with a document that contains multiple pages, you'll find the the Pages panel is an invaluable tool that you need.
To view the Pages panel, go to Window>Pages.
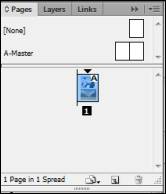
As you can see, our page is shown above in the panel as a thumbnail.
The Options menu is located at the top right corner  .
.
Using the Pages panel, we're going to learn how to create and manage pages in InDesign.
Inserting Pages
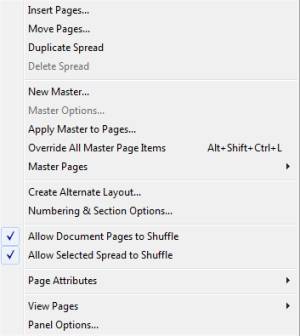
To insert a new page into your document, go to the Pages panel. Click the Options button and select Insert Pages.

Specify how many pages you want to insert. Also, specify where you want them inserted by specifying what page they should be inserted AFTER.
Click the Master arrow to specify a master of nonmaster page to use as a basis for the new page(s). Again, we'll learn about master pages later in this article.
Click OK when you're finished.
Moving Pages
You can also move the pages to change the order in which they appear in your document. Again, click the Options button on the Pages panel and select Move Pages.
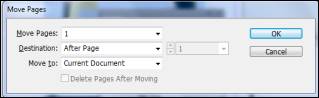
Select the pages you want to move, then select the destination.
Now, choose if you want to move the pages in the current document - or into another document that you have open in InDesign.
If you want to move, then delete the pages from the current document, check the box that says Delete Pages After Moving.
You can also move pages by clicking the Options menu in the panel, then selecting one of the two options:
- Allow Document Pages to Shuffle. This allows you to drag and drop to shuffle the pages.
- Allow Selected Spread to Shuffle. Enables or diables the shuffling of selected spread pages.
When you move pages, the objects in the slug and bleed areas of the page are also moved. Page numbers that are in the slug area will display a number instead of the pasteboard index entry.
Deleting Pages
To delete a page, click on the page you want to delete in the Pages panel. Then, click the Delete icon (it looks like a trashcan
 ) at the bottom right side of the panel.
Creating Master Pages it's time to learn about them because they are an important part of your InDesign experience.
A master page is a page that holds and displays all the objects and items that you want to appear on every page in your document. It may be a header or footer. It could also be page numbers or logos. Simply put, the master page contains elements that will be on every page.
In InDesign, a master page functions like a background layer on the page you're currently working on. Everything you place on the page (in addition to what's on the master page) appears above the master page. The master page elements appear on the page with a dotted border around them so you know they are master page elements.
Whenever you create a document, you automatically create a master page. However, you can also create additional master pages from scratch or from an existing page or spread.
Now, let's learn how to work with master pages.
Master Page Numbers
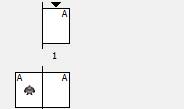
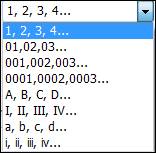
The first thing that's helpful to understand before you even start to create master pages is how they're indexed by InDesign (or numbered). Each master page is assigned a prefix. By default, InDesign assigns each master page a letter as a prefix. When you create a new document, the first page is automatically named A-Master. If you created another page, it would be B-Master. When you apply master pages to other pages, the prefix for that master page will appear as in icon on that page in the Pages panel. See below.
You'll learn how to create your own prefixes later in this article.
Applying Master Pages
First, we're going to go to the Pages panel and double click the master page area in the panel.
You'll see that the master page or two page spread appears in the Document window.
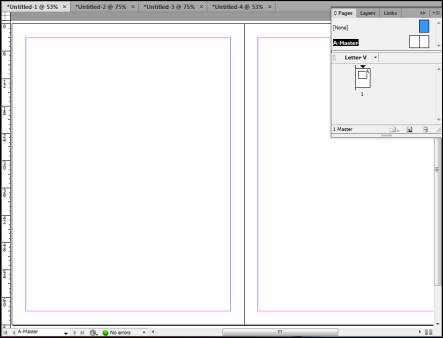
Now we can add the elements that we want to appear on the page.
Now, double click on a page in the document area of the panel:
We're going to click the pages 4-5 spread in the page four area so it appears on that page.
As you can see in the snapshot below, our master page element now appears on page four.

Create a Master Page from an Existing Page
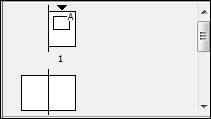
If you've created a page and want to turn that page into a master page, go to the Pages panel, then to the bottom half of the panel where your document thumbnails are displayed.
Drag and drop the page you want to turn into a master page into the master page area. You can also go to the Options menu, select Master Pages, then Save as Master.
Create a Master Page from Scratch
You can also create a master page from scratch. It's easy to do.
Go to the Options menu in the Pages panel.
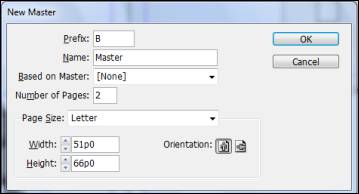
Enter a prefix for the master page. By default, InDesign assigns a letter prefix. You can create your own prefix by entering up to four characters.
Next, name the master page.
If there's another master that you want to base this one on, select the master from the dropdown menu. Perhaps you have a master page that you want to use, but you want to change or add a few things.
Now, enter the number of pages you want in the master spread. Remember, a master can be page, but it can also be a spread.
Select the page size, the height and width, and the orientation.
Click OK.
Change Paper Size
The Pages panel also gives you the ability to change the size of your pages. Just click the dropdown arrow beside the Edit Page Size icon (
 ).
).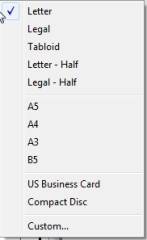
Select your new page size or click custom to create your own.
Liquid Layout
Liquid Layout converts an InDesign document to new dimensions. Let's say you want to change the page size of a layout. You can quickly adapt to the new layout using the Liquid Layout features.
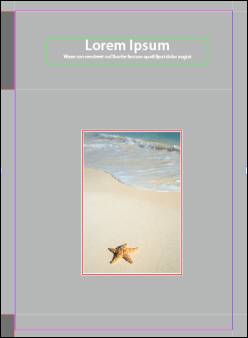
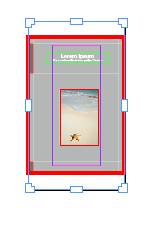
Here's an example of how it works. Look at the snapshot of our page below. This is a catalog page created for an 8.5x11 page. Let's say we want to create a different page size, but we want to keep the layout. If we did that on our own, it would take forever to get the objects moved and resized, all the while keeping the same look and feel of the layout.
Instead of going through all that trouble, we're going to open the Liquid Layout panel by going to Window>Interactive>Liquid Layout.
However, we can't use the Liquid Layout panel without first using the Page tool in the Tools panel. It looks like this:
 .
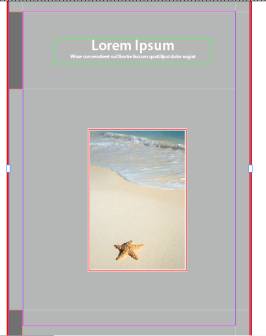
.Click on the page tool, then click on the page you want to work with. You'll see that when you select the page, it's highlighted. Ours is highlighted in red.
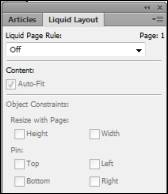
Now, if we look back at the Liquid Layout panel, we can see there are rules that we can apply to the page:
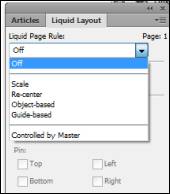
Let's talk about the two simplest rules to use. All rules achieve the same effect. They just take different routes to get you there.
If we use Scale, the objects on the current page simply get scaled to fit the size of the new page.
If we go back to our page after we choose Scale, we can see handles around the borders of the page:
We can use these handles to see our layout in different sizes.
If you select Re-center, as you drag on the handles to resize, the content gets re-centered on the page.
You can look in the Control Panel to achieve the page size you want as you drag:

You can also select a page size. We've chosen US Business card. Note our Liquid Page Rule in the Control Panel and that we've checked Objects Move with Page.
Since our page is currently portrait, we also want to change our Orientation before we begin:
 .
.Let's click Portrait.
As you can see, our page has now been resized to US business card size.
Alternate Layout
The new Alternate Layout feature allows you to create different layouts within the same document quickly and easily.
To do this, go to Layout>Create Alternate Layout.
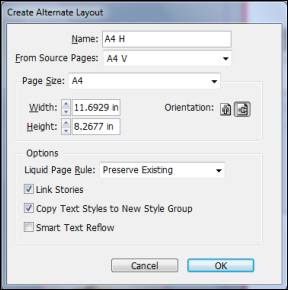
As you can see, our current page is size A4 V, which is vertical. InDesign is automatically suggesting an alternate layout that's A4H.
Now, if we go to the Pages panel, we can see both layouts. They are in the same document, and we can access them from the pages panel whenever we want.

If we want another alternate layout, besides the A4H, we can go back to the Alternate Layout dialogue box and click the Page Size downward arrow.
We selected Tabloid from the dropdown list.
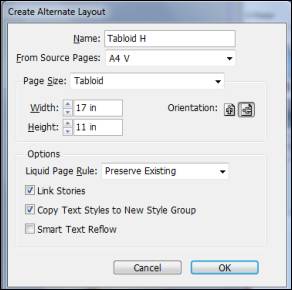
Click OK.
If we drag on the edges to expand the Page panel, we can see all three of our layouts:
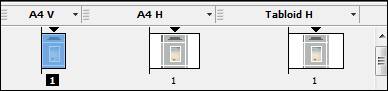
Simply click on a thumbnail to see the layout in the document window.
Adding Page Numbers
Adding page numbers to the pages in your document may be important to you, especially if you're putting together a book. Doing this with InDesign is not complicated, but it does have more steps than if you were using a word processing program.
Start out by double clicking your master page in the Pages panel.
Next, go to the Tools panel. Select the Type (text) tool. We'll learn about this tool later, but for now we're going to show you how to use it to add page numbers. The Type tool looks like this:
 .
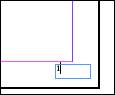
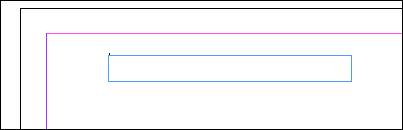
.In the document window and on your master page, click where you want to create a text box for a page or section number. Draw a text box. This is shown below in the lower right hand corner.

Now, right click your mouse.
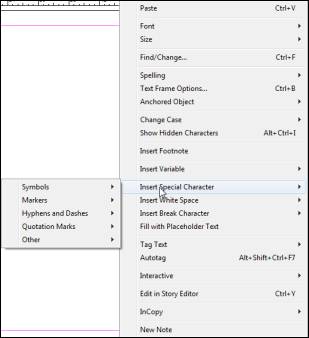
Select Insert Special Character>Markers>Current Page Number - or Section Marker. Select Current Page Number if you just want to add page numbers. If you're creating sections, choose Section Marker.
We inserted the page number:
Page Numbers and Section Page Numbers Options
Perhaps you don't want to start your page numbering with the number one Or perhaps you want to add section prefixes or any number of other things. You use Options to do this.
You can find these options by going to Layout>Numbering & Section Options.
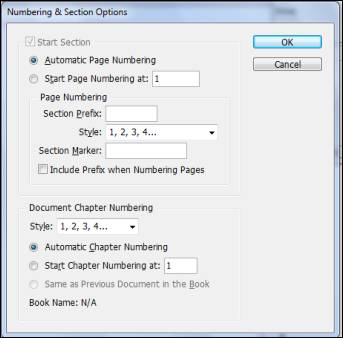
Select if you want automatic page numbering, or if you want to start with a certain number.
If the document you are creating contains sections, you may want each section to be numbered differently. Maybe section one is numbered pages 1-25. Perhaps section two is numbered 1-38. This simply means that each section has its own numbering.
Now, in the Section Prefix box, enter a prefix for the current section. This is optional, but can help you identify sections.
Pick a style for your numbering.
If you want, you can add a Section Marker. This marker could be something as simple as "Section" so that you know a new section is beginning.
Check the Include Prefix when Numbering Pages if you want the prefix to show on your pages.
Click OK.
If you're adding sections, double click on the page where you want the section to end.
When you add a section, a black triangle appears above the thumbnail of the page where the section begins (in the Pages panel).

Adding Chapter Numbers
If you're using InDesign to create a book, chapter numbers will be very important to you.
Adding chapter numbers is much like adding page numbers.
Go to the Pages panel. Double click the master page or page where you want to add a chapter number.
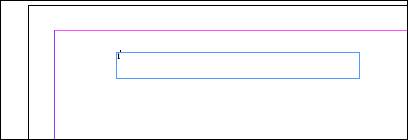
Select the Type tool and draw a text box on the page where you want to insert the chapter number, as shown below:
Right click your mouse and go to Insert Variable>Chapter Number.
Setting Chapter Number Options
To set options for chapter numbering, go to Layout>Numbering & Section Options.

The above dialogue box is the same box we used for page and section numbering.
Go to the bottom part of the box where it says Document Chapter Numbering.
Choose a style for your chapter numbering, then select if you want InDesign to automatically add chapter numbers (InDesign will start at "1"), or if you want to start with a certain chapter number.
Click OK.
Using Text Variables
As you saw in the last section, InDesign will add chapter numbers for you, but it will simply put in the chapter number. What if you want the word "Chapter" to come before the number? We can do this using text variables.
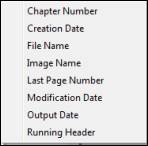
Text variables are elements that vary based on circumstances in the document. You can use text variables for headers, chapter numbers, modified dates, and so on. InDesign provides text variables for you to use. You can see these by either right clicking on a text box, then selecting Insert Variable (as shown below):
Let's show you how to do this.
Go to Type>Text Variables>Define.
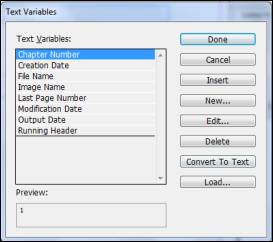
In this window you can edit or define variables. Using our example, we want to add the word "Chapter" before the chapter numbers. To do this, select Chapter number, then click the Edit button.

Enter Chapter Number in the Text before field. Don't forget to include the space after the word "number" or there will not be a space between the word number and the number of your chapter.
Click OK.