Filters change the look of your image. They can correct images that have flaws, or they can add fun effects to your image that make your image appear painted, tiled, etc. You can apply a filter to almost any image that you work with in Photoshop Elements with the exception of Bitmap and Indexed Color. In addition, not all filters will work on images in Grayscale mode.
Applying Filters
In Photoshop Elements, filters can be applied in three different ways:
1. The Filter Menu. To access the Filter menu, click Filter on the Menu Bar, then choose a filter to use from one of the filter categories.
2. The Filters panel. Go to Window>Filters to access the Filters panel in the Panel Bin. We'll learn how to work with the Filters panel later in this article.
3. The Filter Gallery. Go to Filter>Filter Gallery to apply a filter. Save a copy of the original image when applying filters in the Filter Gallery.
The Basic Filter Categories
All filters fall into two basic categories.
1. Corrective Filters fix a problem with your image. Perhaps you need to adjust the color of an image, remove scratches, etc. When you use a corrective filter, your image's appearance stays the same. It's just improved. Sharpen and Blur are two of the most popular corrective filters.
2. Destructive Filters create a special effect, such as making a photograph look like a painting. Destructive filters can make an image look very different from the original, such as warping an image.
All filters, whether corrective or destructive, are either:
-
One-step filters. One-step filters don't have options or a dialogue box. You simply select the filter, and it's applied to the image.
-
Multi-step filters. These filters have options and a dialogue box. You specify options to control the intensity of the filter.
Reducing a Filter's Effect
Since one-step filters don't allow you to control the intensity of the filter, there are other steps you can take to control and reduce the filter's effect.
To reduce a filter's effect, you apply the filter to a duplicate layer instead of the background image.
Let's see how it works.
We are going to apply the texture filter to our original image without adding a duplicate layer in the snapshot below.

We can't control the intensity of the layer, though, so we are going to undo the filter, then create a duplicate layer so that we can control the intensity.
To create a duplicate layer, go to the Layers panel, then go to Layer>Duplicate Layer in the Menu Bar.
You will then see the Duplicate Layer dialogue box.
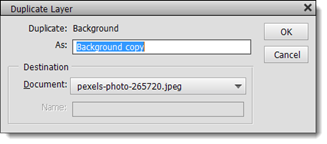
Click the OK button.
You can see the duplicate layer in the Layers panel.
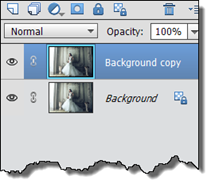
Next, we will apply the filter to the duplicate layer using the Filter panel in the Panel Bin. You can use the blend mode and opacity to adjust the intensity of the filter on your image.
We'll apply the filter and adjust the opacity in the next section of this article.
Using the Filter Panel
To view the Filter panel, click the Filter button below the Panel Bin, as shown below.
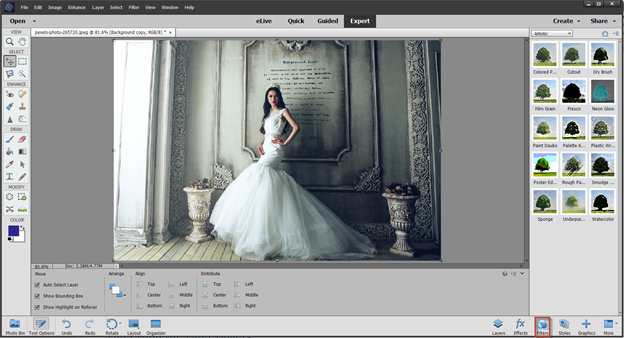
You will then see the Filter panel in the Panel Bin.
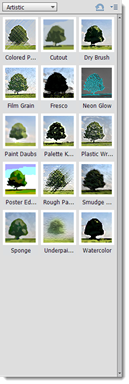
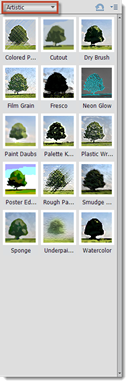
Select the type of filter you want to use from the dropdown list.
We've chosen Texture.
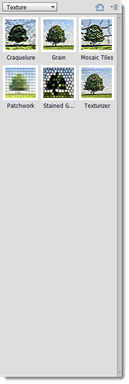
Click on the thumbnail of the filter you want to apply.
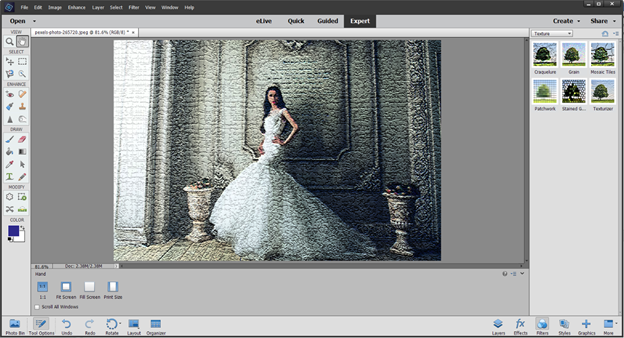
Next, let's reduce the intensity of the filter by going to the Layers pane. To view the Layers panel, click the Layers button located beneath the Panel Bin.
We reduced the opacity of the duplicate layer to 38%.
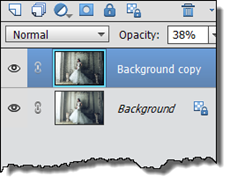
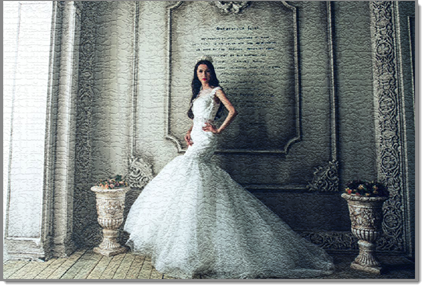
As you can see in the snapshot below, the intensity of the filter has been reduced.
Filters and the Filter Gallery
As we've already learned, filters are used to clean or touch up images. You can also use them to add special and distortion effects. When you apply a filter, you can easily change the mood or tone of an image.
You can find filters in the Filter Gallery by going to Filter>Filter Gallery.
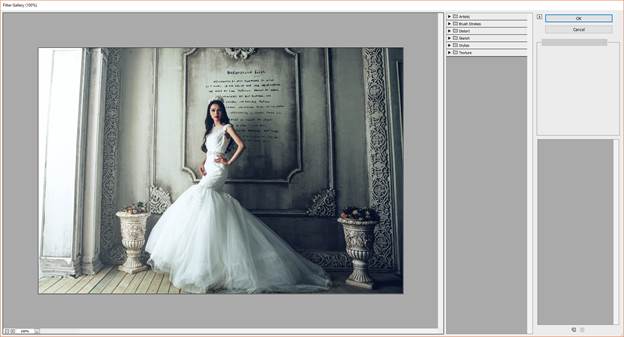
The Filter Gallery shows thumbnails of each filter and what it will look like when applied to your image. It also lets you apply a filter more than once to strengthen its effect.
Perhaps the best way to show you how filters work for your images is to show you by example. Since we already have the picture of the turtles in the snapshot above, we'll use it for this example.
Next to the image in the Filter Gallery, you have a menu that gives you your options.
You can choose from any of these types of filters:
-
Artistic
-
Brush Stroke
-
Distort
-
Sketch
-
Stylize
-
Texture
Let's click on the Texture filter folder.
Now the thumbnails are displayed, as shown below.
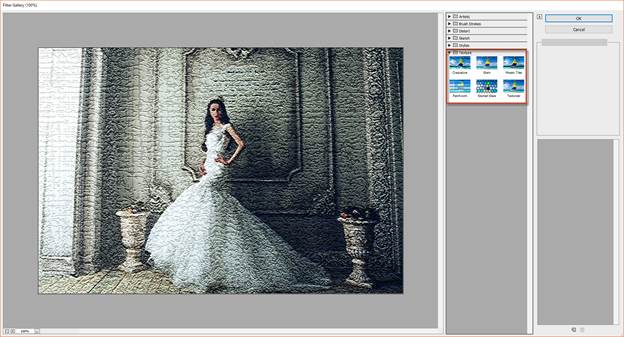
This gives us our options to texturize.
We're going to select Mosaic Tiles.
The Mosaic Tile Filter
Let's apply the Mosaic Tile filter to an image using the Filter Gallery.
Go to the Filter Gallery once again as we did in the previous section of this article.
Click on the Texture folder.

Click on the Mosaic Tile filter in the Texture folder to apply the filter.
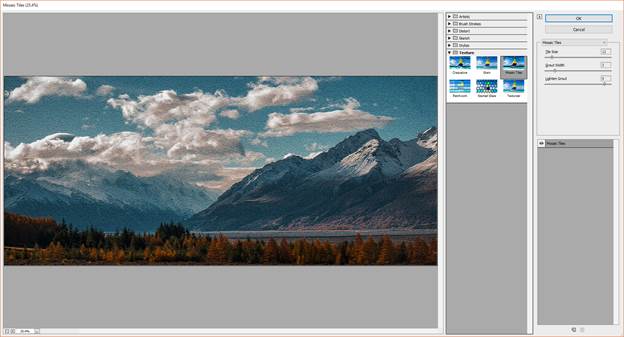
To the far right, we can further specify our preferences for the Mosaic Tile filter.
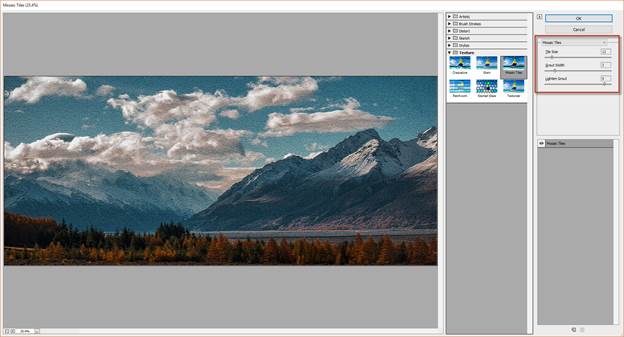
We can change the tile size, grout width, or lighten the grout.
Let's enlarge the tile size and increase the grout width.
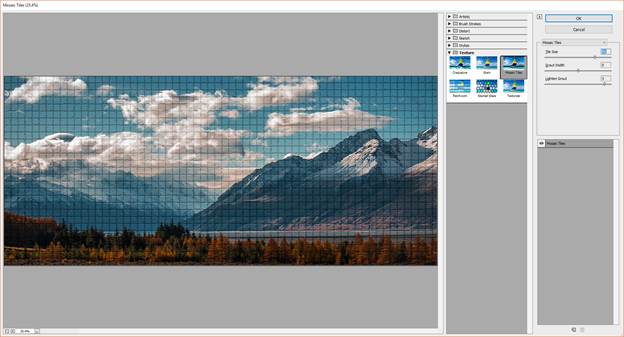
You can see how much the filter changed the mood of the image. Then, you can also see how adjusting our preferences for the filter also changed the image.
The Liquify Filter
The Liquify Filter can work as a filter, but it can also work as an image editing tool. You can use the Liquify filter to manipulate images by pulling, twirling, bloating, and twisting. Once you learn how to use the filter, you can use it to "slim down" a subject in an image -- or even plump it up. You can use the filter on an entire image, a layer, or even on a selection.
To use the Liquify filter, go to Filter>Distort>Liquify.
You will see your image in the preview area.
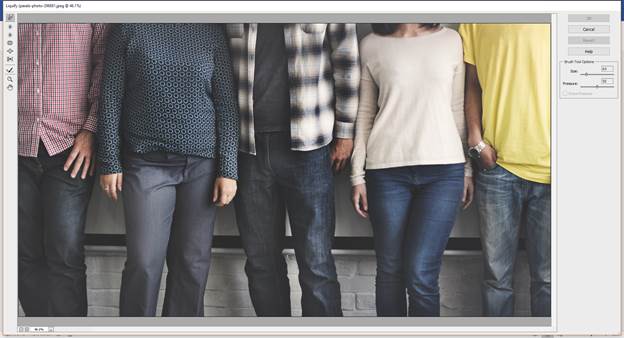
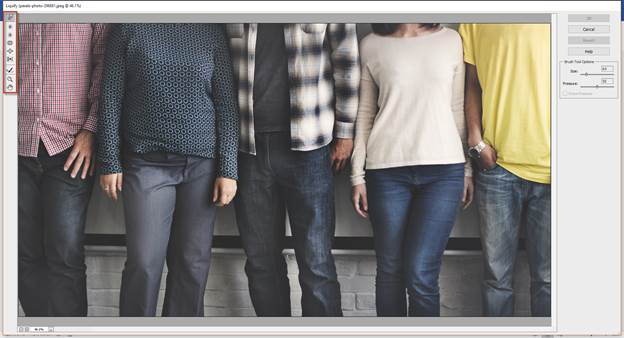
Now, choose how you want to distort the image using the buttons on the left side of the window.
-
Warp allows you to push the pixels forward by dragging the mouse. This creates a stretched effect.
-
Twirl Clockwise. Twirl Counterclockwise allow you to rotate pixels to create a moving, twirling effect.
-
Pucker allows you to pinch pixels toward the center of the brush area.
-
Bloat allows you to push pixels toward the edge of the brush area.
-
Shift Pixels allows you to move pixels to the left if you drag straight up � or to the right if you drag straight down.
-
Reconstruct allows you to reverse the effect of a distortion by dragging your mouse over the distorted portion of the image.
You can also use these tools:
-
Zoom allows you to zoom in to better see the distortions.
-
Hand allows you to move the image in the preview window.
We are going to use the Pucker tool by clicking on the Pucker button.
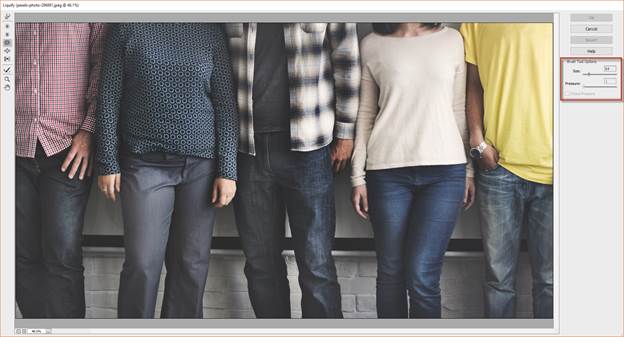
Next, select your options on the far right side of the window.
-
Brush Size is the size of the brush you'll use.
-
Brush Pressure. The distortion effect will be applied faster if you have a higher pressure.
-
Stylus Pressure. If you're using a graphics tablet with a stylus, set the pressure of the stylus.
Click the OK button in the dialogue box to apply the filter.
In the before and after images below, you can see the slight changes in the subjects after using the Liquify filter.

Lighting, Color, Contrast and Clarity
If you've ever had a photo or an image that was too dark, just had poor color, or even problems with red eye, you can use elements to fix all these problems and more.
This section is going to focus on adjusting the lighting, color, contrast, and clarity in your photos. If you're a hobbyist photographer, you'll really benefit from everything we discuss, so sit back and get ready.
Quick Fixes
To go to the Quick editing mode, click the Quick tab at the top of the Photo Editor window.
The Red Eye Removal Tool
For some photographers, red eye is a common problem. Red eye is when the people in your photos all look like they have red eyes.
To fix this, you can use the Red Eye Removal tool located in the Tools panel. It looks like this: .
.
We are going to fix the red eye issue in the image below.
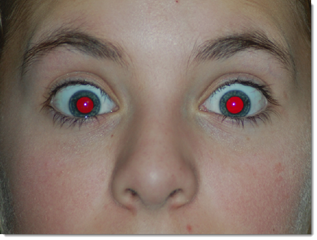
Select the tool, then go to the Tool Options panel.

Use the sliders to adjust the pupil radius and to darken the pupils of the eyes.
Next, click on the pupil of the first eye that you want to fix.
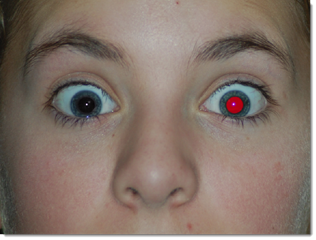
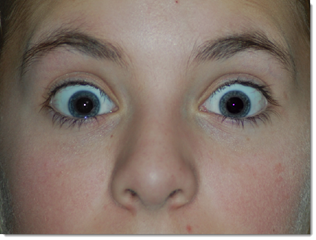
Elements will automatically fix the red eye for you.
Follow the same steps for any other red eye issues in the image.
Adjusting Shadows and Highlights
If you want to adjust the shadows (the darker parts or your images) or the highlights (the lighter parts), you can do this in Elements very easily.
Go to Enhance>Adjust Lighting>Shadows/Highlights.
You will then see the Shadows/Highlights dialogue box.
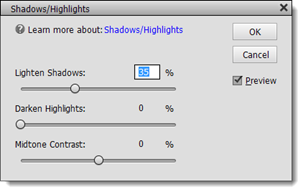
Click on the percentage value. Enter in a value to lighten or darken the photo. The larger the value, the greater the effect will be. You can also use the sliders.
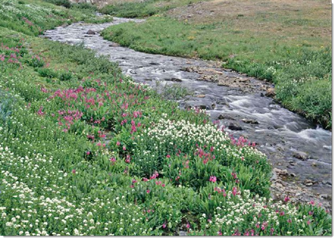
We're going to lighten the photo below.
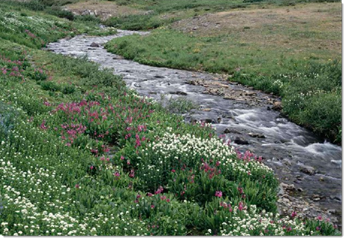
We adjusted the lighting by 50%. This was the result:
Adjusting Brightness and Contrast
You can also adjust the brightness and contrast in your photos just as easily as you did the highlights and shadows.
Go to Enhance>Adjust Lighting>Brightness/Contrast.
You will then see the Brightness/Contrast dialogue box.

Again, enter in a value.
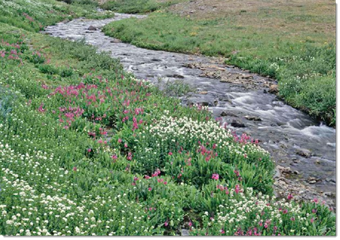
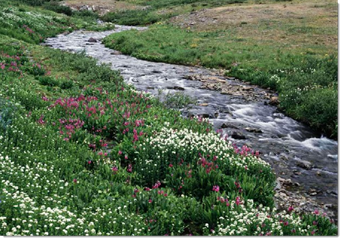
Using same photo as before, we're now going to increase the contrast. Look at the results.
Before
After
Hue and Saturation
You can also correct the hue (color) and saturation (purity) in any photo. You can adjust hue to add special effects, and you can adjust saturation to make the images more vivid or muted.
To correct the hue and saturation, go to Enhance>Adjust Color>Adjust Hue/Saturation.
You will then see the Hue/Saturation dialogue box.
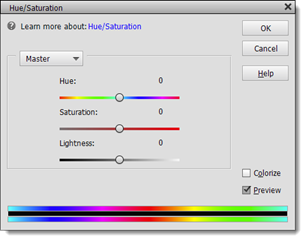
Adjust the hue, saturation, and lightness by moving the sliders.
Click OK to save your changes.
Adjust Skin Tone
Sometimes in an image, the skin tone of the people pictured isn't correct. Maybe it's too dark or too light. In this section of the article, you're going to learn how to adjust skin tones in your images.
To adjust skin tone, go to Enhance>Adjust Color>Adjust Color for Skin Tone.
You will then see the Adjust Color for Skin Tone dialogue box.
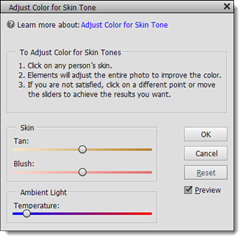
Next, click on a person's skin in an image.
You will see the entire image adjusted so that the color is improved.
You can use the Tan and Blush sliders, as well as the Temperature slider, to make further adjustments.
Click OK when you are finished.
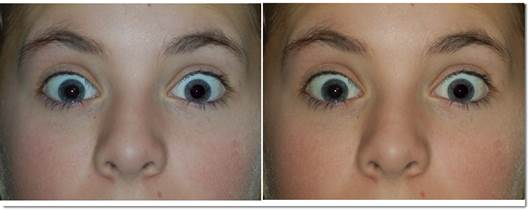
You can see the before and after snapshots of our image below.
Color Curves
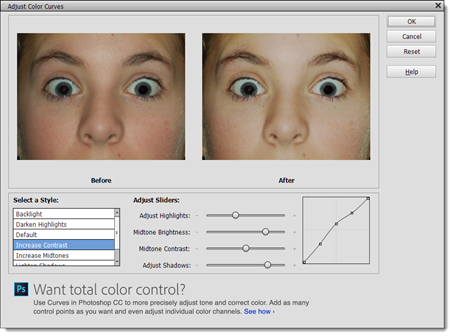
When you adjust color curves, you improve the highlights, midtones, and shadows in each channel of your image.
As you adjust the color curves, you can view the before versions of your image to get it exactly as you want.
To adjust color curves, go to Enhance>Adjust Color>Adjust Color Curves.
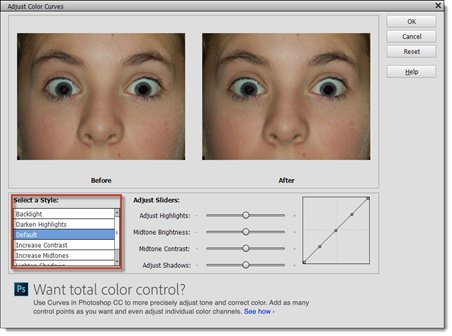
You will then see the Adjust Color Curves dialogue box.

Select a style.
Use the sliders to adjust the color curves. Use the before and after snapshots to help you achieve the desired effect.
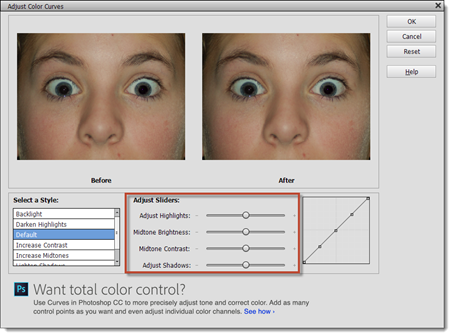
When you achieve the results that you want, click the OK button.
We're going to use the photos above for an example, and adjust the color curves so you can see the effects.
Saving, Printing, Sharing, and Creating
One of the most important things you can learn about Elements is how to save images. Once you make changes to an image, you will want to save the file to preserve all your hard work. The good news is saving your images is easy. What's more, you can save from any editing mode: Quick, Guided, or Expert.
When saving images in Elements, you have two choices when you save an image that you've edited.
You can go to File>Save and save the file under the same name and format. When you do this, the previous versions will be erased.
You can also go to File>Save As. When you select this option, you will see the Save As dialogue box, as shown below.
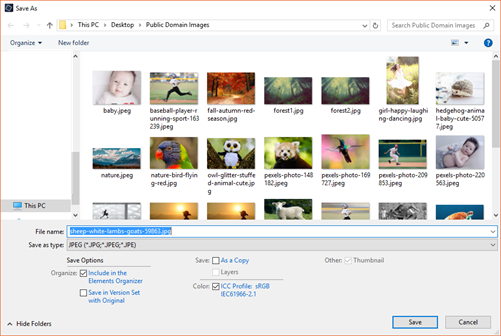
In the File Name field, enter a new name for the file.
In the Save as Type field, select a file format. For example, if your image is currently a jpeg, you can change its format to gif, bitmap, png, or any number of other formats.
When you've made your selections, click the Save button to save the file.
Color Variations
If you're going to publish an image to the web, it's helpful to see what your colors will look like on the web. Remember, different devices show colors differently. This includes the Internet browser windows and your monitor.
To see how the colors in your image will appear, go to File>Save for Web.
Select the optimization settings.
Click Save when you're finished making changes to save your file for the web.
Printing Images
When you're finished organizing and editing your images, you may want to print them out.
You can print images from any workspace or editing mode in the Elements software program. For this section, we're going to print from the Photo Editor.
To print an image, open the image that you want to print.
Go to File>Print.
You will then see the Print dialogue box.
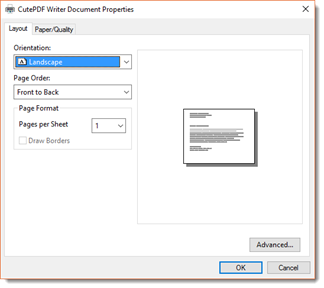
Click the Page Setup button at the bottom of the dialogue box.
Under the Layout tab, select the orientation. You can select either Portrait or Landscape.
Under the Paper/Quality tab, select the paper source, as well as if you want to print in black and white or color.
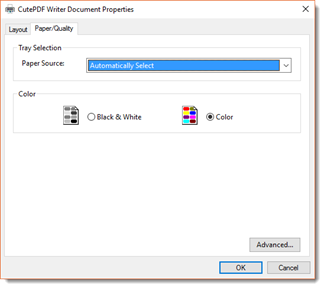
Click the OK button. This takes you back to the Print dialogue box.
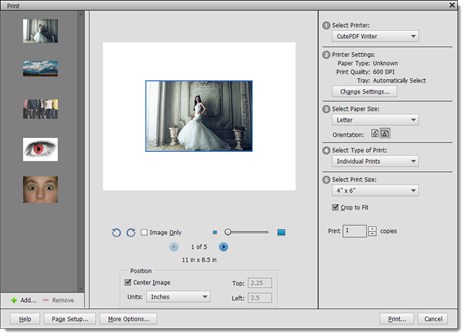
On the left-hand side of the Print window, you can see thumbnails of all images you have open in Photo Editor. These are the photos that will print.
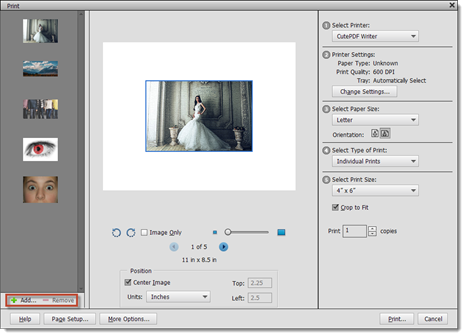
If you want to add photos to print, click the Add button. If you don't want to print a photo, click on the photo, then click the Remove button.
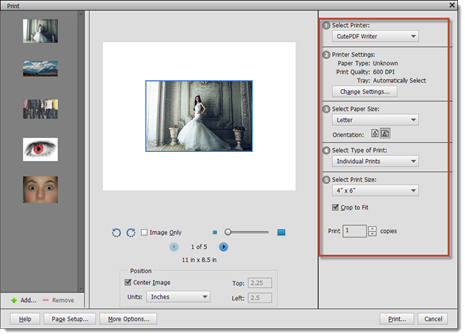
Select the printer that you want to use, the type of print, then the size. You also need to specify how many copies you want to print.
Click Print when you're ready for your pictures to start printing.
The Creation Wizards
The Creation Wizards give you a way to create presentations from your images. You can then either print the presentations or share them online. You can create presentations such as photo books, photo collages, and Facebook covers using the wizards.
To use a creation wizard, click Create at the top right of either the Organizer or Photo Editor window.
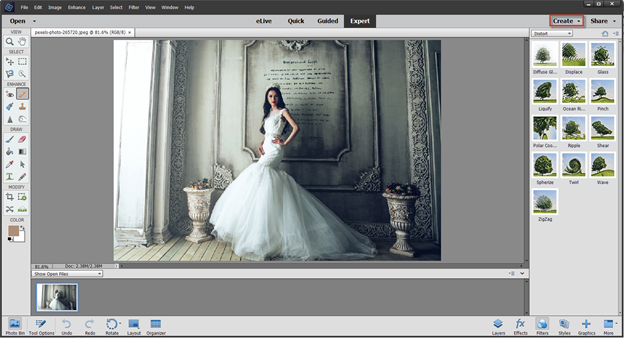
You will then see a dropdown menu that displays the different types of presentations you can create.
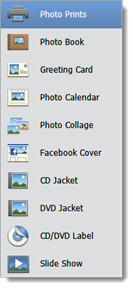
For this example, we're going to create a Facebook Cover. We want you to see how easy it is to use these wizards to create your projects.
Click on Facebook Cover.
You will then see the Facebook Cover dialogue box.
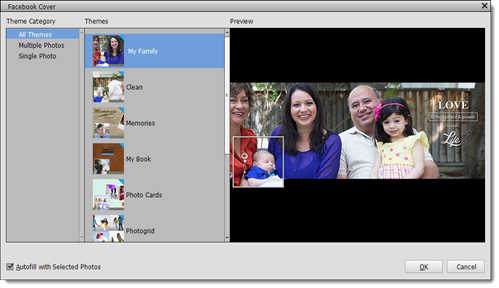
Select a theme to use for your Facebook Cover. We are going to select Memories.
Click the OK button when you're finished.
The Memories theme contains multiple images. Since we only had one image open in Photo Editor, it was the only image placed in our Facebook cover. However, as you can see in the snapshot below, we can now click on the placeholder images or drag other images to be placed on the cover.
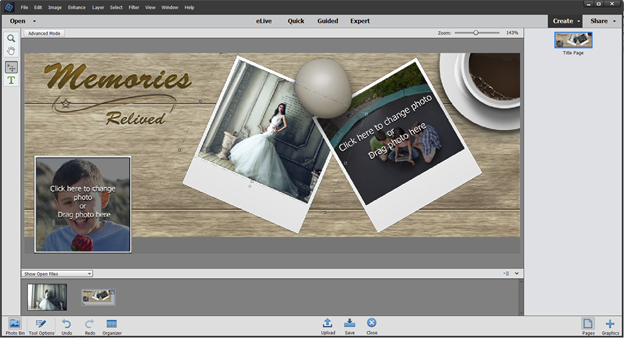
We are going to click in the placeholder image on the left.
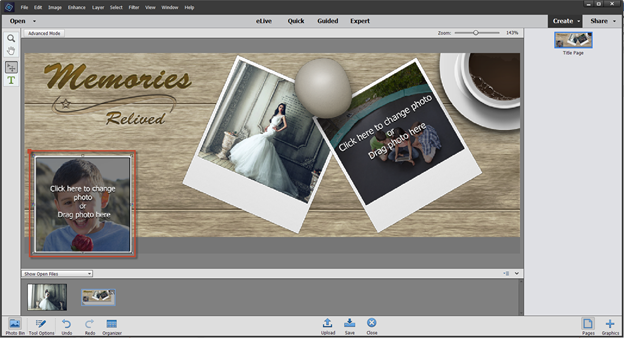
When we click on the image placeholder, the Choose Photo dialogue box appears.
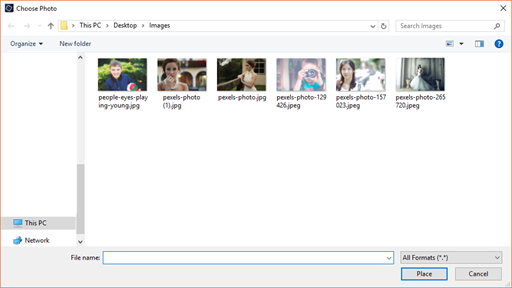
Select an image, then click the Place button.
The image is placed on the cover, as shown below.
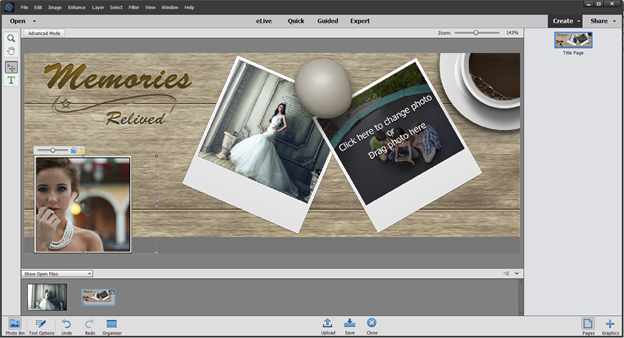
Now we can adjust the image using the slider that appears above it. This changes the size of the image. We can also move or resize the image using the bounding box that appears around it.
Click the green checkmark to commit to any changes.
Next, follow the same steps for the placeholder image on the right side of the cover.
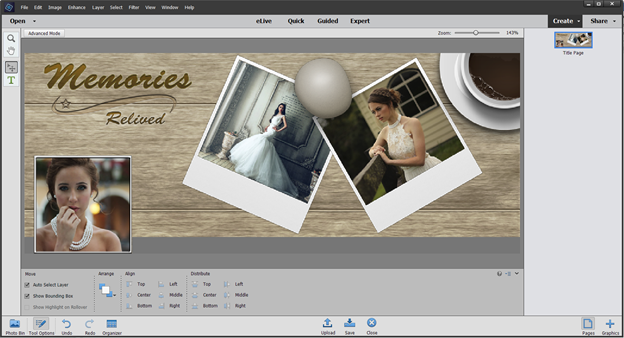
When you're finished, click Upload at the bottom of the Photo Editor window to upload it to Facebook.
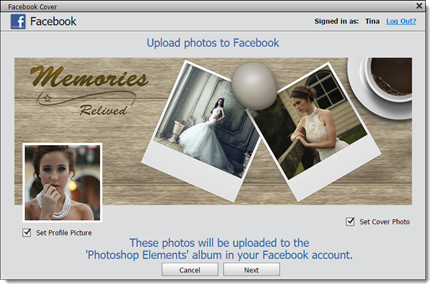
Click Save to save it to your computer.
Creating a Slide Show
There are three different slideshow options in Elements. In the Organizer, there is a Slide Show button in the Media Browser. You can also click the Create button in either the Organizer or Photo Editor, then select Slide Show. If you select Slide Show from the Photo Editor, you will notice that the Organizer opens. That said, you can use the Slide Show or Create button to create a slide show that can be exported as a movie file to share with others. The third option for creating a slide show is in the View menu. This option allows you to view (View>Full Screen) your images in Full Screen view on your computer. This is not the type of slide show that you'll share.
In this section, we are going to create a slide show that you can share with family and friends.
To create a slide show, select the images in the Organizer that you want to include in your slide show. Remember to press CTRL+Click on your keyboard to select multiple images.
Next, click the Create button, then select Slide Show.
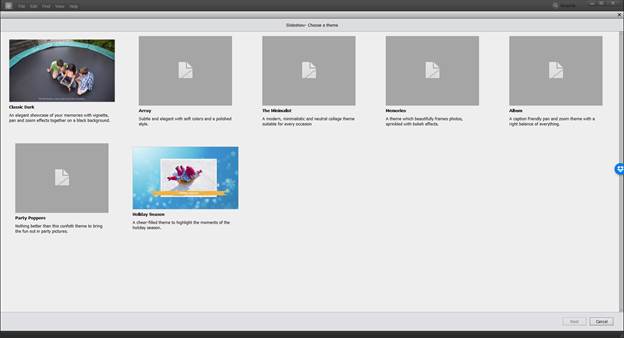
Choose a theme for your slide show from the options pictured above. Simply click on a theme to select it.
We have chosen Album.
Once you've chosen a theme, click the Next button at the bottom of the window.
You will then see a preview of your slide show in full screen.
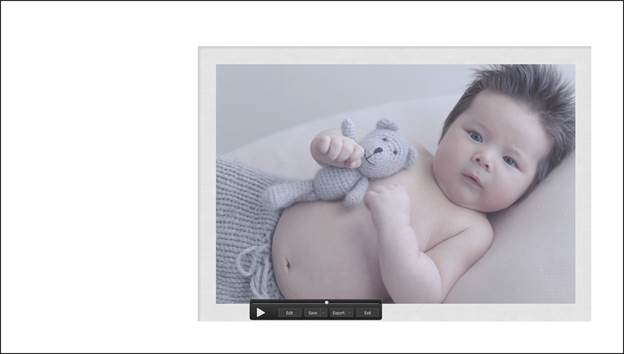
Click the Edit button to edit the slide show.
Click the Export button to export your slide show as a movie format.
Click the Save button to save the slide show to your computer.
Sharing Images
In today's world of social media, we tend to share a lot of information with others. This includes images. You can share any of the images that you upload to the Organizer quickly and easily � with just a few clicks of the mouse.
To share images, select the images in Organizer that you want to share.
Next, click the Share button (located beside Create).
You will then see a dropdown list that contains sharing methods that you can use.
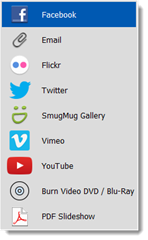
Choose the method that you want to use to share from the dropdown list.
For this example, let's select Facebook.
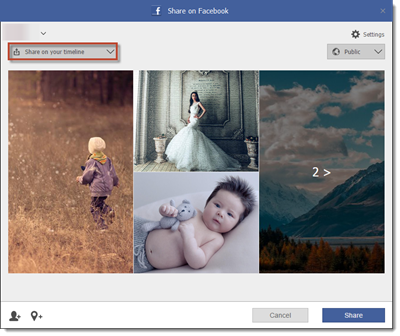
You will then see a dialogue box that looks a lot like your Facebook page whenever you create a new post.
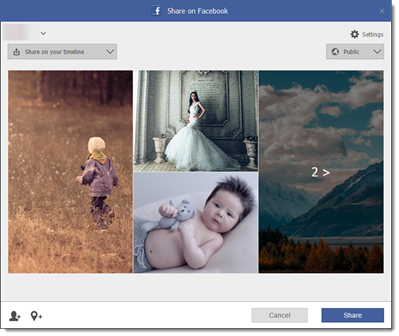
Select how you want to share the images on Facebook. We've chosen to share on our timeline.
Next, select the audience with whom you want to share the images.
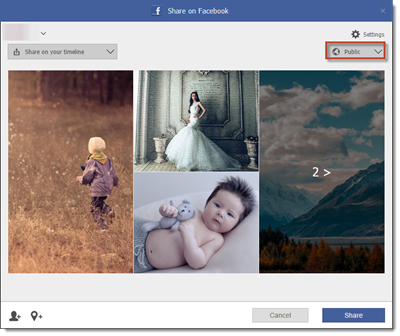
Click the Share button when you're ready to share the pictures to Facebook.


