Spell Check
Spell check is probably one of the most popular features of MS Word simply because you don't have to be an excellent speller or need a top notch editor to successfully use MS Word. If you've never used Spell Check before, then you're in for a treat. Spell check goes through your document from beginning to end (or just in selected parts) and selects misspelled words, grammatical errors, punctuation errors, and any number of other errors you want it to find.
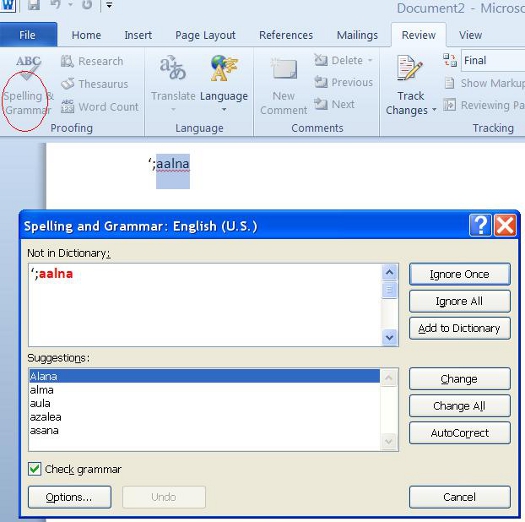
To locate Spell Check in MS Word 2010, click on the Review tab, then select Spell Check on the left. You'll see it on the far left. It's distinguishable by the large blue checkmark with ABC written above it, as in the picture below.
As it reads through your document, it will display a pop-up box with any errors it finds, as well as any suggestions.
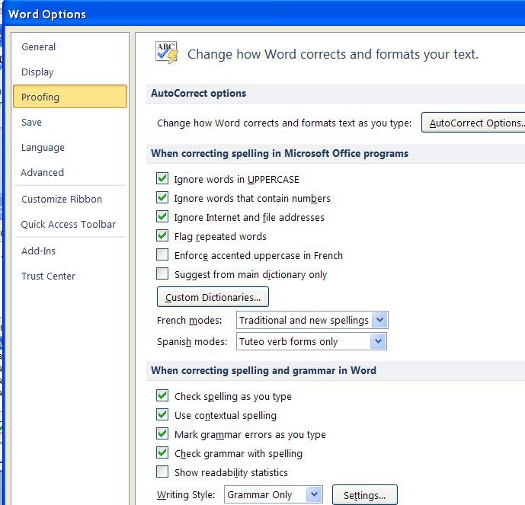
You can also click on options in the Spelling and Grammar window which will pull up the Word Options Proofing screen. Here you can set the types of errors you want Spell Check to find and correct.
If you want to spot check a word that you've typed because you aren't sure if you spelled it correctly, you can also use Spell Check for just that word. Simply right click the word and a list of possible substitutions will appear. Select the substitution you want by highlighting it and left clicking your mouse.
Thesaurus
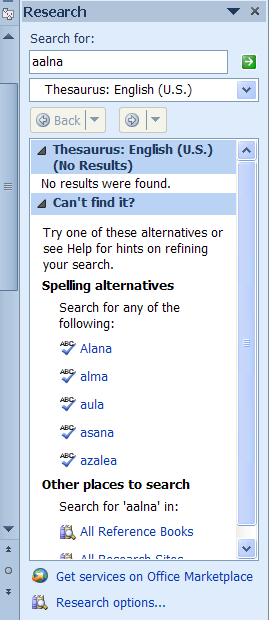
MS Word also helps you find synonyms for words that you've used by providing a thesaurus that's automatically integrated into Word. To use the thesaurus, click on the Review tab (this is your editing tab) in the Ribbon, then select Thesaurus. It's right beside Spell Check.
The thesaurus will appear on the right side of the screen.
Create Your Own Default Dictionary in MS Word
If you use MS Word for business and find that you use a lot of jargon, Spell Check may not recognize the spelling of those words and highlight them as wrong all the time. This can be frustrating, and it can also mean that you start to ignore those flagged errors and actually overlook a typo on your part.
Well, there's good news! You can edit the MS Word dictionary so that it recognizes words or spellings that you use. You can even customize spellings.
To customize your MS Word dictionary:
o Go to File
o Click the Options on the left side of the screen.
o Click the Proofing tab
o Click the When Correcting Spelling tab
o Click Custom Dictionaries
Click on Edit Word List. You should see this window in front of you:
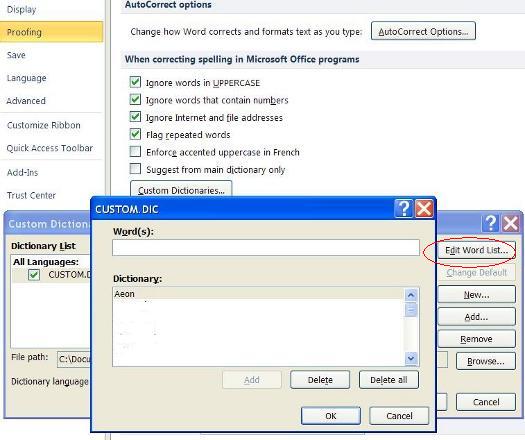
Type in any words that you may use that are not recognized by the MS Word dictionary.
Check Word Count
To check the word count of a document, simply look at the bottom left hand corner of the screen. The first column you will see tells you the page count, and the second one tells you how many words are currently in your document. You can select a passage of text to find out how many words are in the selected portion also.

Track Changes
MS Word allows you to track any changes that you make to a document. This is helpful if more than one person is working on the same file, if you have an editor, or if you simply want to be able to see changes you've made and be able to refer to the "old" version.
As with most of the editing features on MS Word, Track Changes is located under the Review tab. You'll see it right below Mailings in the Tracking Group.
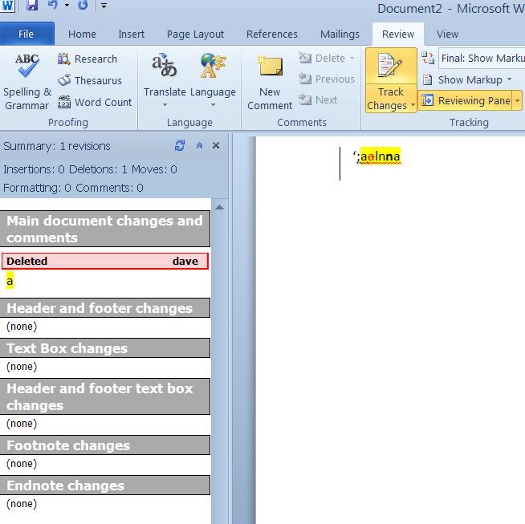
By clicking on Track Changes, MS Word will mark everything that you change. 
In the picture above, Track Changes was used. The words that were replaced were struck through and in red. The new words were also in red, but underlined. These are proofreading marks that MS Word uses. You can also click on the 'Reviewing Pane' button to see the changes that have been made. This appears to the left of the document window.
You can also have all changes noted in balloons on right side of the document. Simply click on Show Markup, then select Balloons (by Track Changes) and select the option you want. Below is a picture of revisions shown in balloons.

When you're done editing and proofreading your document, as well as making changes, you can do one of two things. You can read through the document with the changes you've made, but without the proofreading marks, to see if you've caught every error and made all the changes that need to be made. In other words, you can see if you're happy with the final draft.
To turn off the proofreading marks and view your revised document, click on 'Show Markup'.
You can then uncheck the proofreading marks or comments that you want to hide, so that the document above now looks like this:

To see the proofreading marks and comments again, simply go back to 'Show Markup' and recheck your selections.
When you click the 'Final: Showing Markup' button that is above the 'Show Markup' button, you can do several things.
o You can view the final copy of your document showing proofreading marks and comments.
o You can view a final copy of the document without any proofreading marks.
o You can view a copy of the document before any changes were made.
o Original Showing Markup allows you to view the original document with the original changes.
Accepting and Rejecting Changes
Whenever you make a change using the Track Changes feature, you or whoever owns the document can then go through and either accept or reject the suggested changes. All changes made to a document are only proposed changes until they are accepted or rejected.
There are two ways to accept and reject changes. The first and most commonly used way is within the body of the document. You can select, then right click on any word, sentence, or paragraph for which a change has been suggested. When you right click, you will see a drop down menu. Accept or reject change will be one of your choices. Select one or the other. When changes have been noted in a balloon, you can right click on the balloon and either accept or reject the change.
The other way is using the toolbar located in under the Review tab and in the 'Changes' group.
You can click on accept, then choose accept and move to the next suggest change or accept all changes within the document. Clicking reject will give you the same options. Previous and next will take you from suggested change to suggested change until all changes within the document have been accepted or rejected.
Page View
When editing a document, you may want to change the way you view the page to do a better job at editing it. In MS Word, you can select from four different views:
o Print layout. Shows how your document will look when it's printed.
o Full screen reading. You view the document in full screen so that the space is maximized for reading or commenting.
o Web layout. See your document as it would appear as a web page.
o Outline. Your document as an outline with outlining tools.
o Draft. Elements such as headers and footers will not be visible in this view, enabling you to read or edit the document quicker.
Changing the page view may be done by selecting the View' tab, then clicking on the appropriate icon above the 'Document Views' label.
Research
By clicking Research under the Review tab (as pictured below) you can search dictionaries, a thesaurus, or encyclopedias.
Translate
Translate is located under the Review tab. Using translate, you can translate a document from or to numerous languages.
Just click Translate, you can then choose to have Word translate the entire document, selected text, or to point to a word or phrase for quick translation. You can also select Choose Translation Language to select a language, as shown below.
![]()
Your document is then machine translated. You must give MS Word permission to send your document to the machine for translation.
Print a Document
If you've used previous versions of MS Word, you'll remember that there were two options for printing: Print and Print Preview. These two options have been combined in Word 2010.
To print a document, click the File tab. You'll then see this window over your document window:
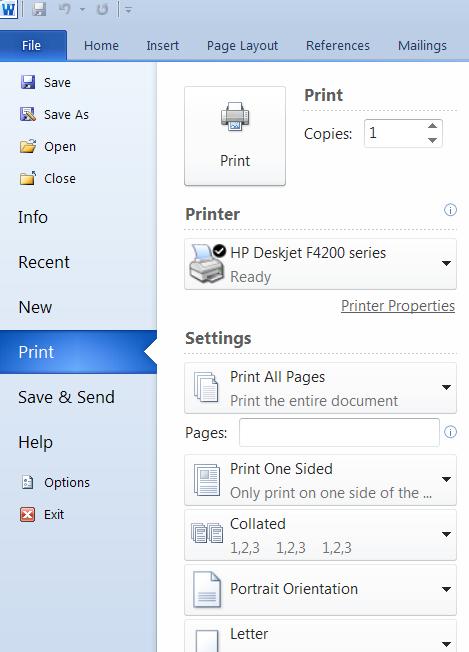
Click on Print. It's on the left side of your window.
You'll then see this window appear:
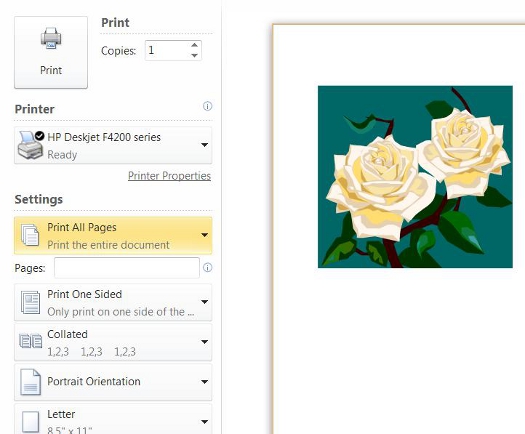
As you can see, the Print and Print Preview windows have been combined. Your print preview is on the right hand side of the screen. To the right of the print preview are your print options.
Click the Print button to go ahead and print. You can select the number of copies to the right of the Print button.
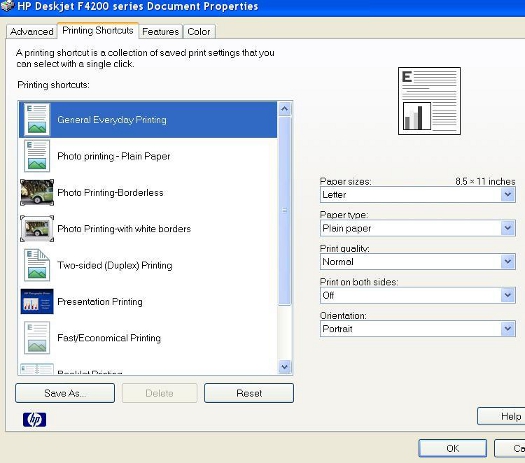
Next, you can select your printer. By clicking Printer Properties, you can adjust the type of print to get a better quality print or to save ink.
Under settings, you can tell MS Word if you want it to print the entire document, or specify pages to print by listing the page numbers separated by commas.
You can also tell Word if you want it to print the document on one or both sides of the paper, if it's collated, and the orientation (Portrait or Landscape. Portrait is the short side going across the top. Landscape is the long side going across the top.)
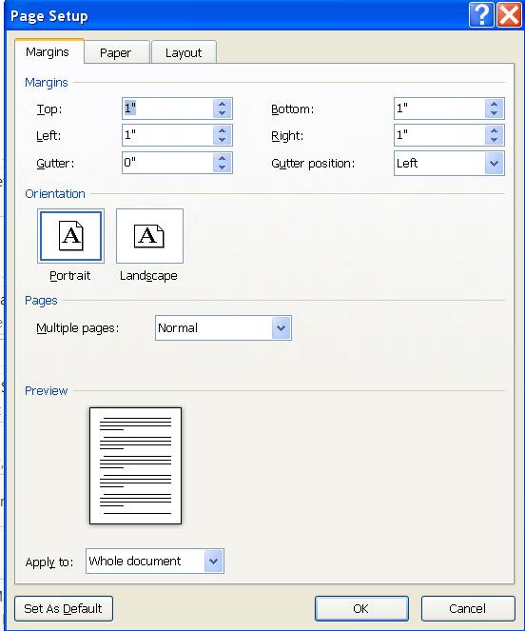
You can also set your paper size, margins, and how many pages of your document you want to print on one sheet of paper.
If you click Page Layout, you can change margins, layout, and paper size from this window also.
When you're finished, click Print at the top of the window, as we showed you before.
Reviewing, Sharing, and Publishing the Web
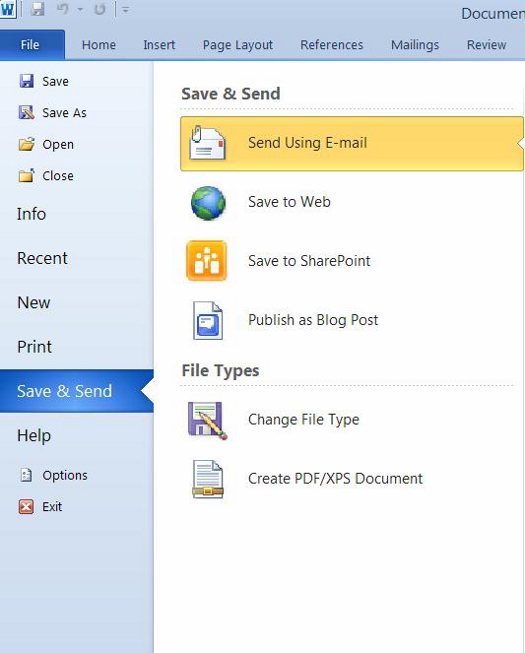
You can review documents created by other people and easily share documents too without having to send them via email as large attachments. To be able to share your documents with others for review or editing, click the File tab, then click Save and Send.
Comparing, Merging, and Protecting Documents
The Document Inspector
The Document Inspector lets you check your documents for hidden properties and personal information before you share it with other people. Since you may share your document and have lots of people viewing it, it's nice to make sure all your personal or private information is also not out there for everyone to see.
To use the Document Inspector:
Click File, Info, then click the Prepare for Sharing button.
Select Inspect Document from the dropdown menu. You'll then see this warning dialogue box.
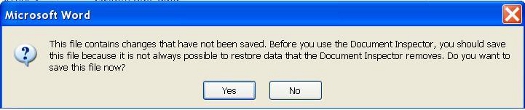
Make sure you save the file by clicking Yes.
You'll then see this window:
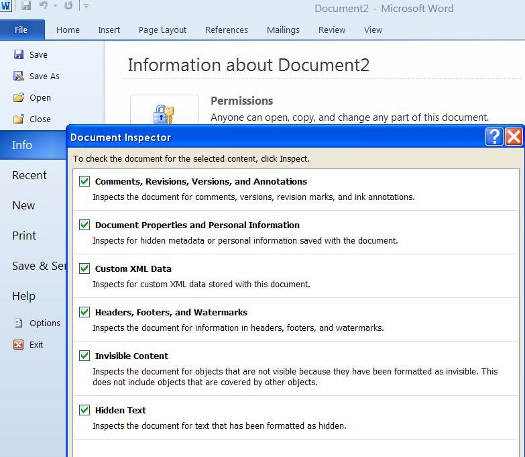
This shows you everything the Document Inspector can check. Everything is checked by default. Uncheck anything you don't want the inspector to look for, then click the Inspect button.
When MS Word is finished checking your document, you'll see a results window:
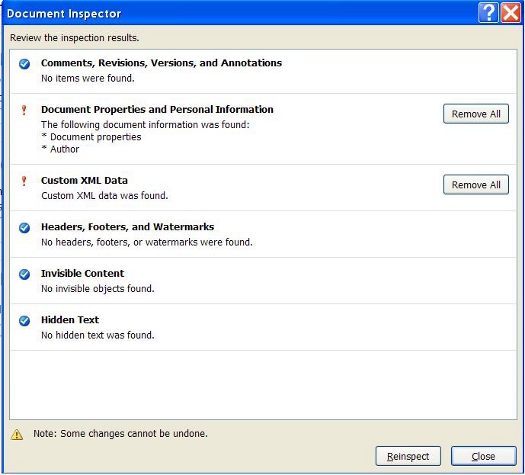
Click the Remove All button to remove the information that the inspector found. When you're finished, either click Reinspect to make sure everything was fixed, or click Close.
Compare and Merge Documents
MS Word 2010, like previous versions, allows you to compare and merge edited documents. These features can be found in the Review tab in the Compare group.
The Compare and Merge feature are located under the same dropdown menu. Simply select compare in the Compare group and select whether you want to compare or combine (merge) the two documents.
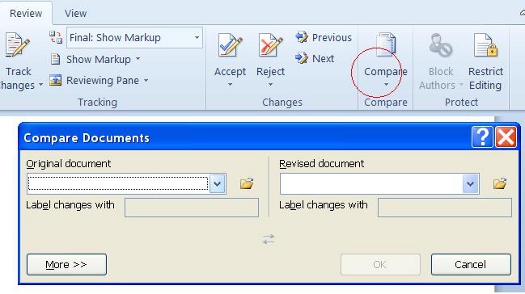
To compare two documents:
o Select Compare from the dropdown menu.
o It will ask you to select an original document, then a revised version. Keep in mind that you must compare an original and a revised or different version. MS Word will pick out changes and differences in the documents.
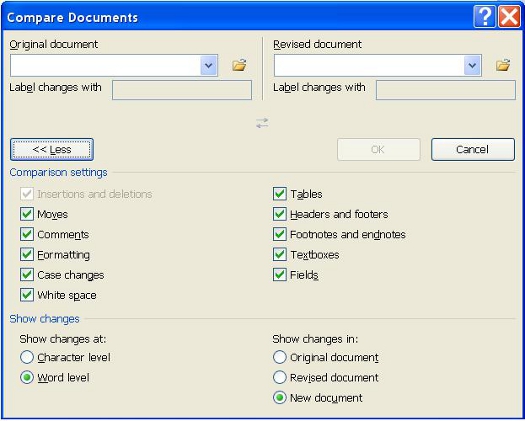
o Click on More to see comparison options.
You can choose how you want changes and differences between the documents noted, and if you want them in one of the two documents or in a totally different document.
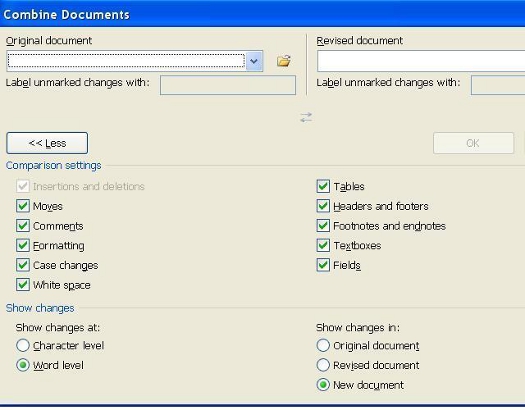
To Merge Two Documents
Combining documents gives you the same dialogue box as Compare, except the two documents you enter will be combined.
Protect Document and Restrict Editing
Microsoft Word 2010 also lets you protect your documents so that nobody else can edit, reformat, or make changes to your document. This is nice if you're creating a document or file for work and you don't want changes to be made. You can also restrict access so that only people you choose can view your document.
To protect your document:
o Go to Review tab in the Ribbon.
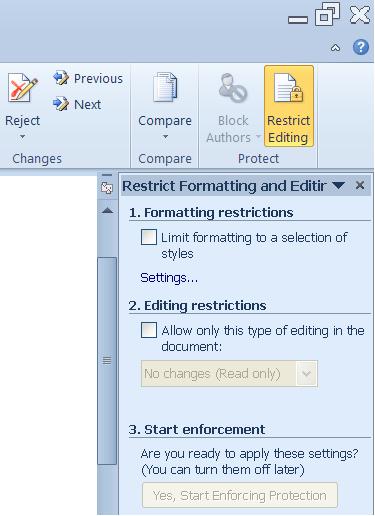
o Select Restrict Editing from the 'Protect' group. 
o A dialogue box will open on the right side of the screen. From there, you can name the restrictions, as well as decide when you will start enforcing them.
Password Protect
MS Word 2010 gives you the ability to password protect your documents to keep unauthorized people from viewing them.
To password protect a document:
Click the File tab, then click Info on the left, then click the Protect Document button.
Choose Encrypt with a Password from the dropdown menu.
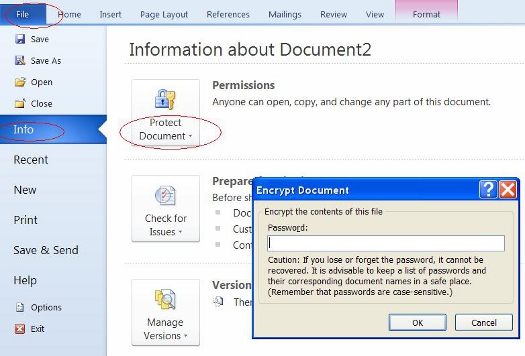
Enter a password in the text field, then click OK. Just remember that you won't be able to recover the password, so make sure it's one you can remember.
Macros
Macros are defined as advanced editing features that you can utilize to record menu selections. When you record these menu selections, you can complete a series of actions quicker and easier. For example, instead of clicking on several buttons and menu selections to add text to a document, you can record a macro and do all this in one step. The 'center align text' button on the Home tab is a macro. You can create macros just like this to format text size, highlight text, and anything you need to do within a document. Instead of clicking on tabs and going through groups, when you create a macro, getting your task done is as simple as a click of a button.
To record a macro:
o Go to the View tab on the Ribbon.
o Click Macros in the 'Macros' group.
o Click Record Macro from the dropdown list.
You'll then see this window:
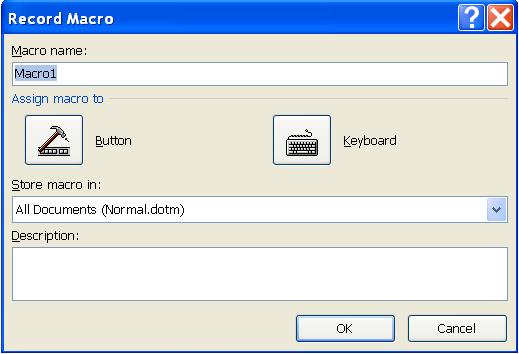
o Enter a name for the macro. Do not add spaces.
o Click whether you want it assigned to a button or to the Quick Access Toolbar. For the Quick Access Toolbar, click Button, then Customize Quick Access Toolbar.
o Choose the document for which you want to use the macro.
o Under choose commands, select the macro which you are recording.
o Click Add then click OK to record the macro
o Perform whatever actions you want recorded in the macro
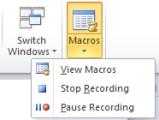
o Click Macros
o Click Stop Recording Macros
To create a keyboard shortcut:
o Click Macros, then Record Macro, then click the Keyboard button.
o Where it says Press New Shortcut Key, type the sequence, then click Assign.
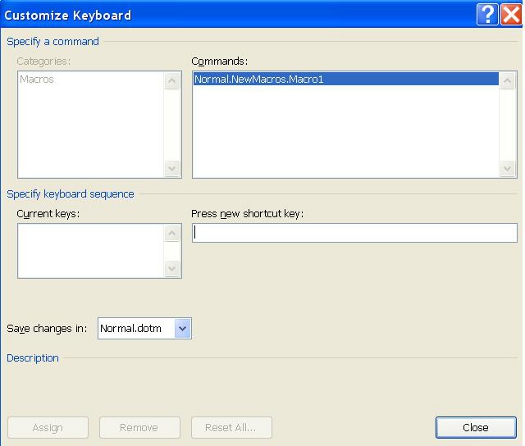
o Click Close to begin recording.
o Perform the actions that you want recorded.
o Click on macros.
o Click on Stop Recording Macros.
Running a Macro
To run a macro from the Quick Access Toolbar, simply select the Macro button:
If you don't see it, click the downward arrow to the right of the Quick Access Toolbar, then click More Commands. You can then add your Macros by adding the icon using the Choose Commands From and finding Macros.