Document properties
Also called 'metadata', document properties is all of the information that can identify the document. It can include the name of the author, the date the document was created, the number of pages, copyright information, etc.
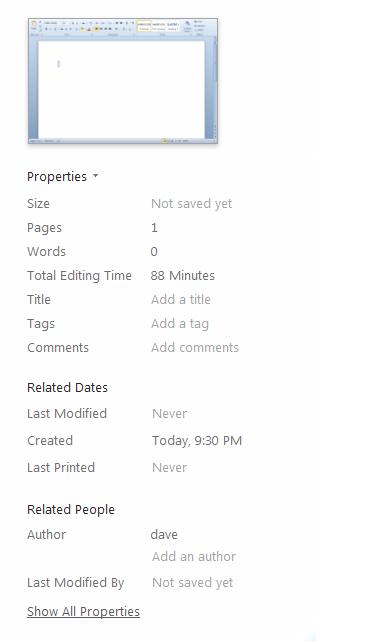
You can easily edit this information from this location. Simply click an item, and start typing. In the example above, we've decided to change the title of the document, so the Title field is active. Hit Enter when finished.
Cover pages
Including a nicely designed cover to your document can give it that final, professional touch. But where are you going to find a designer on short notice, who'll work for peanuts? Luckily, Word 2010 includes some cover design templates.
To access them, navigate to the Insert Pane and click the Cover Page button.
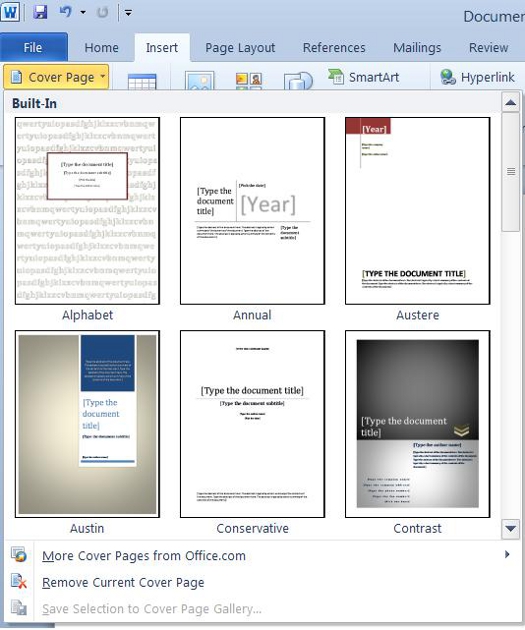
Each cover comes with placeholder text. To change it, simply click the text and start typing your own.
Table of Contents
It's said that utilizing functions in Word 2010 is quick and easy. Well, it's true. What's more, creating a Table of Contents for any body of work that you create in MS Word is also very quick and easy.
The quickest way to create a Table of Contents is to put all chapter titles, subtitles, section headings, etc. as Headings. Any category that you want listed in a Table of Contents should be listed as Headings.
To list categories, chapter titles, etc. as headers:
Go to the 'Home' tab in the Ribbon
Go to the 'Styles' group. Select Heading as the style you want to apply.

The lower the number (ex. Heading 1), the larger the font of the heading. You'd want to use a larger heading for chapter titles and smaller headings for subtitles.
For example:
Section One
Subsection one
Subsection one.
Note how the font for Section One is larger. The heading style that was used was Heading 1. For the subsections, Heading 2 was used. You'll see how this comes into play with the Table of Contents later. As you create your document, it's best if you get into the habit of putting all chapters, subsections, etc. as Headings. It will make creating a Table of Contents a lot easier when it's time to do it.
Creating a Table of Contents
When you're finished with your document and ready to add a Table of Contents, or TOC, select the place in the document where you want it to appear and put the cursor there.
o Next, click the 'References' tab in the Ribbon.
o Click Table of Contents in the 'Table of Contents' group. You'll see this drop down menu.
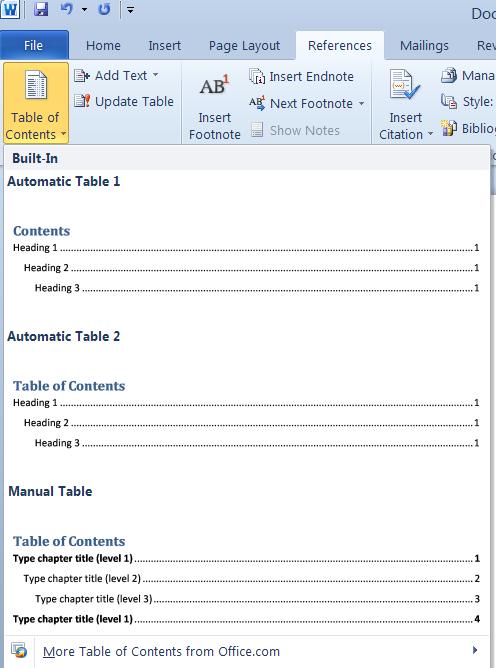
o Select the format you'd like to use for your Table of Contents. (Notice how important Headings are in the format. )
Update a Table of Contents
If you've edited your document or made changes to headings, you can update your Table of Contents without redoing the whole thing.
o Apply all headings to the document.
o Select the 'References' tab in the Ribbon.
o Select Update Table in the 'Table of Contents' group. This is right beside the Table of Contents button.

Delete a Table of Contents
Deleting a Table of Contents is as quick as a mouse click.
Simply click on the Table of Contents again. Scroll down the drop down menu until you see 'Remove Table of Contents.' Clicking on that will remove the Table of Contents from your document. Be careful doing this, however, your Table of Contents cannot be recovered once it is deleted.
Header and Footer Tools
Adding a header or a footer in Word 2010 is a cinch. There are two ways to go about this. You can go to the top of the page (the header) and double-click the white space above the top margin (for the footer, you'd click the white space below the bottom margin.)
When the header and footer is active, the rest of the document becomes opaque. This makes it easy to see only what you are currently editing.

To enter text into the header, click into it and start typing. Format your text and paragraph attributes just like you would in the ordinary body of a story. You can even apply quick styles.
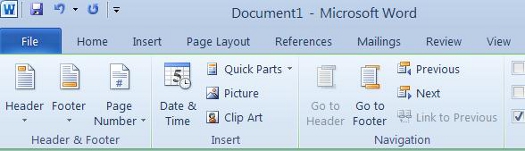
Whenever the header and footer are active (they always activate simultaneously), the Header & Footer Tools also become active. Let's take a look at the options available to us.

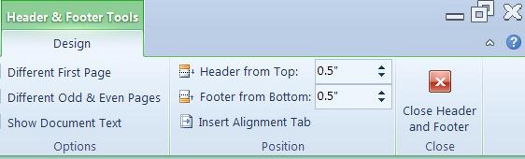
Here is a zoom of the Header and Footer Tools Ribbon left side and right side
Use the Header and Footer buttons to access templates. Below is an example of one such template.

Use the Page Number to insert a page number and select where you want it aligned.
Use the Different First Page box if you want to use a different header (or remove it entirely) on the first page. This is particularly important if you have a cover page and don't want it marred by a header.
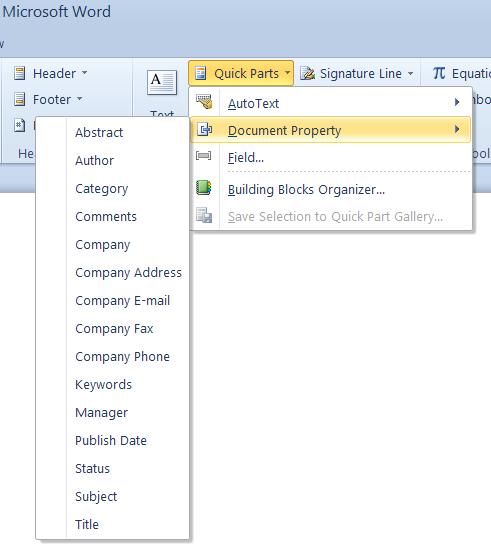
Quick Parts - Headers and Footers
The Quick Parts button on the Header & Footer Tools ribbon is to easily insert commonly used information into the header or footer. As you can see in the following example, some options include the Title, Abstract, Author, and Category.
Auto-Text and Building Blocks
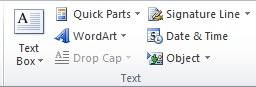
If you use the same content or text throughout different documents, it can be a pain to have to retype it over and over, or even go to a document to copy and paste the text you want multiple times. Instead, you can use Auto-Text in MS Word 2010 to save time. Auto-Text will automatically enter text and fields. It can even edit the properties of a document. It's simply reusable content or text that you can quickly and easily access whenever you need it. You access Auto-Text by going to Quick Parts in the Text group under the Insert tab. Quick Parts in MS Word 2010 is always a quick way to insert text and information.
Quick Parts is a gallery where you can store, create, and find reusable pieces of content, including Auto-Text.
In MS Word 2010, Auto-Text is stored as building blocks. That said, to use Auto-Text, you must first create building blocks. To do this, first select the text that you want to save as Auto-Text. Then go to Quick Parts, click the downward arrow, and select Save Selection to Quick Part Gallery.
You'll then see this window:
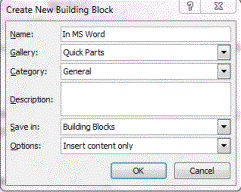
Now you're going to create a building block by entering in information:
o Name: Type a name for the Auto-Text entry that you'll recognize.
o Gallery: Select the AutoText gallery.
o Category: Select General, or you can create a new one.
o Description: Enter in a description for your building block.
o Save in: Click on the name of a template in the dropdown list.
o Options: Select any options you want.
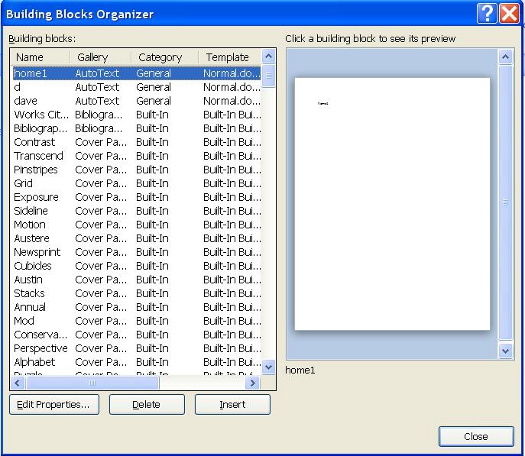
To delete a building block, go to Quick Parts and select Building Blocks Organizer from the dropdown list. Find the building block you want to delete, select it, then click the Delete button, as pictured below.
Using AutoText
Technical Documents
Line Numbering
By default, MS Word numbers every line in a document except for those in tables, footnotes, endnotes, text boxes, frames, as well as headers and footers. However, it does not show these line numbers. You have to specify if you want Word to show line numbers and which ones to display. This is especially helpful in technical papers to create reference points. You can display line numbers in all or part of a document, or at certain intervals such as every tenth line.
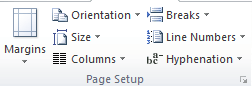
To display line numbers, go to the Page Layout tab. Click on Line Numbers in the Page Setup group, as shown below. Line Numbers is right below Breaks.
If you click the downward arrow beside Line Numbers, you'll see this dropdown menu:
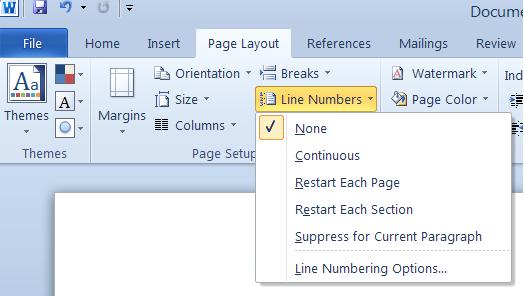
As you can see, None is selected by default. You can also select:
Continuous to display every line number within the document. MS Word will label the first line "1," the second line "2," and so on throughout the entire document.
Restart on each page means that each page's first line will be numbered '1."
Restart Each Section means that line numbering will start over in each section. You must use headers for MS Word to be able to do this.
Suppress for Current Paragraph means you can select a paragraph and select this option so that the paragraph's lines are not numbered.
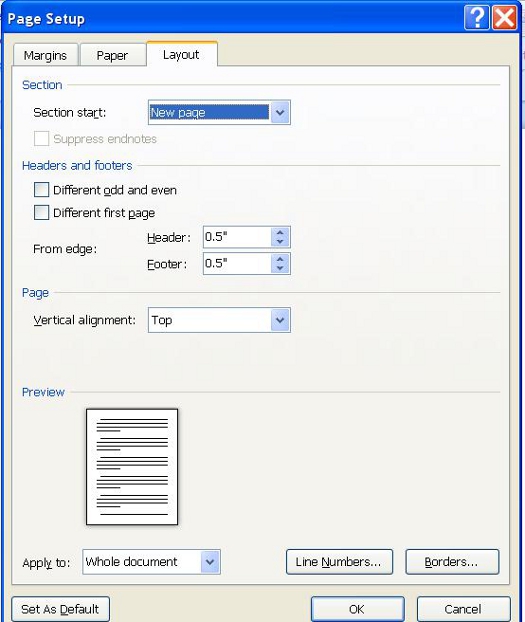
Click the Line Numbers button that appears above the OK button.
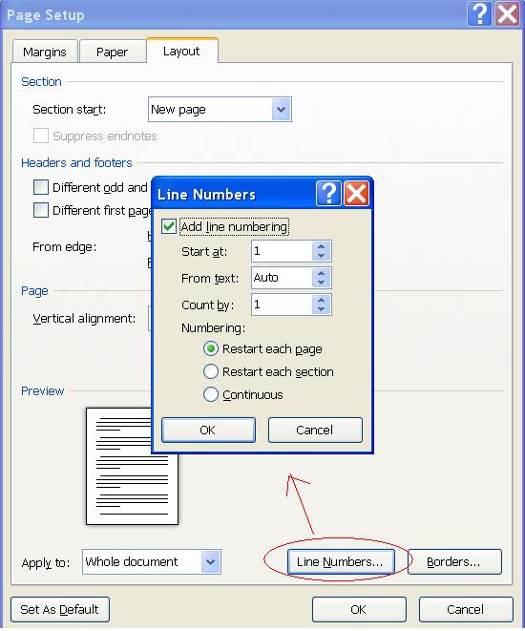
The Line Numbers Window will appear. You can use this window to set intervals. Check the Add Line Numbering box, then specify the page where you want to start numbering lines. Set the rest of the options, then click OK.
References and Citations
If you've ever written a term paper, you know how important (and time consuming) writing a bibliography and citing sources can be. But guess what? MS Word 2010 helps you do all those things. quickly and easily of course.
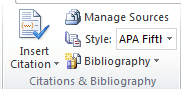
The first thing you need to do when creating a bibliography or citing sources in MS Word is to select the style you want it formatted in. To do this:
Click the References tab in the Ribbon.
Click the Style dropdown menu under the Citations and Bibliography group and select the style you want to apply.
How to Insert Citations
A citation is giving credit to a source in the body of the document. For instance, if you used a quote from a magazine article, you'd want to cite the article, author, and magazine after the quote.
To insert a citation:
o Go to the References tab in the Ribbon.
o Click on Insert Citation in the Citations and Bibliography group.
o Choose the appropriate menu item from the dropdown menu.
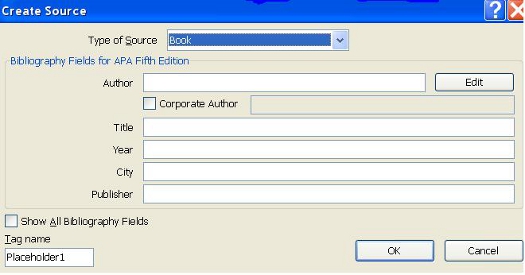
o If you are creating a new source, click Add New Source, then the type of publication.
o Fill out the Create Source Form.
Placeholders
Use placeholders when you need to insert a source, but don't yet have all the information you need.
To insert a placeholder:
o Go to the References tab on the Ribbon.
o Click Insert Citation
o Select Add New Placeholder
Manage Sources
If you ever need to add or delete sources, modify them, or go back and enter information for a placeholder, you can do this simply by managing your sources.
To manage your sources:
o Go to the References tab
o Select Manage Sources. 
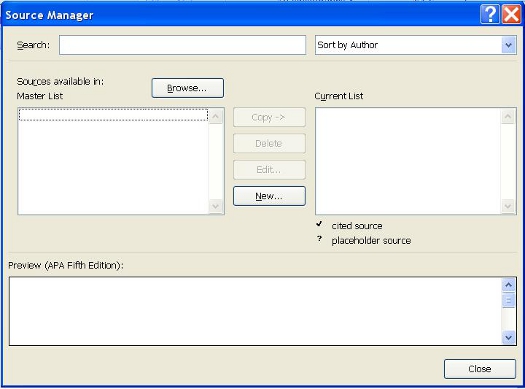
Now you can manage all your sources easily and quickly.
Adding a Bibliography
To add a bibliography to your document, go to the References tab in the Ribbon. In the Citations and Bibliography group, select Bibliography. You can choose from one of the two bibliography layouts listed.

Creating an Index
An index is simply a list of terms that you used in a document with the page numbers where those terms appear. It's kind of like a glossary, just without the definitions. You can mark words, phrases, symbols, etc. for inclusion into the index. You mark them in your document, then create the index. Let's learn how to do that.
To insert an index into an MS Word 2010 document, you must first mark entries that will be indexed.
Marking Entries
Start out by selecting the word or phrase that you want to index (we are using the word "right" for this example. Go to the References tab, then click Mark Entry.
You'll then see this window:
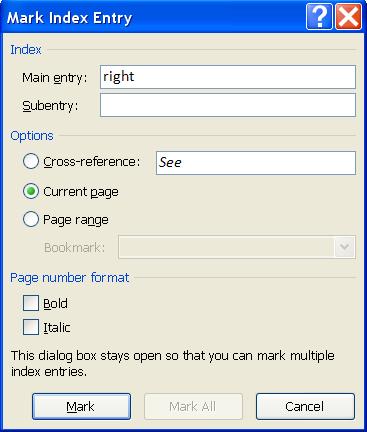
The text that you selected is the text that will appear in the index. If you want something else to appear in the index, then type that into the Main Entry box. For example: if you selected the word "cow" within your document, it will appear as Cow in the Main Entry box above. If you want "cow" to appear as Cattle instead, type Cattle in the Main Entry box. You can also type a subentry. This might be "Longhorns."
You can also create a cross reference to another index entry. If you want to do that, select Cross-Reference in the options group. Perhaps you want to cross reference cattle with dairy farms.
Now, you can specify the way that the indexed page numbers appear. You can make them boldface or italic by using the checkboxes at the bottom of the window above.
If you want to format the text for your index, right click on the text in the Main Entry or the Subentry box. You'll then see this dropdown menu:
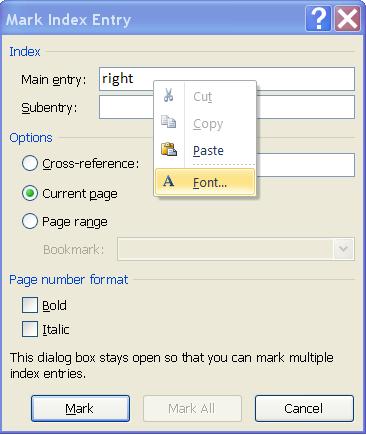
Select Font and click on it. You'll then see this window:
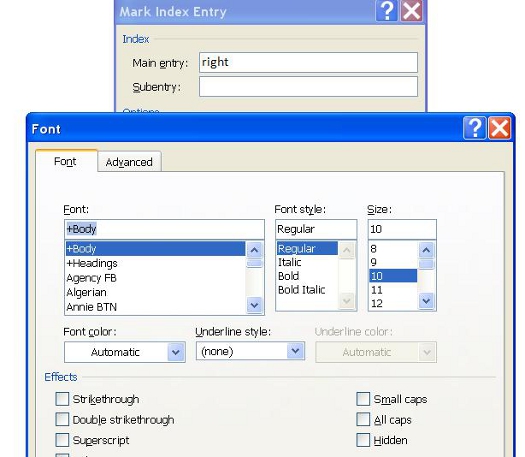
You can now change your font type, style, size, etc. Click OK when you're finished. When you're finished marking an entry, click Mark. If you want to mark all entries, click Mark All.
Marking Text Over Multiple Pages
If you want to mark text that is rather lengthy, such as a few pages in length, here's how to do it.
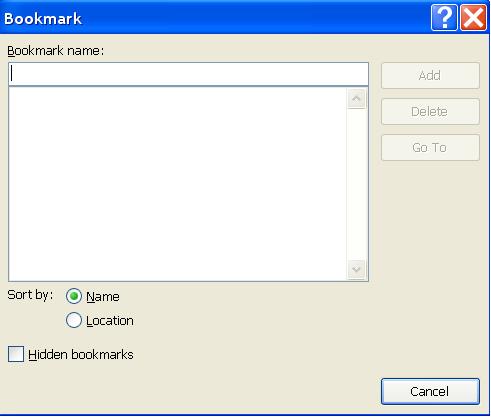
First, bookmark the text. You can bookmark text by selecting it, then clicking the Insert tab on the Ribbon. In the Links group, select Bookmark.
Now, type in a name for the bookmark, then click add.
Now, position the cursor after the bookmarked text, then go to the References tab and click on Mark Entry. Name it. When you select Page Range, you can choose your bookmark from the Bookmark dropdown list.
Adding The Index
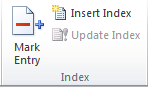
When you're finished marking entries, it's time to create the index. Simply move the cursor to where you want the index to appear. Then go to the Reference Tab and click on Insert Index which has been circled for you in red below.
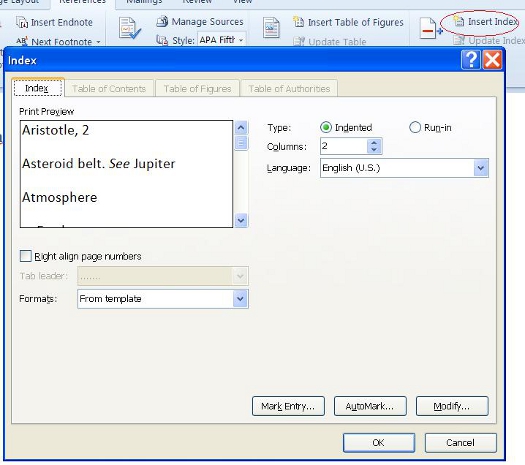
Now you can set the preferences and options for your index:
o Right align page numbers means that all your pages numbers will appear on the right and neatly - one under the other.
o Tab leader is only available if you right align page numbers. Tab leader means that a dotted line, dashed line, or straight line will appear from the entry to the page number.
o Formats means that you can choose a format to change the style of the index. A format is shown in the Print Preview window.
o Type. If you choose indented, each entry will appear on a new line. Run-in displays entries one after the other with multiple entries on the same line.
o Columns determines how many columns your index will have.
When you're finished, click OK. MS Word will collect all your marked entries for the index, sort them alphabetically, reference their page numbers, then display your index in your document. It's really easy, isn't it?
Formatting Marks
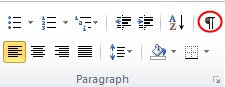
Formatting marks are marks that show the ends of paragraphs, spaces between words, indentions, etc. If you want to see the formatting marks in your document, go to the Home tab, then click on Show/Hide, as shown below. By default, formatting marks are hidden.
When you show formatting marks, your document now looks like this:

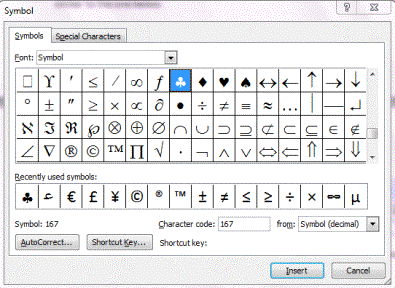
Inserting Special Characters Into Your Document
Special characters refer to punctuation, symbols, or other items that are not generally available on keyboards, such as copyright symbols, trademark symbols, etc.
To insert special characters or symbols:
1. Place your cursor where you want the symbol to appear.
2. Click the Insert tab.
3. Click the Symbols button in the 'Symbols' group.

4. Choose the symbol you want from the dropdown menu, or click on More Symbols.
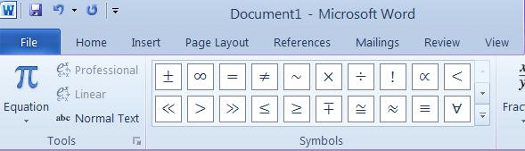
Inserting Equations
You can create and insert mathematical equations into your document using MS Word 2010.
To do this:
o Place your cursor where you want the equation.
o Select the Insert tab.
o Click the equation button (located beneath Symbol) and select your equation from the dropdown menu. If you don't see the equation you want, select Insert New Equation. This box will then appear in your document:

And you'll see this toolbar in the Ribbon:

A zoom of this toolbar is below with left and right sides:
 :
:
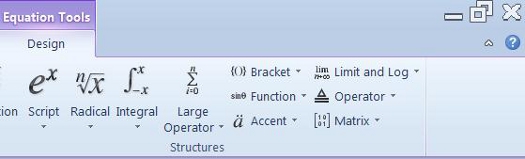
Select your equation.
To edit an equation, click Design in the Ribbon while the equations dialogue box is open. (See above picture.)
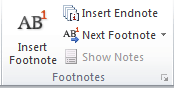
Adding Footnotes
If you need to add footnotes to your document, you can do this by going to the References tab in the Ribbon. Go to the 'Footnotes' group. From there, you can insert a footnote, view and edit footnotes, and also add endnotes.
Adding Bookmarks
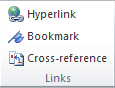
You can use bookmarks in 2010 the same way you would use a bookmark to mark a page of a book so you can pick up reading where you left off. You bookmark text by selecting it, then clicking the Insert tab on the Ribbon. In the Links group, select Bookmark.
Now, type in a name for the bookmark, then click add.
Cross-reference
You can also insert a cross reference to refer someone to another portion of a document. To start with, type the introductory text for the cross reference, such as "See Page 3."
To do this, go to the Insert tab, then click Cross-reference in the Links group.
Alternatively you can find Cross Reference in the Captions group under the References Tab. You'll see this box:

o In the Reference type box, select what you want to refer to. Maybe you want to refer to a heading.
o In the Insert Reference To box, click the information that you want inserted into your document.
o In the For Which box, select the item that you want to refer to. If you want users to be able to jump to that item, make sure the Insert as Hyperlink box is checked.