Templates are documents that were already designed. All you have to do is replace the sample text with your own. They help you save oodles of time and keep your documents consistent. In Word 2010, you can even create your own templates and then use them again and again.
The main difference between a template and an ordinary document is that when you open a template, you're really opening a copy. You can edit it, add or remove elements, and the original will remain unchanged.
Changing the Default Document Template
When you open a blank document in Word, what you are really doing is opening a blank document template-one in which the margins, font, and themes were already defined. In fact, in some word processors, such as OpenOffice.org, in order to change these values, you must create a new template and then set it as the default.
MS Word 2010 makes changing the default values much easier. In fact, it's as simple as selecting the value, and clicking a button.
Let's take a look at the Font section of the ribbon:
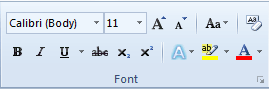
As you can see, the selected font is Calibri, size 11. This is the default font for Word 2010. But let's say you're a professional writer and your editor is a stickler for old-school standards. That means he wants a fixed width font like Courier New, size 12, with double spacing. Since you write almost exclusively for this stodgy old editor, you don't want to have to go in and change those values every time you open Word.
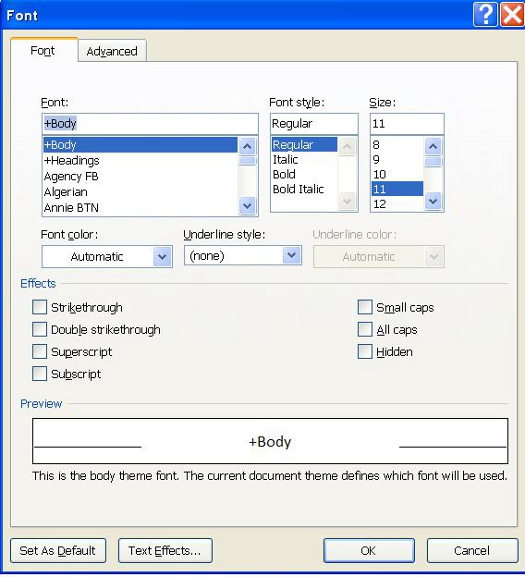
Choose the font and size you want, and then click the "Set As Default" button in the lower left hand corner of the window. Another dialogue box will open, asking you if you'd like to set this font size and style as the default for this document, or all documents based on the Normal template.
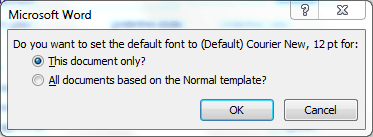
If you want to use 12pt Courier New every time you use the New document button, select "All documents based on the Normal template?" You can change these values anytime you like.
To change the default paragraph values, you click the box with the arrow in the lower right hand corner of the Paragraph section of the ribbon and the Margins in the Page Setup section, and so on.
Opening an Existing Template
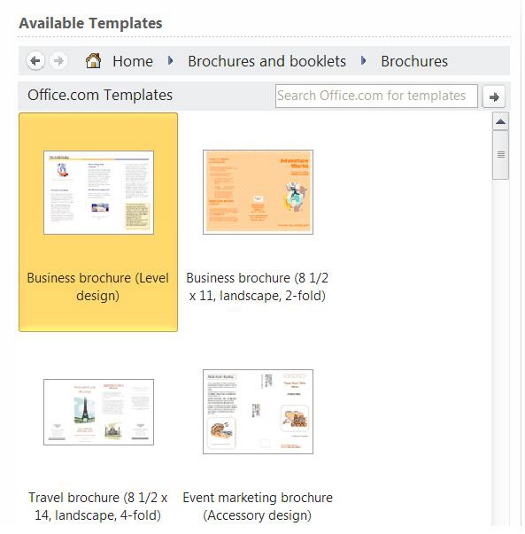
Microsoft provides a number of templates to make your work easier. They can help you create a budget, write professional letters, design flyers and forms and more. If you are connected to the internet, you can browse through and download literally thousands of existing templates from Office.com.without ever leaving Word 2010.
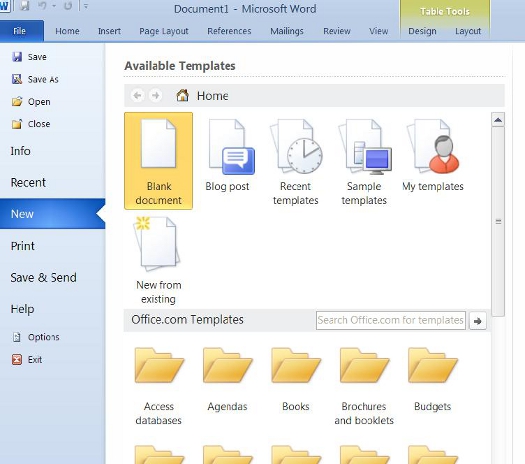
The top row of icons represents the templates that are installed on your computer. You can create a blog post, browse to recent templates, sample templates, or the templates that you've created. Use the forward and backward buttons  and the home button
  to navigate just like you would your web browser.
The categories under "Office.com Templates" are only available if you are connected to the internet and using a genuine copy of Word 2010.
Click the "Download" button to download it from Office.com. It will automatically open after it's done downloading.
Create and Save a New template
In addition to the thousands of templates available on Office.com, you can create and use your own. To do so, simply create the document and when you are finished, click FILE > SAVE AS. Then select "Word Template" or "Macro-Enabled Word Template" from the "Save as Type" drop down menu.
Using Quick Styles
A quick style allows you to easily apply formatting attributes to text. You can use them to change things like font size, type, and color, as well as paragraph attributes like centering or line-spacing. Think of them as mini-templates within every document.
For some reason, a lot of people are reluctant to use styles, choosing instead to highlight the text and then change its attributes with the tools in the font and paragraph tabs of the ribbon. Don't. Applying an actual style tells Word that the text is special. For instance, if you apply a style to chapter and section headings, you can ask Word to automatically build a table of contents based on the style information. If you simply changed the text attributes with the font and paragraph tools, Word will think it's just basic body text.
Another reason to use styles is that you can easily change the font of an entire section. For instance, let's say you originally applied a 14pt Calibri, bold-faced font to all of your chapter headings, but you'd rather have a 14pt Calibri Italics. In a long document, with dozens of chapter headings, changing each item manually could take hours. But if you used a style, all you'd have to do is edit the chapter heading style attributes and Word will automatically make all the changes for you.
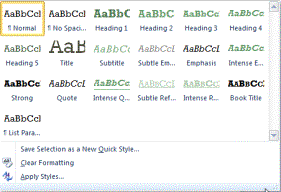
So let's take a look at the style section of the ribbon.

To save space, only the most commonly used attributes are visible in the ribbon. To see more, you can click the down-arrow on the right. To apply a style, simply select your text, then click the desired style.
Each group of styles is a called a "style set." You can select a different style set with the Change Styles button:  . You can also create your own.
Before we go on, take a minute or two to examine the different style sets. Try applying them to various sections of sample text so you can see for yourself how they work.
Managing, Modifying and Deleting Styles
There are two ways to change the attributes of a style. Perhaps the easiest is to make the changes directly to the text and then right click on it. Select STYLES > UPDATE STYLES TO MATCH SELECTION. When you do this, Word automatically updates any other text that style was applied to.
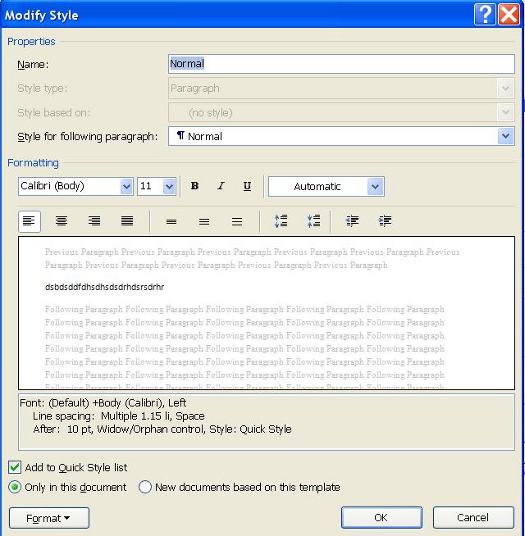
Change the attributes of the style to suit your preferences, then click OK.
Working With Themes
Like templates and quick styles, themes are another way to achieve consistency in your documents. Themes can include font styles, color palettes, and special effects. What they do is give you a group of fonts, colors, and special effects that work well together and even complement each other. This can be illustrated by taking a closer look at some of the themes.
The Theme group in the ribbon is found under the Page Layout tab. 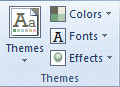
Click the Themes button and select Foundry from the list. It consists of this color pallet:

And this Quick Style set:
 .
.
Working With Graphics and Pictures
Unless you're writing a novel, you probably want to avoid big blocks of text. Readers find them intimidating or dull. Luckily, Word 2010 has a wealth of tools to add interesting graphics that will help your readers easily grasp all of the important information.
Inserting ClipArt and Pictures
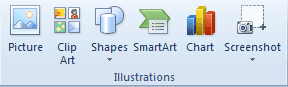
Anytime you want to insert anything into your document, chances are good you'll find the appropriate button under the Insert tab. The Picture and Clip Art tools are grouped in the Illustrations section of the ribbon.
To insert a picture, simply click the Picture button. A window will open, allowing you to navigate to the picture on your computer.
Inserting clip art into your document is slightly different. When you click the Clip Art button, a pane opens to the right of your document.
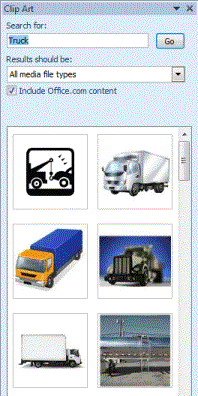
Enter a term in the "Search for" box to find appropriate art. With the "Results should be" dropdown menu, you can choose to exclude certain file types, such as photographs, illustrations, or audio and video files. If you wish to exclude a file type, make sure its box is not checked, otherwise select "All media file types." In this example, we've searched for "truck."
To insert clip art into your document, double-click on its thumbnail. It will appear wherever your cursor is positioned.
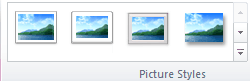
Formatting ClipArt and Pictures Using the Picture Tools and Format Ribbon
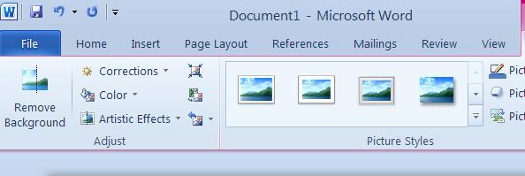
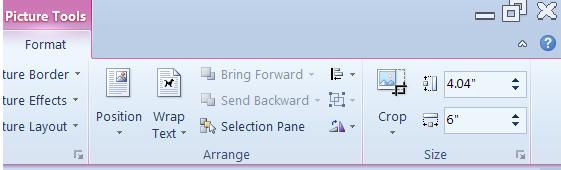
Whenever a picture is inserted or selected, the Picture Tools tab will automatically appear in the toolbar. It provides you with a few of the most commonly used features available in image editing software like Photoshop. You can change the contrast, add artistic effects, remove backgrounds, or crop them. To view the Picture Tools ribbon, select a picture by clicking on it. If the Picture Tools doesn't open automatically, click Picture Tools/Format tab.

Since the best way to learn the different options available in a piece of software is by using it, I encourage you to take a moment and explore the tools on this ribbon. Open up a new document, insert a picture, and just mess around. Don't worry, you won't ruin the original photo.
In the center of this ribbon, you'll see shadow formatting.
This allows you to add shadows and different looks to your pictures.
You can also add captions by right clicking on a photo and selecting Insert Caption from the dropdown menu.

Figure 1: Bear
Using the Screenshot Tool
A new feature in Word 2010 is the ability to take a screenshot and have it appear instantly in your documents. To use this feature, position the cursor in the place you want the screenshot to appear. Select the Insert tab and click the Screenshot button . Be aware though, that this feature is somewhat limited, allowing you to only take screenshots of active windows. Windows that have been minimized to the taskbar will not be available. When we click the Screenshot button, we'll see a list of the windows that are available, as in the following example.
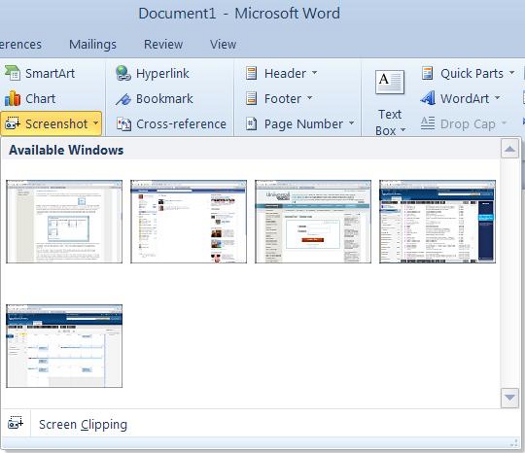
Selecting an available window will take a screenshot of the entire thing and insert it into your document. You can then use the Picture Tools to crop the screenshot or change other attributes.
If you do not want to take a screenshot of the entire window, you can select the Screen Clipping command at the bottom of the window.
Note: For those of you who do not have Word 2010 you can also create a screenshot by using Windows 7 Snipping Tool, which is located in Windows Accessories. This will work in all versions of Windows 7 except the Home edition and Starter edition. If you do not have Word 2010 and also do not have the Snipping Tool you can use the Print Screen method as described under the link below.
Using SmartArt and SmartArt Tools
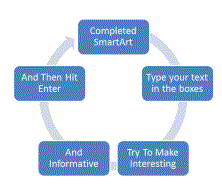
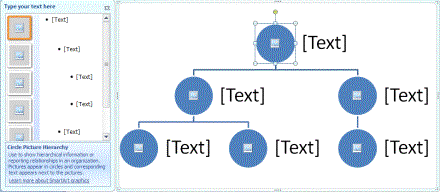
According to Microsoft, SmartArt is a quick and convenient way to create a visual representation of the information in your document. That's a mouthful, isn't it? What they really mean is it's a quick and convenient way to create flow charts. The following is an example of an available SmartArt template.
The SmartArt button is located on the Illustrations section of the Insert ribbon. 
Click it and a dialogue box opens. It gives you a different categories of SmartArt to choose froom. There are lists, processes, cycles, hierarchys, etc.
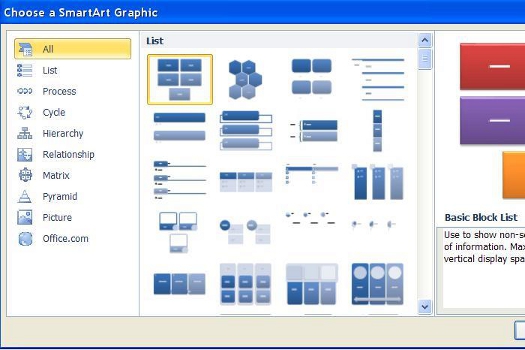
When you've found a SmartArt graphic that you like, select it and click OK.
When the graphic opens in your document, or when it is selected, a pane opens up beside it. You can either click the areas marked [Text] in the graphic or in the pane. In this example, you can also insert pictures. Click on any picture graphic, and then navigate to the picture on your computer.
Inserting Charts
To insert a chart, navigate to the Insert tab and click the Chart button  . The Insert Chart dialogue will open. It looks like this:
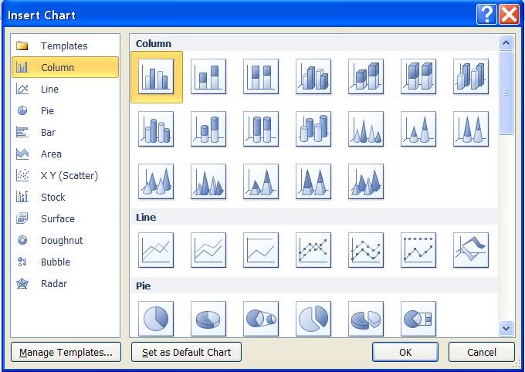
The chart types are arranged along the left side of the window. Alternatively, you can use the scroll bar on the right to browse the entire catalogue of charts. Select the type of chart you'd like to use, then click OK.
Whenever you insert a chart into Word 2010, or select one, the chart tools will become active. In some cases, the table tools will also become active. The chart tools allow you to change the design, layout, and format of the chart, while the table tools allow you to change the design and layout of the table.

If Microsoft Excel is installed on your computer, it will also open. You can input data into Excel which will then be conveyed by your chart.
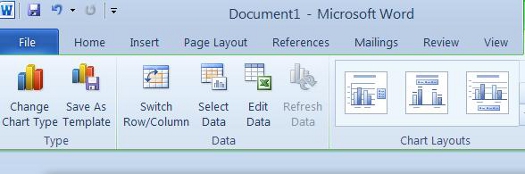
Using the Chart tools
Let's take a closer look at the chart tools available on the design tab.
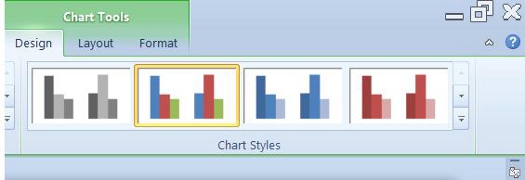
Just like in the text ribbon, you have a choice of Chart Quick Styles. You can apply them just like you would with text.
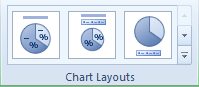
Use the chart layouts section of the ribbon, to change the orientation of the legend. In this example, we have the option of putting only the title of the chart at the top, the title at top, followed by the legend, or the legend below the chart. To access additional chart layouts, we could click the arrow button on the right.
Now look at the Type and Data Sections. The data section lets us select an existing data set, or edit one.
With these, we can change the chart type. Say, for example, that after we entered our data, we realized that maybe a pie chart wasn't the right way to convey it. We've decided instead to use a graph chart. To do so, we'd click the Change Chart Type button and select a new chart.
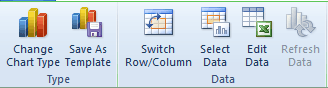
Let's say we really like our chart, though, and plan on using it again in the future, probably regularly. We could then use the Save As Template button to create a reusable template from it.
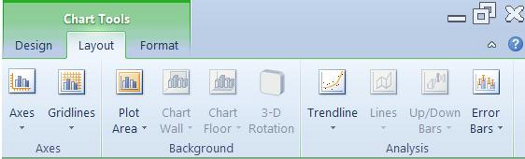
Now let's take a look at the Layout ribbon under Chart Tools.again. To see a close up of this ribbon look above.

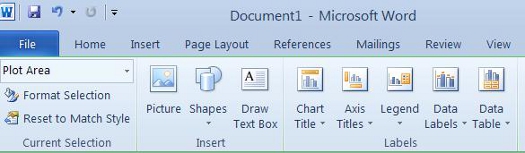
Use the Current Selection section to change the formatting of the- yeah, you guessed it- current selection. In this case, the title is currently selected. We could use the Format Selection button to create a fill, borders, or change the font size and style.
We could use the Insert section to add pictures and draw shapes and text boxes. Doing so is no different than adding pictures, shapes, and text boxes to any other part of a document, so there's no sense repeating it here.
As you can see, several of the icons in this ribbon are faded out. That is because they are dependent on the type of chart used. For instance, you can't really use a trend line (at the far right of the ribbon) on a pie chart.
Use the Labels section of the ribbon to change the labels, and how they look. You can change the legend, the data labels, chart title, etc.
The Format ribbon of the Chart Tools allows you to control the position of the chart within text, add fills, outlines, and other shape effects, and more. Most of these tools should be very familiar to you by now.