Header Styles
Most of Word's most commonly used styles are contained in the "Home" ribbon tab. If you ever question where a style could be, the first place to check is the "Home tab. Header styles are also found in the "Home" tab, and you can find a long list shown in the center of the Word user interface.

(Styles section in the Home tab)
The styles section shows a preview of the letters, colors and font sizes that you'll see if you change a section of text to the style. The default selection is the one on the far left named "Normal." The Normal paragraph format is what you'll use for most content. Even if you change a font style, color or size, you can still return to the default normal style by just clicking this selection.
Like other font changes, to change content to one of the styles in the list at the top of the document, highlight the text that you want to edit and then click the style.
There are a few styles that you'll use the most when you create long documents. For instance, you might want to create a table of contents, and Word has styles that you use that will then tell the table of contents generator which headers are titles to new chapters and which ones are sub-chapters.
Notice the "Title" style has the largest letters of all the styles. When you use this style, Word will consider any pages with these styles as main chapters. The "Header 1" style is considered the sub-chapter of the previous Title section. The next header sections are also considered sub-chapters.
If you used older versions of Word, you'll notice that there are many new styles in the list of options. They are all based on your current default font.
You can customize the styles shown in the menu by right-clicking one and select "Modify." This opens a new configuration window where you can change the options for a particular style.
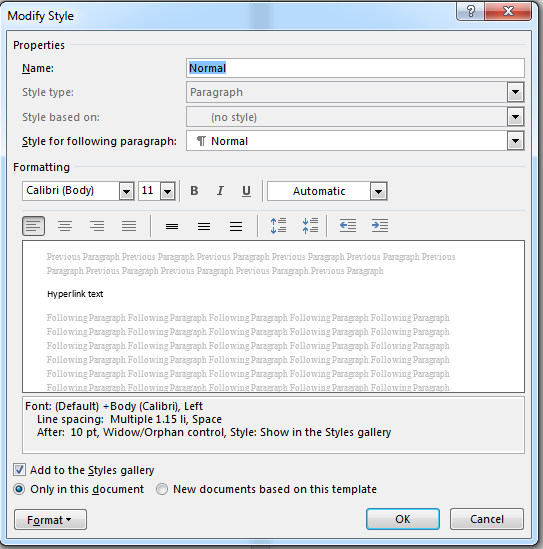
(Style configuration window)
In the image above, the "Normal" style was right clicked and the configuration window shows the current settings. Notice that you can choose a different font, font size, bold, italics or underline formatting.
At the bottom of the configuration window, you can see two options to set the new style to only the current document or to the new document template. When you save style changes to the new document template, it's applied to all documents that you create. When you choose "Blank document" for a new Word file, any changes to the template will persist until you change them back in the template. If you only apply changes to the current document, the styles are available to the current document but will need to be customized again on a new one.
Below the font settings is the paragraph formatting. We'll cover more paragraph formatting options in the next section, but styles can also be applied to the way a paragraph is configured in Word. You can set content to align to the left, right or center. By default, Word aligns any text to the left. For instance, though, you might want to create a title page with text centered.
Indents are also a part of style formatting. For instance, if you read a paperback book, the beginning of a paragraph has an indent. Word will set indents on styles if you set them in this configuration window.
Stylizing Paragraphs
Fonts aren't the only changes you can make in Word to customize the way your documents look. By default, Word sets a small space between lines of text, and it automatically creates a space between paragraphs when you use the "Enter" key. You can test this activity by opening a new Word document and type some text. Type enough text so that you have several lines that word wrap in the paragraph.
Press the "Enter" key and Word creates a new paragraph and simulate double spaces by automatically add extra spacing to indicate that a new paragraph is present.
 (Paragraph spacing in Word)
In the image above, notice that text in the first paragraph is spaced differently than the text that is shown in the second paragraph.
The "Paragraph" section in the "Home" ribbon tab can make changes to these settings. You can apply them in your styles, but instead of changing styles it's usually easier to just make quick changes from the "Paragraph" controls at the top of your document window.
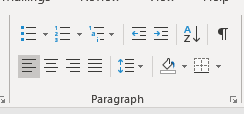
(Paragraph formatting tools)
The first section of the paragraph formatting controls is for lists. The first one creates a bulleted list, and the second creates a numbered list. With a numbered list, Word automatically detects the number of entries and increments accordingly. You can also trigger a numbered list by typing a number in a paragraph (with a period) and then press "Tab." Each time you press "Enter," an incremented number is added, and the new line item is aligned with the previous one.
The next set of icons mark the controls that indent text to the left or right. You can use the tab key to indent, but any subsequent lines of text will align to the page margins. Using the indent controls, you can force paragraphs to align to larger margins, and then you can return to normal margin spacing.
In the previous image, you can see that the "Left Align" control is highlighted. This tells you that the current paragraph setting is set to left align. If you recall from the style settings, you can also set paragraphs to center and right align. The fourth alignment option creates paragraphs that align on both the right and left. If you look at a newspaper, text aligns on both sides. This is the same alignment that will be set should you use this fourth option.
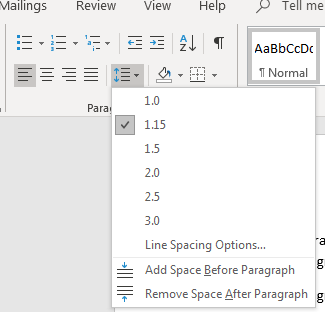
(Paragraph spacing options)
In the image above, paragraph spacing settings are displayed. The 1.15" option is selected in this example, which is the default for new documents. The 1.0" option is common when you want to manually double space content. When you need to transfer content from Word to an online web form, you might need to set this spacing to manually force a double space between paragraphs. When you need to transfer content between your Word document and an online forum, changing these settings can make it easier to copy and paste content with properly formatted paragraphs.
If you change your mind and don't want to add a space between paragraphs, you can select "Remove Space After Paragraph." This selection removes any added space between paragraphs. Should you want to return to paragraphs with automatic spacing, click the "Add Space before Paragraph" and the spacing will be placed prior to each paragraph.
You might recognize the icon with squares and a line at the bottom. This is similar to Excel's controls that add lines around cells. You can add an underline to your paragraphs as well as lines to the right, left and at the top of the text.
Formatting paragraphs and styles is useful when you want to create long documents with a table of contents, several different sub-headers, and ways to create indented content. As you work with Microsoft Word, you'll find that customizing these styles and setting them in your templates will make it faster and easier to create your documents.