
Presentations and slideshows are PowerPoint's primary benefit, but if you've never worked with slideshows before, understanding the way presentations work is much different than Word or Excel documents. Presentations work much differently than other Office software. These files use images, labels, sounds and effects to create a slideshow used in meetings and conferences.
Creating a New Presentation
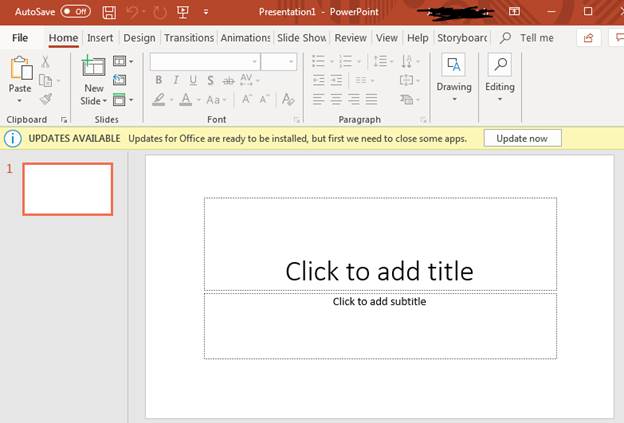
After you open PowerPoint, the opening window is shown where you can choose to create a new presentation or open an existing file already stored on your computer. New files can be created from a template, or you can create a new presentation with no pre-installed images or themes. For this course's examples, we'll use a blank presentation document, which is shown on the opening PowerPoint 2019 main window.

(Blank presentation file with no template theme)
Click the "Blank Presentation" icon and a new file opens in PowerPoint. When a new presentation is created, the first slide is created with two text boxes that can be used in your new file. You can also choose to delete these two text boxes and start with a completely blank slideshow.
(New slideshow presentation)
The left panel shows your slides. This panel lets you see a thumbnail of slides, so you can identify them and get a quick preview of the content contained in the slide. The center window is the current slide you're working on. When you click a slide in the left panel, it becomes the active slide. Since there is only one slide in a new file, it's the only slide active in the above window.
When the file opens, you have a presentation file created but it's not saved yet. Should you close the window now without saving, you lose any file changes.
Save a New File
As you create a presentation and make changes to your file, you must save it for new content to take effect permanently. The top section of a PowerPoint window has a few buttons to quickly save, undo and redo changes.

(Save, undo and redo change buttons)
In the image above, only the first icon is active because it's a new file with no changes to undo or redo. The "Save" icon is a diskette. All Office applications have this quickbar icons to make it easy to quickly save your files.
Make any changes to your file's content and the "Undo" and "Redo" buttons are enabled. The "Undo" button is the arrow icon that faces left (after the "Save" button), and the "Redo" button is the icon where the arrow circles around to the right (the last icon in the list). The "Undo" button deletes the last action that you made in the file. For instance, if you added text to your file, clicking the "Undo" button will remove this text. The "Redo" button is the opposite of the "Undo" button. Clicking the "Redo" button will re-apply your text.
Clicking the "Save" button will open a dialog window where you choose the file name and directory location where you want to save the file. After you save a file, it's now located on your drive, and you can re-open it should you close the file and want to return to it. It also saves your file should you have a power outage and have a computer failure where the machine reboots.
Create a New Slide
PowerPoint 2019 presentations represent the entire slideshow file. One slide is created when you open a new presentation, but you need to create new slides for each topic. The left panel displays a list of slides currently created, and you can create a new slide by right-clicking this panel and selecting "New Slide" from the context menu.
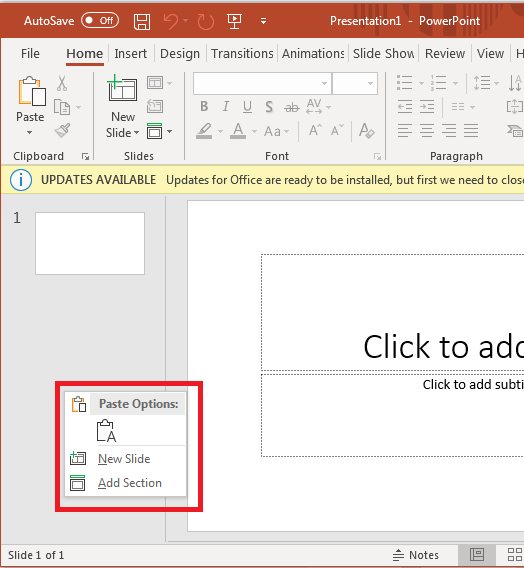
(Context menu to create a new slide or a new section)
After you select "New Slide," a new one displays in the panel. If you have any themes or templates configured, PowerPoint applies background colors and images when the new slide is created.
Large presentations could be dozens of slides, and as you present them to viewers you might want to separate topics into sections. The "Add Section" option will give you a way to link directly to sections of your presentation. By linking to sections, you can jump around your presentation without scrolling and searching for a specific slide.
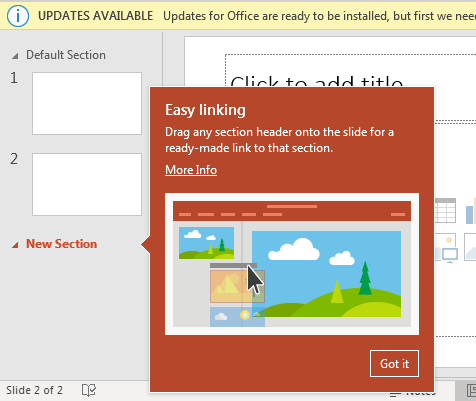
(New section created)
Like the popup tooltip says, you can drag and drop the section link into any slide. When you click the link, PowerPoint scrolls to the section. This tool is especially useful when you have dozens of slides and need to reference back to one during a presentation.
Quick Menu to Insert Objects
When you create a new slide, PowerPoint 2019 uses a template that has a title at the top of the slide where you can add text. The second control has a list of pre-made object insertion options.
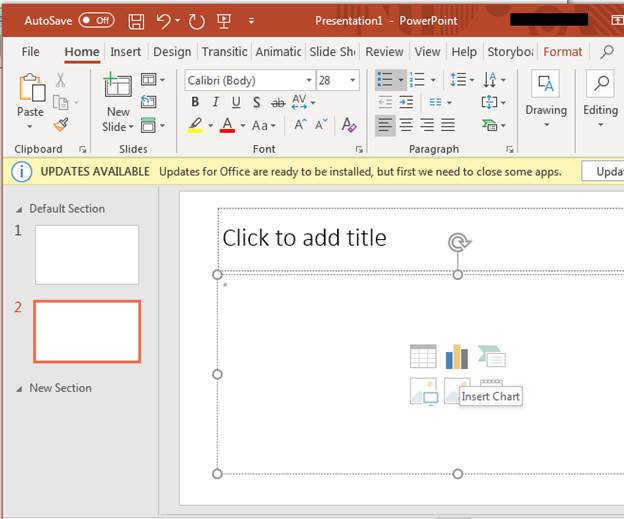
(Insert an object into a slide)
When you hover your mouse over each object, PowerPoint tells you what will be inserted if you click it. In the image above, the mouse is hovering over the second icon in the top row. The tooltip indicates that should you click this button, you will be able to insert a chart. With PowerPoint 2019 slides, you can insert Excel spreadsheets, charts, videos, sounds, graphs, images from your local computer or ones that you've found online.
For this example, click the "Online Image" object. A window opens where you can search for an image online. The search feature uses Microsoft Bing to search for image. Type an image name in the search text box or choose a category. Drill down to the image that you want to use, and then double-click it to add the image to the slide. The image is then inserted into the square that's shown as a dotted line outline.

(Image inserted into a slide)
The image is automatically sized to fit the slide, but you can use the circles surrounding the image to resize it. The arrow at the top of the image can be used to rotate it. If you use the circles in the corners, the image will resize equally both horizontally and vertically. This should be your preferred way to resize the image, because if you resize using the side circles, your image will be skewed, and its quality will be poorly displayed.
Also notice that you can see the image in the left panel. The left preview images can be used to find slides as you scroll through dozens of them. With only two slides, it's easy to identify the right slide with the apple, but when you have dozens of them, it can be time-consuming to search for the right slide using your mouse. Using the panel, you can scroll through dozens of slides much more quickly.
Each new slide that you create is visible in the left panel. Click it and you can see the content in the middle section of the PowerPoint interface. Remember that you can add objects stored on your computer or ones that you find online such as images. By inserting objects, you can create highly effective marketing or sales presentations that can be shown to hundreds of views at a time.


