

You know that you can set reminders on appointments when you create them in Outlook, but sometimes you need to go back to an appointment and set a new reminder. Other times you need to set reminders on existing emails or tasks. With Outlook, you can also set a default reminder for all future appointments. You might also want to dismiss current reminders and remove them from your appointments. Outlook has features that let you place reminders on several items, which can be useful when you have a busy schedule.
Configure Reminder Settings
Before you create a reminder, you should first check the settings in Outlook. Outlook has global settings for reminders where you can set a sound or give them priority over other windows on the desktop.
The options for Outlook are found in the "File" tab.
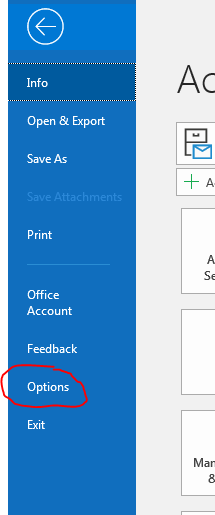
(The options configurations location for Outlook)
Click the "Options" link in the left panel and a window opens where you can set several configurations for Outlook. Click the "Advanced" option in the left panel where you'll find settings for reminders.
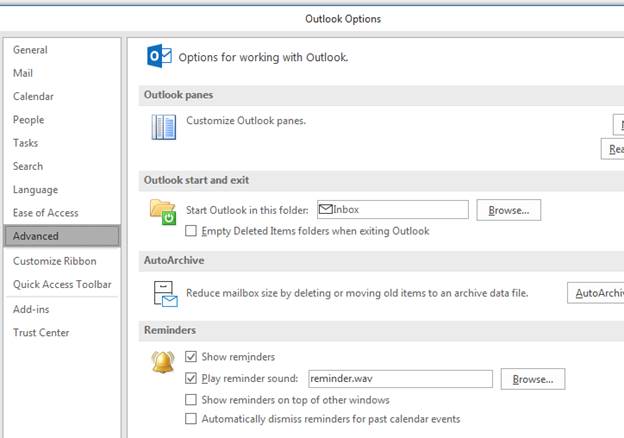
(Outlook advanced options window)
In the "Reminders" section, you see four options. The first one is checked by default. Unless you want to hide reminders, you should leave this option checked. The next option is the sound that accompanies the reminder popup. When you receive a reminder, a sound is made that you can hear if you have speakers installed on your computer. The default sound is "reminder.wav," which is copied to your storage when you install Outlook. You can change this to a different sound by clicking the "Browse" button and selecting a new sound file.
If you choose the option to "Show reminders on top of other windows," then any reminder that pops up on your computer will be shown in front of any other application that you're working with when the alert displays. This is a good option when you want to ensure that you do not miss any reminders.
If you have several past calendar events with reminders, you can use the "Automatically dismiss reminders for past calendar events" to mass delete them. This means that you can avoid several reminder popups when you load Outlook with old appointments in your calendar. For instance, if you have 50 appointment reminders in old events, you would get 50 popups that you would need to dismiss. This option saves you from dismissing these reminders one-by-one.
The next reminder option is found when you click the "Calendar" option in the left-side panel.
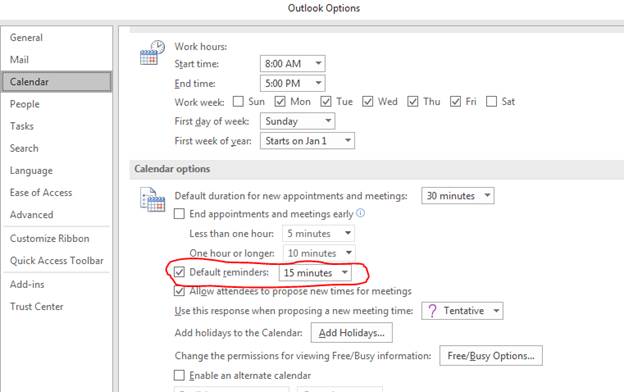
(Calendar reminder options)
In the "Calendar options" section, notice that there is a "Default reminders" option. This is the default timeframe for a reminder to display based on the start time of an appointment. Outlook sets this value to 15 minutes, but you can change this option to any number of minutes that you need to receive an alert on tasks, appointments or meetings. You can set this value to any value that you need for a reminder. Should you create a calendar event without changing the reminder timeframe, this is the default reminder that will display after you save the event.
After you finish setting Outlook configurations, even ones that are unrelated to reminders, click the "OK" button to save them and return to the Outlook window.
Updating a Calendar Event with a New Reminder
When you create a calendar event in Outlook, a reminder is created. The reminder is given a default value of 15 minutes unless you set an alternative amount of time. You can later change the calendar event reminder by changing its settings from your calendar.
You first need to switch your view to the calendar view in Outlook. This can be done by clicking the calendar button in the bottom-left section of your Outlook window. By default, Outlook displays your list of emails, but you can change it to view tasks, calendar events and your schedule. Click the calendar button to switch to a view of your appointments based on months and days.
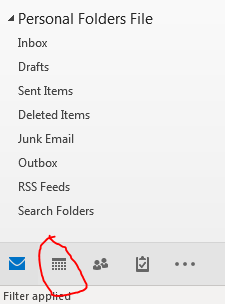
(Calendar button to view events and appointments)
After you change to a calendar view, you can now find the appointment that you want to change. Appointments are marked in orange, and if you set a subject then this subject text will show in your calendar. If not, the appointment start time displays in the calendar event.
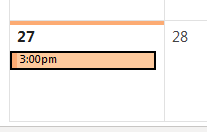
(Calendar event in Outlook on the 27th of the month)
Double-click the text for the event, and the appointment configuration window displays.
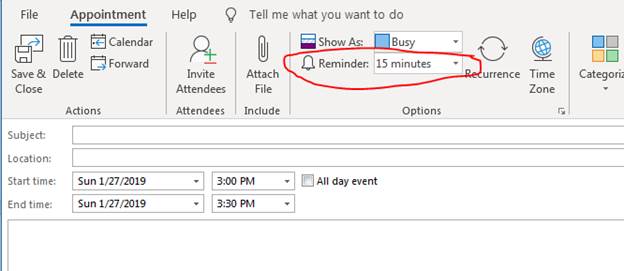
(Reminder settings for a calendar event)
Notice that the "Reminder" setting is a dropdown with a set number of minutes. Use this dropdown to change the number of minutes that you want to use for the reminder. This overrides the default minutes for only the currently open appointment. Once you're finished setting the reminder, click the "Save & Close" button and changes take effect immediately.
Adding a Reminder to an Email
Some email messages need a follow-up, but you can't follow up right away. It's difficult to review all previously read messages to find the ones that you need to send a follow up message. Most read messages are ignored, so to easily find the messages that you need to follow up with, you can set reminders on them. Outlook gives you a feature to set reminders on emails that you need to later reply to and follow up on in the future. These reminders help you from avoiding the disadvantage of forgetting a reply to an important email that could be for business or personal reasons.
Find an email that you feel is important and requires a follow-up. The "Home" tab in Outlook contains the ability to flag the email with a follow-up reminder. The follow-up flag options is found in the "Tag" category of the "Home" tab. With the email selected in the main Outlook window, click the "Follow Up" button.
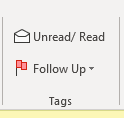
(Tags category that contains the "Follow Up" feature)
After you flag a message, an orange flag icon appears next to the selected email. You can leave this option, or you can select a custom reminder. If you choose a custom reminder, then you need to select when you would like it to display. Select your reminder and save it. This will remind you when you need to follow up with a reply to your email.
Deleting a Reminder
The final feature you need when working with reminders is the ability to delete them. You may no longer need a reminder, or you might want to delete a reminder for an appointment that is no longer important.
Go to your calendar and double-click an appointment. A window opens where you can update and change a current appointment. You can delete a reminder from this window. The feature to delete an appointment is found in the "Reminder" dropdown. If you set this value to "None," then it is effectively removed.
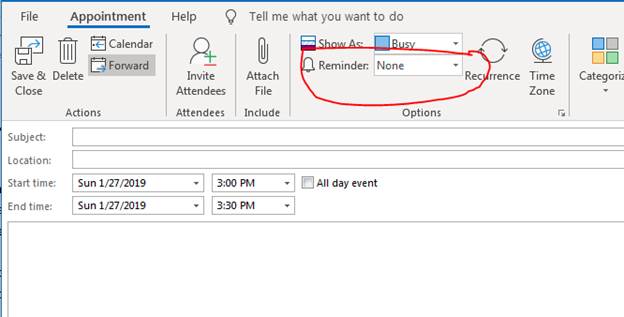
(Reminder setting for an appointment)
After you have set the reminder, click the "Save & Close" button to save the changes. When a reminder setting is set to "None," it tells Outlook that you no longer want to receive notification for an appointment, so no popup or alert will be shown for any task or appointment.


