An icon can be found in the Title Bar to the left of the file, folder, or location that's currently being displayed in the Finder window, as shown below.
In this article, we are going to learn about all the things you can do with those icons to help you get organized in OS X Yosemite.
About Folders in OS X Yosemite
Before we talk about icons, let's talk about the folder structure in OS X Yosemite. Folders are something you probably won't think about much as you use OS X Yosemite unless you want to create a new folder to store documents, files, other folders, etc. However, there are lots of folders in OS X Yosemite that are there when you install it. There's an Applications folder, a Library folder, a Users folder, and so on and so forth.
The Home folder is the folder where all your files, folders, programs, and everything on your Mac is stored. This is the folder that contains, in essence, your Mac. The name of your home folder is your name or whatever name you typed when you installed OS X. To open the home folder, go to the Menu Bar, then Go>Home.
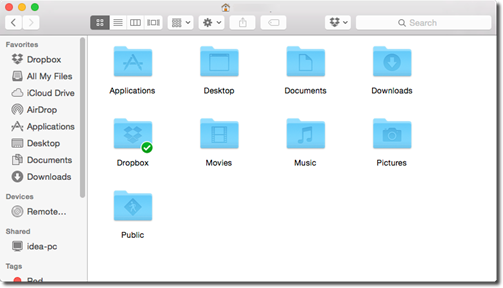
Everything that's on your Mac is stored in the folders displayed above.
To see how the folder system is structured and organized, switch to Column view in the Finder window.
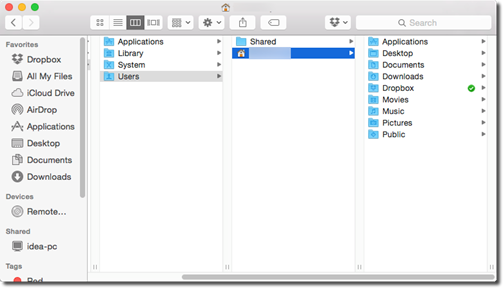
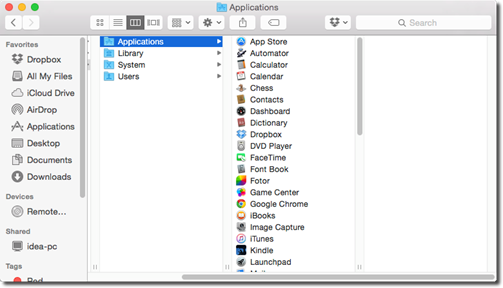
We have selected Users in the first column, then a user name in the second column. In the third column, we can see every folder under that user. These folders include applications (programs), files, libraries, and even other folders.
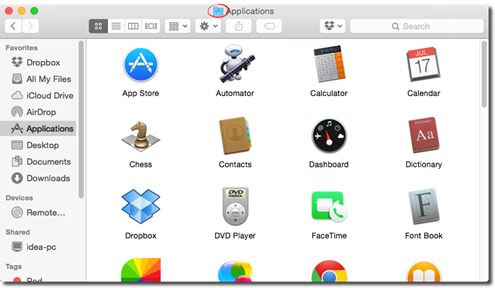
If we click on Applications in the first column, we can see all the applications.
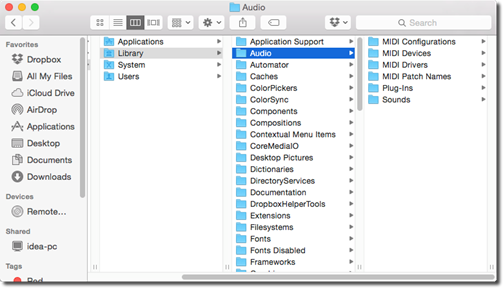
If we click on Library in the first column, we can see all the components for your program, as well as the OS X Yosemite operating system. This includes fonts, preferences, printer drivers, etc. In the snapshot below, we can see our audio devices, drivers, configurations, etc.
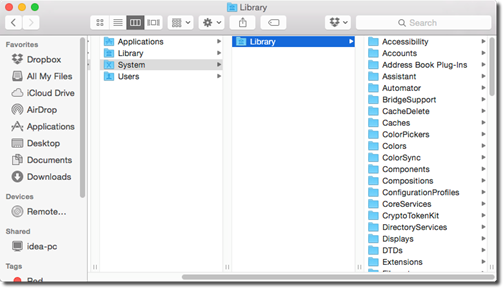
If we click on System in the first column, we can see folders that contain files that turn on the Mac, then control how it operates.
About Icons
Every program, file, folder, and disk on your computer is represented by an icon. Icons can be moved, copied, or double clicked to open. Each icon has a name. You can rename icons using up to 255 letters and spaces. Plus, you can use any symbol except the colon (:) when naming and renaming icons.
Selecting Icons
To select an icon, all you have to do is click on it. To select multiple icons, press Command+Click.
Moving or Copying Icons
To move or copy icons from one location to another on your Mac, you have two choices.
1. You can either drag icons from one location to the next by selecting the icon (or multiple icons), then dragging them using your mouse. If you want to copy the icon instead of move it, press the Option key as you release the icon that you have dragged. This will produce a copy with the original file/folder name and the word "copy" added to the end.
2. You can also use Copy and Paste to move or copy icons. To do this, select the icon (or multiple icons), then go to the Menu Bar and select Edit>Copy. Go to the location where you want to place them, then go to the Menu Bar again and select Edit>Paste. You can also use Command+V to paste. If you want to move the icons to a new location instead of copying them, press Option+Command+V to paste.
Renaming Icons
To rename an icon, click on its name, then press Return on your keyboard. A rectangle will appear around the name, as shown below.
Begin typing in the new name. Click outside of the rectangle when you are finished.
NOTE: You can give more than one icon the same name as long as they aren't in the same folder.
In OS X Yosemite, you can also rename multiple icons at once. You can number them, delete a phrase from their name, or correct the spelling.
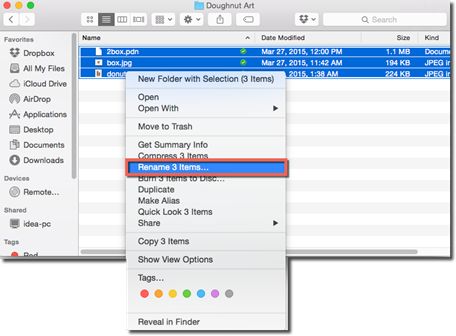
To do this, select the files or folders you want to edit by pressing Command+Click to select the files or folders.
Right click to bring up the shortcut menu, and select Rename 3 Items � or however many items you selected.
You will now see this dialogue box:
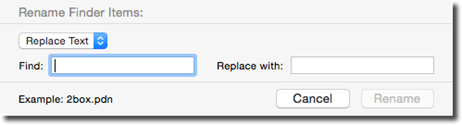
You can choose to:
Replace Text. This is find and replace for your file and folder names. Fill in the Find box with the current file or folder name, then enter the new file or folder name in the Replace box. Click the Rename button when you're finished.
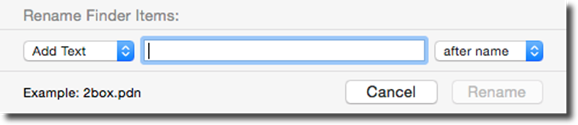
Add Text. Add Text will add text to the file or folders original names. Enter the text you want to add, then specify where you want to add it onto the file or folder name. In the snapshot below, it will add it "after name" or at the end of the file or folder name.
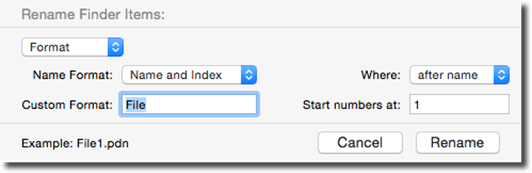
Format. When you choose format, you will change the name on all selected files or folders, and you will give them all the same name. The only way you will have to differentiate between the files and folders will be the number or date that appears either before or after the name. For example, if you choose the base name "Universal," your files and folders might be renamed "Universal 1," "Universal 2," etc.
Creating an Alias
An alias is a duplicate icon that represents an original icon in another location on your Mac. However, an alias is not an actual file or folder. Instead, it's a link to the the original icon and its file or folder.
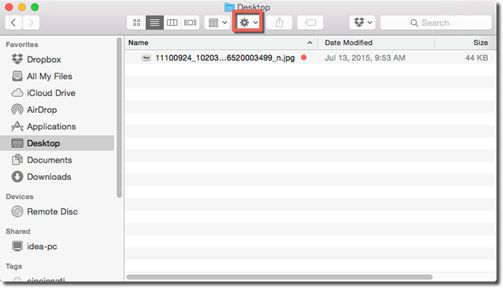
For example, let's say you have an image file called Pizza, as pictured below.
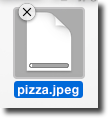
This image file is located on our desktop.
We also want to be able to find this file in our Documents folder, as well as our Dropbox folder. However, we don't want to copy the entire file to these locations. If we copy the entire file, that will take up additional storage space. The pizza.jpeg file is 16kb, so if we moved it to to other locations, that means the one image file would take up 48kb of space on our Mac.
Instead, we're going to create an alias that will be a link to the file without taking up additional space.
To create an alias, select, then right click on the file and choose Make Alias, or go to File>Make Alias.
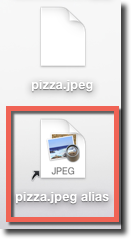
You can then move the alias to any folder you want. When you double-click on the alias, the original file is opened.
Working with Finder Tags
By using finder tags, you can apply keywords or color code your icons. You can apply more than one finder tag to an icon, meaning you can add more than one keyword. In addition, you can choose from seven different colors when you color code your icons.
Finder tags are useful when you're searching for a file. You can use Spotlight to find all the icons that have a particular tag. You can also sort the list view in a Finder window by finder tags. If you color code your icons, you can track progress on your files as you work on them. Perhaps a first drag would be coded red, and a final draft would be coded green.
To add a finder tag to a file and color code it, select the file, then right click. Choose a colored dot.
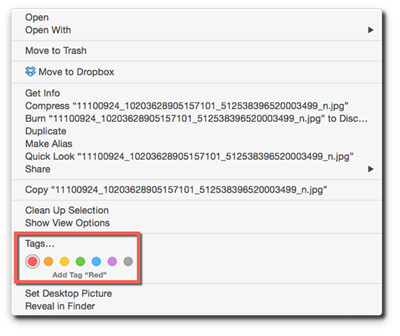
We are going to choose red.
If we go to the Sidebar in a Finder window, we can scroll down to tags, and click on Red.

We can then see all files that we coded with the red finder tag.
To add a tag, you can also select the file, then go to File>Tags in the Menu Bar.
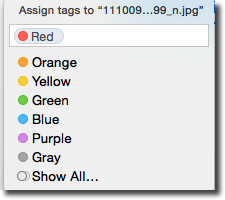
In the box, you can type in a keyword tag.
As you can see below, we typed in "Cincinnati."
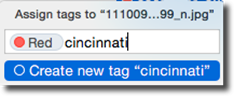
Hit Return on your keyboard.
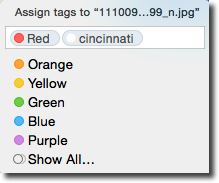
You can now type in additional keywords if you would like.
You can go to the Sidebar in a Finder window, and click on a keyword just as you clicked on a color tag.

All the files for that tag will be displayed.
Trash
The Trash is where all deleted files and folders go once you delete them. The Trash can icon is located on the far right side of the Dock, as pictured below.

You can delete any icon (file or folder) by dragging it to the Trash. Drag it so that the tip of your mouse cursor touches the Trash. When it does, the Trash can icon will turn black. Release your mouse.
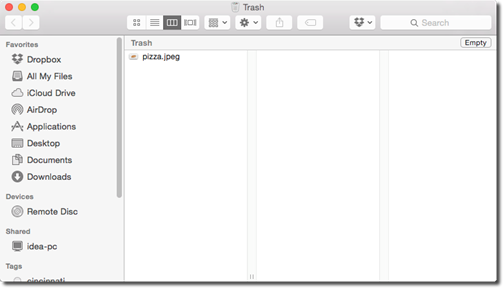
When there are deleted files and folders in the Trash, you will see crumpled up paper in it, as shown above.
If the Trash is empty, it will look like this:

To view the files and folders that are in the trash can, click the Trash can icon in the Dock.
A Finder window then opens and shows you the files and folders that are in the Trash.
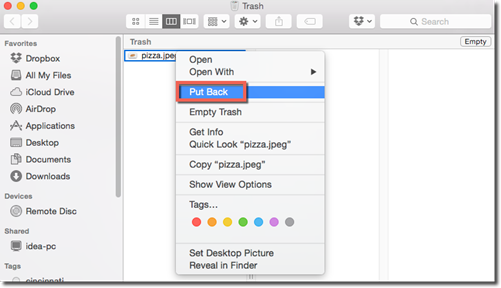
You can click the Empty button on the far right side of the Finder window to empty the trash. You can also select a file or folder in the Finder window, then right click and select Put Back to move a file or folder from the Trash back to its original location on your Mac.
To empty the Trash from your Mac, click and hold the Trash can icon in the Dock until you see the pop-up menu appear.
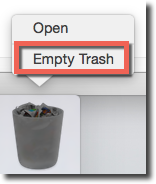
Choose Empty Trash.
You will then see this dialogue box:
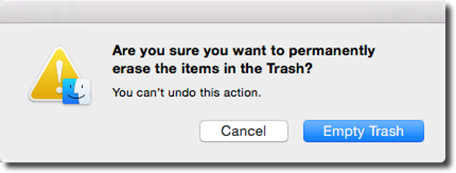
Click on the Empty Trash button.
The Get Info Feature
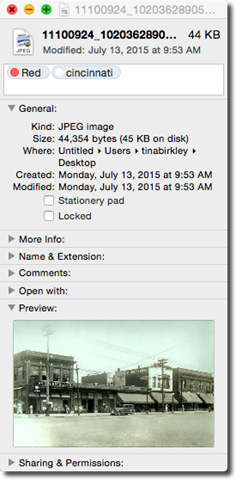
If you click on an icon, then go to File>Get Info, you can see all the information that your Mac has about that icon.
-
If it's a document or image icon, you will be able to see when it was created, as well as modified.
-
If it's an alias, you'll see the actual icon's location.
-
If it's a disk icon, you'll see the capacity, as well as how much space is currently being used.
-
If it's a program, you can turn on Prevent App Nap. This puts an app to sleep when its inactive and buried underneath other windows.
You may also see (depending on the type of icon):
-
The tags added to the icon.
-
Spotlight comments where you can type in comments.
-
General information, such as the name of the icon, size, creation date, modification date, etc.
-
More Info which includes dimensions and color format for graphics. It also includes when the icon was opened last.
-
Name & Extension which includes the name of the icon. You can edit the name here.
-
Open With is for documents and specifies which program will open the document.
-
Preview. A preview will be shown for PDF Files, text files, MS Office files, image files, movie files, and sounds.
-
Sharing & Permissions allows you to specify who is allowed to open or see the icon.
Exploring Action Menus and Shortcut Menus
Shortcut menus are the pop up menus you see when you right click on an icon, a window, the desktop, a link in a browser, text in a word processing program, etc.
Below is the pop up menu we see when we right click on the Desktop.
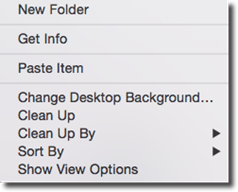
Shortcut menus contain commands that are relevant to wherever you right clicked. We right clicked on the Desktop, so we saw commands that were relevant to the Desktop.
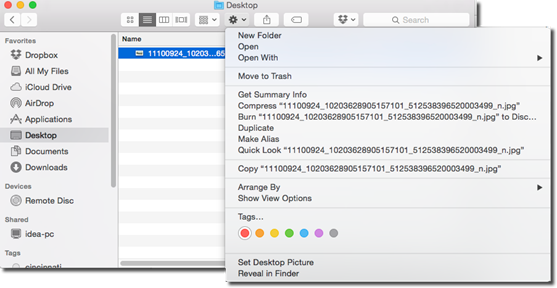
If we click on an image icon, we see the following shortcut menu:

If you open a Finder window, you will see a gear shift icon at the top of the window.
This is the Action menu.
Select an icon, then click the Action menu. You will see that it has the same type of commands found in shortcut menus.