The Messages app is Apple's instant messaging app that comes pre-installed on your Mac computer. Just as with any other instant messenger, such as Yahoo, you can send and receive messages with friends in the privacy of a chat window. However, with the Apple Messages app, you can also do much more:
-
If you or your friend have an iPhone and you both have iCloud accounts, you can also have your conversations in the Messages app appear on your phone with iMessages. These messages can be longer than regular text messages. They can include songs, movies, and other large files.
-
You can also send text messages using the Messages app.
-
You don't have to just type using the Messages app. You can also talk, which means free long distance calls. Use the party line feature and add up to ten friends to the call. If you want to be able to see your friends as you talk to them, you can also use video conferencing. In addition, as you can also share your screen with your friends to show them what you're looking at or give demonstrations.
Setting up Messages
The first time you open Messages on your Mac, you might see a window prompting you to sign up for an iCloud account if you don't already have one. This is something you will want to take the time to do, because your iCloud account is something you will want to have � and not just for the Messages app.
However, if you do not want to create an iCloud account, Messages offers to let you sign into the app with another instant messaging service. You can choose from Google, Yahoo, and AOL. You can also choose Jabber by clicking on "Other Messages Account."
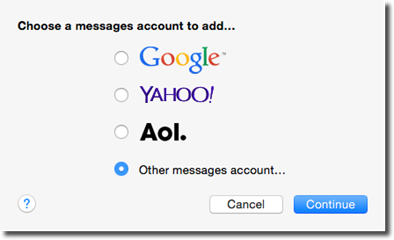
Choose Jabber from the pop up menu. Enter your screen name and password, then click Create.
If you want to login with Facebook and use Messages to chat with your Facebook friends, you can do that too. Simply follow the steps to login to Jabber, except enter your Facebook name instead of your Jabber name.
For your Facebook name, use a period instead of a space, then follow it with "@chat.facebook.com. If your name is Joe Smith, you would enter joe.smith@chat.facebook.com. The best way to do this is to visit your Facebook page in Safari and get the name of your Facebook page. For example: www.facebook.com/your.page. Your page name may not be your actual name.
Type in your Facebook password, then click Create.
Working with Messages Accounts
You can create as many accounts for the Messages app as you want. For example, you can have one for Google, Yahoo, Facebook, iMessages, et cetera.
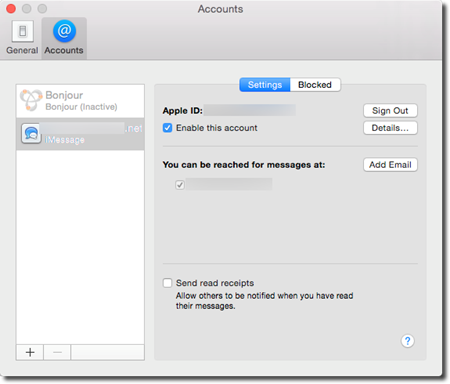
Your Messages accounts can be either activated or deactivated by going to Messages>Preferences>Accounts in the Menu bar.
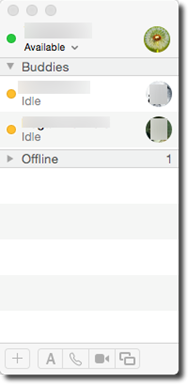
Your Buddy List
Your Buddy List is where all your chat friends' names are stored. You can chat with those in your Contacts list using Messages; however, you can also just add people to your Buddy List. If you add someone to your Buddy List, they will not be added to your Contacts.
If you use more than one chat service, such as Facebook and iMessages, names of your chat friends from both services will all appear in the same Buddy List.
To see your Buddy List, go to Window>Buddies in the Menu Bar.
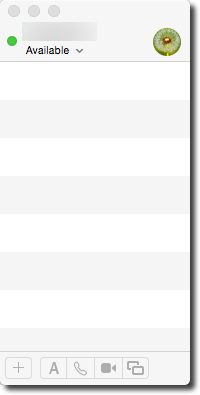
To add a buddy, click the plus sign (+) at the bottom left of the window.
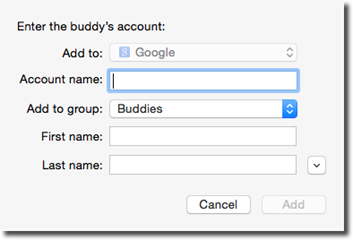
Select the messaging service you want to add them to in the Add To Field.

In the Account Name field, enter the friend's account name.
Next, you can add them to a Buddy Group, then enter the friend's first and last name.
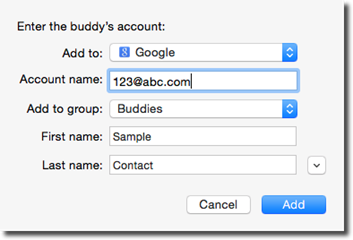
Click the Add button.
Your Chat Status
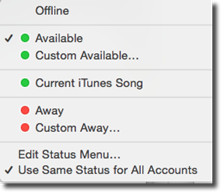
Let's look at the Buddy List window again.
As you can see, our status is "Available," which means we are available to chat.
Click on the downward arrow to the right to change the status.
About Bonjour
By now, you may have noticed the Bonjour account when you go to Messages>Preferences>Accounts.
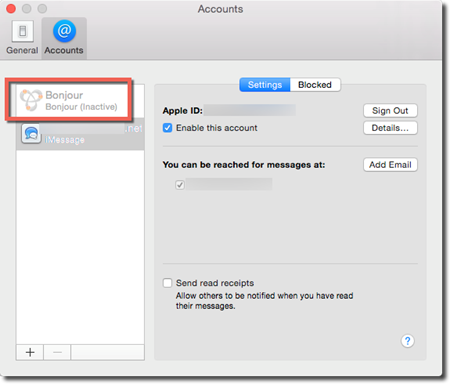
You cannot add buddies to Bonjour. Instead, anyone who is signed into your network and is running Messages will appear on this list.
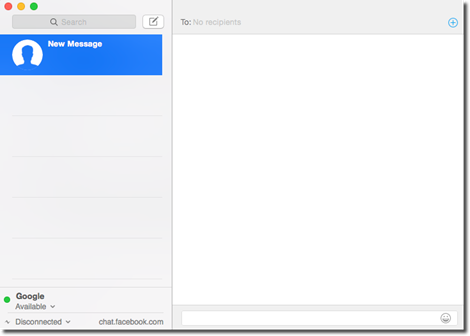
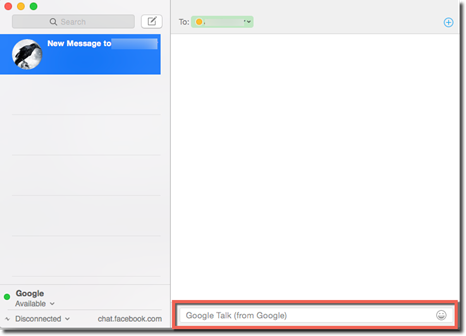
Text Chatting in the Messages App
Below is the Messages app window:
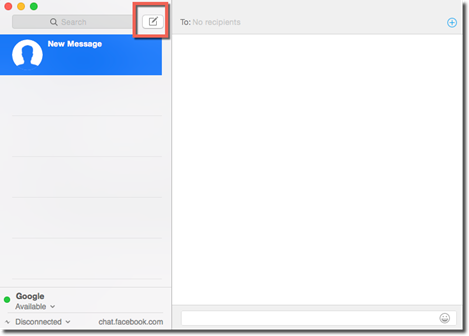
To chat with someone for the first time in Messages, start the enter the person's name in the "To:" field at the top of the window. If you do not see the "To:" field, click the Compose button, as highlighted below.
As you start to type the person's name, their information from your Buddy List starts to appear:
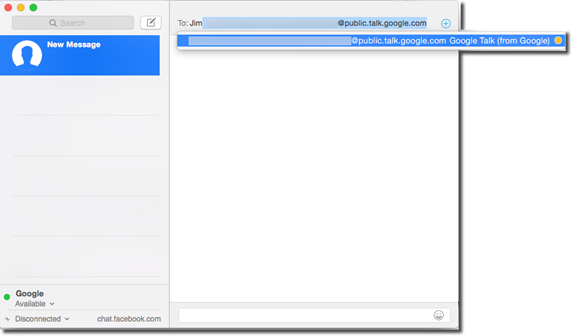
Those whose names appear with a blue bubble beside them have iCloud accounts, and you can exchange iMessages.
Now that we have selected the friend we want to chat with, their name appears in the Chat List on the left side of the window.
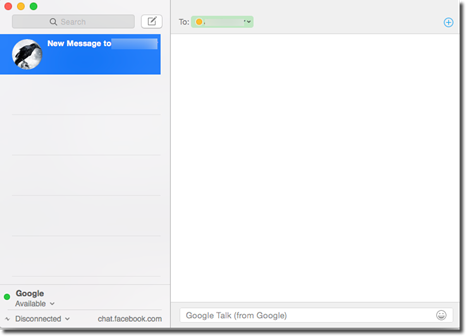
Whenever we chat with any of our buddies or contacts using Messages, their names will appear in the Chat List, and you can simply click on their name to start a text chat.
To send a message, type your message in the text field at the bottom of the window.
Hit Return on the keyboard to send the message.
To add more than one person to the chat, enter a friend's name in the "To:" field, hit Return or Space, then add another.
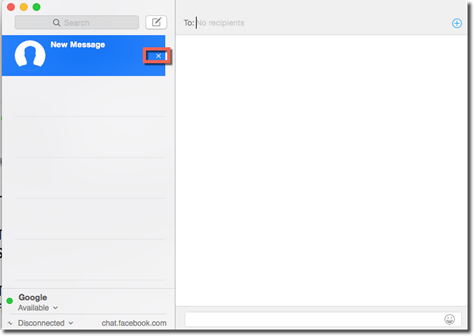
To delete a chat, select it in the Chat List, then click the X that appears to the right of the friend's name.
Audio Chats
To have an audio chat with someone that you're iMessaging, click Details, then click  .
.
If you're chatting with someone who doesn't have an iCloud account, click the  button at the bottom of the Buddy List window. If you're having trouble with your audio, go to the Menu Bar, then Messages>Preferences>Audio/Video.

Make sure a microphone is hooked up to your Mac, and you've selected the correct sound output.
Video Chats
To have a video chat, you will need a web cam. In addition, anyone you have a video chat with must be using the same service as you � and anyone else in the chat. For example, if you are using Yahoo, the friend you chat with must be using Yahoo.
If you're iMessaging with a friend, click Details, then the 
If you're chatting with someone who doesn't have an iCloud account, click the button at the bottom of the Buddy List window.
A window will then open that gives you a preview of what your buddy will see. Your buddies will appear in separate windows.
Sharing Screens
Screen sharing in the Messages app will let you see your buddy's screen, and it can also let them see yours. In addition to seeing your buddy's screen, however, you'll also be able to control it. You'll be able to open folders, create and edit documents, and copy files. It's perfect for collaboration or for technical assistance if you should ever need it.
In order to use screen sharing, you and your buddy must both be using the same chat service. For example, Google, Jabber, Bonjour, et cetera. You cannot share you screen using a Yahoo account.
To share screens with someone in an iMessage conversation, click Details, then click 
NOTE: If the icon is gray and not blue, that means the other person isn't using Yosemite.
When you click the icon, you will be given two choices:
1. Invite to Share My Screen
2. Ask to Share the Screen
Click the one you want to do. This will send an invitation to your buddy. Once your buddy clicks Accept, the screen sharing begins.
If you want to use screen sharing with someone who doesn't have an iCloud account (and you're both not using Yahoo), click the person's name in your buddy list.
Go to the Menu Bar and choose either Buddies>Share My Screen, or Buddies>Ask to Share
You can also click the  at the bottom of the Buddy List window.
Working with Printers, Fonts, and Colors
OS X is compatible with most printers on the market today. To print on your Mac, you should be able to prepare your printer, then connect it with your Mac to start printing almost immediately. You may need to install updates or drivers, but OS X Yosemite will locate and install those for you. This also guarantees that you are using the latest drivers and have the most current updates. There's no need to use the manufacturer's CD or do anything but plug the printer in once it's ready for use.
Installing USB Printers
To install a USB printer, plug the USB into your Mac. Again, do not worry about using the CD provided by the printer's manufacturer.
You will then see a pop up window:
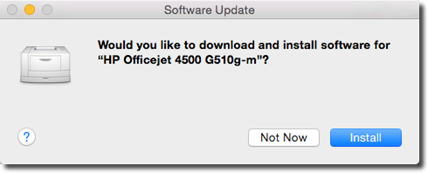
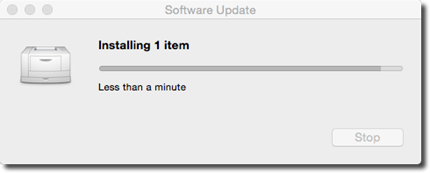
Click the Install button.
As you can see, your Mac will find installation software for you.
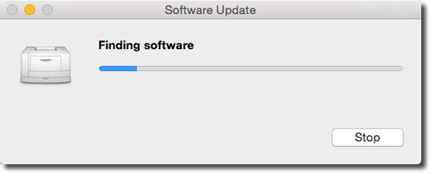
Once it locates the installation software, it will begin installing.
Once it's finished, you can then use the printer to print documents, images, web pages, etc. For most applications, you can go to the Menu Bar, then select File>Print.
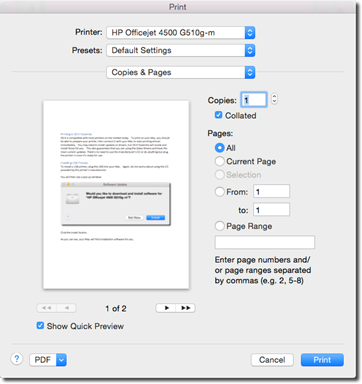
In the Printer field, make sure your printer is selected, as shown below.
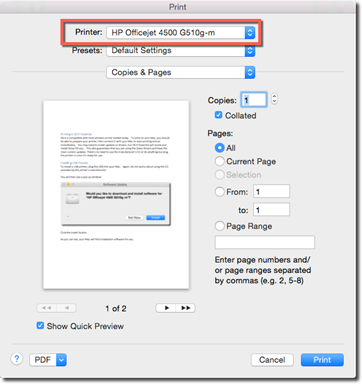
Select your options for printing, then click the Print button.
Adding a Network or Wi-Fi Printer
To add a Wi-Fi or network printer, prepare your printer a per the manufacturer's instructions, then connect the printer to either your network or Wi-Fi network.
Next, go to System Preferences> Printers & Scanners.
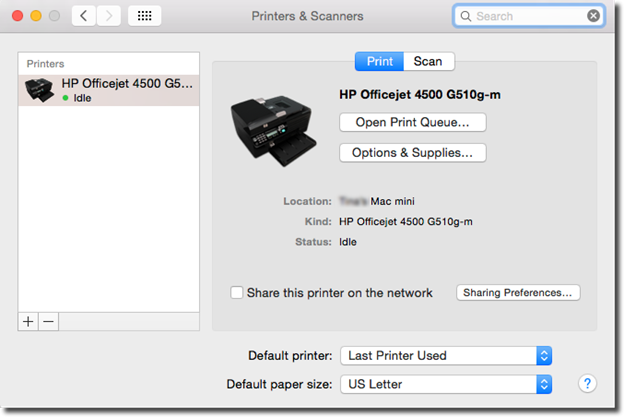
Locate your printer in the column on the left. If you do not see it, click the plus (+) sign.
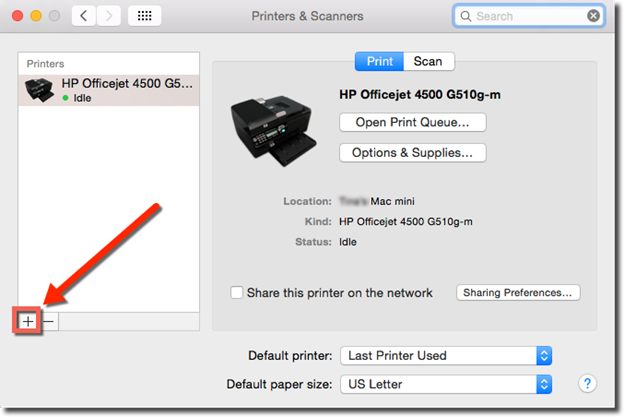
You will then see a list of printers on your network.
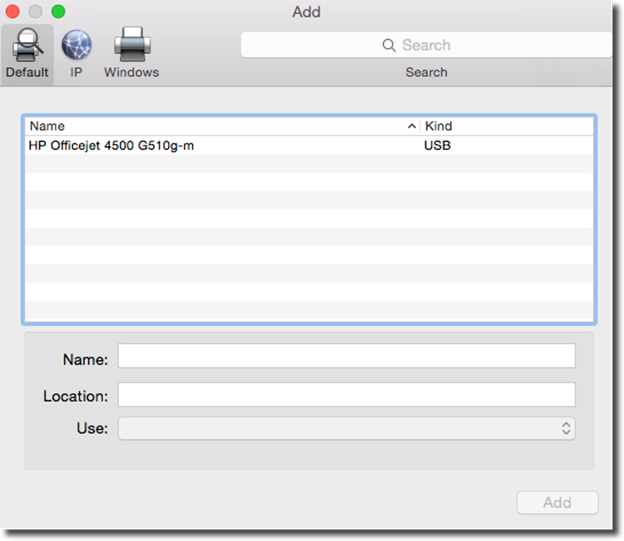
Select the printer, then click Add.
Installing a Bluetooth Printer
To install a Bluetooth printer, first make sure that Bluetooth is enabled on your Mac by going to System Preferences> Bluetooth.
Next, prepare your printer for use, then turn it on.
If any software updates are needed, you will find those in the App Store under the Updates tab.
Go to System Preferences> Printers & Scanners to make sure your printer is selected as the printer you want to use.
NOTE: If you're using an AirPrint printer, you won't have to install software to connect it to your Mac and begin using it.
Shared Printers
In addition to installing a printer on your Mac to print your documents, images, and other files, you can also share your printer for others to use to print.
To share your printer with others, go to System Preferences> Sharing. Check the Printer Sharing checkbox.
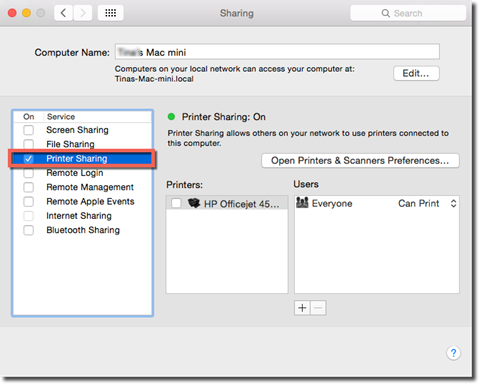
Next, select the printer that you want to share.
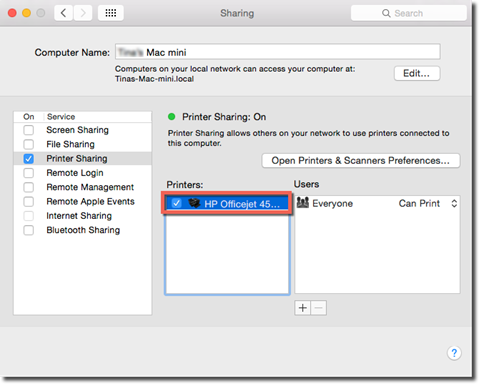
By default, your printer is shared with everyone on your network. To specify who you want to share the printer with, click the plus sign (+).
You can then select a user from Users & Groups, Network Users or Network Groups, or a person from your contacts.
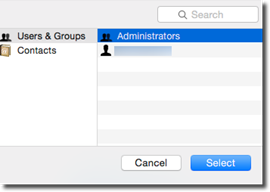
Click the Select button.
To remove a user, click the minus sign (-) in the Sharing window of System Preferences.
Faxing
Faxes can be sent directly from your Mac to a fax machine or another computer that can receive faxes.
To send a fax using your Mac, first open the document you want to fax, then go to the Menu Bar.
Go to File>Print.
In the PDF pop-up menu, select Fax PDF, then choose your fax machine from the Printer pop-up menu.
Next, type in the fax number in the To field.
If you have to dial a prefix to get an outside line, make sure you enter it in the Dialing Prefix field.
Select if you want to use a cover page. Make sure you enter a subject and message.
Click Fax when you're ready to send the fax.
NOTE: The instructions provided here may or may not match the fax settings for the app you're using. Use the app's instructions for sending a fax if you require assistance.
Fonts
Fonts are the typefaces that you see whenever you create a document, read an article, and so on. It's essentially the style of the text that appears � or the way the text looks. For example, we are typing using the Calibri font. Times New Roman, Arial, and Verdana are also commonly known fonts.
The fonts you have installed on your Mac are located in three different places.
1. Your personal font collection is located in Home folder> Library> Fonts. You can add custom fonts to this folder, because this folder contains your fonts that nobody else can access � even if they have an account on your Mac.
2. There is also a main font collection that can be accessed by going to Library> Fonts. Anyone who uses your Mac has access to these fonts. Only administrators can change the fonts in this folder, however.
3. System fonts are found in System> Library> Fonts. There are thirty-five fonts in this folder that your Mac needs. These are the fonts that appear in dialogue boxes, menus, icons, etc. You cannot move or change these fonts.
Font Book
Font Book is what you will use whenever you want to manage, buy, download, and install new fonts. Your Font Book is located in your applications folder, as shown below.
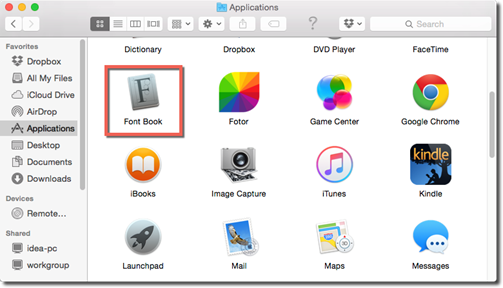
Double click on the icon to open Font Book.
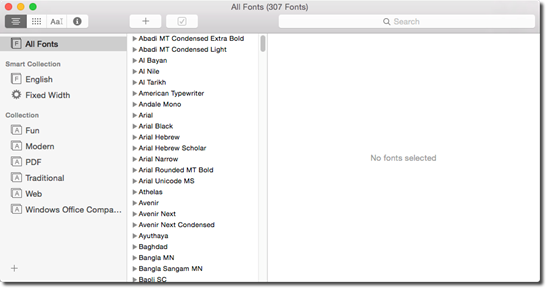
In Font Book, you can see all the fonts installed on your Mac. You can even see samples of each font.
To view a sample, click All Fonts in the Sidebar, then click a triangle beside a font name in the second column.
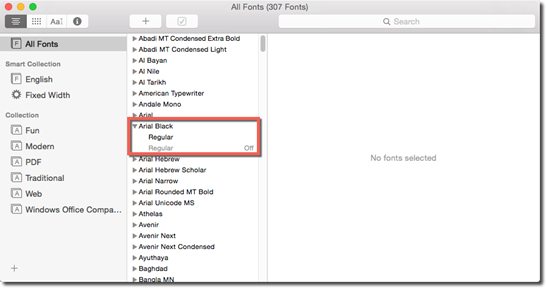
Let's click on Regular below Arial Black.
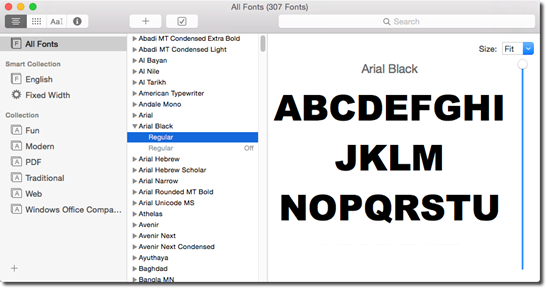
As you can see, a sample of the font appears to the right.
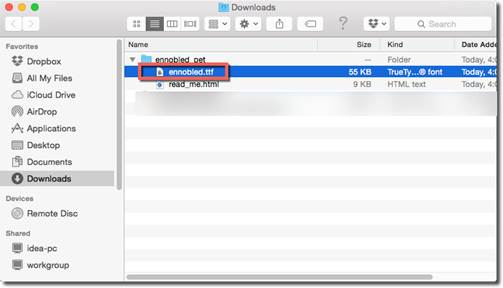
To install a font, double click on a font's icon in the Finder.
Font Book will open. You will also see a pop up window that will allow you to install the font.
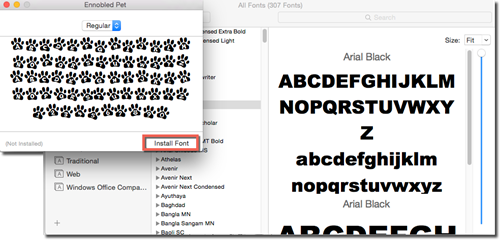
Click the Install Font button, as highlighted above.
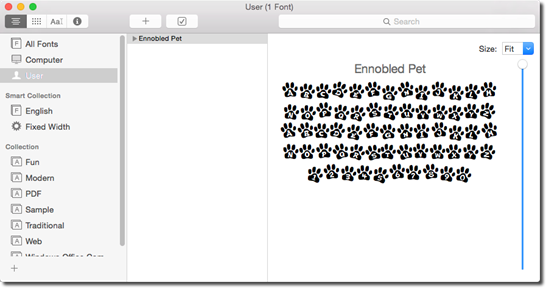
The font is then installed and appears in your Users folder in the Sidebar.
If you want to remove a font from Font Book, click on the font to select it, then press Delete. You will then be asked if you are sure you want to delete the font.
Instead of deleting a font, you can also simply disable it. To disable a font, right click on it, then choose Disable from the pop up menu.
In addition to adding and managing fonts in Font Book, you can also create a font collection. A font collection is a group of fonts that you use for a certain purpose, such as creating PDFs or creating web pages.
To create a collection, click the plus sign (+) at the bottom of the Sidebar in Font Book.
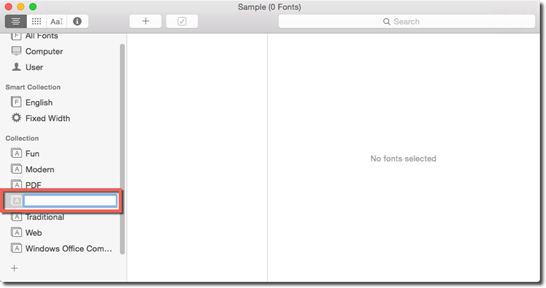
Type in a name for the font collection, then click one of the font storage locations listed toward the top of the Sidebar. We have All Fonts, Computer, and User. You can then drag fonts into the new collection folder.
The Fonts Panel
When you're using an application or program where you select fonts and type, you can use the Fonts Panel. You'll be able to access the Font panel in applications like TextEdit, Pages, Keynote, Numbers, iPhoto, Mail, etc.
The Font panel allows you select a type of font, as well as the typeface and size, as shown below.
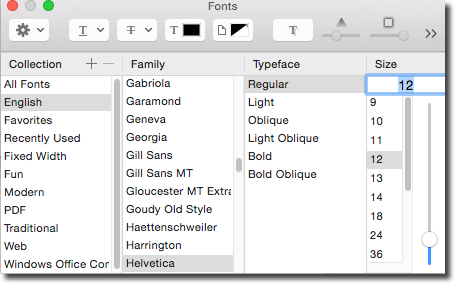
To access the Fonts panel, go to Format> Font> Show Fonts.
About ColorSync and Your Devices
If you've used computers and printers for any period of time, then you know that the colors you see on your screen can sometimes vary greatly from the colors you see on paper after printing. For example, a bright red on your computer screen can look more muted. A brown on your screen can come out as orange on paper. If you're a commercial printer or printing for business use, this can be frustrating to say the least.
ColorSync's job is to try to fix this problem for you. However, for ColorSync to be able to do that, each device that you connect to your Mac, such as scanners, monitors, printers, cameras, etc., must be calibrated with a ColorSync profile. This profile lets your Mac know how the device defines colors. You will find that profiles for a lot of devices are already built into your Mac. If your device didn't, use Google to find the ColorSync profile. Put it in the Profiles folder by going to Library>ColorSync>Profiles.
Below you can see the ColorSync profile for our monitor:
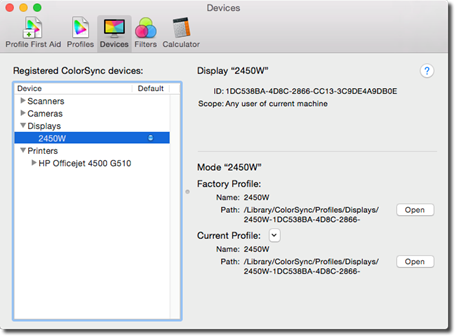
To reach the ColorSync Utility on your Mac, go to  >Go> Color Sync Utility, or go to Launchpad, then Other>Color Sync Utility. To view the profiles of your devices, click on the Devices tab at the top.
Screen Capture
To take a screenshot of your entire screen, press Shift+Command+3. The screenshot will appear on your Desktop.
If just want to capture a rectangular region of your screen, press Shift+Command+4
Your mouse cursor will change to crosshairs. The X and Y coordinates of your mouse will appear beside the crosshairs. Click and drag your mouse to select the rectangular area. Release the mouse when you are finished.