If the only thing you put on your pages was plain text, the pages may look plain and unappealing. For that reason, you can do such things as add lists, tables, and even insert pictures and clippings to dress it up, explain research, or any number of things.
Let's learn methods you can use to add more information to your notes and dress up your pages at the same time.
Adding a List
To create a bulleted list, first click on the place in the page where you want to add a bulleted list.
Go to the Home tab. In the Basic Text group, click Bullets  . Click the downward arrow beside the bullets to choose what type of bullet you want to use.
Now type the text that will appear by your first bullet.
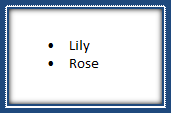
When you are finished, hit Enter twice to end the bulleted list.
To create a numbered list, begin like you did a bulleted list by clicking the place on the page where you want the numbered list to appear.
Next, click the Numbered List in the Basic Text group. ( ) Again, you can click the downward arrow to select how you want the numbers to appear.
Type the text on your page for the first numbered item. Hit Enter to type in another numbered item.

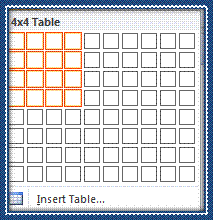
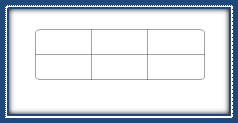
You can simply move your mouse pointer across the boxes to specify what size table you want. As you can see, right now we have a 4x4 table, which is 4 rows and 4 columns.
You can also click Insert table.
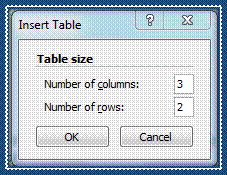
Here you can specify the number of columns and rows. Click OK when you are finished.
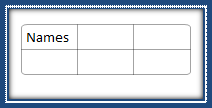
To move to the next column, click Tab on your keyboard.
Use the upward and downward arrows on your keyboard to go between rows.
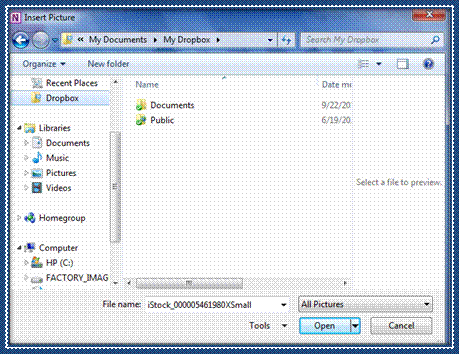
Insert a Picture
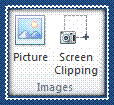
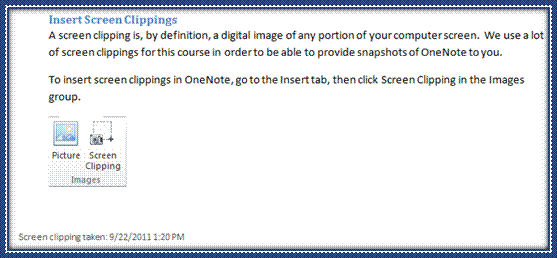
Insert Screen Clippings
To insert screen clippings in OneNote, click on the place in a page where you want to add a screen clipping.
Your screen will change to the open window directly beneath OneNote. It will look like there's a fog over this window. You will see a black plus sign.
Drag the black plus sign over the portion of the screen you want to clip. The black plus sign creates a square or rectangle shape.
Let go of the mouse button when you are finished, and your clipping will be automatically inserted into your page.
Researching
Go to the Review tab and click the Research button in the Spelling group.
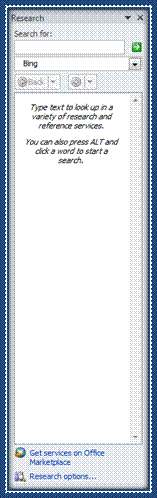
Type in what you want to research in the Search For box.
We are choosing the search engine Bing.
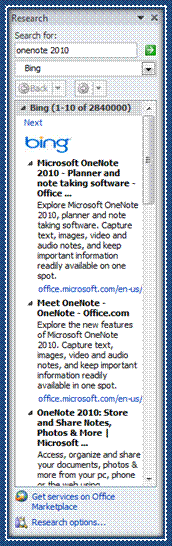
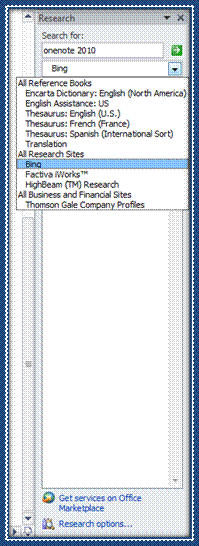
Now, if you click on any one of these results, a browser window will open where you can see the information on your screen.
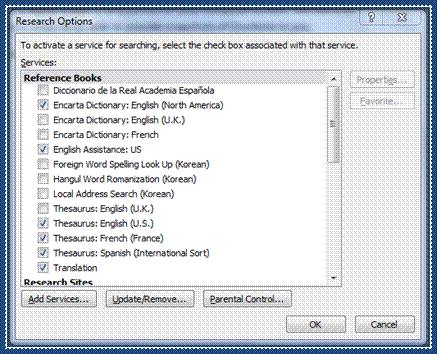
If you want to be able to use more reference books, you can put a checkmark by the books you want to use.
Page Setup Group
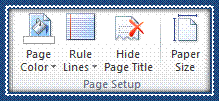
Here you can set page color, add ruler lines to your pages, hide the page title, and choose the paper size.
We're going to go over each of these things one by one and show you how to use each tool.
To add rule lines, click the downward arrow beside the Rule Lines button and select the type of lines you want to add to your page.

Click the Hide Page Title button if you don't want page titles to appear on your pages.
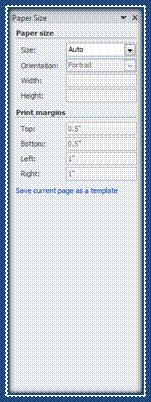
In this pane, you will specify everything that has to do with measurements of your page. This includes paper size and margins.
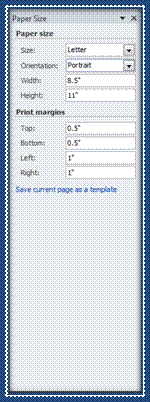
When you do that, as you can see in the snapshot above, all the information is inputted into the other fields for you. However, that doesn't mean you can't enter the information for yourself.
You can specify portrait or landscape, and you can also enter the height and width of the paper yourself � without using the sizes OneNote lists in the dropdown menu.
Also, you can specify margins.
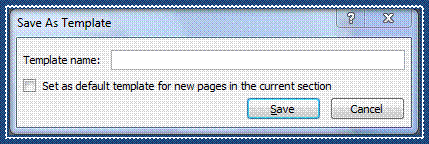
Enter a name for your template and click Save.
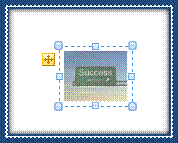
Move an Object Moving an object is the same way. Let's show you how to move a note container.
Simply hover your mouse around the borders of the note container. You will then see this:
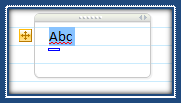
Holding your left mouse button down, you can now drag it to its new location.
Resize an Object
Undo and Redo Undo and Redo are located in the Quick Access Toolbar. This is Undo:
 . This is Redo:
 . If you don't see Redo on the toolbar, click the downward arrow and put a checkmark by it so it appears.
Undo undoes your last action. For example, if you change the color of your page and decide you don't like it, you can click Undo, and it will restore your page to the previous color.
Redo restore an action that you undo.
Check Spelling Spell Check is a feature that is common to all of the MS Office family of products. Spell Check enables you to go through your notebook and correct common typos and spelling mistakes using OneNote as your proofreader. When you run Spell Check, OneNote finds errors for you, suggests corrections, and then either makes or ignores the suggested changes for you. It can also correct grammatical errors. You can use Spell Check at any time. You do not have to be finished with a page to use it.
You can locate Spell Check by clicking the Review tab, then the Spelling button in the Spelling group.


Now, let's go back to the Spelling Pane.
We have two choices with the word listed under Current Spelling.
OneNote is telling us that it is spelled wrong. We can ignore OneNote and keep it spelled the way that we have it. Click the Ignore button to do this. This will make the red squiggly line go away on our page too. Or we can tell OneNote that the word is spelled correctly and add it to the dictionary. Click Add to Dictionary to do that.
Now, on the other hand, if we agree with OneNote that we've spelled it incorrectly, OneNote offers spelling suggestions. We can pick one of those suggestions simply by clicking on it, then clicking on the Change button.
In the Dictionary Language field, we can also change the language of the dictionary that's used to OneNote doesn't mark words misspelled that aren't. For example, the English (U.S.) dictionary would mark the word "recognise" as a spelling error, but the English (U.K.) dictionary wouldn't.
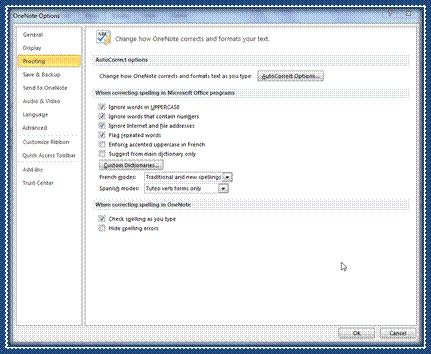
Here you can change how OneNote corrects your errors or if you want OneNote to ignore certain words when it performs Spell Check.
Calculator

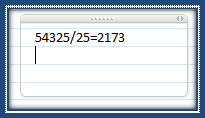
The answer appears.
Remember:
Use / for division
- Use * for multiplication
- Use + for addition
- Use � for subtraction
Handwritten Equations
In OneNote 2010, there is a handwriting tool that lets you easily write the equations that you want to insert into a page.
To access this tool, go to Draw, then Ink to Math in the Convert Group.
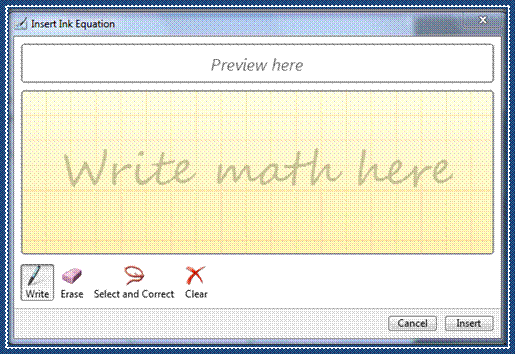
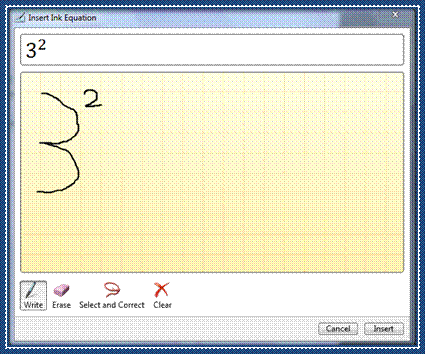

This comes in handy when you want to write an equation with a lot of symbols that you may not see on your keyboard. It can be quicker to use this tool than to search for them in Character Map (on your computer).
Equations In the last section, we learned how to draw equations on our pages. Now let's learn how to actually insert even complex equations using OneNote.
Go to the Insert tab and click Equation in the Symbols group.
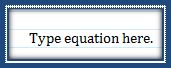
You can choose an equation from the dropdown menu or choose Insert New Equation. When you select Insert New Equation, this will appear on your page:
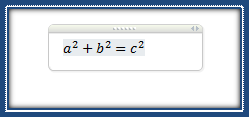
Once you select an equation or tell OneNote that you want to insert a new one, you'll see the Equation Tools ribbon appear, as shown below. As you can see, you can also ink and equation (like we did in the last section) from this ribbon.

If you're inserting your own equation, OneNote provides symbols, fractions, and everything you'll need to structure and write your equation.
Take some time to play with building and writing equations. It can be fun to do and helpful to be familiar with when you start creating notebooks. Click in the equation on the page to replace letters with numbers and create an actual equation that can be solved.
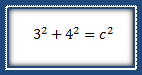
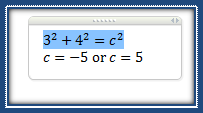
However, it should be noted that all OneNote 2010 does is write equations for you. It does not solve them.
If you want OneNote to also solve your equations, you can download a Mathematics Add-In for OneNote 2010 for free by going to:http://www.microsoft.com/download/en/details.aspx?displaylang=en&id=17786.
Follow the instructions.
We highly recommend it if you need to solve equations as well as write them.
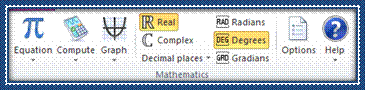
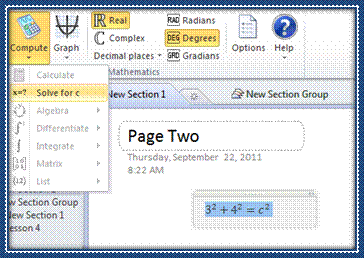
Since we've installed the add-in, let's show you how to solve equations for when you download it. Select the equation, then click Compute.
Outlook Tasks and Meetings with OneNote 2010 If you use Outlook 2010, you know that you can create, schedule, then manage tasks in that program. You can also send tasks to Outlook from OneNote to manage and schedule them better. Let's show you what we mean.
Go to a page in your notebook and select the text that you want to convert to a task in Outlook 2010.
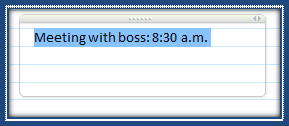
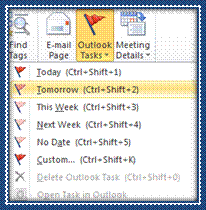
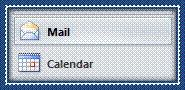
Now go to the Home tab and click Outlook Tasks in the Outlook group.
You can also send meeting details from Outlook 2010 to OneNote 2010. Let's show you how to do it.
Now, add an appointment or meeting to your calendar, then click Save & Close.
You can now close Outlook 2010.
Go back to OneNote and go to the page where you want to add meeting details. Click where you want the details to appear on the page.
Now go to the Home tab and click Meeting Details in the Outlook group. You will see a dropdown menu listing your meetings.
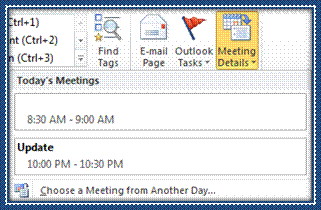
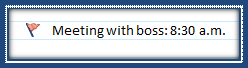
Select the meeting details that you want to include on your notebook page.
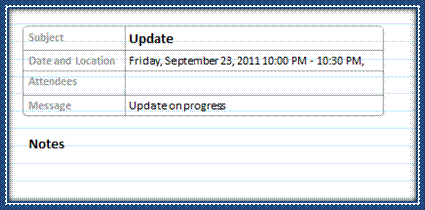
Those details now appear on your page, as shown below.
Insert Audio You can also insert audio into your notebook by placing it on a page. However, we don't mean that you can insert songs or pre-recorded audio clippings. Instead, you can record audio directly to OneNote 2010 to insert into your notebook. You will need a microphone to record audio.
To insert audio, go to the Insert tab, then click Record Audio in the Recording Group.
Click anywhere on the page to start recording.

When you are done recording, you will see the Recording tab change to a Playback tab.
You will also see an icon on your page that represents the recording. OneNote also documents on the page when the audio was recorded.
Inserting Video To record and insert video onto a notebook page, go to the Home tab then click Record Video. You will need a webcam and microphone to record video (that has audio with it).
Now click on the place in your page where you want to add the video.
Follow the same steps that you used with audio.
If you need to adjust the settings for either audio or video, go to Audio & Video Settings in the Options group of the Recording tab.
Attaching Files If you want to attach a file, such as a PDF or MS Word file to a page in your notebook, you can do this in just two easy steps.
Go to the Insert tab, then Attach File in the Files group. Click on it. When you do, you will see this dialogue box:
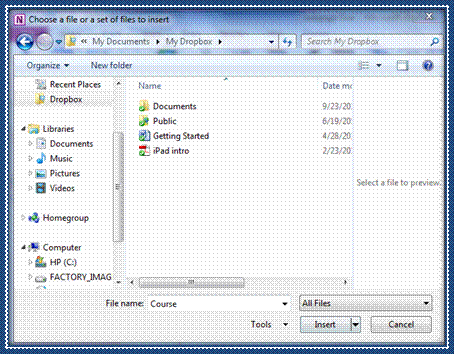
Select the file that you want to attach, then click Insert.
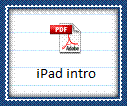
To open the file, double click on it. The file will open just as it would if you opened it directly from its icon on your desktop or other location on your computer.