Masks will become an integral part of working in After Effects for anyone who uses the program on a regular basis. Not only do masks allow you to decide what can be seen or not seen in a layer, they also allow you to add effects to just a part of a layer while leaving other parts intact.
This article will cover how to:
-
Create a mask using the shape tools
-
Create a mask using the Pen tool
-
Invert masks
-
Create curved masks
-
Feather the edges of masks
-
Replacing the content of a mask
-
Use a mask to create a reflection and a vignette
Creating Masks Using Shapes
Using our composition below as an example once again, we want to create a mask for the layer that is showing. The masked part of the layer will be the only part of the layer that shows.

To draw a mask, select the layer for which you want to add a mask. Note that if you do not select the layer, it will add a shape instead of a mask.
Next, select a shape tool from the Tools panel, such as the Rectangle tool, and drag to draw the shape on your composition, as shown below.
Drag the shape onto the composition.

Next, go to the Timeline panel. You can see your mask listed.
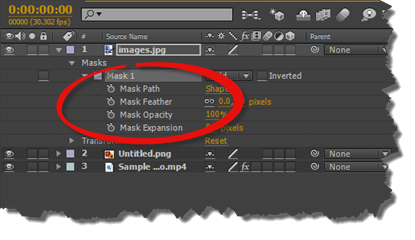
You can adjust the opacity or other properties until you achieve the results you want.
Creating Masks Using the Pen Tool
If you want to create custom mask shapes, you can also use the Pen tool in the Tools panel. It looks like this: 
To use the Pen tool, click on the first location in your composition. A point will appear. Next, click on the next location. Another point will appear, as well as a line connecting the two points. Do the same to add more points until you complete your mask.
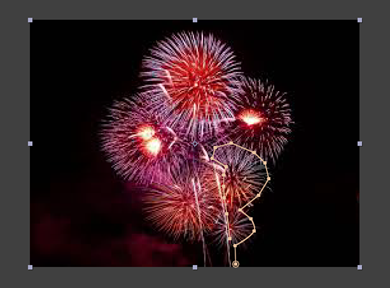
You can also draw a custom mask around shapes in your composition. Click your mouse to place a point, then click your mouse in the location where you want to place the next point.
The important thing to remember when drawing custom masks is that you must close your path. In other words, the last point that you place must be connected to the first point. After you place your last point, click on the first point to connect them and close the path.
NOTE: You can also use the Pen tool to draw shapes.
Inverting Masks
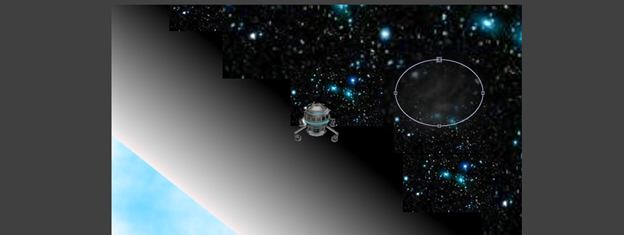
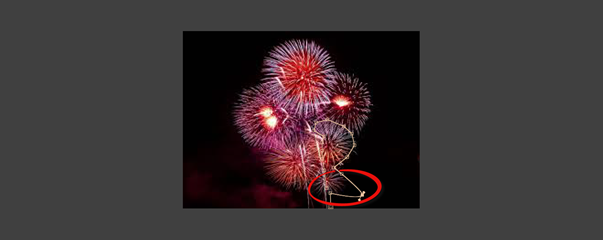
In the snapshot below, we have drawn a mask using the Pen tool.
We have "masked out" everything but what is inside the mask.
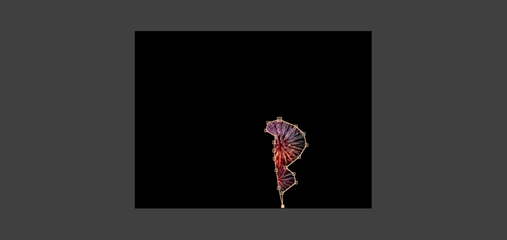
We want to reverse this so everything shows except what is inside the mask.
To do this, select the layer with the mask, then press M to see the Mask Path property in the Timeline panel.
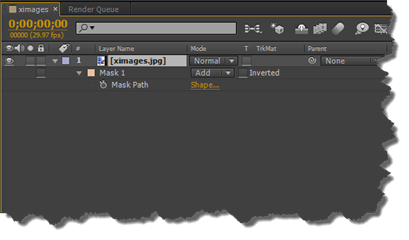
Select Inverted.
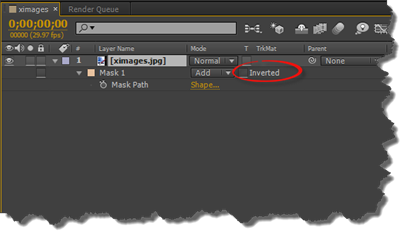
As you can see below, the area inside the mask is now hidden.
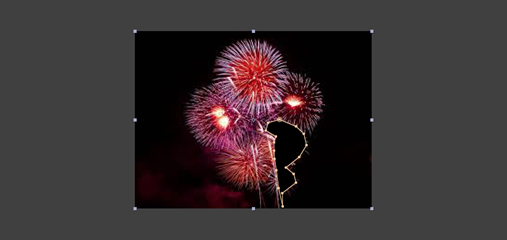
Press F2 to deselect the mask.
About Curved Masks
When you use the Pen tool to create masks, you create masks using straight lines. However, you can also create masks with curved lines using Bezier curves.
Using the mask you have already created, select that mask's layer, then the mask so you can see it in the Composition panel.
Next, click on the Convert Vortex tool. It is grouped with the Pen tool.
It looks like this: 
To access the tool, click on the little triangle located in the bottom right corner of the Pen tool until this menu appears:
When the menu appears, you can select your tool.
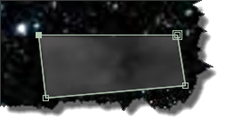
Next, click on any of the vertices in the mask in the Composition panel. A vertice is a corner, and they are marked by squares � or handles.
Click on the Selection tool in the Tools panel, then click in the Composition panel to deselect the mask.
Now, drag one of the handles. You can see how the shape of your mask changes.
Feathering Edges of Masks
When you feather the edges of a mask, you soften the edges.
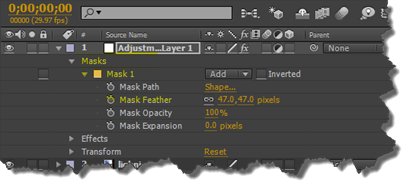
To feather the edges of a mask, select the layer that contains in the mask in the Timeline panel.
Press F on your keyboard to see the Mask Feather property.

Drag on the yellow values to adjust them.
Replacing What's Inside a Mask
There are several reasons to create masks. One of those reasons is to replace the contents of the mask that you created.
Import the footage that contains the content you want to place within the mask. Add it to the composition.
Make sure the replacement content layer is below the layer that contains the mask.
Move the anchor point of the replacement content until it is centered in the mask.
You can also adjust the properties for the replacement content's layer to control the size, shape, and rotation.
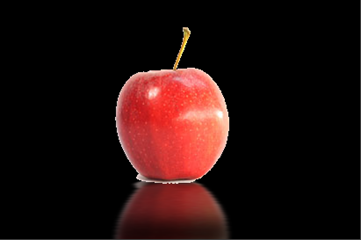
Creating a Reflection
You can create reflections of objects in your composition by following some easy steps, then creating a mask.
The first step in creating a reflection is selecting the layer that contains the object for which you want to create a reflection.
Press CTRL+D to create a duplicate layer.
Right click on the duplicate layer, select Rename from the context menu, then enter a new name.
We have named ours Reflection.
Next, with the new layer selected, right click, then go to Transform>Flip Vertical.
Drag reflection to where you want it.
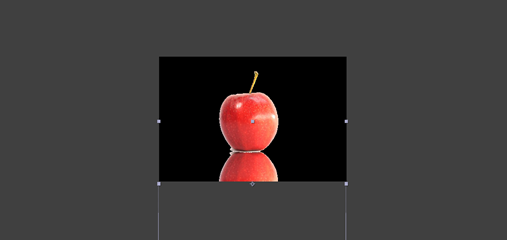
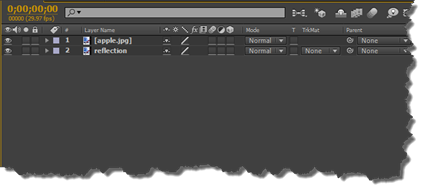
Create a mask on the lower half of the reflection using the Rectangle tool.
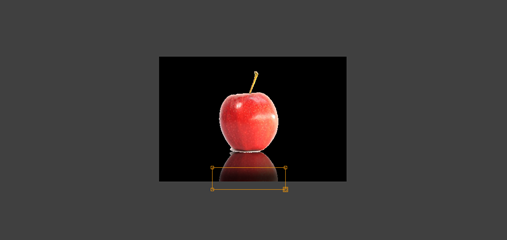
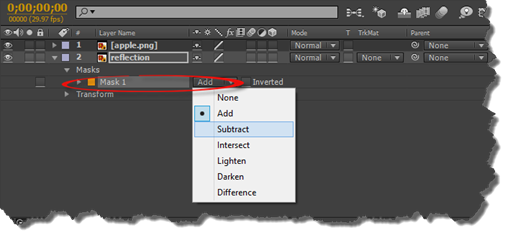
Click the triangle next to your reflection layer to see the mask.
Next, Mask 1 in the Timeline panel, change the mode to subtract.
Click the downward arrow beside Mask1 and adjust the Feather, Opacity, and Expansion Properties.
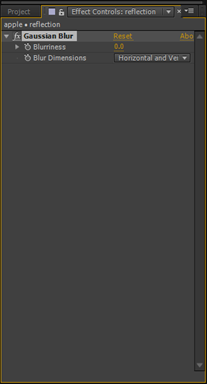
Next, go to Effect>Blur & Sharpen>Gaussian Blur.
In the Effects Control panel, increase blur dimensions. Change the blur dimensions to Horizontal.
The reflection is now added to our object:
Creating Vignettes
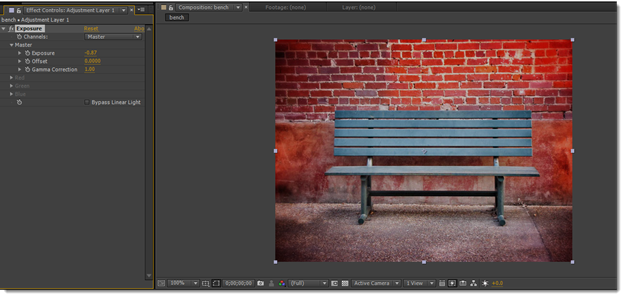
To add a vignette, go to Layer>New>Adjustment Layer to create an adjustment layer.
Select the adjustment layer in the Timeline panel, then go to Effect>Color Correction>Exposure.
Lower the value for Exposure in the Effects Control panel.
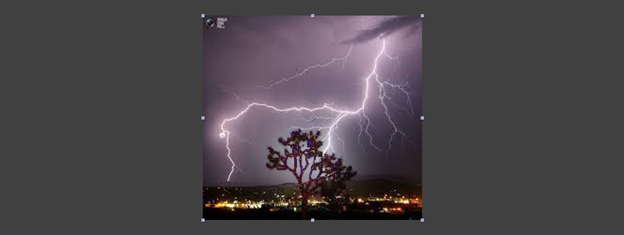
Next, draw a mask using the Ellipse tool, as shown below.
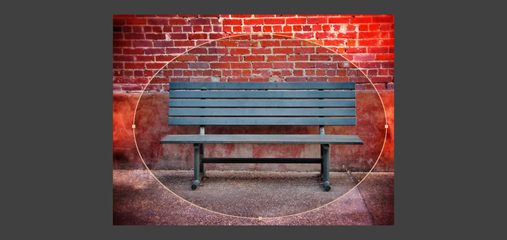
Go to the Timeline panel and your adjustment layer. Next to the Mask 1, put a checkmark beside Inverted.
Your composition now looks like this:
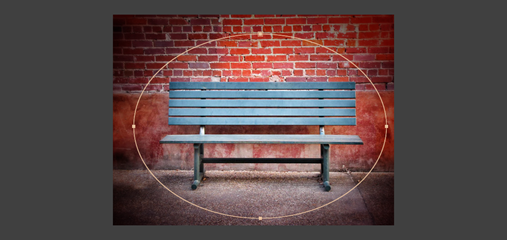
Finally, hit F on the keyboard to see the Feather properties.
Adjust the feather on the mask.
Removing Objects
Even though removing objects from a layer does not involve masks, we thought we would include it in this article because it is a useful tool in After Effects that you may use to cut an object out instead of a mask.
You can remove objects in a layer by using the Clone Stamp tool. The Clone Stamp tool is found in the Tools panel.
If you look at the snapshot below, we want to remove the flower from the image.
To remove the flower, start by double clicking the layer that contains the flower so it opens in the Layer panel.

Go to the Tools panel.
Click on the Clone Stamp tool. It looks like this: 
This tool will sample the pixels in the source layer, then copy them to a target layer. The target layer can be the same layer or a different layer.
Next, go to the Brushes panel and select a brush.
Go to the Paint panel. (Window>Paint).

In the Duration dropdown menu, choose Constant. This will mean the Clone Stamp effect is applied from this point forward in your movie.
Now go back to the Layer panel.
Alt+Click on the area that you want to clone. This will replace the building in our composition. Next, click on the object that you want to get rid of. Keep repeating this step until it is removed.
Animating Layers
Animation in After Effects becomes fun as you learn how to use the program. Adding animation is as simple as choosing and customizing a preset or adding keyframes, but animation can take a dull still image or video clip and turn it into something a Hollywood producer would be proud to claim.
In this article, we will learn how to:
-
Simulate light
-
Use the pick whip and work with expressions
-
Pre-compose layers
-
Create a track matte
-
Add even more animation using keyframes
Simulating Light
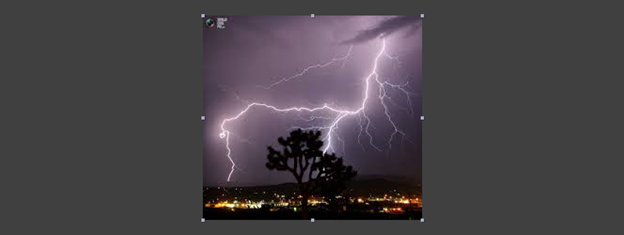
You can simulate light to brighten or darken rooms in your composition or to give a real look to quick flashes of light, such as lightning.
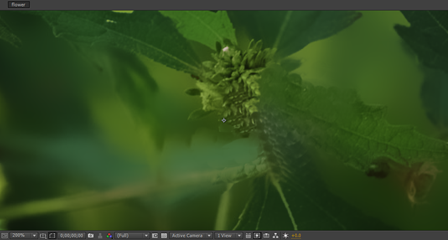
In the composition below, we are going to create a flash of light on the trees from the lightning.
To do this, first create an adjustment layer. You want to use an adjustment layer to create simulated light effects because all effects applied to an adjustment layer will also be applied to all layers beneath it. If you simply add an effect to a normal layer, the effect will only be applied to that layer.
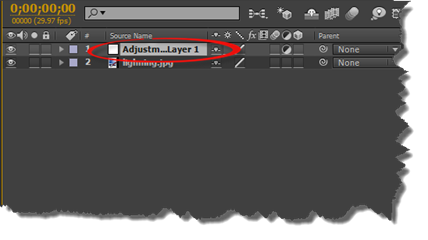
Create an adjustment layer by going to Layer>New>Adjustment Layer.
You will now see the adjustment layer in your Timeline panel.
Next, using the Pen tool in the Tools panel, create a mask around the areas that you want to "light up."

Remember to select the adjustment layer in the Timeline panel before using the Pen tool. Otherwise, you will create a new shape layer instead of adding a mask.
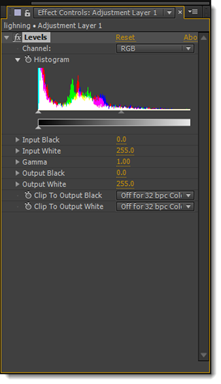
When you are finished drawing your mask, go to Effect>Color Correction>Levels.
In the Effects Control panel, adjust the color channels.
In addition, go to the Timeline panel and adjust the feathering for the mask.
Now, if you want to animate sudden bursts of light, as you would see with a lightning strike, add In and Out Points or adjust the layer duration bar in the Timeline panel so that the burst of light only lasts for one frame.
Take a look at the way we made the lightning illuminate the tree:
That was the after snapshot. Here is the before:

Explaining Expressions
Before we go any further in this section, it is important that you understand what expressions are, as well as their purpose in After Effects.
Using expressions, you can create relationships between layer properties. You can then use the keyframes from one layer to animate another layer.
A property is something that helps define a layer. Opacity, scale, rotation, and position are all examples of properties. In turn, properties have values. If you set the opacity of a layer to 80%, then 80% is the value
Animation presets can use expressions. If an animation preset contains expressions instead of keyframes, it is called a behavior.
Introducing the Pick Whip
The pick whip is used to create expressions that link the properties of one effect or animation to another. We are going to use it to duplicate an animation.
To start, click on the Home key.
Next, select a layer in your composition.
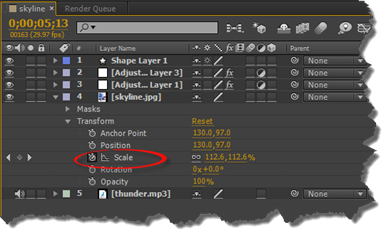
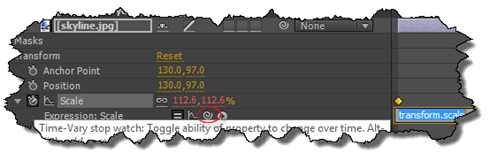
To apply an expression, ALT+Click on the stopwatch next to the property that contains the keyframes � or animation.
In the snapshot below, we are going to ALT+Click on the stopwatch beside Scale.
As you can see, "transform.scale" now appears in the time ruler for that layer.
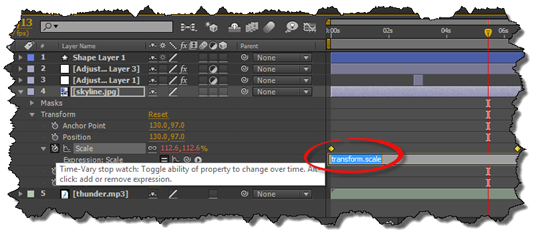
Make sure the "transform.scale" expression selected, click the pick whip icon. Drag it to the Scale property of another layer.
We have circled the pick whip icon below. It is the swirly circle.
The pick whip "snaps" when you release the mouse button. The expression now changes in the time ruler for the original layer property:
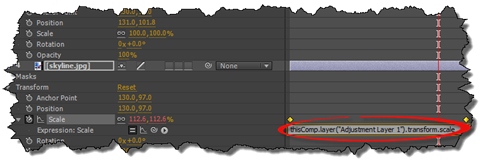
What this means is that the scale property value for the adjustment layer now replaces the scale value for the skyline layer.
Pre-Composing Layers
When you pre-compose layers, you combine specific layers to form their own composition. You can then next that composition in your original composition � or even in another composition in another project.
If you are new to After Effects, pre-composing layers might seem like a step that you do not need to take because it only takes up time. However, pre-composing your layers can actually save you time as you work on your project. It can also allow you to easily transport those layers and their animations into other compositions.
Listed below are some of the uses and benefits to pre-composing layers:
-
As we said, you can reuse the composition that you create.
-
You can apply effects to the nested composition (the one you create by pre-composing layers). That way all layers in the nested composition change in the same way.
-
Just like source footage, if you make a change to a nested composition, the change is made to every composition where the nested composition is used.
To pre-compose layers, Shift+Click to select the layers in the Timeline panel.
Go to Layer>Pre-Compose.
You will then see the Pre-Compose dialogue box.

Enter a name for the new composition.
Put a checkmark beside "Move all attributes into the new composition."
Put another checkmark beside "Open New Composition."
Click OK.
Working with Track Mattes
A track matte allows you to define one layer's visibility through another layer. When you create a track matte, one layer in the composition acts as the matte. This layer masks out portions of another layer.
There are two different types of track mattes in After Effects.
There is a luma matte. With a luma matte, everything white is visible, everything black is invisible, and grey is in between. You will see what we mean in just a minute.
The other type is an alpha matte. An alpha matte uses the layer's alpha channel to decide what you can see or cannot see.
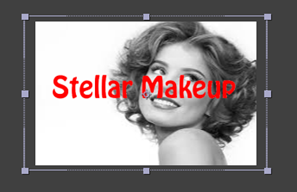
Let's show you how to create a luma matte. A luma matte is a great way to hide text or elements from one layer behind another.
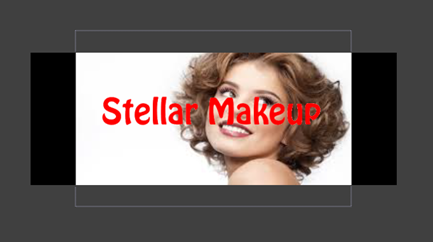
In our example, we have two layers. One is of a woman. The other is of a fictional company that she works for. We want to make it look like she is positioned in a front of a white wall with the company's name.
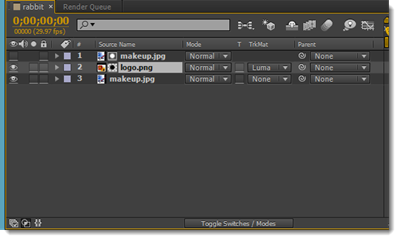
To do this, we are going to go to the Timeline panel. The picture of the woman is our matte layer. We are going to create a duplicate layer of it by selecting the layer, then pressing CTRL+D to create a duplicate layer.
Next, we need to drag the duplicate layer above the layer with the name of the company.
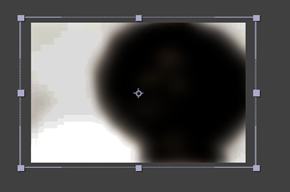
Next, go to Effect>Color Correction>Black & White.
We need to darken the woman in the track matte as much as possible for a luma matte. In addition to making the duplicate layer black and white, we also adjusted the contrast and added a blur.
Now, we can go back to the Timeline panel.
Click the Toggle Switches/Modes button at the bottom of the Timeline panel beneath the layers. It looks like this:

This will enable you to see the TrkMat column next to the layers.
We are now going to go to our logo layer.
Click the dropdown menu in the TrkMat column. Select luma matte.
As you can see, the company name now appears behind the woman in the photograph.

More on Animating Using Keyframes
Being able to animate using keyframes will be critical to your success with After Effects. For that reason, we want to discuss it again by showing you another example.
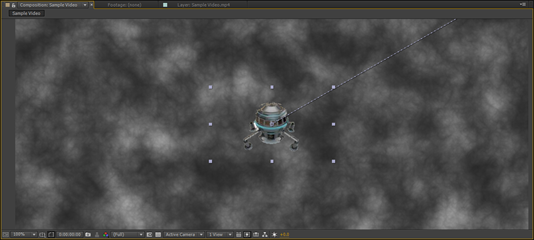
For this example, we are going to further animate our spaceship using keyframes.
To start, we are going to select the layer. The layer name is Untitled.
Click the triangle beside Transform.
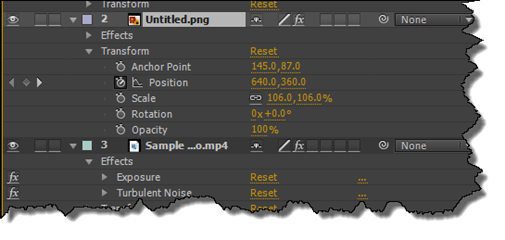
Let's make animate the opacity of the spaceship as it moves across the screen.
To do this, move the playhead to the position in the time ruler where you want the animation to begin.
Click the stopwatch next to Opacity.
Now, move the playhead to the location on the time ruler where you want the animation to end. Change the value of the Opacity property.
What will happen is this:
1. Your animation will start where you added your first keyframe (by clicking the stopwatch).
2. The opacity of the spaceship will gradually change until it reaches the property value you specified � at the location in the time ruler that you specified. It will appear as an animation.
NOTE: You can keep adding keyframes to continue the animation.
Another Look at Effects
After Effects has dozens of effects that you can add to your layers. In fact, there are so many, it is not possible to cover them all in a section. However, we want to cover a few so you can see how they work.
Our composition is pictured below.
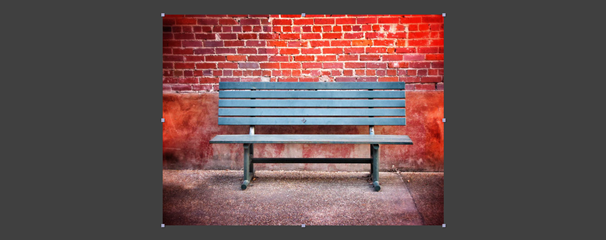
We are going to add a light ray effect to it.
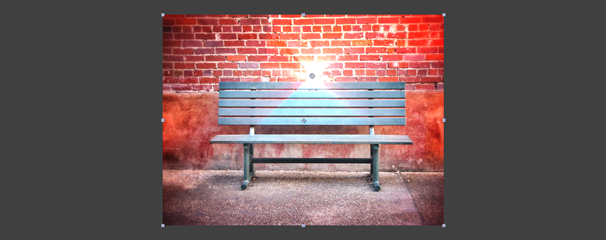
To add this effect go to Effect>Generate>CC Light Rays.
In the snapshot above, you can see the light ray above the top left corner of the bench.
Next, go to the Effects Control panel where you can adjust the properties for the effect.
We adjusted the properties, then dragged the anchor point to move our light ray.
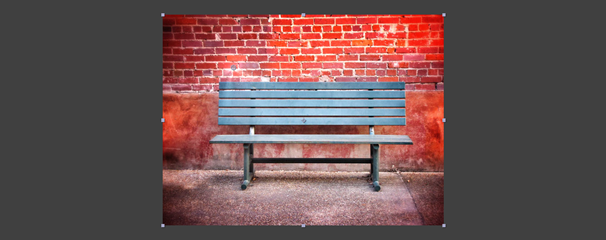
Now let's add another effect to the composition pictured below.
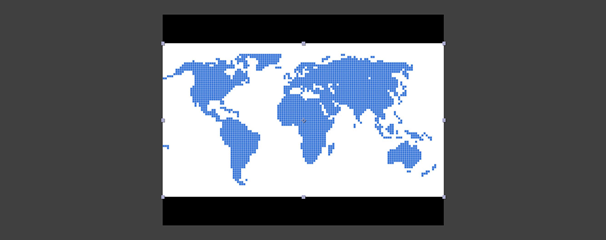
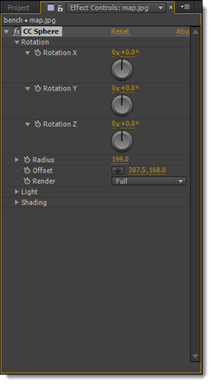
Go to Effect>Perspective>CC Sphere.
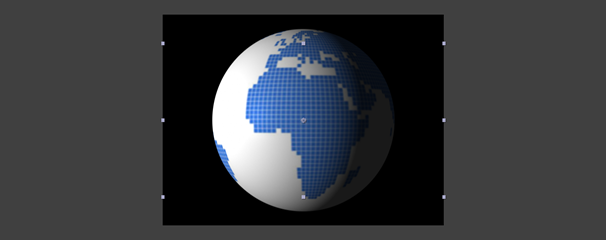
Go to the Effects panel to adjust the property values.
You now have a globe that you can make rotate.