In this article, we are going to talk more about the workspace, including how you can customize it to fit your needs.
We will discuss how to:
-
Toggle between screen modes
-
Resize the application window
-
Use a second window or view
-
Resize panels
-
Show or hide panels
-
Expand and collapse panels
-
Use Loupe view
-
Dim the lights in Lightroom
-
Edit the identity plate
-
Customize the side panels
Toggling Between Screen Modes
Lightroom 5 allows you to toggle between four different screen modes.
To toggle between screen modes, go to Window>Screen Mode.
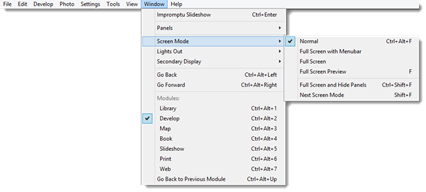
In the snapshot above, you can see the four screen modes listed. They are Normal, Full Screen with Menubar, Full Screen, and Full Screen Preview.
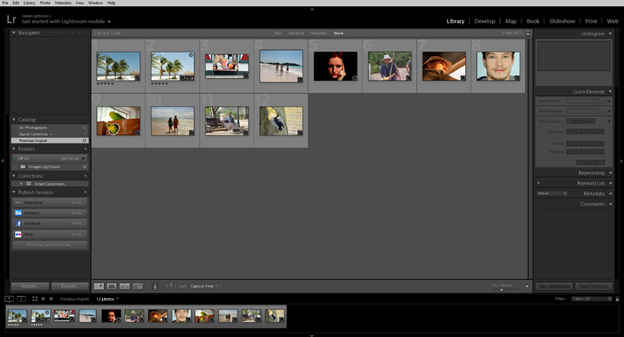
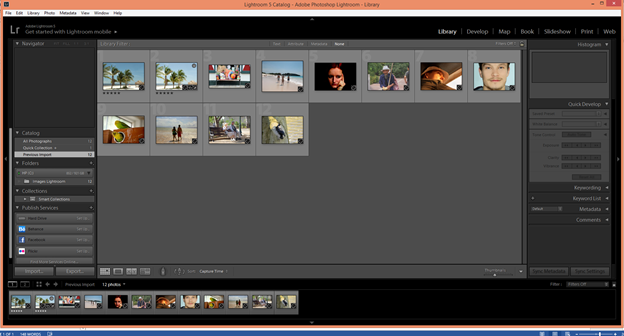
Below is a snapshot of Normal screen mode. The workspace appears inside an application window.

Next, let's look at Full Screen with Menubar.
As you can see above, this screen mode makes the workspace take up the entire screen. The menu bar goes across the top of the screen. You will be able to see your Windows task bar below the Lightroom window.
Now let's look at Full Screen mode.

The Menu bar is hidden in this mode. Also, you are unable to see your Windows task bar in this mode.
You can also choose Full Screen and Hide Panels, as pictured below.
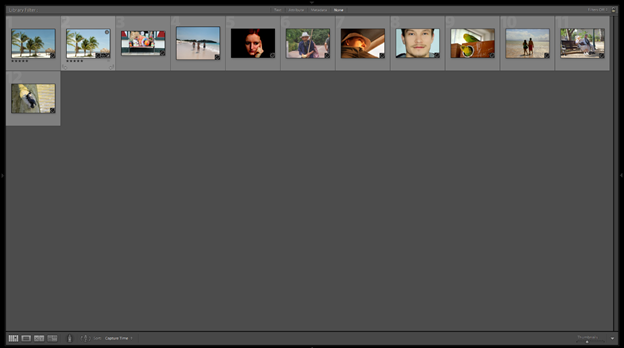
This puts Lightroom in Full Screen mode, but hides all the panels.
In addition to the screen modes to alter the appearance of your workspace, you can also:
-
Hide the Toolbar by pressing T.
-
Go to Window>Screen Mode>Next Screen Mode to go from one screen mode to the next.
-
Press Shift+Tab once or twice to show all panels.
-
See a full screen preview of a selected image by pressing F on your keyboard.
Resizing the Application Window
Return to Normal screen mode. As we stated in the last section, Lightroom is shown in an application window in this screen mode.
We can resize the window by moving our mouse to the edge of the window. Our pointer will change to a double arrow icon.
Next, we can drag to resize it.
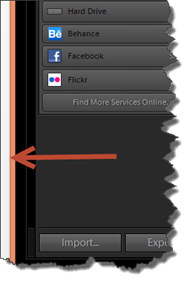
In the snapshot below, the arrow is pointing toward the edge of the application window. This edge is what we would drag to resize it.
You can also click the Maximize button  at the top right of the application window. When you do this, the window will fill the entire screen.
Using a Second Window
You can open a second view either by using another monitor or by opening a floating window. The floating window can be moved and resized to meet your needs.
Let's show you how this works.
To open a second window (either in the same or a second monitor), click the Second Window button in the Filmstrip. We have circled it below.

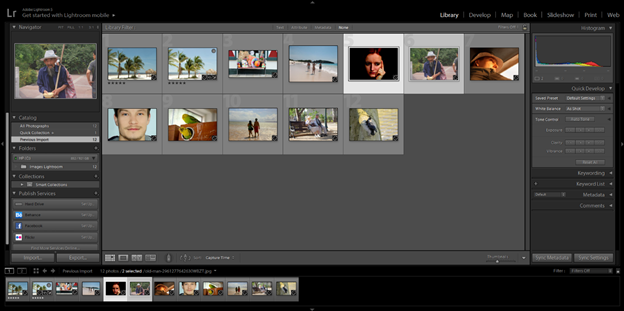
You will then see the secondary display.
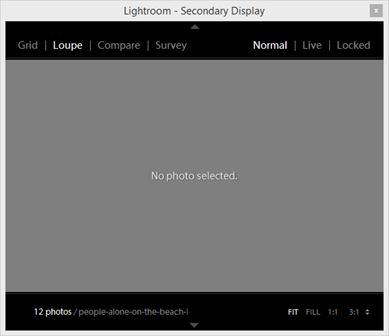
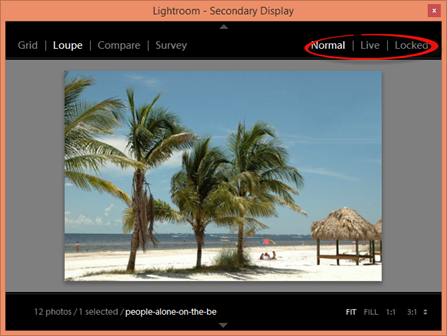
In the secondary display, click Grid (at the top of the window).

The image selected in the main window is the image selected in the secondary view.
You can use the thumbnail slider at the bottom right of the secondary display to change the size of the images. You can use the scroll bar to scroll through your images.
Next, click on Loupe (to the right of Grid).
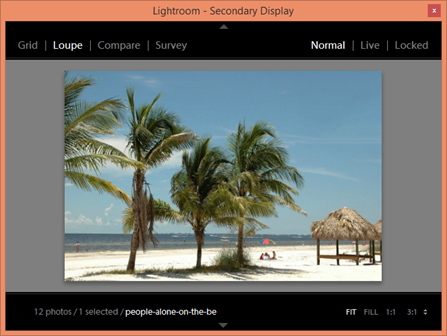
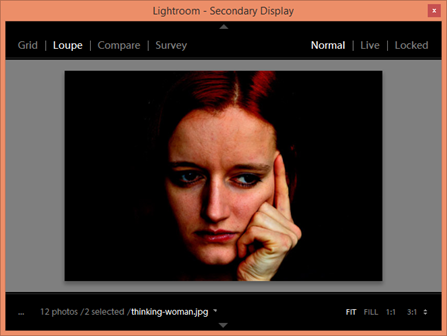
Loupe view displays the active image from Grid when Loupe is in Normal mode. The modes are circled below:
In Live mode, the secondary display features the image that is under your pointer in the main window.
In Locked mode, the image is fixed in the secondary display until you go back to Normal or Live mode.
You can zoom in or out on an image in Loupe view by choosing Fit, Fill, or 1:1. These buttons are found at the bottom right of the secondary display.
To compare images in the secondary display, click Compare at the top of the window, then select two images from the main window. To use Survey, select three or more images in the main window after clicking Survey at the top of the secondary display.
Close the secondary display by clicking the "X" at the top right corner.
NOTE: Close the secondary display at this time if you are following along in Lightroom.
Resizing a Panel
In Lightroom, you can resize panels to create more space for you to work.
To resize a panel, move your mouse to the edge of a panel. Your mouse cursor will change to a double arrow.
Drag out to increase the panel's size.
Drag inward to decrease it.
Showing or Hiding Panels
You can also choose to have the panels showing � or to hide them.
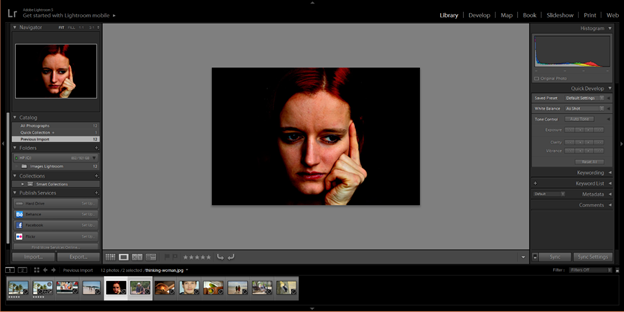
In the snapshot below, you can see the left, right, and top panel, as well as the Filmstrip.
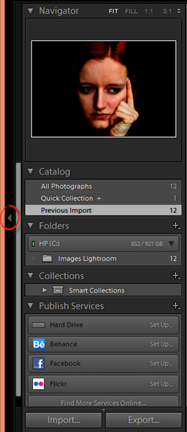
To hide them, click the arrow to the left of the left panel, to the right of the right panel, above the top panel, or below the Filmstrip � depending on which panel you want to hide.
Below is the arrow to hide the left panel:
To show a hidden panel, click the arrow again.
Expanding or Collapsing Panels
If you look at the left panel, as shown above, you will see it is made up of individual panels, such as the Publish Services panel and the Collections panel. All these panels make up the left panel. They are a panel group. In the last section, we showed you how to hide and show panel groups. However, you can also expand and collapse individual panels within a panel group.
In the snapshot below, the Collections panel is collapsed.
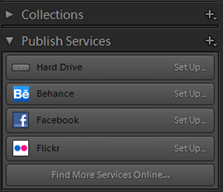
You can tell that it is collapsed because the triangle to the left of Collections is pointing to the right. In addition, you can't see the tools and options that are in the Collections panel.
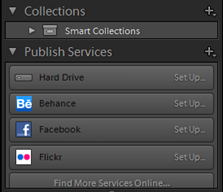
Now, click the arrow beside the Collections panel. This expands it.
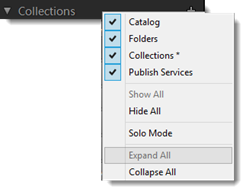
If you want to expand or collapse all panels in either of the side groups, click CTRL+Click in any of the panel headers. The header is where you see the name of the panel. You can also right click on a header, then select either Expand All or Collapse all from the context menu, as shown below.
Hiding Individual Panels
To hide all panels except for the upper most panel in either the left or side panel groups, right click on a panel header, then select Hide All.
To unhide the panels, right click in the panel area and select Show All.
About Loupe View
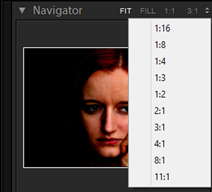
You will use Loupe view when you need to view your image at different magnifications. By using the Navigator panel on the left, you can switch between different magnification levels.

You can choose between Fit, Fill, 1:1, or 3:1. These magnification options are shown in the top right corner of the Navigator panel. You can also choose another magnification option by clicking on the menu (the arrows to the right of 3:1 below).
You can also toggle between magnification levels. To do this, go to View>Toggle Zoom View. You can also press Z.
Options for Grid and Loupe Views
By setting options for both Grid and Loupe views, you can tell Lightroom what information to display for each of your images.
To do this, let's go back to Grid view by pushing G on your keyboard.
Next, go to View>View Options.
You will then see the Library View Options dialogue box, as pictured below.
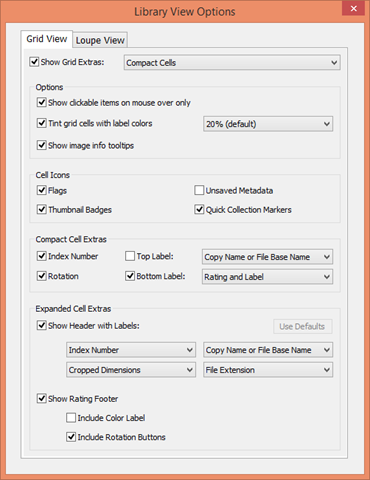
Notice that there are two tabs in the dialogue box: Grid View and Loupe View.
Make sure the Grid tab is active, then uncheck Show Grid Extras. We want to do this just for a moment to focus on the options you should already be familiar with thus far.
This is what you will see:
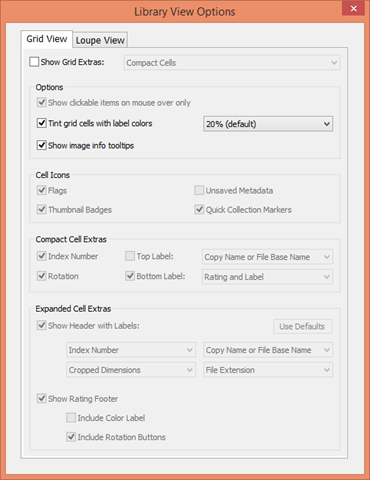
The options showing allow you to tint an image cell in Grid view with the color label color. It also allows you to see the tooltips that show the image name, capture date, time, as well as the cropped dimensions.
Now, go back and recheck Show Grid Extras. All the options are active again. You can play with each of these settings to learn how it affects your images in Grid view.
When you are finished, click the Loupe View tab.
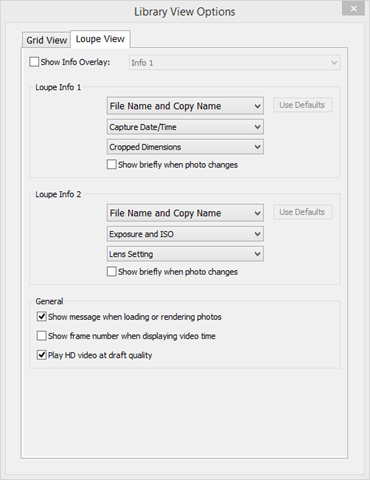
The work area in Lightroom will switch to Loupe view when you click on the tab. This way, you can preview the changes made when you change options.
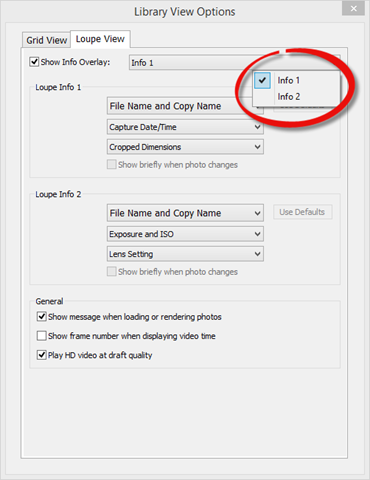
Under this tab, you can put a checkmark beside Show Info Overlay Options to show image information in the top left corner of the work area, as shown below.
Under the Loupe Info 1 and Loupe Info 2 categories, you can decide which information is displayed. Then, by going back to Show Info Overlay, you can specify if Info 1 or Info 2 is displayed in the work area.
Click the X at the top right of the dialogue box to close it.
Dimming the Lights in Lightroom
If you have not noticed by now, the interface in Lightroom seems dark. With the exception of the images, everything in the program seems tinted dark grey or black. However, it is for a reason. That reason is so that you can focus on the image or images that you have open in the work area.
You can dim the lights even further if you want by going to Window>Lights Out>Lights Dim, or you can completely darken the workspace by going to Window>Lights Out>Lights Off. You can also push L on your keyboard to first dim the lights, then turn the lights off, and then back on -- just continue to press the L key.
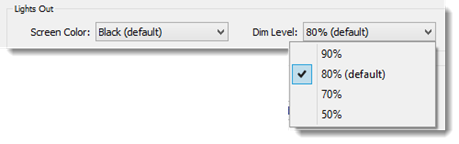
If you want to change the opacity for the Lights Dim mode, go to Edit>Preferences, then click on the Interface tab, as shown below.
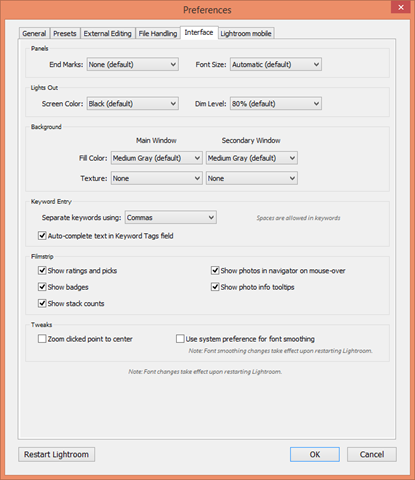
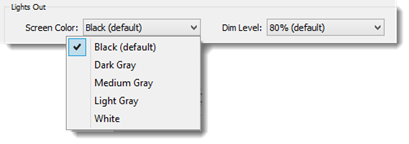
In the Lights Out section, choose a screen color from the Screen Color menu.
Next, choose a new opacity level from the Dim Level menu.
Editing the Identity Plate
The identity plate can contain things like your name, your company logo, or anything else that personalizes the workspace and makes it yours.
The default identity plate is pictured below.

To edit the information and/or graphics in the identity plate, go to Edit>Identity Plate Setup.
You will then see the Identity Plate dialogue box, as pictured below.
NOTE : Make sure you choose Personalized from the Identity Plate menu.
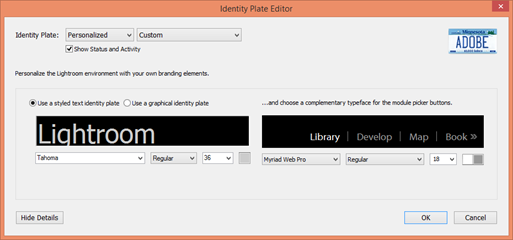
You can choose to either use text or a graphic for your identity plate.
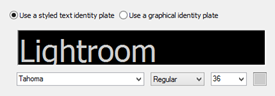
If you choose text, you can choose a font type, size, and color.
To add text, simply select the text (shown above) and start typing your own.
If you want to use a graphic for your identity plate, select Use a Graphical Identity plate, as shown below.
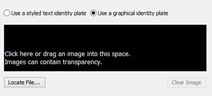
Click the Locate File button, then locate the graphic on your computer.
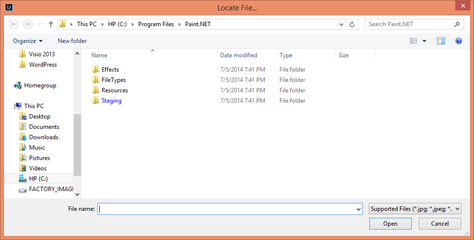
Click the Open button once you have selected the file.
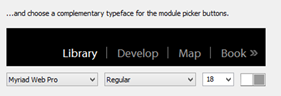
You can also customize the typeface for the module picker buttons:
Editing the Side Panels
You can also add a decorate ornament to the bottom of individual panels in the side panel groups.
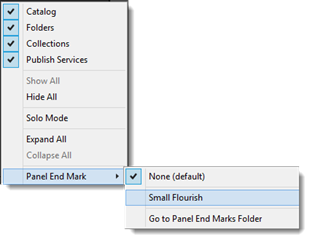
To do this, right click in the space below the side panels.
Select the Flourish ornament from the Panel End Mark submenu.
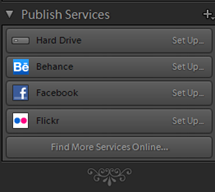
You can see the Flourish ornament after the panel below:
Using a Custom End Mark
You can also use your own graphics as end marks. Perhaps you want to use a small version of your company logo or a piece of clip art that you like. Any of these items can be used as end marks to help further customize Lightroom for you.
Here's how to do it.
Right click that same area again, go to Panel End Mark>Go to Panel End Marks folder.
Open the folder by double clicking on it.
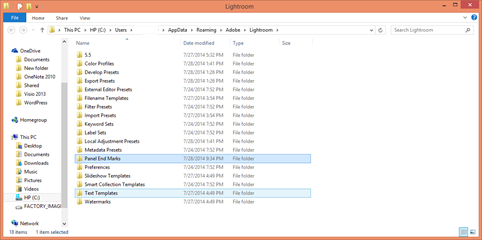
By default, the folder is empty.
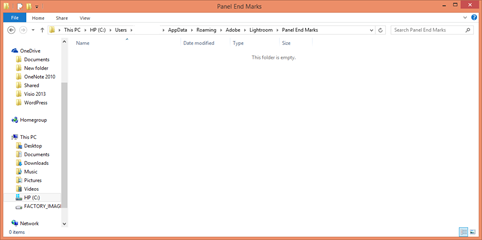
You can add any graphics you want to use as end marks to this folder.
To add graphic files to this folder, simply open another Windows Explorer window, then drag graphic files to the open Panel End Marks folder. We added example.jpg.
Now when we right click, then go to Panel End Marks, we can see the new graphic we added to the folder:
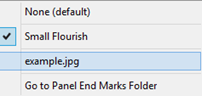
We can then use this graphic as an end mark.