Dreamweaver behaviors allow your visitors to interact with a web page. You can use behaviors to create jump menus, pop-up windows, play sounds, validate forms, and much more. In this article, we're going to learn how to use behaviors to create interactivity on your web pages.
Using the Behaviors Panel
The Behaviors panel is used to add behaviors to your web page. To view the Behaviors panel, go to Window> Behaviors.
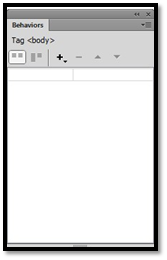
Any behaviors that are already attached to the selected pages appear in the behavior list, or the white area of the above snapshot. These behaviors are listed alphabetically.
The Behavior panel contains these options:
 Show Set Events. When you click on this, the panel displays events that have been attached to the document. These events are listed in client-side and server-side categories.
 Show All Events displays a list of all events within a given category.
 Add Behavior. This displays actions that can be attached to a document. Selecting an action results in a dialogue box where you specify parameters.
 Remove Event. Just as it states, this option removes the selected event and action.
 Up and down arrow buttons. You can navigate through the behavior list to find an event.
Applying and Changing Behaviors
To add and apply a behavior, open the HTML page that you want to add a behavior to.
Next, make sure the Behaviors panel is open.
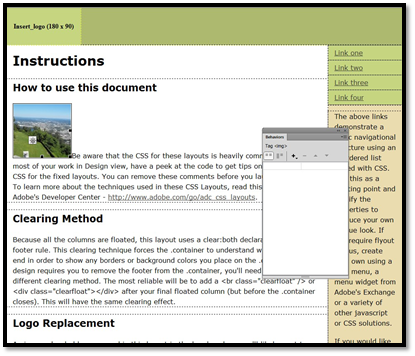
Select the element in your document that you want to give an action. We're going to select the image on the page pictured below.
Click the Add Behavior (+) icon and select a behavior. We've selected Effects> Shake.
Some behaviors will need additional input from you and dialogue boxes will appear, such as the one below for our behavior.
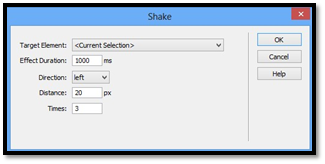
Click OK.
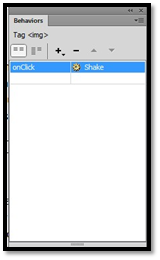
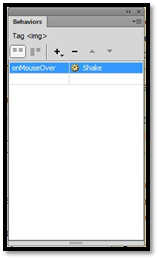
You can now see the event in the Behaviors panel.
Changing Behaviors
In the snapshot above, you can see that our behavior (shake) is triggered by the action "onClick." This means that when a user clicks our image, it will shake. Perhaps we want another action to trigger the event (behavior). We can change it by clicking on "onClick." A down arrow will appear. Select a new action from the drop down menu.

As you can see by the snapshot below, we selected onMouseover.
Save your document to save the behavior.
Create a Pop-Up Window
Creating a pop up window for your website is easier than you'll ever believe. All you have to do is simply add a behavior.
Start out by selecting the element that you want to add the behavior to. We've selected the H1 text in the snapshot below.
Now, go to the Behaviors panel, click the Add Behavior icon and select Open Browser Window.
You'll see this dialogue box:
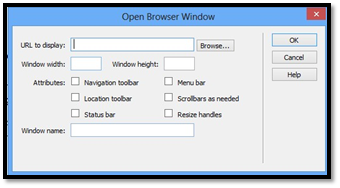
Enter the URL of the page that you want displayed in the pop-up window. Since we're not actually going to upload this site to the web, we're going to select a local file inside our root folder that we've named more.html.
Next, select the width and height for the pop up window.
Select any attributes for the window, such as a navigation toolbar, location toolbar, status bar, menu bar, scrollbars, or resize handles that allow the pop-up window to be resized.
Finally, enter a name for the window in the Window Name box. We're going to enter "More."
Click OK.
Now, we'll save the document and preview it in a browser window to view our new pop up.
Create Status Bar Text
You can use the Set Text of Status Bar behavior to show a message in the status bar at the lower-left hand corner of the browser window. You can use it to describe a link, a photo, a section of text, etc. We're going to show you how to do it, and let you see what it looks like, in this section of the article.
To add text to the status bar:
Select an object in your document as we've done with other behaviors, then go to the Behaviors panel, add a behavior by going to Set Text>Set Text of Status bar.
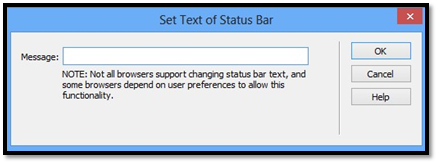
Type your message into the dialogue box. Keep the message as brief as possible so it doesn't get truncated.
Multimedia
We've come a long way from the simple, text-based web pages of the past. Back then, a web page might be laid out like the front page of a newspaper, with columns of text and basic images. Today, users expect a rich multi-media experience, complete with Flash movies, audio and video clips. In Dreamweaver CS6 and CC, you can easily incorporate these elements into your web pages.
Embedding vs. Linking
Before we go on, let's take a moment to discuss the two ways in which audio, video and Flash movies can be incorporated into your website.
That's really all we're talking about here, but instead of redirecting your users to a new web-page, we're redirecting them to a video, audio, or Flash file. This is the easiest way to add media elements to your web-pages. Users must click the links to launch the video or audio clips.
To embed a video or audio clip means to insert it directly into the webpage. These can be set to begin automatically, without any input from the user. This is handy if you want to include something like background music or would like to control the way the media player looks on the page.
Working with Flash
Flash is quickly becoming the most common type of element added to web pages. In fact, some pages are made entirely with Flash.
Before we go any further, let's take a look at the different type of file extensions associated with Flash.
- .FLA � These are files that can only be edited in Adobe Flash, and cannot be inserted into Dreamweaver documents.
- .SWF � These are .fla files that have been optimized for the internet. They can be inserted into and previewed in Dreamweaver documents. Please note, however, that .swf files cannot be edited in Adobe Flash. To make any alterations to an .swf file, you must edit the original .fla file.
- .FLV � This is a video file similar to a .mov (QuickTime) or .wmv (Windows Media Player) file. They are viewed with Flash Player.
Embedding SWF Files into a Dreamweaver Document
You can insert Flash elements into a Dreamweaver document in the same way you insert images or other objects. Activate Design view and select an insertion point. Then click Insert > Media > SWF. Choose the SWF file you'd like to insert and click OK.
|
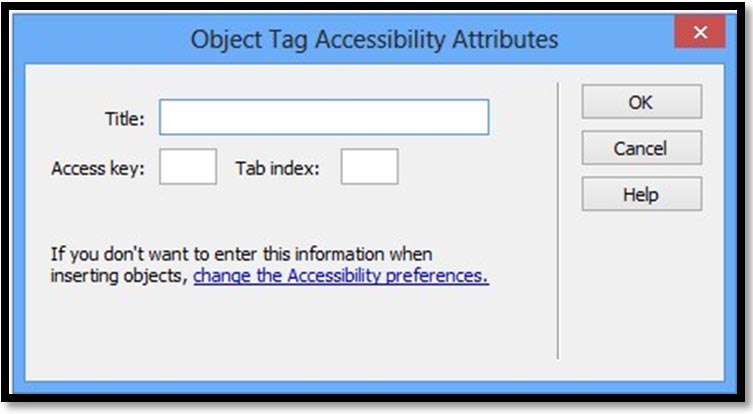
Enter attributes for the Flash movie.
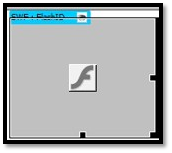
The Flash movie will appear in your document as a placeholder frame:
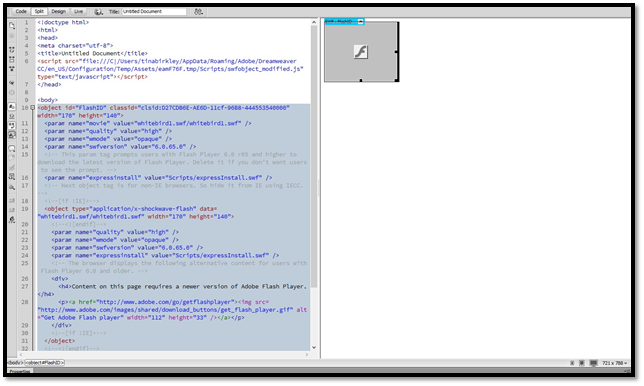
In the next section, we'll tell you how you can preview the contents of the Flash frame. But first, take a look at the blue tab at the top of the placeholder box. This indicates the asset type and ID.
Whenever you insert a SWF file into Dreamweaver, it automatically inserts code that checks to see if the user has the appropriate version of Flash Player installed. If the user does not, the SWF file cannot play, and a message prompting them to download the latest version is displayed. Click the eye icon to the right of Asset type and ID to customize this message. By default, the message looks like this:

You can change the Flash icon, to an icon or image of your choice. The text can be edited just like any other text in Dreamweaver.
Exploring the Flash Properties Inspector
Now let's take a look at the Flash Properties Inspector. To see it, you must select a Flash file within your document. If the file is selected and you don't see the Properties Inspector, click Window and double-check that Properties is checked. Alternatively, try double-clicking on the Flash file.

At this point, most of the functions and information on the Properties Inspector should be familiar to you. From here, you can easily adjust the height and width, select the location of the file or change the source. So let's take a look at a few of the functions that are unique to Flash files.
 This button launches Flash and automatically loads the selected file for editing.
Note: Adobe Flash must be installed on your computer to be able to use this button.
 This button allows you to preview only the selected SWF movie while you edit your Dreamweaver document. If you'd like to preview all of the SWF movies, press Control + Alt + Shift + P.
 This button is only visible when playing a selected SWF movie. In fact, the Play button transforms into it. Use it when you want to stop previewing a Flash movie. The SWF file will return to the placeholder icon.
 This button launches a dialogue box to assign additional parameters to the movie. You can only enter these parameters if the SWF file has been designed to accept them. If you have Flash installed, check the documentation to see what options are available to you.
Loop � Check this box if you want the movie to play continuously.
Autoplay � Select this option if you want the movie to play automatically when the page loads. Otherwise, the user must interact with the page in some manner, such as rolling the mouse over a specific location, or clicking a hotspot.
Wmode � Use this option to avoid conflicts with Dynamic HTML objects.Following is a list of the options available along with a brief description.
-
Opaque � This is the default option. If selected, Dynamic HTML objects will appear on top of the SWF file in the browser.
-
Window � Use this option if you'd like the SWF file to appear on top of Dynamic HTML objects. Please remember, however, that the objects underneath the SWF file will not be visible to users.
-
Transparent � This is similar to the window option, in that it places all Dynamic HTML objects behind the SWF file. However, you'd use this option if the SWF file contains transparent areas that allows users to see the DHTML objects behind them.
Quality � As the name implies, you'll use this option to control the quality of the movie. This option is set to High by default, and most of us might be inclined to leave it there, thinking that of course we want high quality movies. There are other things to consider, though. Putting together a web-page is a lot like designing an aircraft � you sometimes have to make trade-offs between performance and practicality. A high setting means the movie will look better, but it also demands more processing speed to render correctly. A low setting takes less processing speed, but isn't as sharp. So make sure you take these issues into consideration before making a selection. The Auto High and Auto Low options give you a little bit of autonomy. They start with either a High (Best Appearance, slower speed) or a Low (Faster, poor appearance), then take the capabilities of the user's computer into account. In the case of Auto High, if the user's computer cannot handle the initial setting, it will automatically make adjustments to appearance. In the case of Auto Low, it will automatically improve the image if possible.
Embedding FLV Files in Dreamweaver Documents
FLV files are similar to SWF files, except that a set of playback buttons are added to allow the user to control the movie.
Media players are so common anymore that most people are thoroughly familiar with the controls associated with them. The controls are called the skin.
You can add FLV files to your Dreamweaver document just like you added SWF files. Go to Insert > Media > FLV.
|
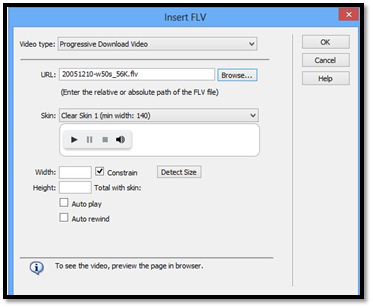
Below is your basic Insert FLV dialogue box. Notice the Video type menu at the top. There are two options associated with this menu. They are Progressive Download Video (as selected in the example) and Streaming Video. The dialogue box is slightly different for each option. First we'll discuss the differences between the two, then we'll discuss the options available with each.
-
Video Type � You can think of these options as "delivery methods." When most people think of "delivery methods" they think "UPS or Parcel Post?" But a better comparison would be Live Broadcast or TiVo.
-
Progressive Download Video � The video is downloaded to the user's computer and played. The entire file does not need to be downloaded before the video can begin playing. This is the default option.
-
Streaming Video �� The video is played on the server and does not download to the user's computer. There is a brief buffer period, though, that helps to insure smooth playback.
Progressive Download Video Options
Take another look at the Insert FLV dialogue box above. These are the options associated with Progressive Download Video.
-
URL � Use this box to specify a path to the FLV file. There are two types of paths: relative paths and absolute paths. To select a relative path, click the Browse button and locate the FLV file. To select an absolute path, type in the item's URL. An example of an absolute path might be http:///www.mysite.com/myvideo.flv
-
Skin � As mentioned earlier, a skin is the controls associated with the video file. A preview of the selected skin appears in the box under this option.
-
Height, Width, Detect Size � Use these options to set the height and width of the FLV file. You can use the detect size button to have Dreamweaver check the file and enter the height and width automatically.
-
Auto Play � Check this option if you'd like the movie to begin playing automatically when the website loads
-
Auto Rewind � Check this option if you'd like the video to go back to the beginning once the video reaches the end.
Streaming Video Options
As you can see in the example below, many of the options available to insert a streaming media file are the same as for Progressive Download Video, so we won't repeat them here. Instead, we'll only talk about the different options.
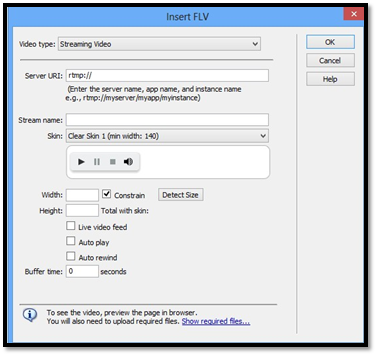
Now let's look at your options in the dialogue box above:
-
Server URI � Use this box to insert the server name, application name, and instance name. An example might be, "rtmp://www.myserver.com/app_name/instance_name."
-
Stream Name � Use this box to insert the name of the FLV file.
-
Live video feed � Select this if the video content is live. When this option is selected, only the volume control will appear on the Flash Player skin. This is because you cannot fast forward or rewind a live video. Please note, however, that if this option is selected, it disables the Auto play and Auto rewind functions.
-
Buffer time � Buffer time refers to the length of video that is preloaded into the web-page before the video begins playing. So if you set the buffer time to 15 seconds, 15 seconds worth of video will have to load before the video will begin playing. This is important if you have a high volume of internet traffic which causes bandwidth or connectivity issues or if the user has a slow connection speed. The default buffer time is set to zero, which means the video will begin playing as soon as the play button is pushed.
Note: Whenever you insert an FLV file into your document, Dreamweaver automatically generates a video player and skin file. These files are stored in the same location as your HTML file. When you upload the HTML file to your server, make sure you upload these files as well. In the case of streaming video, Dreamweaver also creates a "main.asc" file which you'll have to upload to your Flash Media Server.
Windows Media, QuickTime, and Other Video Formats
You can easily add Windows Media, QuickTime and other video formats to your web-pages. What's more, these files can be either linked to or embedded.
Embedding these files is almost identical to adding Flash files, except there isn't an actual button labeled Windows Media or QuickTime. Instead, go to Insert>Media>Plugin.
You use the insert plug-in function because the file won't play unless the user has the appropriate plug-in installed on their computer.
Windows Media and QuickTime players already have a skin associated with them so you don't have to pick one. QuickTime controls typically look like this in a web browser:

As you can see, the controls are basically the same as in the Flash Player.
One thing you should be aware of when embedding these kinds of video files is that they begin playing automatically.
Linking to Audio and Video Files
You can also link to a video or audio file. To link to a file, simply highlight the text, image, or graphic that you want to use as a link, and then go to Insert>Hyperlink.
Adding Audio to a Page
Adding audio to your document is almost identical to adding video. You can either link to audio, or embed it. Just like video files, the sound will only play if the user has the appropriate plug-in installed on their computer.
One thing you should be aware of before adding audio files, however, is that different browsers handle audio in different ways. To maintain consistency, you can add a sound file to a SWF file and embed it into your web page.
Below is a list of the most common types of audio files.
- .midi � MIDI files are for instrumental music. They are supported by most browsers and don't require a plug-in.
- .wav � These files do not require a plug-in either. One disadvantage of .wav files is that they tend to have a large file size, which can affect the length of the sound clip, as well as loading speed.
- .aif � These files do not require a plug in. They have good sound quality but also tend to have large file sizes.
- .mp3 � MP3 files require a plug in, but they have several advantages over the other types of files listed here. One such advantage is that they are a compressed format, which means the file is substantially smaller. If recorded and compressed properly, the sound quality is very good. They can also be streamed.
- .rpm, .ram, .ra � These are all Real Audio file extensions. These use a higher degree of compression than MP3 files, which translates into smaller file sizes. A plug-in is required to play these files.
- .qt, .qtm, .mov � These are all QuickTime file formats. A plug-in is required.
YouTube, Vimeo, and Other Online Services
Storing videos on your site can take up a lot of space. Instead, you may opt to upload your videos to YouTube, Vimeo, or some other video-hosting site, then paste some HTML code into your web pages that the video-hosting site provides to you. The video will then play in your web pages the same way it would if you uploaded the video to your site.
To play videos that you upload YouTube, Vimeo, or another service on your site, follow the simple instructions below:
-
Create an account with the site. For example, YouTube. If you already have an account, log into your account.
-
Upload your files to the site.
-
Use the instructions provided by the site to copy the HTML code that you'll need to embed the video on your website.
-
Go to your document in Dreamweaver. Go to the HTML code for your page. Click where you want the video to appear, then paste the code given to you by the site.