Final Cut Pro X is a video editing software application created by Apple for OS X. Unlike previously released versions of the video editing program Final Cut, Final Cut Pro X is an all-new application. It has been designed from scratch as opposed to redesigned. It also offers features and abilities not found in its predecessor, Final Cut Pro or Final Cut Studio. Final Cut Pro X is a trackless 64-bit application that can use all cores for processing. In addition, it's resolution independent.
The Final Cut Workflow
The workflow is essentially the steps you will take to create and complete a project. There is a standard workflow in Final Cut, just as there is with about any project you create and complete. It doesn't matter if we're talking about movie making software or construction on your home.
For example, if you are going to make a cake, there is a workflow involved in making that cake. First, you set out the ingredients, then you combine the ingredients in a bowl, and so on and so forth. Understanding the workflow helps you to know what you need to do next. It can also help you stay organized.
The process � or workflow--that you will follow in Final Cut Pro X is listed below. Keep in mind that you don't always have to follow every step. You might even add more steps depending on the project.
1. Import Media. The first thing you will do when creating a project in Final Cut Pro X is transfer images, video, and audio so that it can be used in the project.
2. Organize Media. Next, your media will be organized into events. An event is similar to a folder. The media is organized into events based on the date the media was recorded. The media will appear as clips. The clips link to the media that is stored on your computer.
3. Create the Project. You will then create the project from the clips.
4. Edit the Clips. Next, you will rearrange and edit the clips in the Timeline.
5. Add Effects. Once you have your clips organized, you can then add effects and transitions to your project. This includes title and credits.
6. Share. The last step is sharing your project. You can publish directly to the web or send it to iTunes, as well as your iPad, iPhone, or Apple TV. What's more, you can also burn it to DVD.
These are the general steps you will take to complete any project in Final Cut Pro X. As was already stated, you may not use all these steps with every project, and you may add a few of your own depending on what you need to accomplish. However, this is a general guide that you can use as we start to learn how to use Final Cut Pro X.
The Final Cut Pro X Interface
The Final Cut Pro X interface is pictured below.
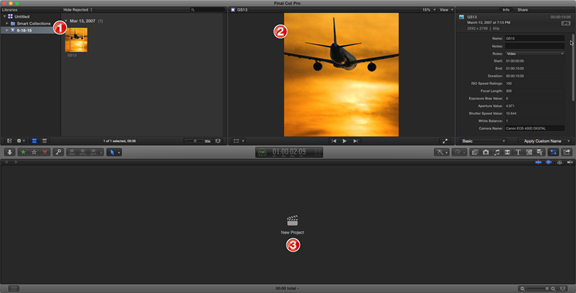
The Final Cut Pro X screen is divided into three parts. We have numbered the three parts in the picture above.
1. On the upper left hand side, you have the Event Browser where you can access imported media.
2. To the right of the Event Browser, you have the Viewer. This is where you will play back clips.
3. On the bottom, you have the Magnetic Timeline. This is where you will edit your video project.
Let's take a more in-depth look at each of these.
The Event Browser
All the media that you import into Final Cut Pro X appears in the Event Browser. As you can see below, we've imported one image.
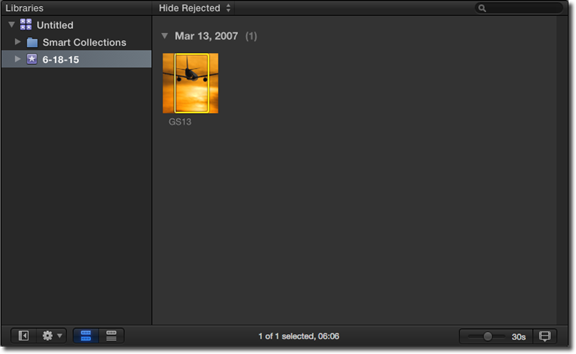
On the left, you will see the Event Library. You will see the name of all your clips listed in the library. To view a clip in the Event Browser, simply click to select it.
You can also manage, sort, add keywords, and rate imported media in the Event Library and Event Browser.
The Project Library
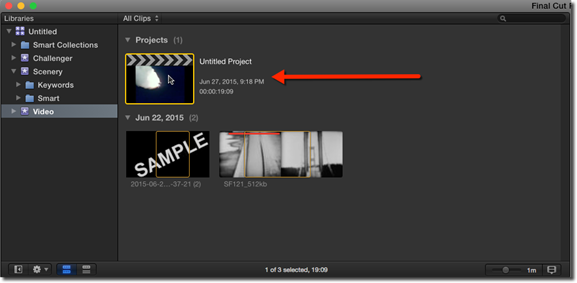
The Project Library only appears in older versions of Final Cut Pro X. For versions 10.1 or later, the Project Library is merged with the Event Library.
That said, the Project Library contains your projects. Your projects can now be found in events in the Event Library and Event Browser, as pictured below.
The Viewer
The Viewer is where you will play your clips and preview your project. You can play them back with up to 1920x1080, 2K, 4K, or 5K resolution. Events, projects, and clips can be played back in full screen view. They can also be played back on a second display so that you can display a clip from the Event Browser and a clip from the Timeline.

The Toolbar
The toolbar contains a lot of the features and tools you will need when you work in Final Cut Pro X. You will use the toolbar to edit clips. You will also use it to import media, including music.
The toolbar is pictured below. It is located below the Event Browser and the Viewer.

The toolbar also includes the timecode for your project in the dashboard:

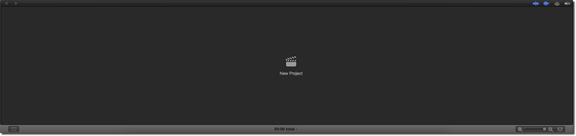
The Magnetic Timeline
The Magnetic Timeline is where the work takes place in Final Cut Pro X. It is also where your project will be displayed as you work on it.
You can add and arrange both audio and video clips in the Timeline. Since it is magnetic, clip are adjusted to fit around clips that you drag into place in the Timeline. If you remove a clip, all the other clips are automatically adjusted the fill the space.
The Info Inspector
The Info Inspector will display metadata about the media you select in the Event Browser or the Timeline. This metadata may include start and end times, duration, scene, codecs, and the list goes on.
The Info Inspector is displayed to the right of the Viewer. You can see it by going to Window>Show Inspector or by clicking the Inspector button in the toolbar. We have circled the Inspector button in the snapshot of the toolbar below.

About Media Files and Clips
When you first begin a new project in Final Cut Pro X, you will import the media that you want to use in your project. Media can be defined as audio, video, or still images. It can be imported from cameras, camcorders, external hard drives, and any audio or video recording device. You can also import media that's on your computer.
Once you import media files into Final Cut Pro X, those media files will appear in the Event Browser as clips. Clips represent source media files. They are essentially a link that points to the location where the original media file is located � or its source. If you edit a clip in Final Cut Pro X, the changes you make to the clip are made to the clip only. The changes are not made to the source media file. This is called nondestructive editing. It allows you to preserve your source media files.
About Events and Projects
Now that we've discussed the difference between media files and clips, let's discuss the difference between events and projects.
As mentioned earlier in this article, events are essentially folders that store the media you've imported. The media stored in events are unedited.
A project is what's found in your Timeline. It includes all the audio and video clips you've added to the Timeline. It also includes all the editing and effects that you've added to those clips.
Importing Media
In this sections, we are going to learn how to import media from various sources, including cameras, iPhones, iPads, and local drives. When you import, you will be able to assign it to events, transcode it, and analyze it for different issues. We will take the time to walk you through all the necessary steps for importing media into Final Cut Pro X.
Importing for the First Time
It goes without saying that when you open Final Cut Pro for the first time, the Event Browser will be empty. This is because you have yet to import any media.
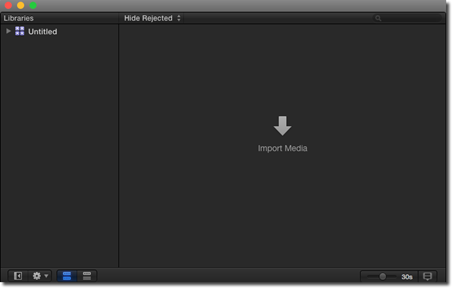
To import files from a camera that is connected to your computer, or to import files from your local disk, click the Import Media button.
Follow the instructions on the screen to import your media. We will cover these instructions in detail throughout this article.
Importing from a Local Disk
You can import media from your computer into Final Cut Pro X. This includes media you have stored on your hard drive, connected external drive, or in other locations such as Dropbox, as long as you have Dropbox installed on your Mac.
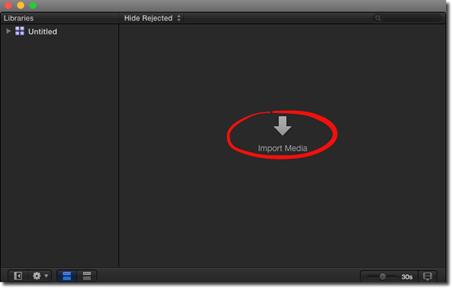
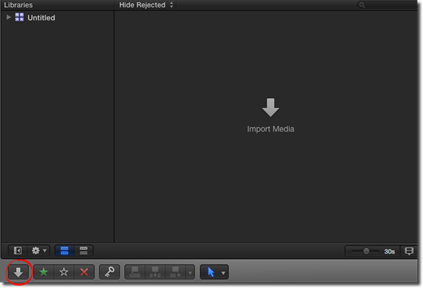
To import media, you can do one of two things. You can go to File>Import Media, or you can click the Import Media button, circled below.
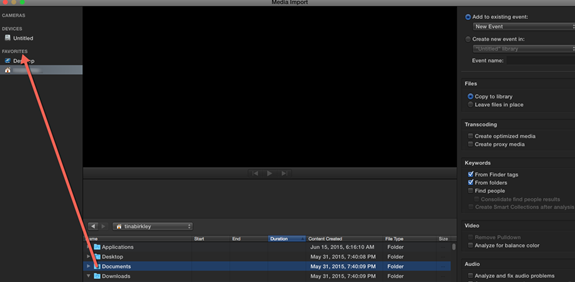
You will then see this window:
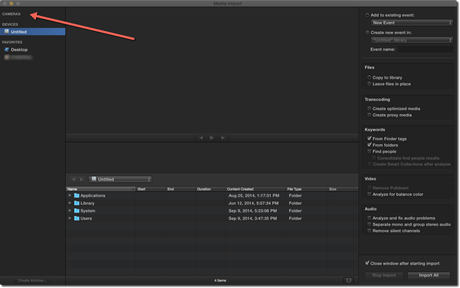
Choose the location, as shown above. For example, you can choose Desktop. You can also choose the name of your Mac, which appears with a Home icon beside it.
If necessary, navigate to the proper folder.
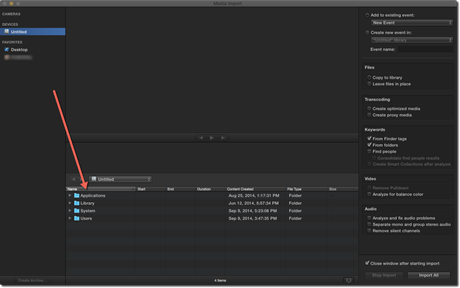
You will then see all the media available on that device displayed

You can click on the media to preview it. In the snapshot above, you can see our media in the preview window. You can then use the playback controls also. You can see the playback controls circled below.
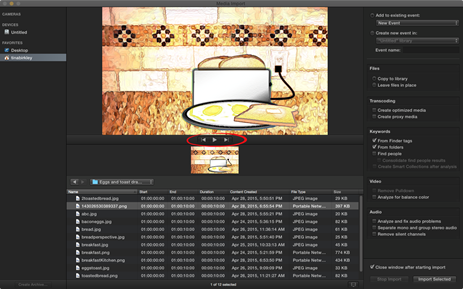
You can also skim it by moving your mouse forward or backward over the filmstrip.

Since we are importing a still image, only one image is displayed in our filmstrip.
Importing from a Camera
If you want to import media from a file-based camera, camcorder, or other device, first connect the device to your computer. These devices usually connect by USB. You may need to adjust the settings on your device so that the device goes into connect mode.
If your device has a memory card, and you wish to import media files from that instead, simply remove the memory card from the device, then insert it into the card slot on your computer. If your Mac does not have card slots, you can use an external card reader.
Once you have the device connected or the memory card inserted, you can begin the process of importing the media into Final Cut Pro X.
To import from a camera, click the Import Media button in Final Cut Pro X, as we did early in the last section. You can also go to File>Import>Media.
You will then see the Media Import Window.
This time, instead of choosing the location on your Mac to look for media, you will choose the camera from the left hand side of the window.
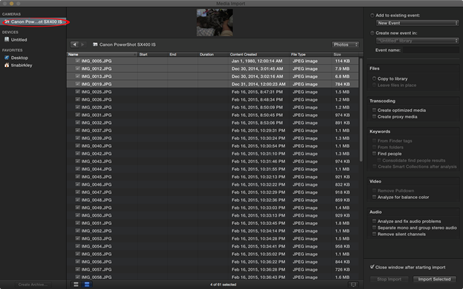
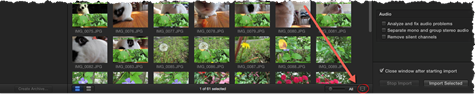
Once you select the camera, you can then choose to look at Photos, Videos, or all clips, as shown below.
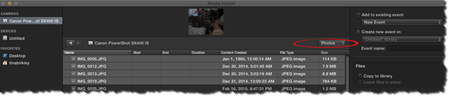
We are going to look at photos.
You will then see a list of all the photos. The list will contain the name of the photo, the date, the file type, and the size.
If you want to see thumbnails of each photo, click Show Clips in Filmstrip View.
This is located at the bottom of the Media Import Window, as shown below.

You can go back to List view by clicking the Show Clips in List View button.

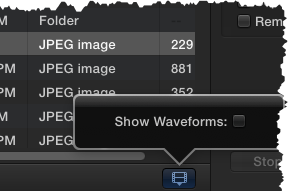
To change the appearance of the clips, click the Change the Appearance of Clips button.
When we click the Change the Appearance of Clips button for images, we get the option to Show Waveforms. Put a check in the box to the right to show the waveforms.
According the Merriam-Webster dictionary, a waveform is:
"a usually graphic representation of the shape of a wave that indicates its characteristics (as frequency and amplitude)"
Import Options
Whenever you import media into Final Cut Pro X, there are certain options available to you to make importing the media that you need as easy as possible.
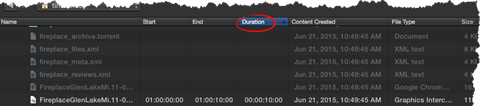
One of those options is the ability to sort through the media listed in the Media Import window.
You can click on a column heading in list view to sort your clips by duration, size, rating, etc. We have circled the Duration column heading below.
In addition, you can make finding a particular folder easier, if you want to be able to access that folder again later. For example, if you have a folder in list view that you would like to easily be able to access at a later date, you can drag that folder to Favorites on the left.
If you want to remove a folder from Favorites, Control+Click on the folder, then select Remove from Sidebar in the menu that appears.
If you want to import all clips in List or Filmstrip View, click Import All.
To select more than one clip to import (but not all clips), Command+Click on the clips you want to import.
If you want to import a portion of a clip, simply drag inside the filmstrip to select the clips that you want, then click Import Selected.
Import from an iPad, iPhone, or iPod
To import media from your iPad, iPhone, or iPod, first connect the device to your Mac.
In the Media Import window, select the device from the left hand side of the window.
Use the import options discussed in the last section to find and select the media you wish to import into Final Cut Pro X.
Importing from a Tape-Based Device
You can also import media from a tape-based camcorder or other tape-based device. The tape-based formats that you can import into Final Cut Pro X are HDV, HD, DVCPRO, and DV, including DVCAM, DVCPRO, and DVCPRO50.
To begin the process of importing the media, first connect the tape-based device to your Mac. You should have a cable that came with the device that will enable you to connect it to the computer. If you need to, you can also configure the device for remote control over FireWire.
Once you have the device connected to the computer, turn it on, then set it to either VTR or VCR mode. (There is a chance that there may be a different name for the mode on your device. If you do not see VTR or VCR mode, consult your device's documentation for the name of the mode on your device.)
In Final Cut Pro X, go to the Media Import window as we have done when importing media from other devices already in this article.
Select the name of the device from the list on the left. The current position of the tape will be displayed in the Media Import window. You can use the playback controls, or the J, K, L keys, to progress the tape to the point where you want to begin import. You can then click Import.
Importing Photoshop Layers
Final Cut Pro X has always allowed you to import Photoshop (PSD) files. However, prior to version 10.3, whenever you imported PSD files, the layers were flattened and imported as one layer � or a still image.
To import Photoshop layers, go to the Media Import window and import the PSD file as if it were any other file. Follow the steps provided in this article to import the file.
After you have imported the file, go to the Event Browser. You will notice an icon in the upper left hand corner of any clip you have imported that contains Photoshop layers. It looks like this:

Double click the file.
The image now opens into a special form on the Timeline. You can see all the layers in the image, and each layer is separate. You can select individual layers.
You can:
-
Select a layer and animate it.
-
Select a layer and apply an effect.
-
Select a layer and make it invisible (type V).
Importing from iTunes
Final Cut Pro X also allows you to import audio from iTunes. To import audio from iTunes, go to the main Final Cut Pro X window.
Click the Music and Sound button located in the toolbar.

You will then see the Music and Sound browser appear below the toolbar.
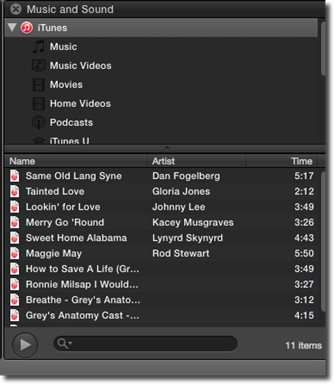
Select iTunes as we have done above, then locate the audio file that you want to import.
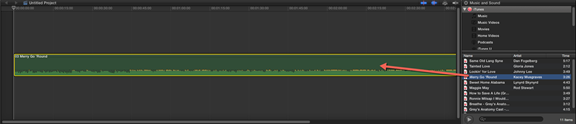
When you have found the file, drag it to the Timeline.
Importing from iMovie
If you have an iMovie project that you want to import into Final Cut Pro X, go to the Media Import window, then locate the Movies folder on your hard disk and locate your project.
Creating a Camera Archive for Quicker Importing
By creating a camera archive � or a backup copy of the contents of your camera � you can import the media from various computers instead of having to keep it stored on the camera or camcorder.
Although creating a camera archive is not required to be able to use Final Cut Pro X, an archive can be extremely helpful and time-saving. Camera archives can be stored wherever you want. You will never have to worry about deleting source footage by mistake either, and this could easily happened if you copied media from a memory card into Final Cut Pro X. In addition, it makes re-linking media easier if you ever have media go offline, because you will not have to locate media clip-by-clip by searching through different folders.
To archive media, first choose where you want to save the archived media. If you want to use an external storage device, make sure it is connected to your computer.
Next, connect the camera or camcorder to your computer. Make sure, if you are connecting a camcorder that it is set to PC mode.
Now, to go the Media Import window in Final Cut Pro X.
Select the camera or camcorder on the left, just as we did when we imported from the device.
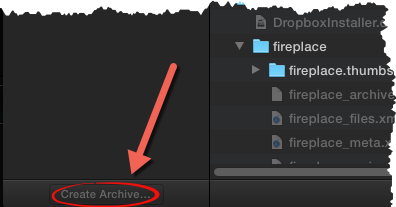
Click the Create Archive button located in the bottom left hand side corner of the window.
You will then see a pop-up window where you will be asked to name and choose a location for the archive.
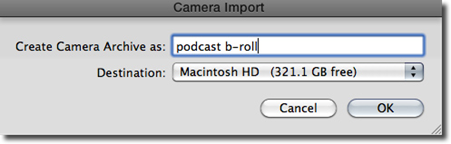
Click OK when you are finished.
To access archived media and import media from the archive, go to the Media Import window. Select the archive you want to access from the list on the left hand side of the window. You can then import it just as you imported from a camera.
Media Formats
So far in this article, we have talked about importing media. However, we have not talked about the different media formats that you can import into Final Cut Pro X.
Below you will find a list of the formats that can be imported.
|
Video |
Audio |
Image |
Container |
|
Motion JPEG |
AAC |
BMP |
3GP |
|
HDV |
AIFF |
GIF |
AVI |
|
H.264 |
BWF |
JPEG |
MP4 |
|
iFrame |
CAF |
PNG |
MXF |
|
DV |
MP3 |
PSD (including layers) |
QuickTime |
|
AVC-Intra |
MP4 |
RAW |
|
|
AVCHD |
WAV |
TGA |
|
|
Apple ProRes |
TIFF |
||
|
Apple Animation Codec |
|||
|
Apple Intermediate Codec |
|||
|
MPEG IMX |
|||
|
REDCODE RAW |
|||
|
Uncompressed 10-bit 4:2:2 |
|||
|
Uncompressed 8-bit 4:2:2 |
|||
|
XAVC |
|||
|
XDCAM HD/EX/HD422 |
|||
|
QuickTime |
Organizing File as You Import Them
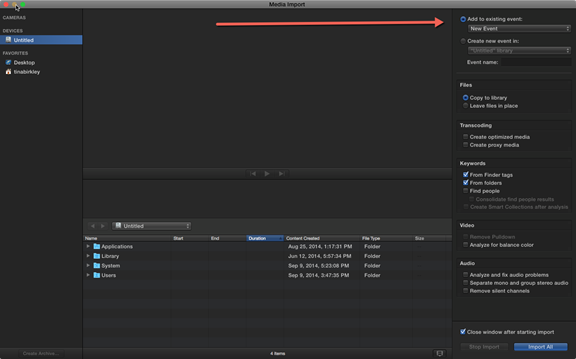
When it comes to the Media Import window in Final Cut Pro X, we have talked about the left hand side column where you choose a device from which to import, then about the files on that device which you can select to import. We have not yet talked about the right side of the window where you can organize and analyze the media you are importing.
Let's start by talking about organizing media.
Final Cut Pro X allows you to organize the media that you are importing into events during the actual import process.
To do this, you will go to the right side of the Media Import window.
After you have selected the media that you want to import, you can then organize that media in the Event Library --- before you the import process ever begins.
If you want to add media to an existing event, choose Add to Existing Event, then select the event from the menu.
If you want to create a new event for the media, select Create New Event by putting a check in the box to the left of Create New Event. Type a name for the event in the text area that appears.
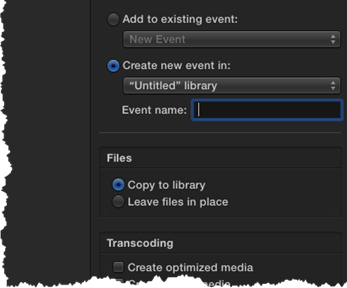
Next, in the Files section, choose how you want to store the files.
-
Copy to Library will duplicate the imported media. Copies of the file will be in the library storage location.
-
Leave Files in Place is self-explanatory, and Final Cut Pro X will link to the files.
You can also transcode and analyze the media that you are importing. We will talk about these options in the next two sections of this article.
Transcoding Media
If you are importing a format that has a high bit-rate, selecting the Create Optimized Media option under Transcoding may give you better performance during editing, as well as result in faster render times and a better quality. This is because Final Cut Pro X eliminates or reduces dropped frames by transcribing the media to ProRes 422. That said, if the format you are importing will not benefit from optimizing, the option will not be available.
Under the Transcoding section, you can also select Create Proxy Media. This will create video and image proxy files. Your video will be transcoded to the ProRes 422 format, but Final Cut Pro X will also create a medium quality proxy version to further increase performance while editing. Proxy files also take up less storage space. This might make it easier to work from a laptop with less power than a desktop.
Analyzing Media
Final Cut Pro X can analyze your media either during the import process or after it is imported to correct problems, such as shaky video and color balance. It can also remove hum or loudness from audio media files.
After Final Cut Pro X analyzes your media, it assigns keywords to the clips or range of clips that tell the results of the analysis. For example, if a clip range has shaky video, it will be assigned the Excessive Shaky keyword.
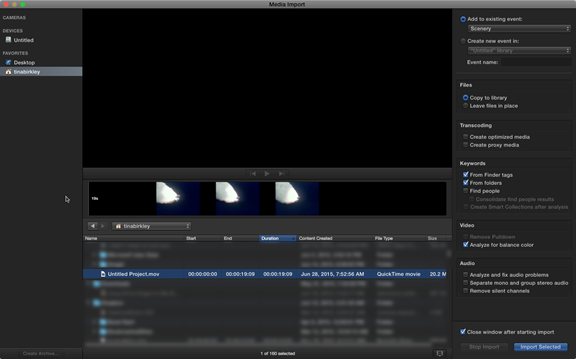
Final Cut Pro X can analyze your media directly from the Media Import window. The option is found on the right side of the window, as pictured below.
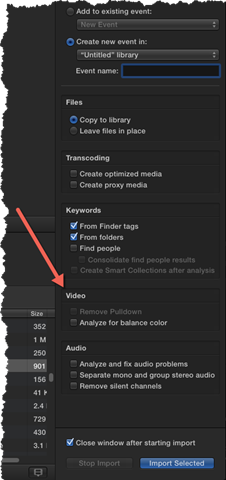
In the Media Import window, you can analyze video for color balance or to remove pulldown patterns. You can analyze audio to fix audio problems (such as hum), separate audio and group stereo audio, and remove silent channels.
If you choose to wait to analyze your audio and video files until after they are imported into Final Cut Pro X, you can go to Modify>Analyze and Fix.
You will then see this pop-up window:
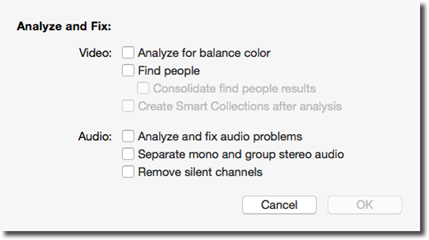
You will notice that you can also analyze your video for people. This option is not available in the Media Import window. If you select Find People, Final Cut Pro X analyzes video clips and images for the number of people in a shot, as well as the shot type. Keywords are added after the analysis. Examples of these keywords are One Person, Two Persons, Close Up Shot, etc.
Select what aspects you want to analyze, then click OK.
Importing the Media