iPhone Tips: Managing Photos & Videos
The iPhone puts a camera in your pocket-but it also puts several hundred images in your pocket too, and without a bit of organization, managing all those images would be chaos. The iPhone's camera roll is Apple's answer to managing both photos and videos. The iOS 8 update introduced several new features with the way photos are organized and subsequent updates are likely to keep improving the system as well.
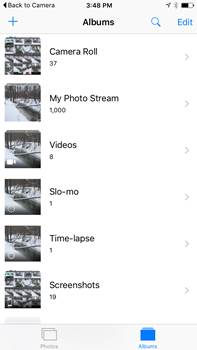
Every photo that you take with the iPhone is added to the camera roll, accessible by taping the Photos icon from the home screen. While all the photos are added to the camera roll, you can choose to further organize images using albums. The iPhone automatically adds a few albums: Panoramas, videos, slo-mo videos, time lapses, and bursts are all organized into their own album. Sometimes, apps have their own albums as well, so you may see an album for Instagram or other photo apps you may use. Once added to an album, the original photo will still be saved in the camera roll-albums are simply a tool for accessing specific images without having to hunt them down.
Taking a burst of photos (by holding down the shutter release) automatically groups those photos together. You'll only see one photo from a burst at a time from the camera roll. To view the burst photos, simply click "select." Once in select mode, you'll be prompted to choose your favorites. Tap on the photos that you'd like to keep-you'll see a blue check in the corner indicating that you've selected the shot. Then, click done. Then you'll be asked if you want to keep the entire burst, or only the photos that you selected. Burst photos can take up a lot of space on your phone, so selecting only the best ones is a way to save space, but you can choose to keep all of them as well.
To add a new album, tap the plus on the top right of the screen. Choose a name, then you'll be directed to a screen to add photos to your album. The images will be divided by date-you can tap on them individually, or tap the "select" next to the date to choose all the photos taken on that day. Once you've selected all the photos, simply tap done and the album will be created automatically.
If you've deleted any photos recently, you'll also see a "Deleted Photos" album. This feature keeps the photos that are deleted for 30 days, so if you accidentally delete a shot, you can recover it easily. To move a deleted shot back into your camera roll, click on the photo and tap recover. (Or, to delete permanently, tap delete.)
Since the introduction of iOS 8, the iPhone also includes a "Favorites" album. When viewing a photo, simply click on the heart to save the photo as a favorite. If you want to remove a photo from favorites, tap the heart icon again (tapping the trashcan will delete it from your camera roll, not just the favorites).
You can also organize your albums by tapping the "edit" at the top of the album screen. The albums that are created automatically-like the camera roll and panorama albums, for example-cannot be deleted or moved to another position. The albums you create, however, can be deleted by tapping the red circle to the left, moved by holding down the icon with three lines to the right, or renamed by tapping on the album name.
If you have the GPS tagging on, you'll also see a place listed on your collections. If you tap the place, you can see all of the images you took at that same location. (Remember, when GPS tagging is on, others can see the location you took the photos at as well-it's best to use this feature only when in public locations).
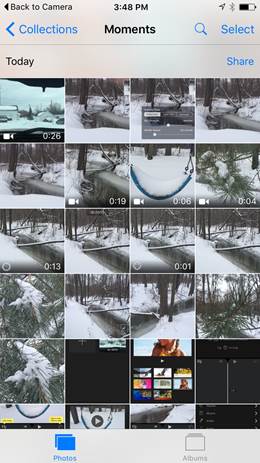
The iPhone camera roll also has a search feature, which you can access by tapping the magnifying glass at the top of the screen. The search screen will display images that you took nearby to where you are currently, as well as a few photos organized by month. Type in a location, date or album name to search for a specific photo.
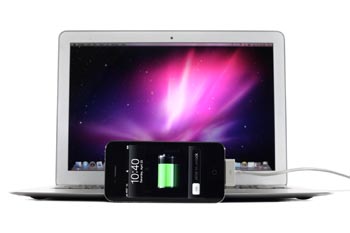
When you attach the iPhone to your computer with the USB cable (which also doubles as your phone charger), you can upload the photos onto your hard drive like you would with a camera. Simply located the photos the iPhone and drag the photos over to the folder on your hard drive where you would like to store them.
But if you use a Mac, you can also use the iPhoto program to upload and organize your photos. iPhoto comes pre-installed on Mac computers (if you don't see it in the dock, use the search bar at the top right to locate the program). To import your photos, click the iPhone under "Devices" in the lefthand column. Select the photos you'd like to import, or simply click import all. Once the photos are imported, you'll be asked if you'd like to delete them from your phone (to free up space) or keep them on both your phone and computer.
On the left side, you can navigate through all the photos that you've imported to iPhoto. Events will tag the photos by date, photos is like the iPhone's camera roll, and places uses the geotagging to put your images on a map. You can also tag the faces in your photos by clicking Photos > Detect Missing Faces. One tagged, you can browse photos by who's in them, which is a pretty cool feature. Also on the left hand sidebar, you can access the last import, your albums and slideshows.
On the bottom right, you can click info to see details like the geotag and what shutter speed and ISO the photo was taken at. The Edit option brings up a few basic enhancement and filters. The create icon allows you to put together a slideshow or print product like a book or calendar. The "add to" will put the image that you've selected into an album or slideshow. The share button functions just like the share feature on your iPhone, allowing instant uploads to connected social media accounts.

Setting up iCloud is simple. Head to Settings and then iCloud. If you haven't already, you'll need to put in your Apple ID and password-then any other device that uses the same Apple ID will have instant access to your camera roll. Then, scroll down to photos. In iOS 9, there are four options. Turning on the iCloud library adds your entire set of images, even old shots. Swiping My Photo Stream on adds only new photos, a good option if adding all your photos to the iCloud fills up that free 5 MB of space. You can also choose whether or not to upload all your burst photos to the iCloud, and if you'd like to share albums with others using iCloud.
Under "Storage" in the iCloud menu, you can see how much space you have left in your iCloud, and purchase more if you need.
If you take lots of photos, your phone and iCloud account will fill up quickly-how do you keep all of your photos, while still freeing up space on your iPhone?
One option is to purchase additional iCloud storage. Additional iCloud storage is a monthly subscription-you'll pay the fee every month that you continue to use that storage. Additional iCloud storage currently ranges from $.99 to $9.99 a month, depending on how much you need.
You don't need to be limited to just the iCloud, however. Other companies offer cloud-based storage, where you upload your photos to the internet and can download them again when you need them. Google Drive and Dropbox are popular options, but there are many more choices out there, all at different price points. Some also offer iPhone apps, so you can upload directly from your phone without connecting to a computer.
The biggest advantage of using a cloud-based storage system is that you can access your images anywhere that you have an internet connection. Since cloud storage systems are off-site, you won't loose your images to fire, flood or theft. But, most cloud-based storage is paid for by the month, which can add up over time. If you live in a rural area with a slow internet connection, uploading images will also take some time (or use up your data plan if you're not in wi-fi range).
Another option is to store the images on your computer, or, to prevent filling up your computer, an external hard drive. Unlike cloud storage, the only expense is buying the hard drive-there's no monthly fee. Saving images to an external hard drive also doesn't depend on internet access or speed. But, hard drives are prone to loosing data from a crash or malfunction, as well as disasters like a house fire.
Few people actually print their digital images, but photos are meant to be shared and printing is a great way to do just that. There are many options to print photos, both online and in physical stores. But how do you get the best results when printing iPhone photos? Here are a few tips:
- Keep it at an 8x10 or less. The resolution on the iPhone is enough for an 8x10, but not much bigger. If you print photos larger than an 8x10, you'll degrade the image quality. The iPhone 6 and 6s has a 12 megapixel camera, which offers a resolution large enough to print about a 14 x 9 inch image without any loss in quality.
- If you used the digital zoom to take the picture or cropped the photo in editing, an 8x10 is likely too large. Digital zoom and cropping reduces the resolution, so you'll want to print smaller sizes if you used zoom or cropping.
- Make sure to edit. Before you spend the money to get a physical print of your photos, make sure you're getting the best quality by editing the image with an app.
- If you want to print your photos at home, consider a printer that is compatible with Apple AirPrint. With an AirPrint printer, you can use the share button from your camera roll to print, without having to transfer images to your computer. Without AirPrint, you can upload your photos to your computer and print from iPhoto or another photo management program or photo viewer.
Photography is an art form, and as such, there is always room for improving-even professional photographers continue to learn and fine-tune their work. While you've now mastered the basics, keep working to improve your shots. Share your images with others interested in photography and get constructive criticism. Practice and experiment with different subjects, techniques and lighting. Follow photography blogs to continue to learn new techniques. Consider your own shots with a critical eye and note what you could have done to improve the image.
Keep learning, and your photography will continue to improve.