Why is my picture so dark?
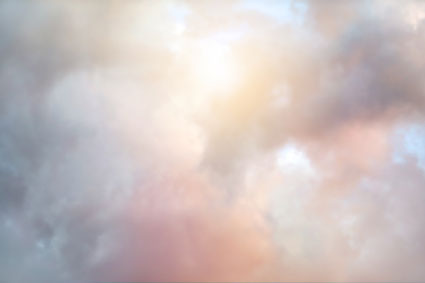
Why is my picture so bright?
Both questions can be answered with one thing: Exposure.
In the early days of photography, a piece of film was exposed to light to create an image. The iPhone camera, and every digital camera, works instead by exposing a digital sensor to light. When light enters through a camera's lens, it hits the sensor and an image is recorded.
But exposure is a bit more complex than simply light entering the camera. Too much light will leave an image blown out, with complete portions lost in a white mass. To little light, and the image is left looking dark and gloomy. Three different factors affect how much light enters the camera, which in turn effects how light or dark the final image is: shutter speed, ISO, and aperture. Each of these three settings work together to determine an image's exposure, or just how bright or dark the photo is.
The word photography is actually two Greek roots put together: Photo-, which means light, and -graphy, which means to write. Photography, then, literally means writing with light.
Exposure is the general term used to describe how much light enters the camera for a single photo. That term can be used to create two more:


But exposure errors will create more issues than simply an image that's too dark or two light. Overexpose an image too much, and the details in the brightest portions of the image will be lost-you can't even get them back through the best photo editing apps. The same holds true for underexposing an image-if you loose too many details in the dark shadows, you can't fix the issue later on.
In auto mode, the camera chooses the three settings that affect exposure for you. In order to do that, it has to have a way to measure the light in the scene in order to choose those settings. The meter is the tool that the camera uses to do just that. Your iPhone's meter is simply the tool that tells the camera how much light is in the scene, so it can choose the settings in auto mode.
Under the default settings, your iPhone's meter will measure the light from the entire scene. On a DSLR, the same setting would be labeled as matrix or evaluative metering, because the entire scene is evaluated to take the picture.
In most scenarios, that works well, but in high contrast scenes, this method of measuring often leaves the main subject too dark or too light. That's where spot metering comes in. Instead of reading light from the entire scene, the spot meter considers only the light from one point. If your subject is too dark or too shadowy, using spot metering is an easy way to fix the issue.
Spot metering on the iPhone is actually pretty simple. You can touch the screen to focus on a certain object. That feature will also activate spot metering, basing the camera's exposure settings on the object you just touched, so it's not too dark or too light. In some camera apps, you can set the spot meter and the focus point separately-so you can measure light off a different portion of the image than the part that's in focus.
The iPhone's light meter, like other cameras, doesn't exactly measure light in the way you think it does, though-that's why sometimes auto images are too bright or too dark. The meter reads the light that bounces off of objects and color plays a big role on how much light the meter "sees." If there are a lot of white objects in the photo-for example, shooting a snowy landscape-the meter will think the scene is much brighter than it actually is. Because all that white tricks the meter into thinking the scene has more light than it really does, you end up with a dark picture, sometimes even if you use spot metering.
Exposure compensation is the tool that allows you to tell the camera that the image is too light or too dark. In simple terms, using the exposure compensation tool allows you to adjust how the meter is reading the scene, to lighten or darken the image from the default.
Exposure compensation is measured in "stops" of light. While the term makes many new photographers nervous, the concept is fairly simple: A stop will double (or halve) the amount of light in a single image. One stop of exposure compensation, often written as +1 EV, will double the amount of light that the camera records in an image. When you set the exposure compensation to +1 EV, you are telling the camera's meter to take in twice as much light as the meter initially thought it should.
Written as a negative number, like -1 EV, exposure compensation doesn't double the amount of light that the camera records, but cuts it in half. If the image appears too dark, use a positive number; too light, a negative one.
Exposure compensation is adjusted in increments of 1/3-so you don't have to double the amount of light and you can increase or decrease it by smaller amounts.
Use the touch-to-focus feature, then sliding up or down to lighten or darken the image. That is just a simple form of exposure compensation, without all the numbers thrown in.
When a typical camera takes an image, a part called the shutter opens to let light in through the lens. When that shutter is open, the image is being recorded, when the shutter closes, the picture has been completed.
But the shutter in the iPhone, and most other smartphones, works a bit differently. To pack all of the technology into a small phone, there's actually no room for a physical moving part to open and close. Instead, the iPhone uses an electronic shutter.
The electronic shutter isn't actually a physical moving piece. The iPhone lens isn't blocked by a shutter or any moving pieces and the sensor actually receives a small electrical surge anytime the phone is turned on. When you press the button to take a picture, the sensor receives a much bigger burst of power that tells the sensor to record the image. Instead of having a physical barrier, the sensor is always exposed and electricity tells the sensor when to stop and start recording an image.
Whether you use a camera that has a physical shutter, or the iPhone's shutterless camera, the amount of time that the sensor is exposed to light is referred to as shutter speed. Any time the shutter is open, or the electronic sensor is receiving the signal, an image is being recorded. Shutter speed can vary widely, from just a fraction of a second to several minutes long.
The longer the shutter speed is, the more light that is let in to an image. An image with a 1/200 second shutter speed will let in much less light than a 30 second shutter speed. The image taken with the 30 second shutter speed, then, will appear much brighter than the one taken at 1/200 when the image is taken of the same scene. If you take an image that's too dark then, you can lower the shutter speed to let more light in.
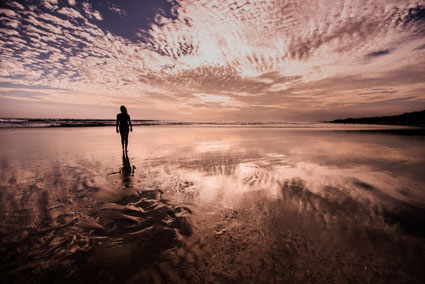
Take a look at how this photo, taking indoors in limited light, looks with a 1/30 second shutter speed:


The difference in quite noticeable. If a photo is too dark, reducing the shutter speed (so the sensor is exposed for a longer period of time) will correct the issue.
But, there's one more factor to consider before adjusting the shutter speed: everything that moves while the shutter is open will become blurry. If you are taking pictures of a pet or child playing, and you use a low shutter speed, all of their movement will become blurry.
The movement of the camera will create blur too. Even the slightest movement in your hands will introduce blur to the entire image at longer shutter speeds. When using a longer shutter speed, a tripod is essential to prevent blur. Ideally, if you don't have a tripod, you should try to keep the shutter speed at or above 1/30 on the iPhone.
The best shutter speed is also going to depend on how much light is in the scene as well as how much movement is in the scene. Shooting outdoors during the day, it's easy to get a high enough shutter speed to eliminate blur, even when taking sports pictures. Taking pictures indoors, though, tends to have less light available, so you'll need a slower shutter speed to let more light in.
The digital sensor inside your iPhone captures light-ISO determines just how sensitive the sensor is to light. A low ISO setting, like ISO 50, isn't very sensitive to light, so the image will be very dark if there isn't enough light in the scene. A high ISO, on the other hand, like ISO 1500, is very sensitive to light. Even if there isn't very much light in the scene, a high ISO of 1500 will capture much more light, because the camera's sensitivity has increased.
If you take an image and it is too dark, turning the ISO up will lighten the image, helping you achieve a proper exposure. If on the other hand the image is too bright or overexposed, you can turn the ISO down to fix the issue.
But just like low shutter speeds risks blur, there's a compromise with ISO as well. High ISOs will produce what's called noise or sometimes grain. Noise is a type of image distortion that looks like lots of tiny dots.
Take a look at what happens when we zoom in to the overexposed image we shared earlier, which was shot with a high ISO of 2000:

Take a look instead at the same section of the image at ISO 32:
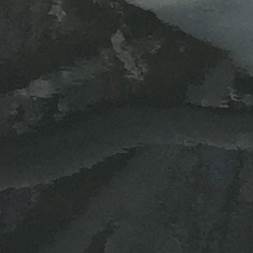
The photo is a bit darker, but you can't see those tiny dots anymore. If you look closely, you can see more detail in the shot with the low ISO, making out the outlines of the branches reflected in the water.
Using shutter speed and ISO together, you can take images that aren't too bright or too dark. As you choose the shutter speed and ISO, you need to determine what's more important, freezing the motion, or getting a clear image with little noise. When you are photographing action, avoiding blur is more important, so you'll use a higher ISO when photographing a moving subject. But if there's nothing in the frame that's moving, you'll get much better image quality by using a low ISO and a low shutter speed, since there's nothing in the photo to blur anyways.When shooting still subjects, you can use a low ISO and low shutter speed for the best image quality. But when shooting a moving subject, you can use a fast shutter speed to freeze the action with a high ISO to precent underexposing the image.
But wait, didn't you say there were three settings that adjust the exposure?
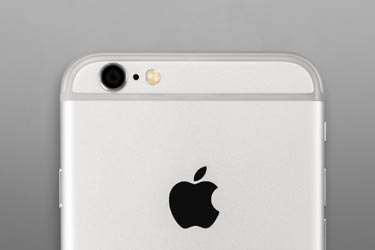
The iPhone lens, however is fixed-the aperture won't change. That means that when adjusting the exposure on a DSLR, you have three settings to work with, but on the iPhone you just have two.
The good news is, the aperture on the latest few iPhone models is pretty wide, so the lens does well in limited lighting. And while the flexibility of having one more setting to adjust would be nice, that also means you really only need to remember two factors for adjusting exposure: shutter speed and ISO.