The Color Panel
You can store colors that you use frequently in InDesign so you don't have to constantly look for them or match them to a previous instance. Using the Color Panel, you can create different colors and save them. You can use sliders, spectrum colors selectors, a grayscale ramp, and you can create a color ramp for current fill and stroke colors too.
Click on the Color panel on the right side of your screen. Its button looks like this:  .
.
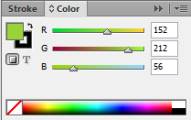
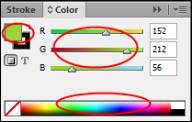
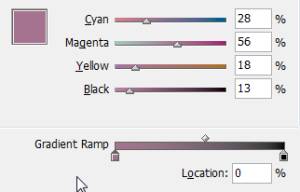
In the snapshot, you can see the RGB sliders, since we're working in the RGB color mode.
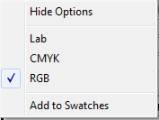
Click the Options button:  .
.
Now, you can select from several sliders.
To change a color using the Color Panel, click a color box, use a slider, enter specific values, or click a color in the spectrum. The box with the red diagonal line means no color.
To use the Adobe Color Picker, double click a color box:

You'll then see the Adobe Color Picker:
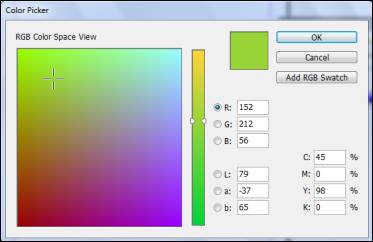
Select a color. You can use the sliders in the center to pick a color range, then pick a color in the Select Color box.
Click OK.
Color Swatches
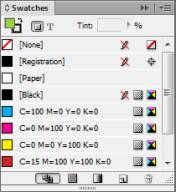
Swatches are colors that you use often. These are saved in the Swatches panel. To load the color swatches, click Swatches on the right side of the screen:  . This will open the Swatches panel:
To add a new swatch, click the Options menu  .
.
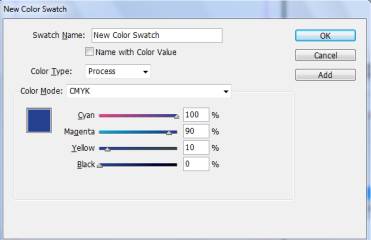
Enter a name for the new color swatch. By default, the Name with Color Value will be checked. Uncheck this if you want to give your swatch its own color.
Next, choose the color type.
- Process. In printing, process is four color printing (CMYK).
- Spot. In printing, this includes colors that are matched to colors used in printing, like for a logo that has to be exactly the right shade of blue. Spot, when combined with process, can turn into five or six color printing.
Next, choose your color mode. RGB is three color. CMYK is four color and used in printing.
Click OK when you're finished.
You can also drag a color from the color boxes or the Color panel to the Swatches panel.
Creating and Working With Gradients
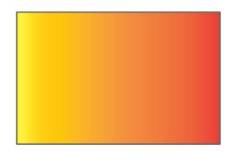
A gradient is a transition between different colors, or even between different shades of the same color. Below is an example of a gradient that goes from yellow to orange.
To create a gradient fill, make sure the object you'd like to apply it to is has been selected, then expand the Gradient panel (Window>Color>Gradient). Its button looks like this: .
Let's take a closer look at the Gradient panel.
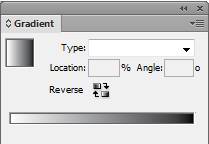
Here you can select whether you'd like a radial gradient or a linear one. The first example we showed you is a linear gradient. Below is an example of a radial one.
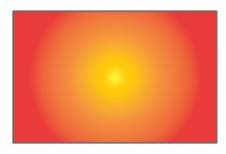
As you can see, the gradient goes from yellow in the center, to orange at the edges.
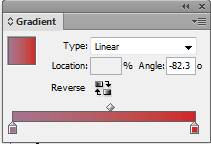
Use the Type drop-down to select either radial or linear.
You can select the location and angle as well.
Creating Your Own Gradients
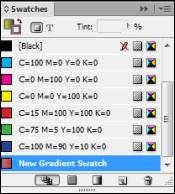
You can create your own gradients and add them to your swatches.
To do so, we're going to go to Window>Color>Swatches.
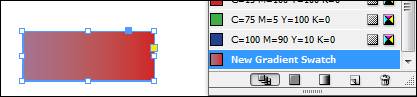
Click the Options menu and select New Color Swatch.
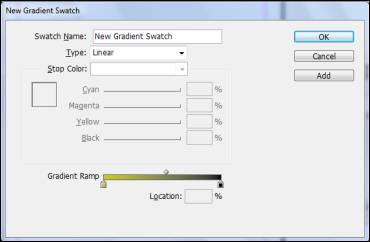
Enter a name for the Gradient swatch.
Enter the type.
Look at the bar at the bottom. This is where you create your gradient. You can drag the handles to change the length of each shade of color.
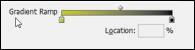
Or you can click on them and select a color from the color chooser. (These handles are called "Color Stops.") To add a new Color Stop
 , click on either the left or right color stop.
We clicked on the left color stop.
Create your color.
Now repeat the steps for the right color stop.
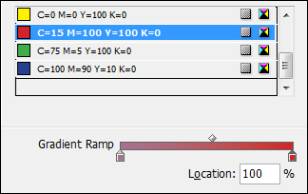
You can use the diamonds at the top of the bar to increase or decrease the length of the transition.
Click OK when you're finished.
The gradient will then be available for you to use again in the Swatches panel.
Using the Gradient Tool
The Gradient Swatch tool on the toolbar gives you one more way to create and edit gradients. Simply select this tool
 .
.
Gradient Swatches
You can select and apply gradients from the Swatches panel. To do so, launch the Swatches panel and click gradient you wish to use from your list of swatches.
Simply drag and drop the name of the swatch to the object you wish to apply it to.
You can also click on the Fill or Stroke color box in the Tools panel, then click on the name of the gradient swatch to have it used as either the fill or stroke color.
-
Points and Paths
InDesign's vector drawing tools are the pen tools. When you use the pen, InDesign creates a path and stores the information about the path. The paths are defined mathematically with anchor points and segments. You can modify paths at any time.In this article, we're going to learn about InDesign's pen tools, as well as creating simple and complex paths.
Drawing with Pen ToolsYou use the Pen tool to create a path. The path is made up of curved and straight segments. These segments are created by anchor points. When you click the Pen tool ( in the Tools panel
 ), you can draw corner points and straight segments. If you drag the Pen tool, you can create smooth points and curved segments. These segments will have direction handles so you can change the direction of the segments. You can use Smart Guides to help you align segments, as you'll see in this article.
That said, let's use the Pen tool to create a Polygon.
First, click on the Pen tool.
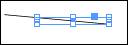
Click on a blank area in your document to create an anchor point.

The blue anchor point appears on our page, as shown above.
Now, click to create a second anchor point in a different location.
As you can see, a line segment appears between the two anchor points that you created.
Continue to add anchor points to create your shape.
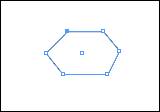
To create a closed path, connect your last anchor point with the first anchor point. Remember, a straight line is an open path. A circle is a closed path. So is a polygon.
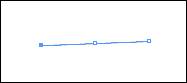
Next, let's learn to draw a curve with the Pen tool.
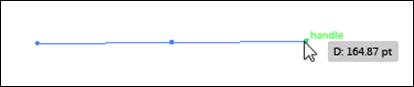
To do this, you're going to click to place the first anchor point, just as before, but now you're going to click and drag. Notice the handle in the snapshot below.
Now, release the mouse and move to where you want the second point to be.
Click and drag again.
As you can see, your curved line appears between the two points.
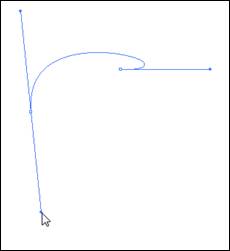
The shape of your curve is defined by the length and direction of the handles.
You can add more anchor points and handles.
Click on the Selection tool when you're finished to see your shape. Remember, just as with lines, segments are drawn from the previous to the new anchor point. To create a closed path, connect the last point with the first.
Moving Anchor Points and Segments
Let's say that you draw a segment on the wrong part of your artboard and you want to move it, or let's say that you need to move an anchor point. If you move a segment, the anchor points move with it. However, if you move an anchor point, the segments connected to the anchor point change. If you move a curved segment, the curve will change, but the anchors remain the same. If you want to change a curved segment, you can do so by adjusting a direction point on the direction handle.
Let's learn how to move points and segments to see what we mean:
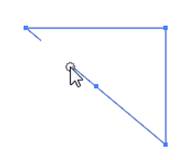
To move an anchor point or segment, select the Direct Selection tool in the toolbox.
Next, click a blank area to deselect all points in the active area.
Now, drag an anchor point or the middle of a segment, as we've done below.
Convert Points
When you create a curve with the Pen tool, the curve segment that comes after the second anchor point will appear on the opposite side of the first curve segment. If you want the second curve segment to appear on the same side as the first, you need to convert the anchor point from a smooth point to a corner point. You use the Convert Direction Point tool to do this.
Paths can have two types of anchor points: smooth or corner. A smooth anchor point connects two curved segments and creates a smooth line. A corner anchor point connects two straight or curved segments to create a change in the path direction.
To convert the point from a smooth point to a corner point, we go to the Convert Direction Point tool located in the Tools panel. It's grouped with the Pen tool. Click on the Pen tool and hold it down to see this tool. It looks like this:
 .
.To convert a point, first use the Direct Selection tool to click on the path to convert points.
Now, click on the Convert Direction Point tool.
Now you can:
1. Drag a corner point if you want to create a smooth point with no handles.
2. Click a smooth curve point to create a corner point without handles.
3. Drag a handle of a smooth curve point and create a corner curve.
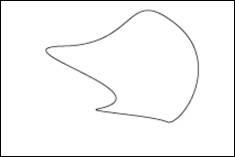
Add and Delete Anchor PointsIn InDesign, you can add, subtract, or delete anchor points to modify a path. You can also modify the points to conform to a shape. Let's show you what we mean, and how you can add and delete anchor points to modify paths and shapes.
Here's how to add anchor points:
Go to the Direct Selection tool in the toolbox.
Now, select the object for which you want to add an anchor point.
Now, go to Add Anchor Point in the toolbox. It's grouped with the Pen tool and looks like this:
 .
.Click on the path once to add a new anchor point.
The new anchor point is added:
Now, click the Direct Selection tool again, then click and drag on the path to add and modify the segment.
To delete an anchor point, go to the Delete Anchor Point tool located with the Pen tool.
Click on an anchor point to delete it.
We deleted the upper right point from the illustration above:
The Pencil Tool
The Pencil tool does just as a regular pencil that you hold in your hand does. It allows you to draw freehand.
Select the Pencil tool in the Tools panel. It looks like this:
 .
.Start drawing in a blank area on your page.
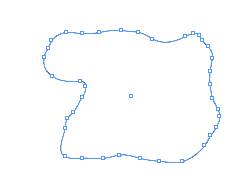
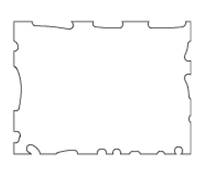
Smooth Paths
If you have a rough looking or ragged path, you can smooth it out using the Smooth tool in the toolbox. It looks like this:
 . It's grouped with the Pencil tool.
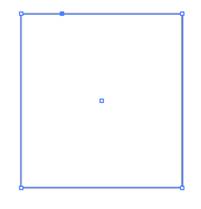
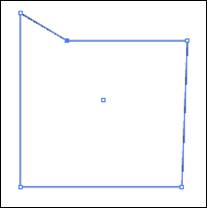
We're going to smooth a path on this shape:
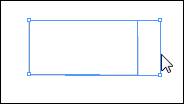
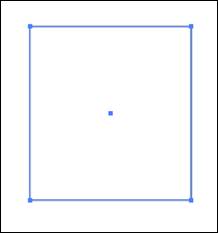
Select the object that you want to smooth with the Selection tool.
Then, click on the Smooth tool, then drag it along the path you want to smooth.

Erasing Paths
You can use the Erase tool in the Tools panel to erase paths and parts of objects. It looks like this:
 . It's grouped with the Pencil tool. When you do so, InDesign connects the parts that remain to reshape and close the path.
Here's how to erase parts of paths:
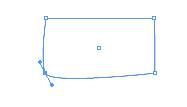
Use the Selection tool to select the object that you want to partially erase.
Click the Erase tool and drag to erase the paths that you want to remove.
Splitting Paths
The Scissors tool, located in the Tools panel, allows you to split an open path into two paths or open a closed path. The Scissors tool looks like this:
 .
.To use the Scissors tool, select the path you want to split or the closed path you want to open using the Direct Selection tool.

Now, click the Scissors tool.
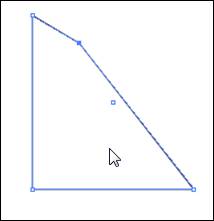
Click on the path where you want to split it.
As you can see, we now have two open paths instead of just one.