Images and graphics add color and interest to your pages. They can help bring attention to text, sell products/services, provide information or education, and much more.
You can add as many images as you want to your Muse CC website. However, there are just a few things to keep in mind.
Muse CC allows you to use the three web-friendly formats only for images. All images that you use in your Muse CC website must be in either JPEG, GIF, or PNG format.
Choose the format that will work best for your image.
-
JPEG is the best format to use for images because it has more colors.
-
GIF is the best format to use for graphics. It has 256 colors, which is more than enough for most graphics.
-
PNG is a combination of JPEG and GIF.
You'll also want to remember that too many large images on your pages can increase the time it takes your website to load (or appear) in a visitor's browser. For that reason, it's always a good idea to optimize your images using a photo editing program such as Photoshop before putting them into Muse CC.
Placing an Image on a Page
Placing an image on a page that you have saved on your computer is easy. Just make sure that it is saved in the correct file format on your computer.
Go to File>Place.
In the dialogue box, locate the picture you want to use, click the select it, then click the Open button.
You'll then see the place gun over your page in Muse CC.
Click the location on the page where you want to place the image.

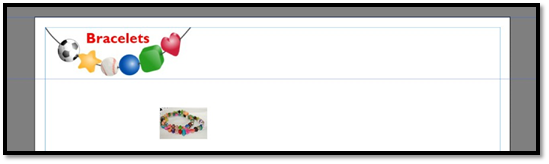
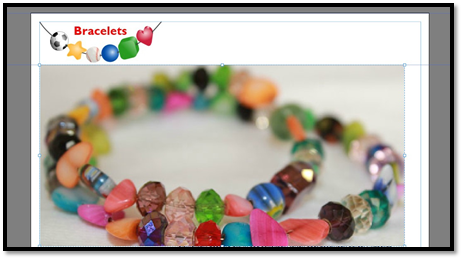
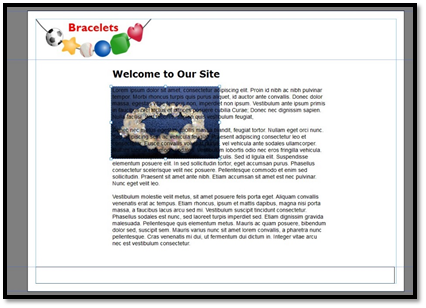
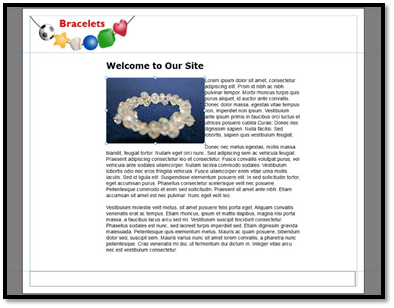
As you can see, the image above doesn't fit onto our page. That's okay. We are going to learn how to make images fit into our page designs.
Copy and Paste Images
In addition to using images you have stored on your computer, you can also copy images from other programs, such as Photoshop.
To copy an image from another program and paste it into Muse CC, go to the other program and follow the steps necessary to copy the image to your clipboard.
Once the image is copied to your clipboard, return to Muse CC.
Go to Edit>Paste.
You'll then see the place gun over your page.
Click to place the image in the location where you want it on your page.
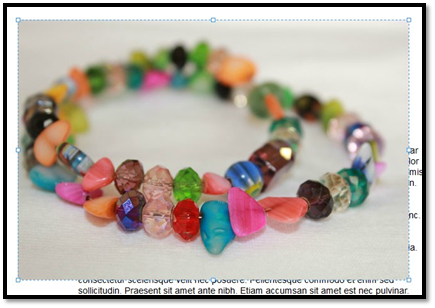
Crop an Image
Look at the snapshot above again. Let's say we want to trim away some parts of the image that we placed onto the page.
To do that, we can crop the image.
When you crop an image, you cut away the edges of the image; therefore, reducing its size. You can crop an image to reduce the size or to change the focus and appearance of an image.
To crop an image, click the Crop tool in the main toolbar. It looks like this:

Now click on the image.
Next, drag the handles inward to crop away the edges of the image.
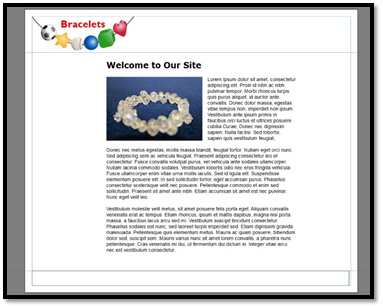
As you can see in the snapshot below, we cropped three edges of the image.
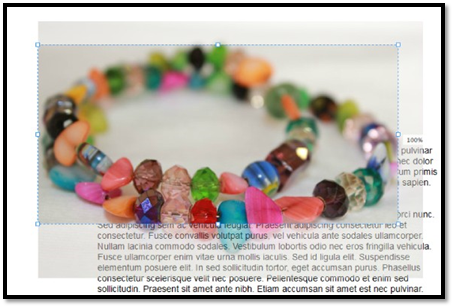
Our cropped image now looks like this:
Resizing an Image
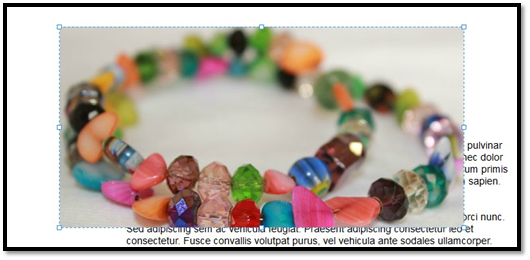
In the snapshot above, our image is still bigger than we want it. To fix this problem, we can resize it.
To resize an image, click the Selection tool, then click on the image to select it.
Click and drag on a handle.
-
Drag inward to reduce the size.
-
Drag outward to increase it.
-
Drag a corner handle to reduce or increase the size without distorting the image.
-
Drag a side handle to reduce or increase the size, as well as distort the image.
We've increased the size of our image.
You can also resize images by adjusting the height and width in the Control bar.
Moving Images on a Page
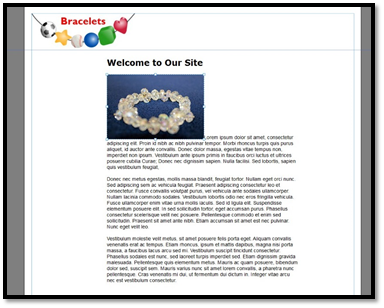
The snapshot below shows our image after we cropped it, enlarged it, then cropped it again to give it the look and size we wanted.
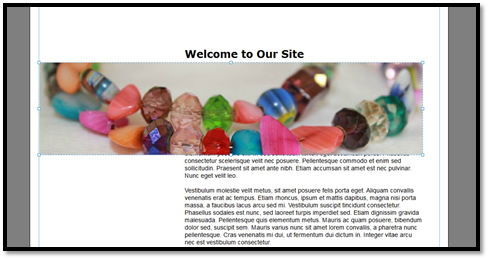
Now we need to move the image because, as of now, it's covering our text.
To move an image on a page, use the Selection tool to select the image.
Place your mouse over the image, then click and drag the image to where you want to place it on the page.
You can also move an image by adjusting its X and Y coordinates in the Control bar.

Rotating Images
Muse CC allows you to rotate images on your pages.
To rotate an image, select the image using the Selection tool.
Go to the Control bar. Enter the degrees you want to rotate the image in the field.
Applying Effects to Images
Just as you applied special effects to your pages earlier in this article, you can also add special effects to images.
Click the word Effects on the Control bar.
As you can see, you can add (from left to right) a drop shadow, bevel, or glow.
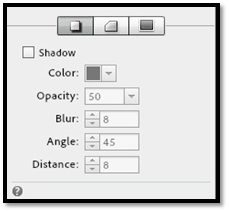
To add a drop shadow, click the drop shadow button as pictured above.
Put a check in the box next to Shadow.
Specify the color, opacity, blur, and angle of your drop shadow. Specify the distance the shadow extends from the image (measured in pixels).
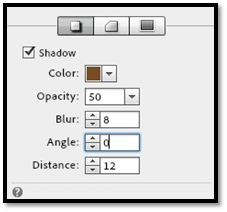
The drop shadow is applied to your image.
Adding Graphic Styles
Just as you can create character and paragraph styles, you can also create graphic styles using the Graphic Styles panel (Window>Graphic Styles).
Let's say we want to create a graphic style so that we can easily add a drop shadow to any of our images on our site using the same drop shadow setting options as we did in the example earlier in this article.
First, use the Selection tool to select the image that contains the formatting you want to use to create the graphic style.
Go to the Graphic Styles panel.
Click the New Style  button.
The style is then added to the panel. Double click on it to give it a name.
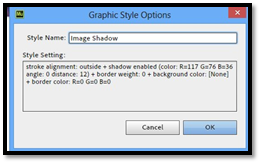
Click OK.
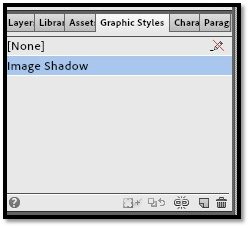
The style then appears in the panel.
Apply a Graphic Style
To apply a style to an image, first select the image using the Selection tool.
Next, go to the Graphic Style panel. Click on the style you want to apply.
The style is then applied.
Modify a Graphic Style
Once you create a style, you may decide that you want to make some changes to it. Perhaps in the example above, we decide that we want to also add a glow.
To modify a style, first select the image whose style you want to modify using the Selection tool.
Make the formatting changes that you want to make.
Now, go back to the Graphic Styles panel.
Click on the Redefine Selected Style from the Attributes Applied button. It looks like this:

The style is then modified.
Adding Alternate Text
 It's also a great SEO tip that can help your site rank higher for your keywords.
To add alternate text, go to the Assets panel (Window>Assets). This is where all your images are listed.
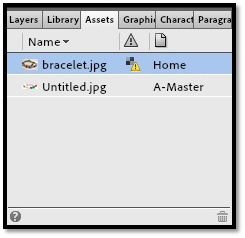
Right click on an image in the panel.
Select Edit Image Properties.
You'll then see the Image Properties dialogue box.
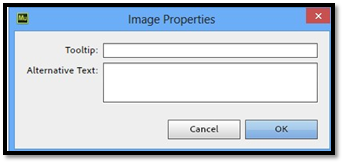
Add a title, then a description for the image.
Wrapping Text around Images
Let's say we want to put an image in with our text in the same box (or frame). This is helpful to do so if you move elements around on your site later, the images stay with the text they belong with. The alternative is creating text boxes, then placing images beside the text boxes. You'd have to move both separately and realign them. That can be too time consuming.
As we said, it's more helpful to place them together.
However, if you put both image and text into the same frame, this is what you'll see:
To fix this problem, you have to wrap the text around the image.
To do this, cut the image from the page by going to Edit>Cut.
Next, using the Text tool, click in the area of the text where you want the image to appear. We want it to appear before the first word.
Now click Edit>Paste.
Next, click on the Selection tool. Select the image.
Open up the Wrap panel (Window>Wrap).
Select a wrap option from the panel.
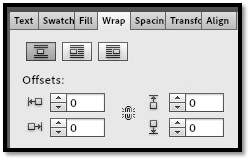
You can (from left to right):
-
Position object in line with text
-
Position object to the left of text
-
Position object to the right of text
We've selected to position our object to the left of text.
You can adjust offsets to add white space between the image and your text.
Fixing Broken Asset Links
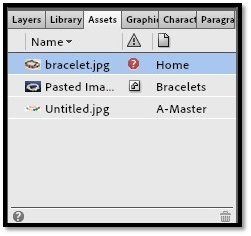
When you place an image on a page, Muse CC creates an asset link that links the image to its location. If you move the image, the link becomes broken.
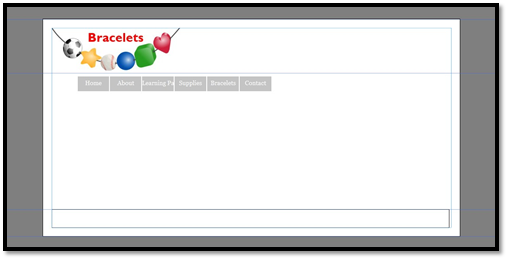
In the snapshot below, we've moved the image we had at the top of our home page.
In the Assets panel, you see a red circle with a question mark in the middle of it, letting you know the asset is missing.
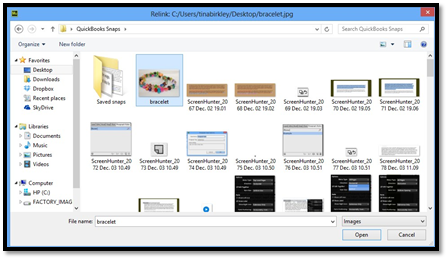
Right click on the asset. Click Relink.
Find the file in its new location, then click Open.
Next, break the link again by moving the file again.
Right click the image in the Assets panel. Click on Embed link.
The warning is now gone.
Creating a Favicon
A favicon is a small image, more like an icon, that appears to the left of your URL in someone's browser window. It's a visual representation of your site.
To create a favicon, first create and save a 32x32 pixel image in a photo editing program.
Next, click File>Site Properties in Muse CC.
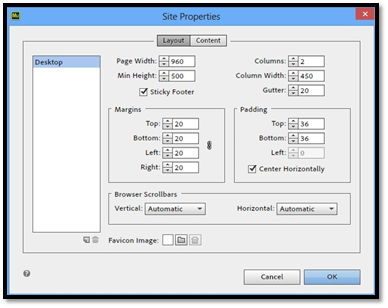
Click the button that looks like a file folder to the right of Favicon Image.
Select the image you want to use, then click Open.
Click OK.
Your Site's Main Navigation Structure
Your website is nothing more than a series of pages linked together. The pages on your website will be linked together by your site's main navigation structure, any secondary navigation structure, and hyperlinks.
In this article, we are going to talk about your site's main navigation structure, and learn how to add navigation to your pages.
Organizing in Plan View
Whether you realize it or not, you already created the basis for your site's main navigation structure when you created your pages in Plan view. Your site's main navigation structure contains links to your top level and secondary pages. It typically appears on every page of your website.
Let's go back to Plan view now. Look through your pages. Make sure all the top level and secondary pages that you want are created in Plan view. If they're not, create them at this time.
After you are finished, double click on your Master so it opens in Design view. Since your site's main navigation structure will appear on every page, it's easiest to go ahead and place it on the Master.
Creating a Menu Bar
Your site's main navigation will be contained in a menu bar.
To create a menu bar, go to Object>Insert Widget>Menu, then choose either a horizontal or vertical menu bar.
We've chosen a horizontal menu bar.
You'll then see the place gun over your page. Click to place the menu.
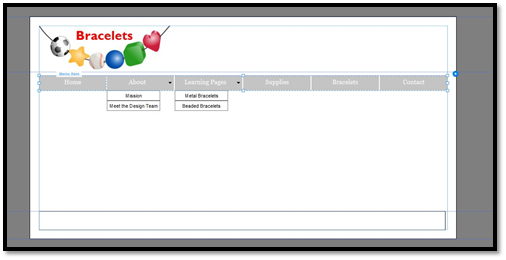
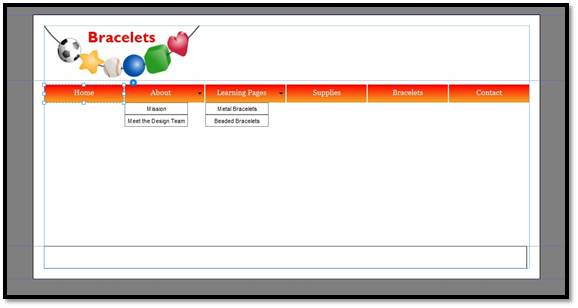
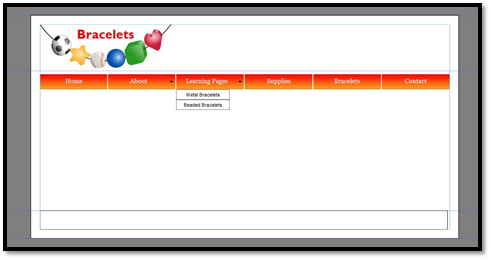
As you can see in the snapshot above, all of our top level pages are listed and linked to in the menu bar.
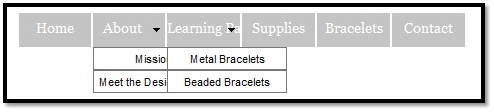
Adding Secondary Pages to a Menu Bar
The menu bar we just created only contains are top level links. We also want to include our secondary pages. To do this, use the Selection tool to select the menu bar.
Slick the editing options icon. It looks like this:

When you click on the icon, you'll see an options menu open.
Go to the Menu Type dropdown, and select All Pages.
Now you can see your secondary pages displayed in the menu bar.
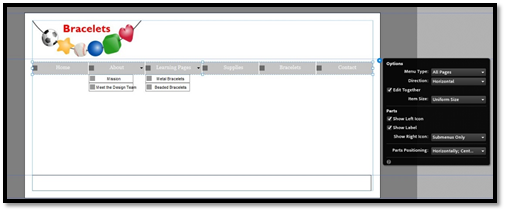
Changing the Orientation or Size of a Menu Bar
Your menu bar's orientation refers to whether it is a vertical or horizontal menu bar. You can change the menu's orientation even after you've placed it on the page.
To do this, click on the Selection tool, then select the menu bar.
Click on the editing options icon.
In the Direction dropdown, change the direction.
To change the menu bar's size, you can drag on the handles around the menu bar. To change a button's size in the menu bar, use the Selection tool to select the individual button. Drag on a handle until you reach the size you want.
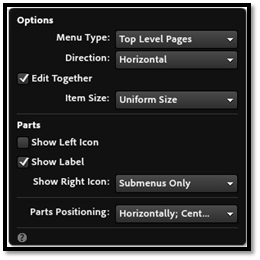
Adding Icons to a Menu
You can also add icons in addition to or instead of the text labels that appear on the buttons. To create the icons, you can use a fill color or small images. The image must still be clear after the icon is created.
To add an icon to the menu, use the Selection tool to select the menu.
Click on the editing options icon.
Put a check in the box beside Show Left Icon.
You'll see a small grey box appear to the left of the labels.
Click on one of the grey boxes. Go to the Fill panel to either add a fill color or set a background image.
If you don't want text labels to appear on the buttons, click the edit options icon, then uncheck the box beside Show Label.
Formatting a Menu Bar
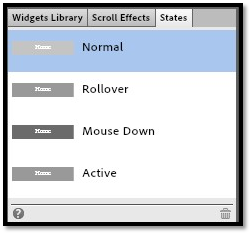
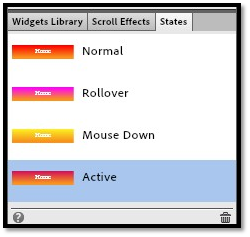
The menus in Muse CC have four states:
Normal � The color of the button when nobody's interacting with it.
Rollover � The color of the button when they position their mouse pointer over it.
Mouse Down � The color of the button when someone clicks on the button.
Active � The color of the button that links to the current page.
By default, these states are in different shades of grey in Muse CC. You can change these colors and even add gradients to further customize the look of your menu.
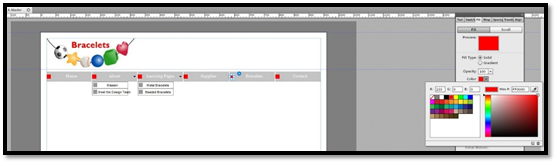
To format your menu bar, use the Selection tool to select the menu. Now, use the Selection tool again to select a button in the menu.

Now go the States panel (Window>States).
In this panel, you can see the states for the selected button.
Click on a state in the States panel.
Now go to the Fill panel.
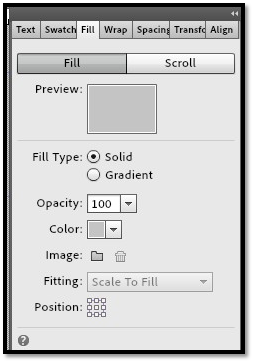
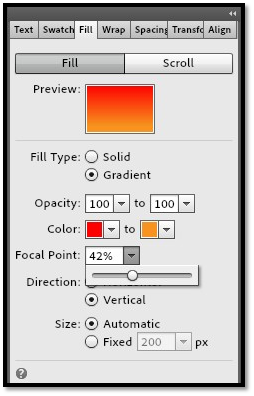
Select either the Solid or Gradient box, then select a color for the state.
If you choose gradient, select a beginning and ending color. Also, you can set your focal point (or the percentage of the first color of your gradient) and choose if you want a horizontal or vertical gradient
All changes are made to your button for you.
Select your color(s) for the rest of the states as well by selecting a state in the States panel, then choosing colors in the Fill panel.
The changes are made to your page for you.
Deciding Which Pages Appear in Your Menu
You may not want all of your top level or secondary pages appearing in your menu. For example, let's say you have a Career page as a top level page, but you don't want it to appear in the main navigation.
To take care of this, go to the Plan view.
Right click on the page that you don't want to appear.
Click Page Properties.
Click the Option button at the top of the Page Properties Dialogue box.
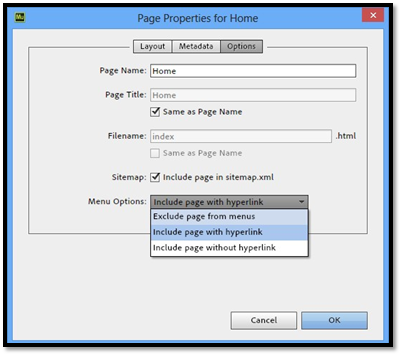
In the Menu Options dropdown, select Exclude Page from Menus.