Apps is short for application software, which is software created for a specific purpose. Apps are popular nowadays on cell phones, computers, laptops, and � of course � tablets such as the iPad. There are gaming apps, productivity apps, entertainment apps, and the list goes on. If you just browse through the iPad app store, you'll see you can get an app for just about anything.
Your iPad is stocked with apps by default. Just about everything you do on the iPad requires tapping to open an app. You've already learned to use the Photos app, the Mail app, and the Music app. In this article, we're going to show you how to find even more to use.
It goes without saying that you can find apps using your iPad and download them to use. However, you also can find apps using your computer by simply opening iTunes.
Start by connecting your iPad to iTunes.
Next, go to iTunes and click the iTunes store button on the far right. It's to the right of your iPad button, and below the search field.
The iTunes store opens:
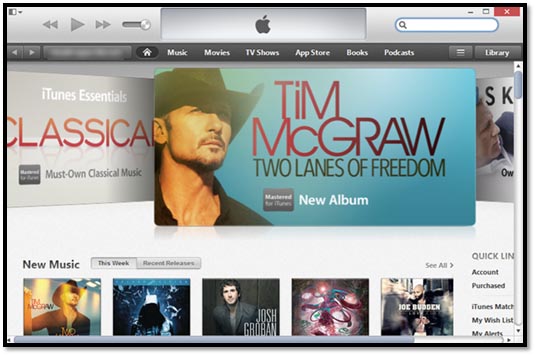
At the top, you'll see Music, Movies, TV Shows, App Store, Books, and Podcasts. We want to look for apps, so we're going to click the App Store.
We found a free game app that we want to download to our iPad.
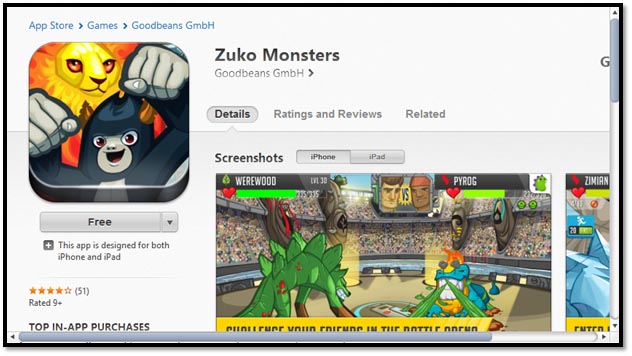
Next, we click where it says FREE (on the right-hand side). If this were an app that we had to purchase, the price would be there instead. This is the same method we used to buy music on our iPad through the iTunes store.
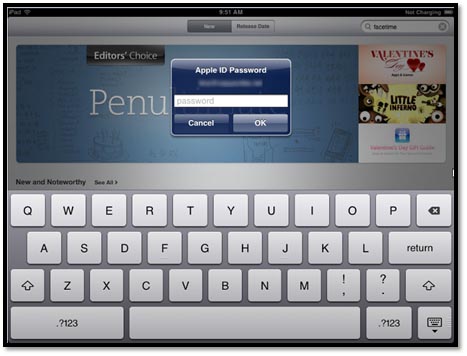
Now, we enter in our Apple ID and password. Click Get.
![]()
Once the app is downloaded, you can sync it to your iPad. However, if you don't want to have to sync every time you download an app on your computer, simply tap the Settings icon on your iPad, go to Store on the left, and turn on Automatic Downloads for music, apps, books, or all three. This way, when you download an app on your computer, it automatically installs on your iPad as well.

Finding And Downloading Using Your iPad
You also can shop for apps using the App Store app on your iPad.Tap the App Store on the Home screen to open it.

You can search for apps in the same way you searched for books and music -- by tapping the bottom of your screen for Featured apps, Genius (based on apps you've purchased), Charts (most popular), Categories (games, productivity, etc.), and apps you've already purchased. You also can search for apps using the search feature at the top right of the screen.
When you find an app you want to purchase, tap on the gray box. The box turns to green. Tap it again to purchase the app.
Enter your Apple ID and tap OK.
Updating Apps
Every once in a while, the apps on your iPad will need to be updated. The reason for the update might be to fix glitches or to upgrade the app. Your iPad will let you know when you have apps that need to be updated by displaying a red circle at the top right corner of your App Store app.
![]()
As you can see in the snapshot, our red circle has the number 7 inside it. This means that we have seven apps that have updates available.
Tap on the App Store to open it.
At the bottom of the screen on the far right, you'll see Updates with the same red circle. Tap on Updates.
The App Store displays all your apps that have updates available.

You can choose the updates you want to install. Simply tap the Update button to the right of the app, then enter your Apple ID to start the update. If you want to update all apps listed, tap the Update All button in the upper right hand corner.
If you want to delete an app from your iPad that you installed, simply press your finger on the app until all the apps on the screen start wiggling.
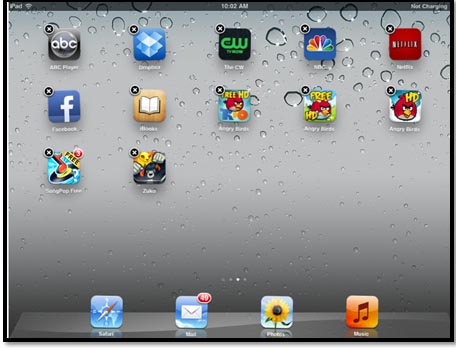
As in the snapshot above, you'll see little black circles with a white X inside appear at the top left corner of all the apps.Tap the X of the app you want to delete.
![]()
Tap Delete.
The Calendar on the iPad
The calendar on your iPad can be used to enter events and appointments, then manage them across multiple devices.
To access the calendar app, tap on Calendar on your Home screen.

By default, the Day view of the calendar is displayed. You'll see the current day as well as all your appointments and events for that day.
To add an event, tap the plus sign at the bottom right corner.

Enter a title for the event, then a location.
Tap the Start date to change the date and time.
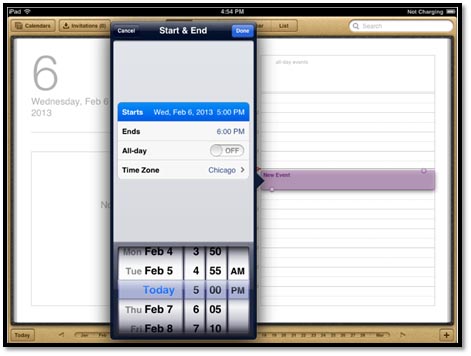
Flick the dates at the bottom using the wheel (shown above) to position it to the start date and time.
Next, tap Ends, then flick again to set the end time.
If it's an all day event, turn the switch ON.
Select the time zone.
When you're finished, tap Done.
Tap Done again.
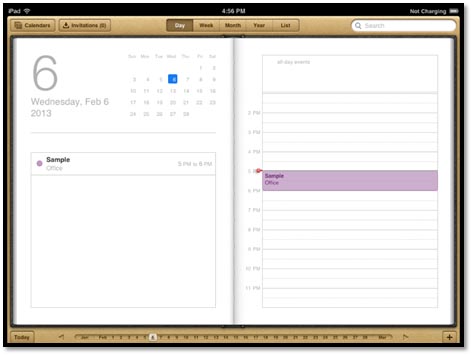
As you can see, the event is added to the calendar.
Calendar Views
There are five calendar views for you to choose from: Day, Week, Month, Year, and List.
Tap a view at the top center of the screen to switch between views.

- The Day view was shown in the last section of this article. This view shows your appointments and appointment times on the left side of the page, plus a calendar for the current month, and an hourly breakdown on the right-hand side.
- The Week view allows you to see all events for a week. Appointments will be shown with the times on the left side of the screen.
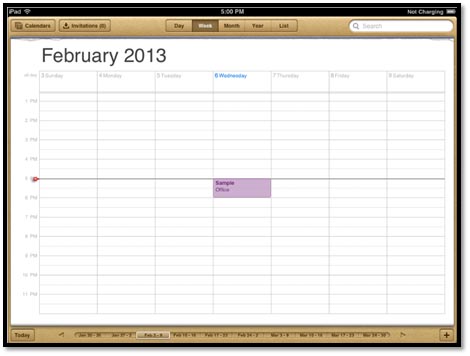
- The Month view shows one month at a time. You can't see the times for events, but you can see what days are busy and which aren't.

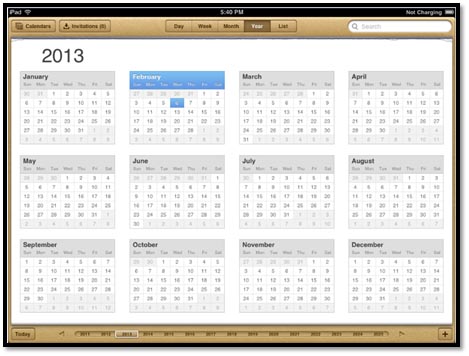
- The Year view shows a 12-month calendar.
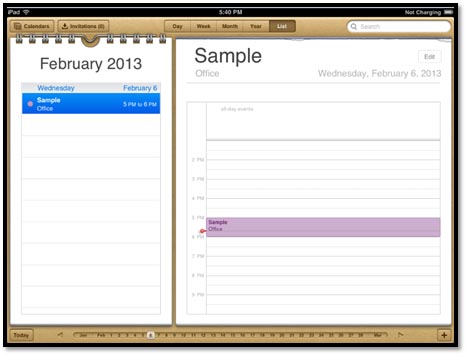
- List view shows the daily calendar with all of your appointments on the left-hand side.
Searching Your Calendars
If you need to find appointments or events in your calendar, but don't know exactly where to look, you can use Search to do so.
To search for events:
- Open the calendar and tap any view.
- Type a word or a phrase that you want to use to search in the search box located in the upper right-hand corner, then tap the search key on the keyboard.
If you look at the Calendar app, you'll notice an Invitation button toward the top left corner. This allows you to see invitations from others who want to add events, meetings, and appointments to your calendar.
Simply tap the Invitations button to view the invitations.
You can tap on any items to get more details.
If you want to accept the invitation, tap Accept.
You can also tap Decline, or Maybe.
Sharing and Subscribing to Calendars
If you want to share your calendar with others or sync it to other calendars on other devices, you can do that as well. For example, if you have a calendar that you use with an online service, such as Google, you can subscribe to that calendar so you can see events you have saved on it.
To do this, go to the Home screen and tap the Settings icon.
Tap Mail, Contacts, and Calendars on the left.
Tap Add Account.

Now, tap an email choice where you have your calendar.

Enter your account information.
Tap Save.
Now your iPad will fetch the data from your calendar at the interval that you have set for it to fetch data. You can change these settings by going to Mail, Contacts, and Calendars in Settings, then tapping Fetch New Data.
![]()
Syncing Calendars from Other Devices
If you use a calendar on a program such as Microsoft Outlook, you can sync that calendar to your iPad calendar by using iTunes.
To do this, open iTunes on your computer and sign in.
Connect your iPad to your computer.
When you see your iPad appear in the list on iTunes, click on it.
If you don't see the Info tab, go to View (in the menu) and click Show Side Bar.
Pictured below is the Info tab:

When you click the Info tab, this is what you'll see:
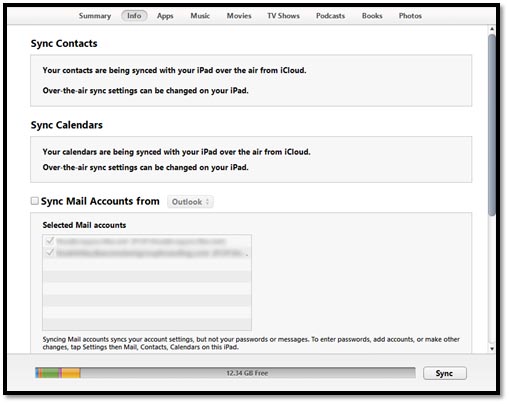
As you can see, our calendars are automatically synced through iCloud. However, if your settings aren't the same, you should put a check mark in the Sync Calendars With Check box, then select the calendars you want to sync.
Click Apply.
Want to know what time it is in different cities around the world? Perhaps you have a friend in China, a business associate in London, and you want to make sure you don't call them in the middle of the night.The Clock app in the iPad contains a world clock that you can customize to show different cities.
Shown below is the Clock app's World Clock:

Across the top, you can see clocks with cities listed below them. Below that is a world mpa with the cities marked.
The last clock on the right says Add beneath it. If you want to add a city, tap the plus sign in the middle of that clock.
Type in the name of the city you want to add.
If you want to remove a city, tap the Edit button, then tap the red circle to the left of the city you are removing. Next, tap the Delete button.
Using the Alarm
The Clock app also comes with an alarm. Tap to open the Clock app, then tap the Alarm tab at the bottom.
Next, tap the Plus button in the upper right-hand corner of the screen, then choose the time you want to set the alarm by using the wheel at the bottom half of the screen.
Tap Save when you're finished.
Also located with the Clock app is a stopwatch. To access the Stopwatch, tap the Stopwatch tab at the bottom of the Clock app screen.
It's simple to use. Tap start to start the stopwatch. Tap Stop when you want to stop it. If you want, you can tap the Lap button to time laps.
The Timer
The Timer tab is located within the Clock app also.
Tap the Timer tab to use the timer. Set the timer by using the wheel. Next, tap When Timer Ends and choose a ring tone that will sound when time's up.
Tap Start to start the timer.
Tap OK to silence it when the ring tone sounds.
Setting up Reminders
The Reminders app is located on your Home screen. You can use the Reminders app as a To-Do list so you don't forget the things you need to get completed.
Tap the app to open it. The first time you open the app, this is what you'll see:
![]()
Here's how to set up reminders.
Set up a new reminder by tapping the button with a plus sign at the upper right-hand corner of the Reminder list (it looks like a piece of notebook paper).
Now you can add your reminder. The keyboard appears automatically so you can start typing.
Tap Return on the keyboard to enter the reminder.
![]()
Now, tap the reminder so it's highlighted. Tap the text of the reminder, not the check box to the left of it.
Enter details about your reminder:
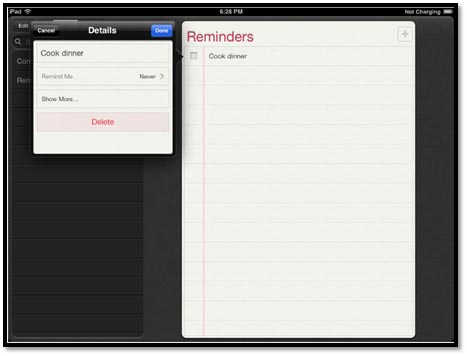
Set when you want it to remind you:
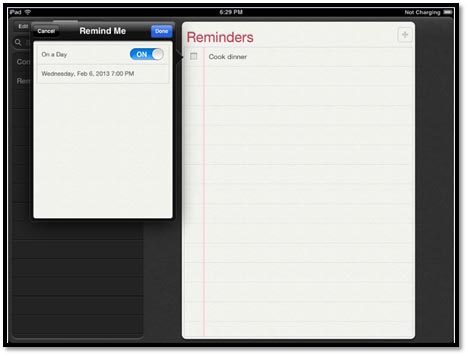
You can have the reminder repeat. For example, let's say we want to start cooking dinner every night at 7 p.m. We can have the app remind us every day at 7.
If you tap Show More, you can set a priority for the task:

You can also add notes.
Tap Done when you're finished.
When you've completed a task, tap the check box beside it to mark it as complete.
On the left-hand side of the screen, you can see your completed tasks as well as the reminders you still have open.
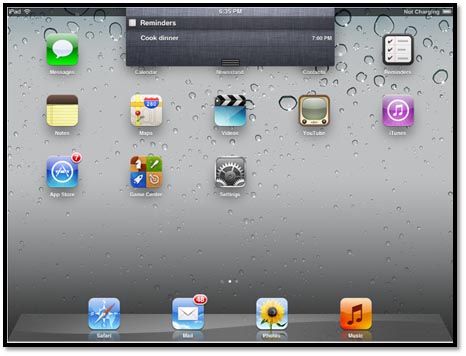
The Notification Center is something you can access at any time, even if you're using an app, to see calendar entries, reminders, and new emails.
To open the Notification Center, all you have to do is place your finger on the black area at the top of your iPad screen and swipe down.
You can tap on any notification to open it.
You can clear notifications by tapping the little X to the right of the app's name. You'll then see a Clear button. Tap it to clear the notification.
To close the Notification Center, put your finger on the three lines at the bottom and swipe up.
Siri is like your own virtual assistant on the iPad. Siri can keep you up to date on the weather, give you directions, check your email, send messages, and look up information for you. All you have to do to get Siri to work is talk to your iPad (iPad 3 and newer).
To launch Siri, hold down your Home screen button until you see this:
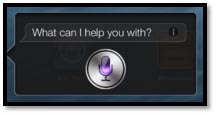
Now you can ask Siri a question.
A purple glow will surround the mic until Siri has an answer.
The answer will be shown on your screen. Siri will also speak the answer. In addition, Siri may open an app or web page, depending on what you wanted.
To learn how to talk to Siri and what all Siri can do, press and hold the "I" button when you launch Siri.