In this article, we're going to talk about taking and managing the pictures you have on your iPad.
It's important that for this article, you have the Camera/Video switch located in the lower right-hand corner of your camera turned to Camera mode. Also, decide if you want to use the front or rear camera, and slide the switch to reflect you choice.
Now, let's get ready to take a picture.
Hold the iPad up like a camera. Use the viewfinder to frame the image you want to shoot. Now, tap the portion of the screen that is going to become the focal point. You'll see a small rectangle around the selection. The iPad will automatically adjust the focus and exposure for your focal point.
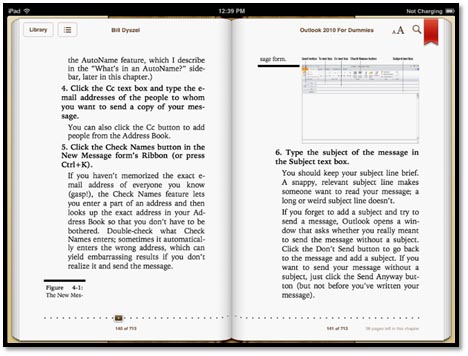
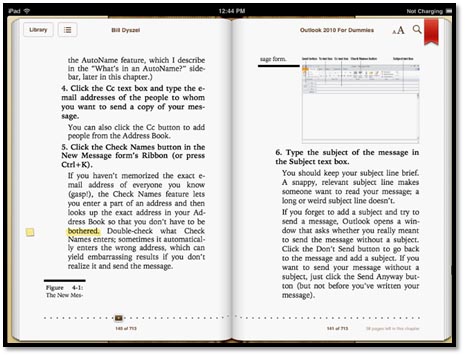
To zoom in or out, pinch your fingers . Just take note that zoom only works with the rear camera.
If you want grid lines to help you create a better picture, tap the Options button, then the Grid switch so it's turned on.
Once you have the picture you want, simply tap the shutter release to take the picture. The shutter release button is located in the middle, right-hand side of the screen.
Syncing is the most frequently used method to import pictures to your iPad. If the pictures are already on your computer, it's probably the quickest and easiest way. If the pictures aren't already on your computer, they are probably easy enough to transfer using a memory card or USB storage device.
Once the pictures are on your computer, connect the iPad to your computer. Go to iTunes and tap on the Photos tab that's on the iPad Device page. Select your iPad device on the left, then look at the top of iTunes for the Photos tab:
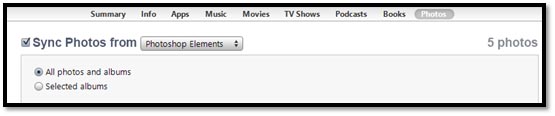
Now, choose where you want to sync photos from. You can do all photos and albums, or just selected albums.
Photo Stream is a feature on the iPad that allows you to upload and store up to 1,000 photos from the last 30 days on the iCloud. It automatically downloads those photos to all your devices that have Photo Stream enabled. You have to be connected to WiFi to do this.
If you want to use Photo Stream, you first have to enable it. To do this, tap Settings on the Home screen, then tap iCloud on the left side of the screen.
Now, tap Photo Stream.
Turn Photo Stream on by tapping the switch.
If you want to use Photo Stream with your Photos app:
Tap Settings on the Home Screen
Tap Photos on the left side of the screen.
Turn Photo Stream on.

Connecting a digital camera or memory card to your iPad means you'll have to buy accessories.
Although most digital cameras come with a USB cable that allows it to attach to your computer, your iPad does not have a USB port. For that reason, Apple sells the iPad Camera Connection Kit.
If you buy the kit, you'll be able to connect your camera to your iPad by using one of two connectors in the kit. They fit into the iPad's dock connector that you use to charge your iPad. One connector has a USB port at the other end. The other has an SD slot for a memory card. If you use the USB port, you'll also have to use the USB cable that came with your camera.
Now, tap Import All to import all the pictures, or tap the pictures you want to transfer.
Unlock the iPad if it's locked. Then, turn your camera on (if you're connected to your digital camera) and set it to transfer pictures. Your iPad will organize the pictures into albums.
Photos that you have on your iPad are typically stored in the Photos app or the Camera Roll. Let's learn how to navigate through the pictures you have in your Photos app.
First, tap the Photos app to open it.
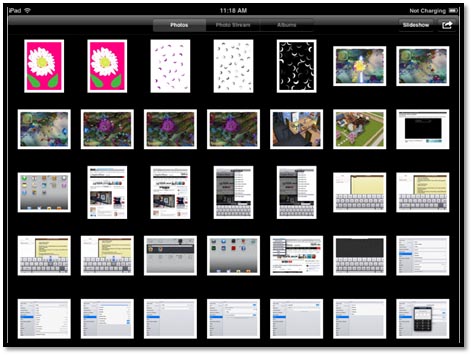
When the app is open, you see thumbnails of all your pictures. At the top of the screen, you see Photos, Photo Stream, Albums. You may also see Events, Places, Faces, and Places. Tap where you want to look for a photo.
![]()
Now, tap or pinch the photo that you want to display on your screen. You can pinch this image to make it bigger or smaller on your screen.
Again, you can navigate through collections of images, tap Albums, Events, Faces, or Places at the top of your iPad screen. You can also pinch them.
For example, you see a stack of pictures. Tap the collection and all the pictures in that collection scatter into individual images.
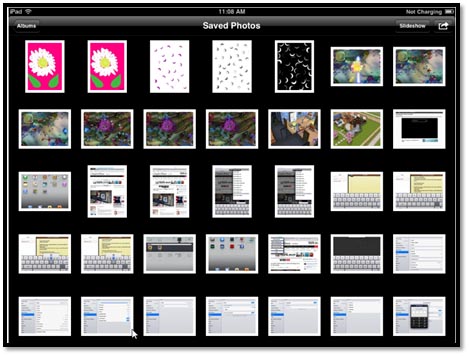
In the snapshot below, we have an album.
![]()
We tap the album and the pictures scatter.
You can use your iPad to rotate, enhance, red-eye, and crop photos. To use the tools, tap the Edit button in the upper right hand corner of the screen. You'll then see a tool bar at the bottom.
- Rotate allows you to turn the image a quarter of a turn counter clockwise.
- Enhance improves lighting, contrast, and color balance.
- Red-Eye removes red eye. Just tap on the red eye in the image.
- Crop allows you to crop or straighten the image. Tap the corners of the overlay to set the area you want to crop. Tap the Constrain button so that the cropped image conforms to popular proportions such as 5x7.
The Photos app also allows you to create slide shows with your pictures. You can even add transition effects and background music to your slide show, just as you might do with some fancy computer programs.
To create a slide show on your iPad, tap the Photos app to open it.
Next, tap the Photos tab at the top.
Now, tap the Slide show button in the upper right-hand corner. You'll then see the Slide show Options menu.

Choose a transition. The transition is what happens between slides (or photos). One photo can dissolve into another, etc. The transitions are shown below:

If you want background music, tap the switch to turn it on.
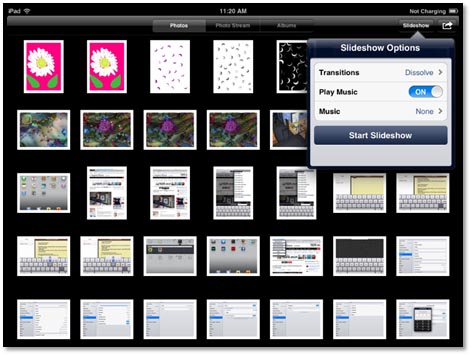
You can then select the music from your music app.
![]()
Tap Start Slide show to start the slide show.
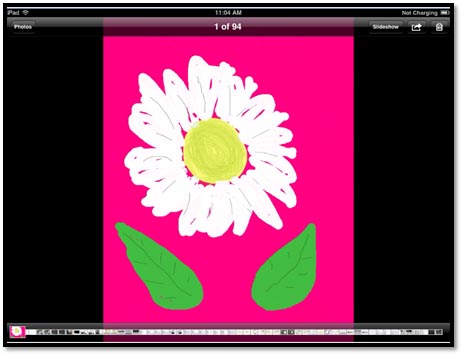
You can run your slide show when your iPad is locked so that you or anyone else can see a display of your pictures. It's as if the iPad were a digital picture frame.
Here's how to do it.
Lock your iPad, then tap the Home screen button to go to the lock screen.
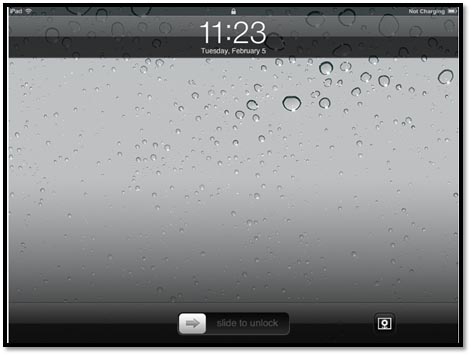
The Picture Frame button is on the right and looks like a flower. Tap the Picture Frame button.
Your slide show begins.
To end it, tap the Home button.
AV adapter cables that allow you to connect your iPad to a standard or HDTV. Apple sells these cables., and you'll need these to look at pics on your TV. If you have a 4th generation iPad or iPad mini, you'll need a "Lightning to VGA Adapter" or the "Lightning to Digital AV Adapter."
To delete photos, tap to open your Photos app. Tap on Photos at the top.
Next, tap the Action button on the far right hand side. It looks like an arrow.
Now, go through your photos and tap the ones you want to delete. A check mark will appear on the photos you've marked for deletion.
![]()
Tap the red Delete button to delete the photos.
You can tap photos again to remove the check mark. If you change your mind about deleting any photos, tap the blue Cancel button on the upper right-hand side.
You also can share the photos you have in your Photos app. Tap the application to open it, then tap the Action button again.
Tap the pictures that you want to share. A check mark will appear on them.
Next, tap the Share button in the upper left-hand corner.

You can choose to share them by email or Twitter, to print them, or send a message. In later generations of the iPad, Facebook may also appear as an option.
The iPad Photo Booth started with the second generation iPad. It's simply a modern version of the old photo booths -- and a lot of fun to play with.
Tap the Photo Booth icon to open it. You'll see a red curtain open and a tic-tac-toe style grid will appear.
Using the front-facing camera, point it at your face. When you do this, you'll see yourself through a variety of special effects: Thermal Camera, Mirror, X-Ray, Kaleidoscope, Light Tunnel, Squeeze, Twirl, and Stretch. Only in the center one do you look normal.
Now, choose a special effect or choose the normal one. Tap on a thumbnail to choose what you want.
Once you've chosen an effect, you can distort the image even more by pinching or spreading your fingers on the image.
Tap the shutter release to take the picture.
Books on the iPad
The is the electronic version of the traditional paperback or hardcover book. Just like a regular book, it can consist of texts, images, or both. can be read on computers, mobile phones, e-reading devices -- such as the Kindle -- and tablet computers, including the iPad, as we'll learn in this section.
In order to read electronic books, or eBooks, on the iPad you have to install the iBooks app from the app store. The App store icon is on your Home screen. Once you have the iBook app installed, you can start downloading and reading eBooks.
All the books you download appear on a nice wooden bookshelf inside the iBooks app. It gives you the feel of pulling books off a traditional bookshelf. This is called Bookshelf view.
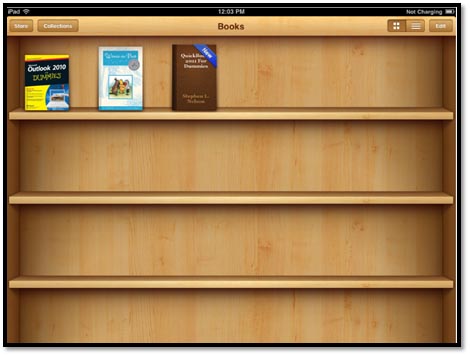
However, if you don't like sorting through your books on a bookshelf, you can also change the view so your books are listed by title, author, or category. To do this, tap the button with three lines to the left of the Edit button on the upper right-hand side of the screen. This is List view.
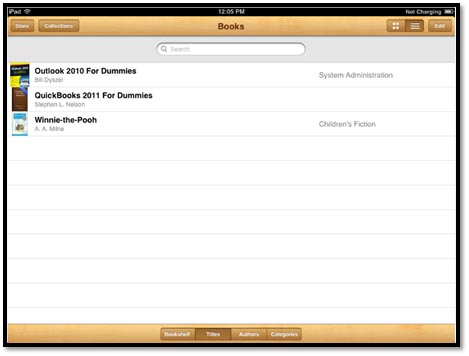
At the bottom of this screen, you can choose how to sort your books. Right now, we have ours sorted by Title.
You can also rearrange books in the Bookshelf view if you want by holding your finger down on the book you want to move. When the size of the book increases, you can move it by keeping your finger down and dragging it to its new location.
To rearrange books in List view, tap the Edit button in the upper right-hand corner, then press the three lines that appear to the right of the book you want to move. Now simply drag the book.
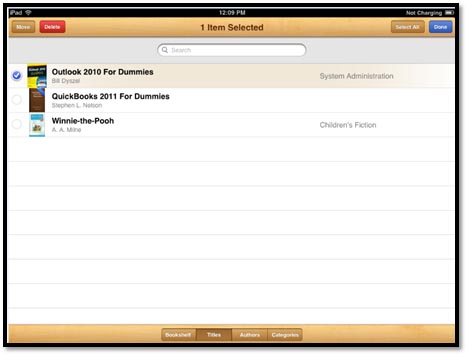
If you want to remove a book from the bookshelf, tap the Edit button, then tap the book you want to delete. A check mark will appear on the book. Tap the Delete button.
Organize Books Into Collections
You can organize your books in the iBooks app by collections. You can organize them by genre or subject. Tap the Collections button at the top left of the screen.
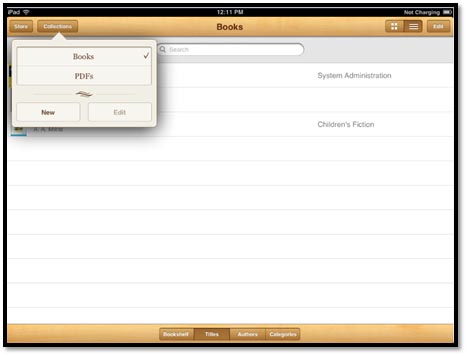
You'll see that there are already two collections created: books for all titles, and PDFs for any PDF files you have on your iPad. Tap New to create a new collection.
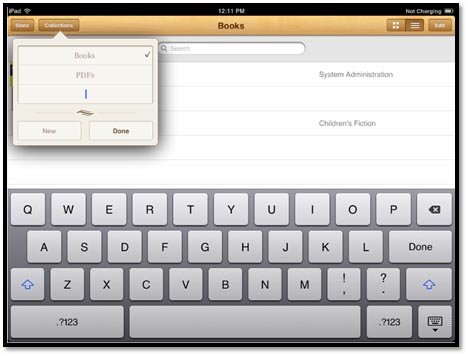
Type in a name for the collection.
Tap Done.
To move a book to a collection, go to the Bookshelf view, then tap the Edit button. Tap the books you want to move. A check mark will appear on them. Tap the Move button in the upper left-hand corner.
Tap on a book on your bookshelf to open the book.
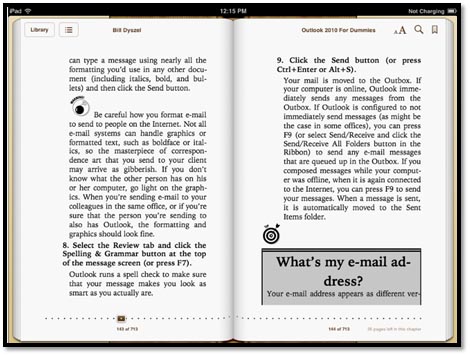
To turn to the next page, place your finger on the page you want to turn and swipe it to the left, much like if you were using just a finger to flip a page in a book.
To turn to a previous page, place your finger on the page and swipe it to the right.
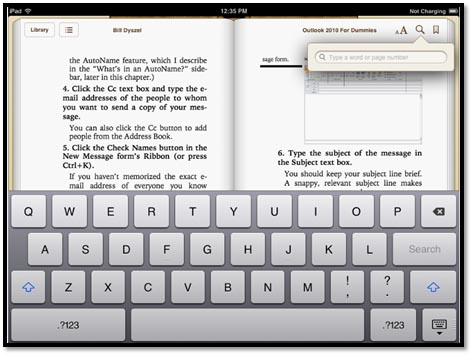
To jump to a different page in the book, tap the magnifying glass in the upper right corner of the page. You can then type in a word you're looking for in the book, or a page number.
Go to the Table of Contents
If you're reading a book and want to refer to the Table of Contents, tap the button with lines on it. It's located on the left-hand side of the book and to the right of the Library button.
It takes you directly to the Table of Contents.

Tap the Resume button to go back to where you were in the book.
You can also add bookmarks to your eBooks to mark certain places you want to read again � or to remember where you left off.
To add a bookmark, tap the Bookmark button on the far right-hand side of the screen. It's to the right of the magnifying glass and looks like a bookmark.
When you tap it, a red bookmark will appear.
To view all your bookmarks, or to go back to where you placed a bookmark, go to the Table of Contents and tap Bookmarks.

Add Highlights and Notes
You also can highlight sections of text and make notes in your eBook.
To highlight text, press your finger on the area of text where you want to start to highlight, then drag it across the text. You'll see the text is highlighted in yellow. Release your finger when you're finished.
![]()
You also can press on the text until a rectangular magnifying glass appears. Release your finger and select Highlight.

You can also select Note using this method and add a note. When you tap Note, a yellow, virtual sheet of paper appears where you can type in your note.

The text where you placed the note will be highlighted in yellow, and there will be what looks like a yellow Post-It note in the side margin.
Increase Font Size, Change Font, Add Page Background
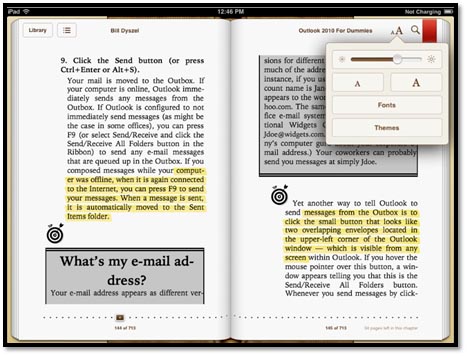
If you tap the button that has the little A and big A (to the left of the magnifying glass), this is your Font button. You can tap this button to change the font, change the font size, or add a theme. You can also control the brightness of the screen.
To change the brightness of the screen, use your finger to adjust the slider.
Tap the little "A" to reduce the font size.
Tap the big "A" to increase the font size.
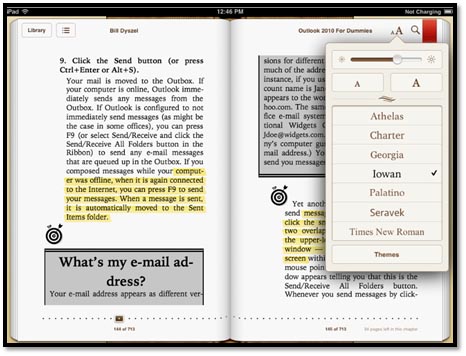
If you want to change the font, tap the Font button.
Tap on the font you want to use.
Tap Themes to change the background color of your pages.

You can also change the orientation of the book. You can read it in book format, bring it to full screen, or change it to scroll. If you select Scroll, instead of flipping through pages, you'll simply scroll up and down by flicking your finger.
If you still have a book open, click the Library button on the far left side of the screen to return to your bookshelf. As much as you need to know how to read books in your iPad, you also need to know how to search for new ones to read.
Once you return to your bookshelf, tap the Store button in the upper left-hand corner. This takes you to the iBookstore.
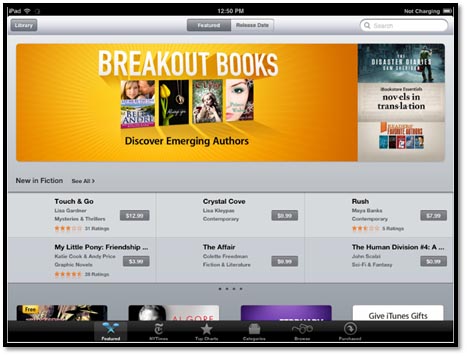
By default, the featured books are shown. You can also tap Release Date at the top of the screen to recently released books.
At the bottom of the screen, you can sort books by NY Times bestsellers, Top Charts (bestsellers in the iBookstore), and Categories, You also can browse by author or category for books (there is a free category), or by books you've purchased. If you want to search by genre, then it's best to tap Categories at the bottom to search for books.
Of course, you also can use the search field at the top right of the screen. Just enter your search criteria. It can be author, title, or genre.
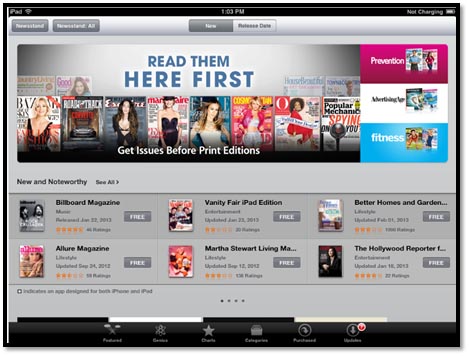
Reading newspapers and magazines on the iPad is unlike any other electronic device you may have. It's that much better! In fact, it's the closest you'll get to actually holding the magazine or newspaper in your hand.
Now, there are different ways that you can go about reading newspapers and magazines on your iPad. First, you can download apps for individual magazines and newspapers that offer apps for download. Some of these may charge subscription fees.
There is also the Zinio app that offers different publications, such as Rolling Stone, Newsweek, National Geographic, and Spin � to name a few. With this, you can buy subscriptions or just a single issue.
You also can use the Newsstand app that is on your iPad. It looks a lot like your bookshelf.
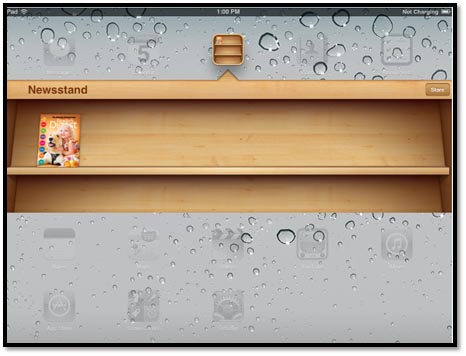
Tap on a publication to read it.

You also can tap the Store button on the right to look for magazines and newspapers, much like you did for books in the iBookstore.