Screen captures are snapshots or videos of what is being displayed on your computer monitor. You can see examples of screen captures all throughout this course. We took snapshots of the various screens in Adobe Captivate and inserted them into the various articles to help teach you the program. To take these screenshots, we used a program called Snagit. You can purchase Snagit for either Windows or Mac. If you have a third party program to capture screenshots and make screen recordings, you can use it to create those things for your Captivate project. However, Captivate also offers you the tools to take screenshots and recordings within the program.
There are three recording types within the Captivate program: Automatic, Manual, and Video.
-
Automatic records the steps you take by taking a screenshot each time you click your mouse. Automatic has four different capture modes: Demonstration, Assessment Simulation, Training Simulation, and Custom. We'll talk about these in this article.
-
Manual requires that you press a key each time you want to take a screenshot. In Windows, the default key is the Print Screen key.
-
Video doesn't create screenshots, it creates videos. The videos show the actions you've taken on your screen. If you use a software program, it will record you doing that. If you surf the web or visit a website, it will show that.
Rehearsing the Script
Before you start to create a screenshot or video, you want to rehearse the script. The script is the actions that will be taken. To create the script, you write down those steps, then rehearse them before you record them. If you're taking screenshots using the Automatic recording type, the script will help you determine the screenshots you want to use. If you're using the Video recording type, the script will help you practice the on-screen actions that will be recorded by Captivate.
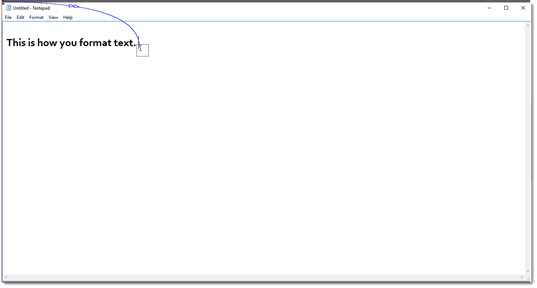
Let's pretend that you're creating a lesson on Notepad for an instructional course. Your script may look like this:
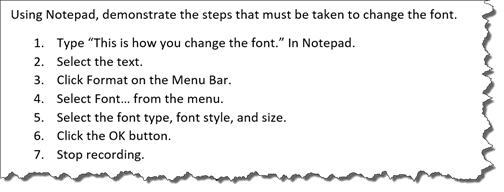
Rehearse the script several times. This script may seem easy enough, but factor in nerves and the pressure to do everything correctly, and you may just realize you'll mess up more times than you think.
Recording Options in Adobe Captivate
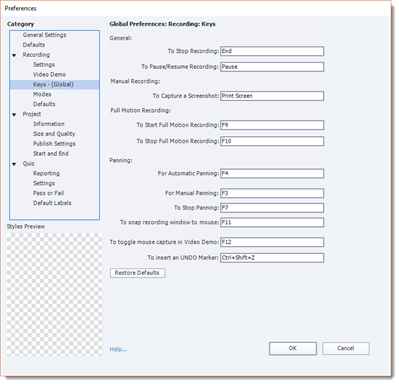
All options for Adobe Captivate are found under Preferences. To reach Preferences, go to Edit>Preferences in Captivate for Windows. On the Mac, go to Adobe Captivate>Preferences. You will then see the dialogue box pictured below.
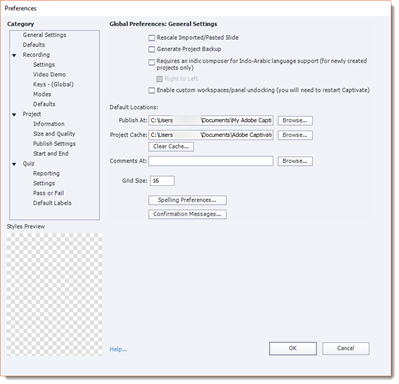
To set recording preferences, click on Recording on the left side of the dialogue box.
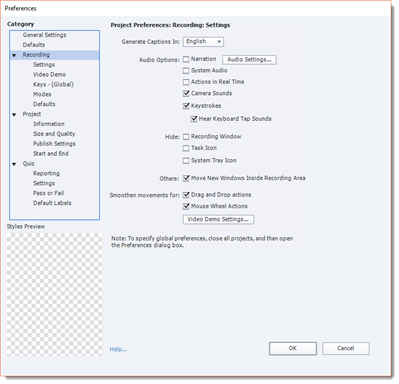
The options in the dialogue box are self-explanatory. The one thing we want to pay attention to at this point in the course, however, is the keys you will click on the keyboard to start and end recording sessions. To set these options, click Keys-(Global) on the left hand side of the dialogue box.
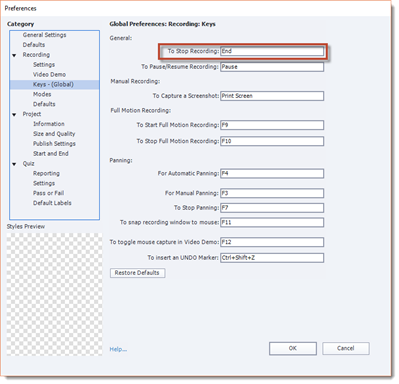
In the To Stop Recording field, you can add a key to stop recording. We are going to select Shift+A. You can also select a key to pause and continue recording.
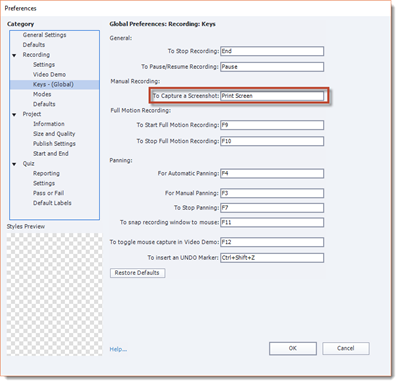
Earlier in this article, we told you the default key to take a screenshot is Print Screen. You can also change that key in the Preferences window.
When you're finished setting your preferences, click the OK button at the bottom of the Preferences window.
The Automatic Recording Modes
At the beginning of this article, we talked about the different recording types available in Adobe Captivate. We also discussed that the Automatic recording type has four different modes: Demonstration, Assessment Simulation, Training Simulation, and Custom. Let's learn about these four different modes, then learn how to record screenshots using each mode in Adobe Captivate.
-
The Demonstration Mode is used when you want to show a concept, but your viewers aren't going to follow along and perform the same steps. The Demonstration mode includes Text Captions, Highlight Boxes, and a simulated mouse cursor. Text Captions appear as text bubbles. They tell the viewers what's happening on the screen.
-
Assessment Simulations let you record your actions, but also create interactive eLearning while you record your actions. Assessment simulations include Click Boxes and Failure Captions. Failure Captions let the viewer know if they click the wrong area or perform an incorrect step. However, Assessment Simulations do not include Text Captions. For that reason, it's best to team it with a Demonstration. First, you would demonstrate what the viewer needs to do (the Demonstration mode), then include the interaction with the Assessment Simulation mode.
-
Training Simulations are similar to Assessment Simulations, but they also contain Hint Captions. These captions appear if the viewer's mouse gets close to the Click Box, but the viewer doesn't click.
-
Custom recordings are a combination of the three modes we've discussed above.
Recording Using the Automatic Modes
Let's learn to record your screen using each of the Automatic recording modes.
To do this, first open the program or file that you want to record using Adobe Captivate. Earlier in this article, we created a script for Notepad, so we are going to open Notepad.
Next, save and close any other projects that you have open in Adobe Captivate.
With all projects closed, you should see the window pictured below.

Go to Edit>Preferences. Before you start the project, you will need to set preferences for the recording.
Click on Modes on the left. Select the mode you will use to record, then set your preferences.
Click the OK button when you're finished.
Once you set your preferences, you're ready to record.
Click on the New tab, as shown in the snapshot below, then the Software Simulation button.
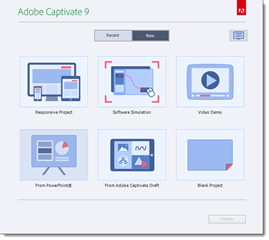
Click the Create button.
NOTE: You can also go to File> Record New Software Simulation.
You will immediately notice a red box on your screen. This is the recording area. There are handles � or little white squares � in the corners and the sides of the recording area. You can drag these handles to increase or decrease the size of the recording area.
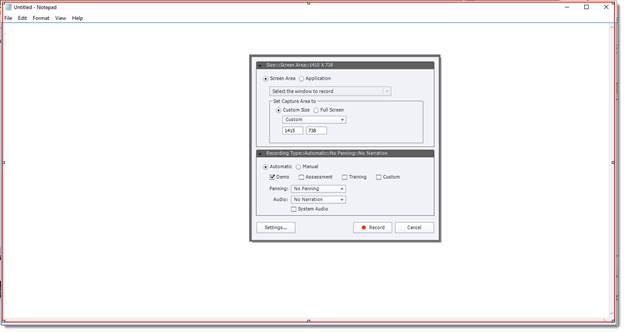
You will also see a dialogue box in the middle of the recording area. You can also use this to define what you want Captivate to record.
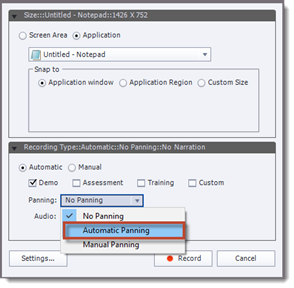
In the dialogue box, select the area you want to record. You can choose to record the application or the screen area. We are going to choose Application, since we want to record Notepad.
In the Select the Window to Record dropdown, we are going to choose the file and program we want to use, as shown below. Ours is Untitled-Notepad.
In the Snap To field, we will define the recording area. Remember, the recording area is defined by the red box. You can use the handles to define it or the dialogue box that we're using now.
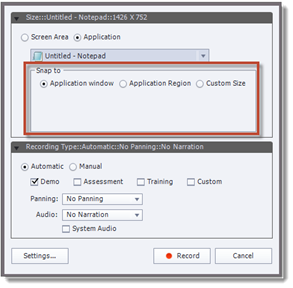
In the Snap To field, we've chosen the application window to be our recording area. This means that the entire Notepad window will be recorded.
Next, we can choose if we want to make an automatic or manual recording. We have selected Automatic so that we can show you the different recording modes.
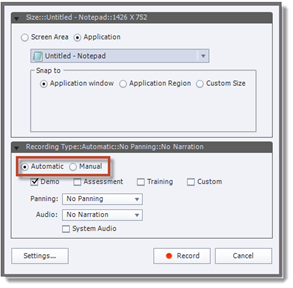
Choose the mode you want to use to record. You can choose more than one mode. We are going to choose Demo.
Set Panning to No Panning and audio to No Narration. We will learn about panning later in this article, and we will learn about Audio later in this course.
Click the Record button when you're ready to record.
You will see a countdown box like the one pictured below, then nothing.
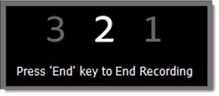
After the countdown, it's time to record the script you rehearsed.
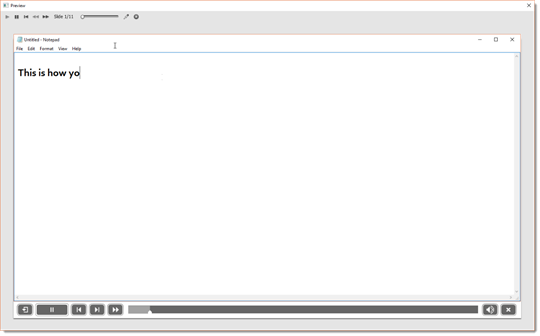
Once you stop the recording, you will see the first slide in the work area of Adobe Captivate. All of your slides are shown in the filmstrip.
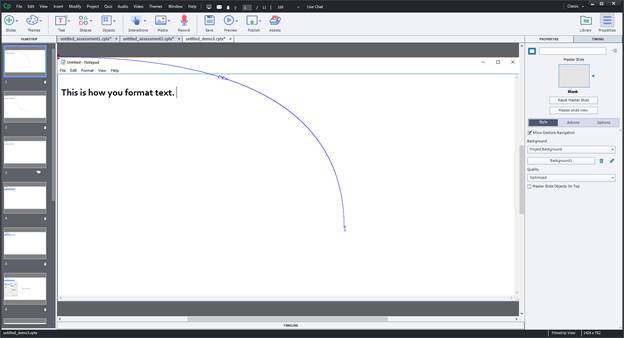
As you can see with the Demo mode, you can also see the movement of our mouse on the screen. This is shown by the blue line above.
You can click on the "I" at the bottom of the blue line to change its length, as we've done below.
You can delete slides in the Filmstrip, or click on a slide to see it in the work area.
In the slide pictured above, you can see the Text Caption that was added by Adobe Captivate.
If you want to preview your recording, go to the Toolbar. Click on the Preview button dropdown arrow.
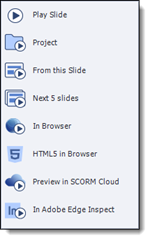
If you want to view all the slides from start to finish, select Project.
Your recording then plays in a different window.
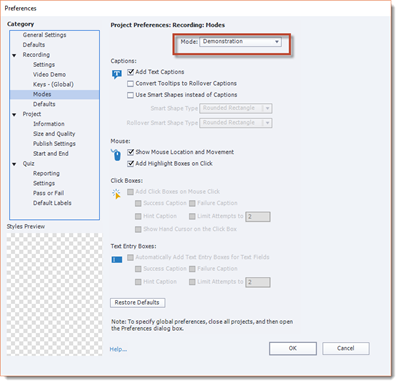
About the Custom Mode
To do a Custom Automatic recording, you first need to set the preferences to select the aspects of each of the other modes that you want to include in your recording. For example, perhaps you want to include Text Captions.
To set the preferences, go to Edit>Preferences when you see this screen (when starting a new recording).
![]()
You can set the preferences for any recording in this manner.
You will then see the Preferences window, as shown below.
![]()
As you can see above, we clicked Modes on the left. Then, in the Mode field, we selected Custom.
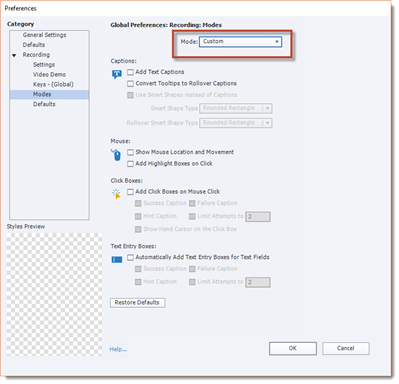
Select the aspects you want to appear in your recording, such as adding highlight boxes or adding text entry boxes for text fields.
Click the OK button when you're finished. You can then start your recording as we learned to do in the last section.
Using the Panning Feature
The panning feature in Adobe Captivate allows you to record things that are outside of the red recording area. When the panning feature is activated before you start recording, all you have to do is click your mouse outside of the recording area. Captivate then moves the recording area to include the area on the screen where you clicked.
Simply select Automatic Panning in the dialogue box that appears inside the red recording box.
If you select Manual Panning, you'll have to drag the red recording box to the part of the screen you want to record.
Creating a Manual Recording
A Manual recording requires that you press a key each time you want to take a screenshot. In Windows, the default key is the Print Screen key.
To create a Manual recording, start a new Software Simulation project as we learned to do earlier in this article.
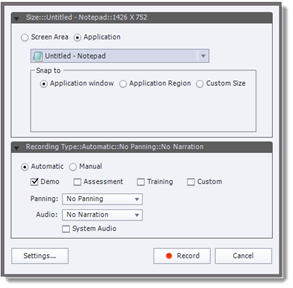
You will then see the red recording box and the dialogue box that appears inside it. The dialogue box is pictured below.
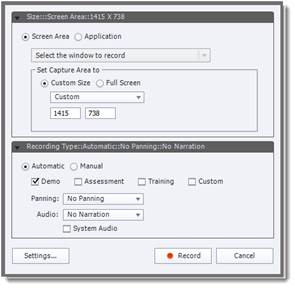
Since this is a manual recording, we selected to record a screen area. We also set the capture area to a custom size. To create the capture area, we could also drag the red recording box or use the handles to resize it.
In the Recording Type section of the dialogue box, we chose Manual.
We are now ready to record.
You will see the countdown window again.
Once the countdown has finished, you can press Print Screen to capture the recording area.
Working with Objects, Object Styles, and Timing
In Adobe Captivate, objects are anything that you place on the slide, including buttons, captions, boxes, etc. Objects can be resized and formatted. They can also have their own timings and transitions. The timings and transitions of objects control how and when they appear on the slide.
In this article, we're going to learn about objects, object styles, transitions, and timing. We'll also introduce you to text captions, one of the types of objects that you can insert onto your slides in Adobe Captivate.
About Text Captions
Text captions are objects. They are used to explain what is being shown on the screen. You can have several text captions on one slide. You are not limited to just one. In addition, you can edit the text in a Text caption, change where they appear, change when they appear, and even alter the look.
Inserting a Text Caption
To insert a Text caption on a slide, first go to the Filmstrip and select the slide for which you want to add a Text caption.
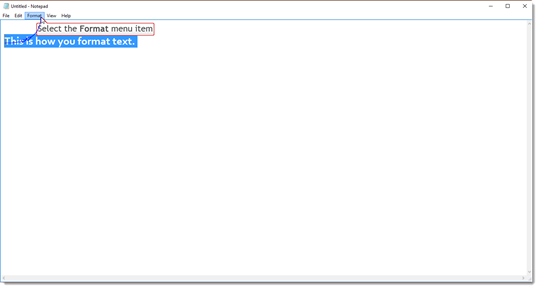
Next, go to the Toolbar. Click on the text button to see the dropdown menu.
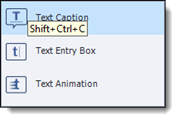
Select text caption from the dropdown menu (pictured above).
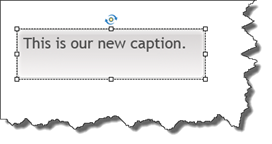
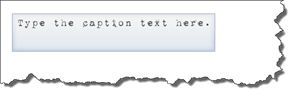
You will see the new text caption appear on the slide.

With the placeholder text selected, type the caption that you want to appear.
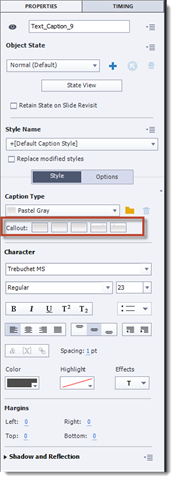
Next, go to the Properties Inspector.
![]()
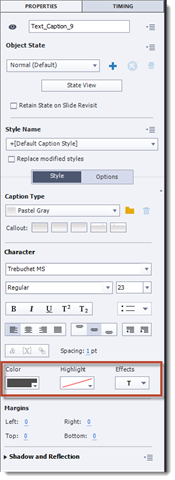
Change the Caption Type by going to the Caption Type dropdown in the Properties Inspector and selecting a type.
![]()
We chose Pastel Gray.
Formatting Text in Text captions
By going to the Properties Inspector, you can also change the font type and size, as well as make the text appear as boldfaced or italicized.
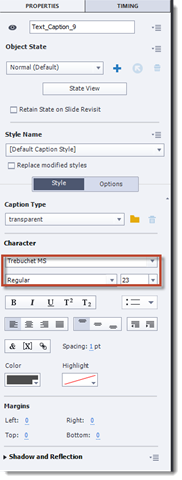
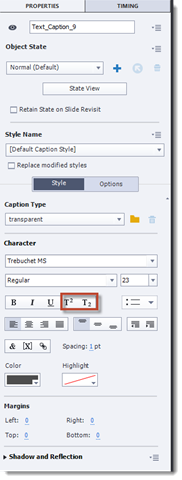
You can make the text appear as superscript or subscript.
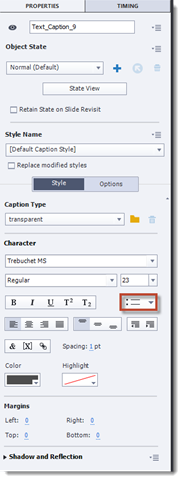
You can create bulleted or numbered lists.
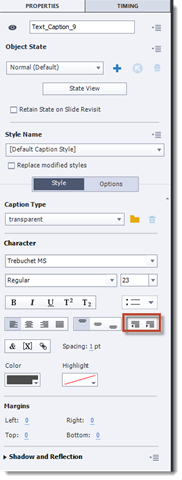
You can align the text to the left, center, or right side of the text caption box. You can also justify it.
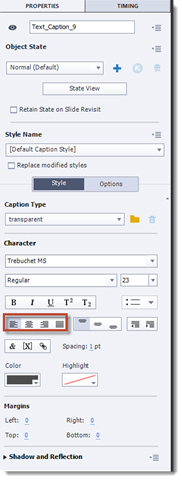
You can also align it the text to the top, middle, or bottom of the text caption box.
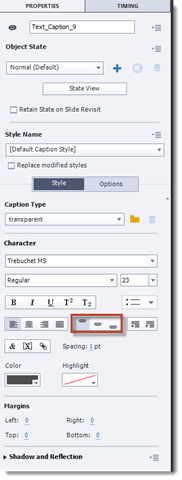
You can indent the text � inward or outward.
You can change the color or highlight the text as well. What's more, you can add text effects.
The formatting options for text in Captivate are the same options you'll find in other Adobe programs, as well as Microsoft programs. Take a few minutes to format the text in a text caption box until you find the look you want to achieve.
Changing the Caption Style
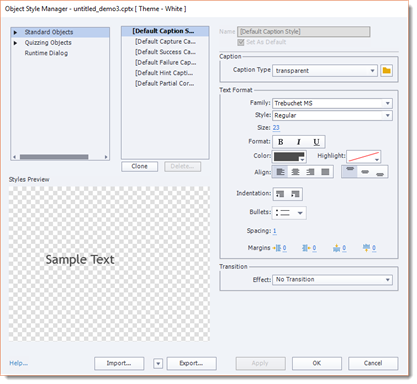
The text caption that we inserted earlier in this course is the default text caption. This means that each time you insert a text caption onto a slide, it will look exactly like that one with the same Caption type, font, and font size. If you want to alter the way text captions appear in a project, you can do so by going to Edit>Object Style Manager.
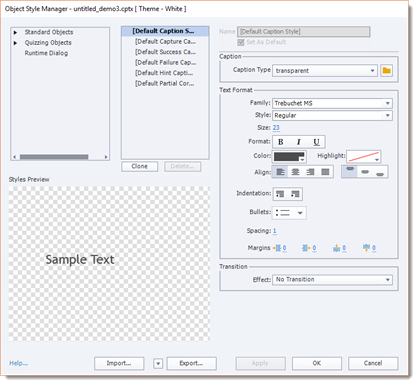
In the dialogue box pictured above, select [Default Caption Style]. Now, you can change the Caption Type. We are going to change ours to Frosted.
![]()
You can also change the text formatting and alignment.
When you're finished, click the Apply button, then the OK button.
Whenever you insert a text caption into your project, it will then use these new settings for the default style.
Working with Callouts
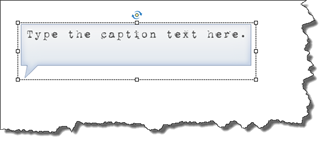
A callout gives a direction to text captions. They can look like a simple rectangle, but they can also look like speaker attributes you see in comic books. Callouts are added to objects one at a time. You cannot apply a style to all callouts in a project as we did with the text caption style.
So far in this article, the callouts being used have been rectangles.
To change the type of callout for a text caption, go to the Properties Inspector.
Select a new callout from the Callout section.
You can see the new callout applied in the snapshot below.
Editing Object Styles
Every object that you insert onto a slide in Adobe Captivate has a default style. The default style for objects is how the object will appear on a slide when you first insert it. We saw the default style for a text caption earlier in this article. We also learned how to change the default style for a text caption after you insert it onto a slide.
That said, you can edit the default style for any type of object by using the Object Style Manager. When you edit the default style for an object using the Object Style Manager, you change the style for all instances of the object. What that means is this: whenever you insert that type of object on your page, the default style that appears will be the one you created in the Object Style Manager.
Here's an example. If you edit the default style for a text caption using the Object Style Manager, that is the style that will appear on the slide whenever you insert a text caption.
You are editing the default style of all instances of the object instead of changing the style of one instance of the object after it's inserted onto a slide.
To view the Object Style Manager, go to Edit>Object Style Manager.
The Object Style Manager dialogue box is pictured below.
At the top left of the dialogue window, you can see the various types of objects in Adobe Captivate.
Let's click on Standard Objects. You can then see a list of all the standard objects.
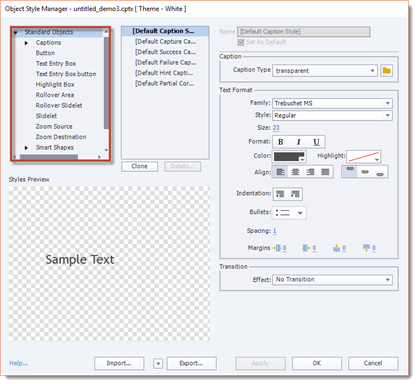
Click on a standard object to edit its default formatting.
Since we just worked with text captions, let's select Text Caption.

Select Default Caption Style in the next column.
You can then edit the Caption Type using the Caption Type dropdown. You can also edit and format the font, as well as apply a transition.
Click the OK button when you are finished.
Creating a Customized Object Style
In addition to editing the default style for an object, you can also customize a new style using the Object Style Manager.
To do this, select the type of object.
Click the Clone button.
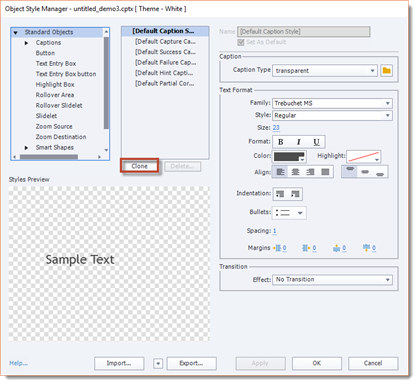
Enter a name for the new style. If you want to set it as the default style, check the "Set as Default" box.
Select the properties for the style, then click OK.
To apply the style to an object on a slide, select the object, then select the style from the Properties Inspector.
About the Timeline
The Timeline is located at the bottom of the Captivate window, as we learned earlier in this course. Every slide in your project has a unique Timeline, and you use the Timeline to control the timing of each slide object. For example, you can make text captions appear at different times on the Timeline or you can make them all appear at the same time.
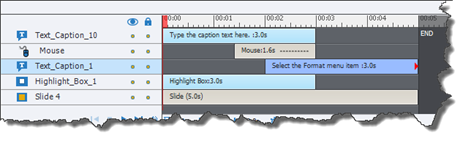
The Timeline is comprised of the Object Bars, a Header, a Playhead, and Playback controls. You'll see all the objects on your slide appear as stacked bars on the left side of the Timeline, as pictured below.

The Header shows the time in seconds. The Playhead shows the point in time when the slide is being viewed. The Header runs across the top of the Timeline.
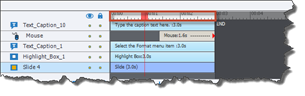
The Playhead is highlighted in the snapshot below.

Controlling the Timing of Objects and Slides
You can use the Timeline to extend or reduce the duration of a slide or objects on the slide. You can also use it to specify when objects appear on the slide � and for how long.
To extend the duration of an object on the slide, drag the right corner of the object. We've circled the right corner of the first object on our slide in the snapshot below.
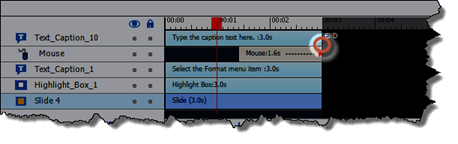
Drag to the right to increase the amount of time. Drag to the left to reduce the amount of time.
Notice that in the Timeline, even the movements of our mouse are listed as an object. We can also extend or reduce the duration for the mouse.
To change when an object appears on the slide, put your mouse over the object's bar in the Timeline. Your mouse cursor will change to a hand. You can then drag the bar beneath the time on the Header where you want the object to first appear on the slide. For example, perhaps you don't want the object Text_Caption_1 (shown above) to appear on the slide until 00:02.
Hiding Objects on a Slide
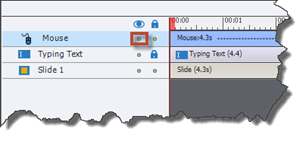
To hide an object on a slide, go to the Timeline. Go to the Show/Hide column, then click the circle in the column for the object you want to hide, as pictured below.
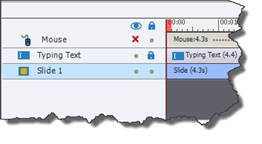
The object is then hidden on the slide. A red "X" will appear on the Timeline beside the object, as pictured below.
Naming Objects
It's not uncommon for your slides to contain multiple objects. For example, one slide may have two or three text captions. For this reason, naming objects with unique names can be helpful to you when you're working with those objects in the Timeline.
To name an object, select the object on the slide.
Go to the Property Inspector.

Enter a name for the object.
Working with Object Timing
The Timing Inspector is grouped with the Properties Inspector, as pictured below.
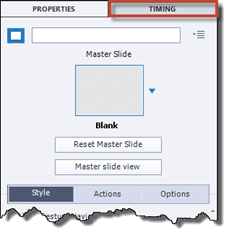
Click on the tab to see the Timing Inspector.
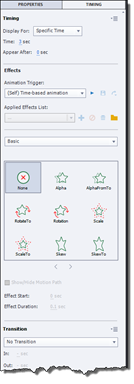
In the Timing group of the Timing Inspector, specify the period of time for which the selected object will be displayed on the slide. You can also specify when it will appear after the slide is visible to viewers.
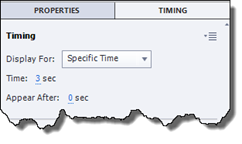
In the Display For dropdown menu, you can choose to have the object displayed on the slide for a specified time. If you choose specified time, you must specify the time by clicking on the Time value, then entering a value.
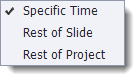
You can also choose to have the object displayed for the rest of the slide or the rest of the project, as shown above.
Object Effects
You can also apply effects to objects in the Timing Inspector.
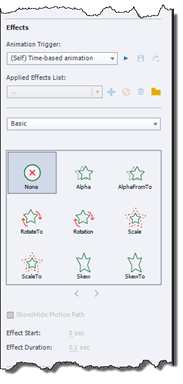
In the Basic dropdown field, choose a type of effect.
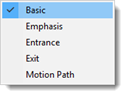
You can choose from Basic, Emphasis, and Motion Path. You can also choose an Entrance effect for when the object enters the slide � or an Exit Effect for when it leaves the slide.
Next, choose the effect.
![]()
Specify when the effect should begin, as well as the duration of the effect.
![]()
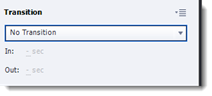
Object Transitions
You can also apply transitions to objects. A transition could make an object fade onto the slide, or fade out of the slide.
You can select and apply transitions at the bottom of the Timing Inspector.