
Basics of Email Routing
Email routes in a similar way to your browser's request for information from a web server. The difference is that you send email without any kind of confirmation that a connection was made to the recipient's email server. With web browsers, a connection is made, and the web server returns an acknowledgement that the request was successful. With email, your email client sends the message off to an email server with no way of knowing if the message reached its recipient. It could get lost in the void, and you would have no way of knowing. This is why email is an unreliable way of communication even though its an integral part of communication in today's online life
As you know from previous lessons, you can't use Outlook until you've configured it. You must configure an incoming email server and an outgoing email server that uses the Simple Mail Transport Protocol (SMTP). This protocol has been used for decades to send email. SMTP runs on email servers and accepts messages from senders including your Outlook program.
When you click the "Send" button in Outlook, the software packages your message and sends it to the SMTP server configured. The email server performs a lookup to find out where the email must be sent. Just like web traffic that must be routed using routers that direct traffic using the most efficient path, email messages are also sent using the same routing methods. The only difference is email messages bounce from email server to email server until they reach the designated recipient inbox.
A recipient's email inbox sits on their own configured incoming server. This server could be a web host's designated email server. It could also be a corporate email server. Some cloud hosts offer an email server with hosting service. Other recipients lease mail servers from vendors. Regardless of the service, an email server runs simple software that understands that an incoming message should be stored until a recipient logs into their email client and downloads messages. Microsoft Outlook works well with Microsoft's own email software Exchange. Corporations that use Microsoft as its operating system and network environment often use Exchange as their internal email server.
As an email bounces from email server to email server as it's routed across the Internet, but each bounce is recorded in the email headers. This helps administrators track them and identify the sender of an email. It can also help individuals identify the sender, but it's also useful to identify a phishing email.
Many email servers use headers to determine if the sender is from the organization they claim to be from. "Spoofing" email is when a sender identifies an email address from an organization manually. Although the sender can be changed to any manual setting, the recipient's email service can check headers and identify if the sender email address is forged. If it's forged, the email is sent to the recipient's spam inbox. In a corporate environment, the email is filtered and never sent to the recipient's inbox. This email filtering technique is part of many organization's cyber security infrastructure.
Viewing Headers in Outlook
Depending on your Outlook configuration, you might need to download email headers for messages that you download to your inbox. Outlook has a button where you can manually download headers from an email server.
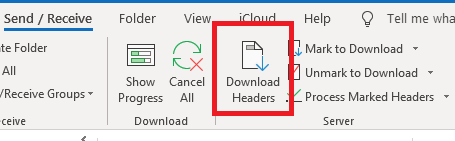
(Download headers button to retrieve them from an email server)
The button to download email headers is located in the "Send/Receive" tab. Select the email from your inbox and click the button and Outlook downloads them, although you cannot see them in the current window.
Double click the email message that you want to view. By double clicking a message, it opens in a new window. Now, click the "File" tab. In this tab, you'll see a button named "Properties." Click this button and another window opens.
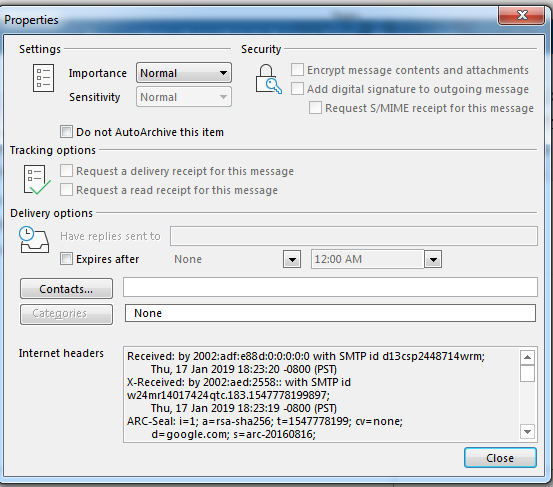
(Window that displays an email's headers)
The properties of a message have several benefits. This window gives you a list of settings configured by the sender. Notice that the importance of this message is set to normal. You can also identify if a user places delivery and read receipts on a message. When a delivery message is placed on a message, you get notification when the email is sent to the user's inbox. Since SMTP does not have a way to verify that an email was successfully delivered, this option provides a way for you to verify that it was delivered.
Being delivered does not mean an email was viewed by the recipient, so a read receipt tells you if the email was opened. A message is sent to your inbox for both read and delivery receipts. Note that a recipient can block these receipts from being sent, so they are not a guaranteed way to identify if an email was delivered and read.
The Internet headers are shown at the bottom of the message. The headers in this text box can be long, but you can use Ctrl+A and then Ctrl+C to copy them. You can then paste them into another document to view them. You'll notice several properties in the email headers that identify the sender, but the routing information can be difficult to dissect. Fortunately, there is a way to plug in headers and see formatted output with information that can be analyzed without reading header content.
Google provides you with a tool that parses header content and gives you the information that you need to identify the sender of an email. The tool can be found at: https://toolbox.googleapps.com/apps/messageheader/analyzeheader
Email headers should be read from the bottom to the top. Think of headers as a "first in, last out" configuration. The first email server added to the list is at the bottom of the list, and each new one is added on top of the previous one. The first email server to send the email along its route is place in the headers first, and then each new route is added to the top. This means that the first email server to receive a message is at the bottom of the headers. This can be difficult for readers to understand, so a tool such as Google's parses the information and makes it easier to understand.
With a read on email headers, you can better understand the path an email had to take to reach its destination to your inbox. It's these headers that help you identify phishing or a sender that spoofs the sender value to trick you into thinking it's from a different one. Whenever you receive an email message in Outlook that seems questionable, always look at the headers.