

If creating PowerPoint 2019 presentations is a common part of your workflow, then you'll be interested in master slides to save time. Master slides save your theme configurations, fonts, styles, and common objects that you add to each presentation. Think of master slides as your own, customized template that contains settings you commonly add to every slide in your presentations. Master slides store these settings and apply them to each new slide that you create.
View Options
Before you work with master slides, you should understand the way views work in PowerPoint. You can find view options in the "View" tab. The first two sections set your view configurations.

(View options)
The first section is the "Presentation Views." These options set the way you see slides as you create an edit them. The default option is "Normal," which is the view that has a left panel of slide thumbnail images and a center section with a larger view where you edit each slide. Each option in the "Presentation Views" section lets you work with different layouts to build slides. The view option that you use depends on your own preferences. Click another view preference and PowerPoint automatically changes the layout in the interface.
The "Master Views" section contains settings for slides that will be used as templates for your presentations. Just like the presentation view preferences, the master view preferences let you review your master templates using pre-defined settings with each selection. The main view for master templates is the "Slide Master" view. From this view, you'll be able to set up your default templates.
Creating a Master View
Click "Slide Master" from the "Master Views" section to change PowerPoint's interface to a template view.
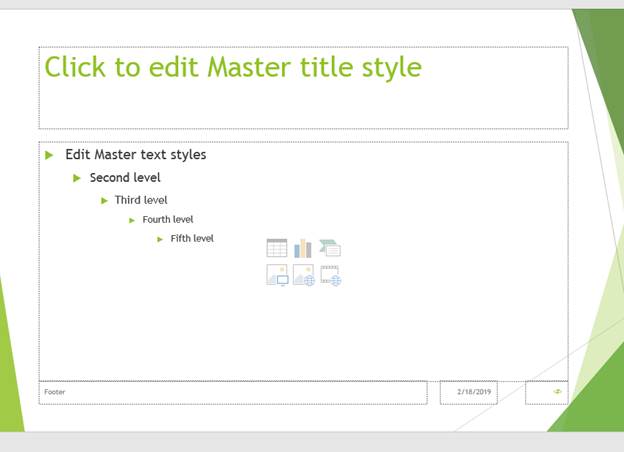
(Master view main slide)
When you click "Slide Master," the main slide displays with a left panel of all master templates shown. The first slide that displays is the one that opens when you create a new slide in your presentation. Each component shown in the master slide can be edited to reflect your own preferences. When you change styles in a master slide, the styles are automatically applied with each new slide that you create.
After the slide master view is enabled, the "Slide Master" tab activates. Controls to change master slide styles are shown in this tab.

(Master slide style controls)
In the "Edit Master" section, you can insert a new master slide by clicking "Insert Slide Master." This control adds a new slide to your list of masters that you can then edit without having any predefined styles added to it. PowerPoint has several master slide templates predefined when you create a presentation.
Click "Insert Slide Master" and a new slide displays where you can edit styles and create a layout for a new master slide. If you decide that you no longer want this slide, click it in the left side panel and then click the "Delete" button. The "Delete" button is only available to master slides that you create and not the basic ones available by default in PowerPoint.
When you create new slides, default objects fill the template where you type text or add images and other media. With a master slide, you can add new placeholder objects by clicking the "Insert Placeholder" button.
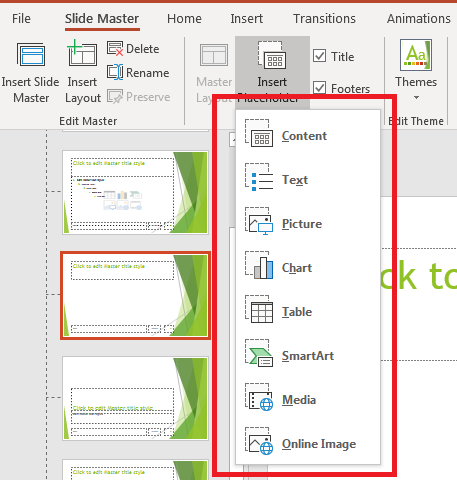
(Insert placeholder options)
Notice that each one of these placeholders are the same object available when you create a new slide. Some placeholders automatically display when you create a new slide. When you add these placeholders to a master slide, they will automatically display when you create a new slide in a presentation. Think of a master slide as a template, and each placeholder adds content to the template that you can edit when you create new slides.
Editing Master Slide Styles and Themes
After you set up slides and placeholders, you can edit the colors, fonts, background and other styles on a master slide. The "Themes" button displays a list of pre-made themes available in PowerPoint that can be applied to a master slide.

(Theme options)
Changing a master slide template theme is the same as changing the them for a standard presentation. Clicking the "Themes" button displays a dropdown of several available templates installed on your computer. If you purchased a theme or want to browser for others, click the "Browse for Themes" and a window opens that allows you to find a theme that isn't installed in the default directory.
Click one of the themes and notice that your master slides now have the newly chosen theme colors, fonts, and background images. Should you ever decide to remove background images and return to the default blank theme, the first theme shown in the "Themes" button is a blank slide with PowerPoint's default colors and font.
With master slides, you can edit a theme using controls found in the "Background" section of the main menu.
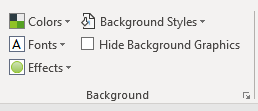
(Background menu section)
The "Background" section has controls to change every style feature in a master slide. You can change colors, fonts, effects, and background styles using these functions. The default colors shown in these control icons are the same as the ones in the chosen theme. Any of the colors displayed in the current master theme template can be changed, but since colors are a part of a theme, the list of colors is displayed in a set.
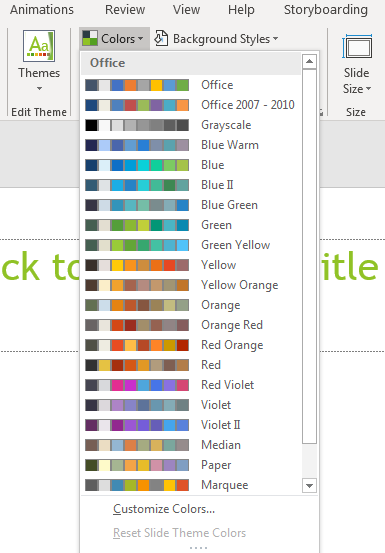
(Theme color sets)
The first set of colors is the default theme styles for a blank template. The others are color sets created from other themes displayed in the "Themes" dropdown. You can also customize theme colors by clicking the "Customize Colors" button. This feature allows you to customize the color palette associated with the master slide theme.
The other master slide styles have the same type of dropdown. Click the "Fonts" button, and a dropdown of fonts displays. The fonts that display in this dropdown are installed on your computer. If you find a font on the Internet or in another theme that you want to apply to your master slide, you must download the font from the creator and install I on your computer. The font must also be installed on the computer you use to run the slideshow. PowerPoint supports any font installed on your computer.
Finally, the "Background Styles" button displays a dropdown of shades and colors that can be applied to the background of the template. You might not want to apply a background style to your master slide while you're working on it, so you can click the "Hide Background Graphics" button to hide them while you edit your master slide.
Slides are given a default "widescreen" height and weight, but this also can be changed to a more traditional standard length and width. The "Size" section of the window has a "Slide Size" button that shows the two slide size options.
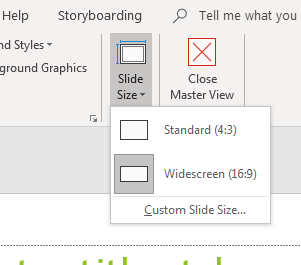
(Slide size options)
Changing slide size is normally done when you need to display your presentation on a non-traditional screen such as a projector.
When you are done with your master slide configurations, click the "Close Master View" button, and you're returned to the default presentation view. To exit the master plan editing view, you can also click another tab in the PowerPoint main menu.


