Your iPad also can be used as an iPod using the Music app. The Music app is docked on the Home screen and looks like this:

In this article, we're going to learn the many things you can do with the Music app so that you can use it like you would your iPod.
The best way to find music with the Music app is to use the Search field.
Keep in mind that we're talking about music you already have on your iPad, not music in the iTunes store.
The Search field is located on the bottom right side of the Music app screen. When you tap inside the Search field, the keyboard appears.
Simply type the name of a song, artist, or album.
If you'd rather just look through your music library, tap one of the tabs at the bottom of the screen: Playlists, Songs, Artists, Albums, or More.
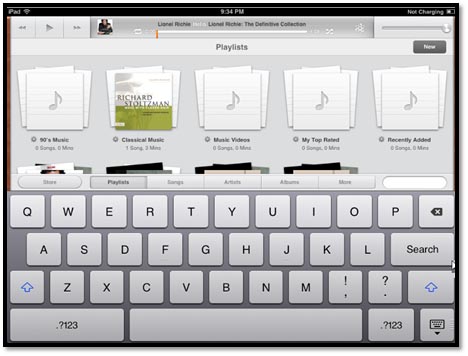
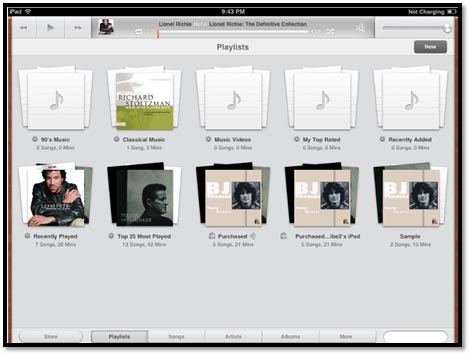
If we tap the Playlists tab, this is what we see:

By creating a playlist, you can organize your songs by themes, mood, genres, or however you want to group them for listening. A playlist on your iPad works just like any other playlist on your other devices or computers.
To create a playlist on the iPad, tap the Playlists tab at the bottom of the Music app screen. Next, tap the New button at the upper right hand corner, as shown below.
Now, enter a name for your new playlist.
Tap Save.
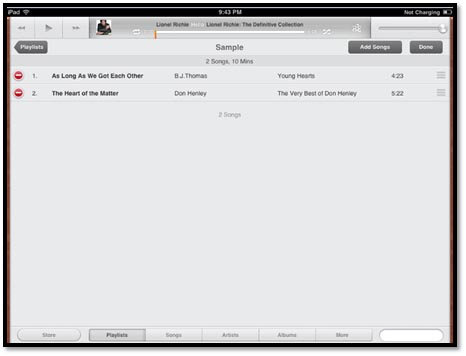
It's time to add songs! Tap the songs you want to add to the playlist, or tap the Add All Songs button in the upper right hand corner.
Preview your playlist to make sure you have all the songs you want. You can tap Add Songs to add more. If your playlist is the way you want it, tap Done again.
The Audio Controls
Once audio starts to play on your iPad, you'll see the audio controls. These appear at the top of the Music app.
- The volume control is located on the far right. Simply use your finger to slide the slider to the right to increase volume, or to the left to decrease volume.
- The Previous Track/Rewind button lets you tap once when a track is playing to go back to the start of the track. If you tap twice, you go to the start of the preceding track. If you touch and hold the button, you can rewind at double speed.
- The Play/Pause button lets you tap to play or pause the track.
- The Next Track/Fast Forward button lets you skip to the next track in the list. If you touch and hold the button, it will allow you to fast forward at double speed.
- The Scrubber Bar and Playhead allow you to drag the little dot (the playhead) along the scrubber so you can skip to different parts of a track.
- If you tap Repeat once, you can repeat all songs on the current list (playlist, album, artist, composer, or genre). If you tap it again, you can repeat the current song.
- Shuffle. If you tap shuffle, you can play songs at random. Just tap it again to go back to playing songs in the order they appear on the screen.
- Genius creates a sort of playlist for you, selecting songs from your library that go together.
The iPad allows you to customize the volume and equalizer settings so you get an iPod experience with your iPad. This prevents some songs from playing louder than others and allows you to adjust certain frequencies. You can also set a maximum volume limit.
If you want all songs to play at the same volume on your iPad, you first have to turn on the feature in iTunes. Here's how you do it:
Open iTunes. If you're on a PC, go to Edit>Preferences>Playback. If you're on a Mac, go to Preferences then tap the Playback tab.
Select the Sound Check box to enable it.
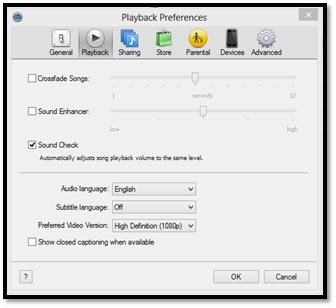
Click OK.
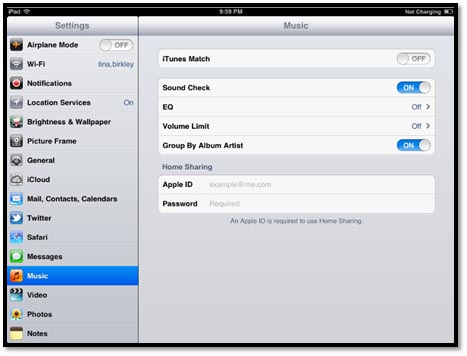
Next, you need to tell your iPad that it should use the Sound Check settings from iTunes.
Go to the Home screen on your iPad and tap the Settings icon.
Tap Music on the left.
Turn on the sound Check On/Off switch by tapping it.

An equalizer will increase or decrease specific frequencies in order to improve the quality of sound that you hear. You may want to increase the bass or make higher frequencies more noticeable.
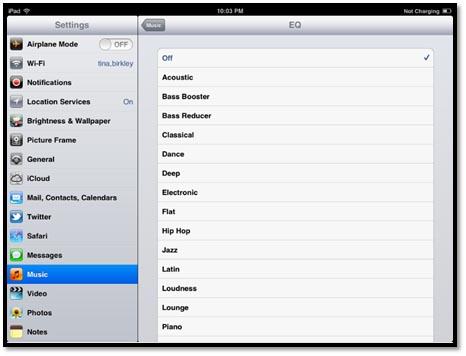
The iPad offers more than a dozen equalizer presets including Acoustic, Bass Booster, Bass Reducer, Dance, Electronic, Pop, and Rock. These presets are geared toward a specific kind of music so you don't have to mess with adjusting the frequency so often.
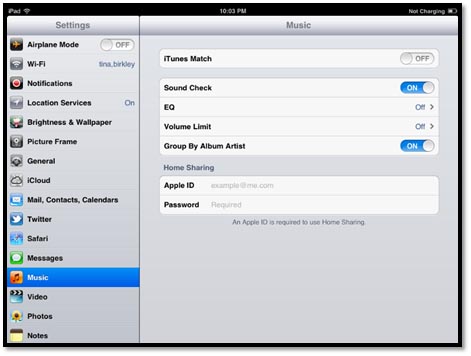
To find what equalizer preset you prefer, start a song, then go to the Home screen and tap Settings. Tap Music on the left, then tap EQ in Music Settings:
Now tap different presets until you find one you like.
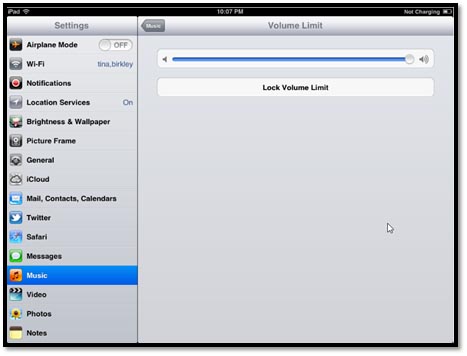
Set a Volume Limit for Music and Videos
You can set a volume limit for your iPad that prevents music and videos from being turned up beyond a certain volume level.
To do this, tap Settings on the Home screen.
Tap Music on the left, then tap Volume limit.
You can drag the slider with your finger to adjust the volume limit. If you want this to apply to all songs and videos, tap Lock Volume Limit.
The iTunes app icon is located on your Home screen. It looks like this:

If you tap it, you can shop for music and videos and download them directly to your iPad.
Tap to open up the iTunes app.
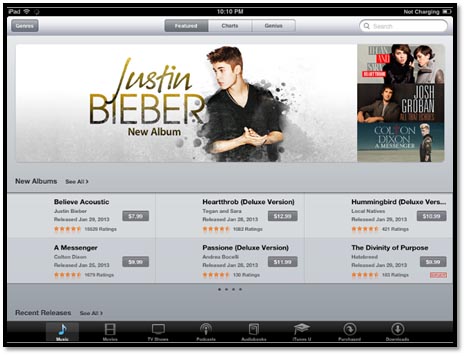
As you can see in the snapshot above, you have categories that appear at the bottom of the app. These categories are Music, Movies, TV Shows, Podcasts, Audiobooks, iTunes U, Purchased, and Downloads.
Tap on Music since audio is the focus of this article.
At the top left of the iTunes app, you'll see the Genres button. This can help to narrow down your search for music.
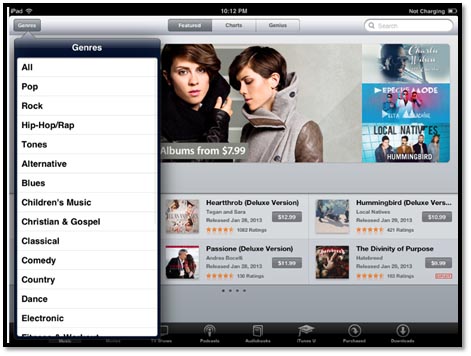
Choose the genre that you want to search.
We've chosen Country.
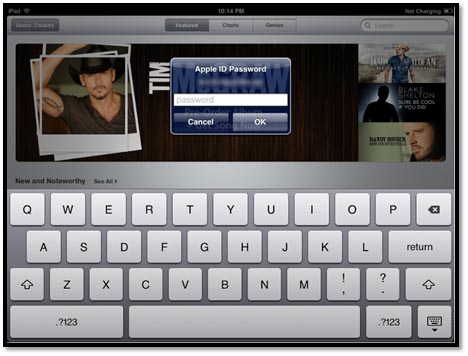
The iTunes app now shows you their featured artists and songs:
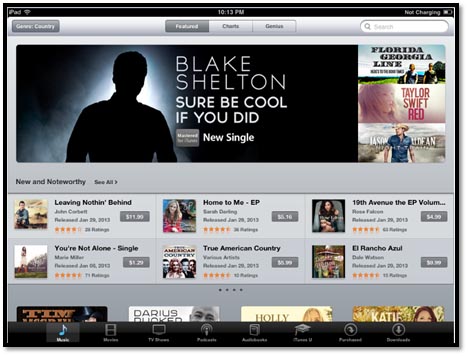
You can purchase any of the songs or albums by tapping on the gray bar that contains the price. When you do this, the bar will turn green and will read "Buy Album" or "Buy Song." Tap it again, then enter your Apple ID to purchase.
You can also search for songs and albums that are on the top of your genre's charts by tapping Charts at the top of the iTunes app.

It will show you the top songs and the top albums.
If you tap Genius, the iTunes app will make recommendations based on songs you've already purchased from iTunes.
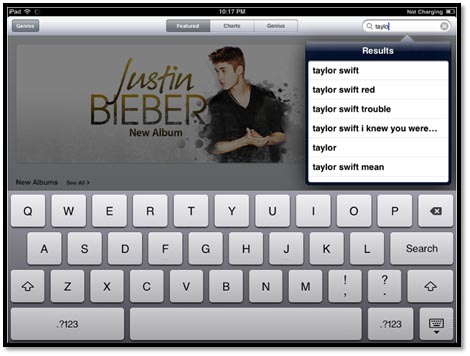
If you just want to search for songs, you can enter a song, album, or artist in the search field at the top right.
The results will start to appear as you type:
Using the Videos app on your iPad, you can play and watch TV shows, movies, and podcasts that you download online.
Using the Videos app on your iPad, you can play and watch TV shows, movies, and podcasts that you download online. Using the Videos app is as easy as anything else we've learned so far once you master the basics.
The Videos app on your iPad is marked by this icon:

Playing Videos on the iPad
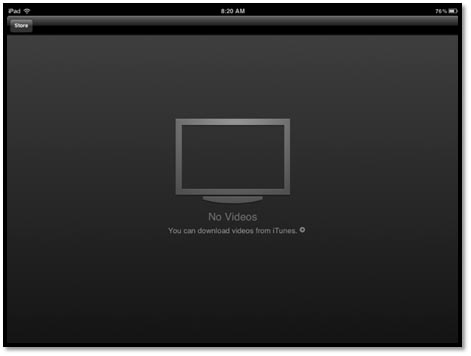
To play videos on your iPad, first tap the Videos app to open it.
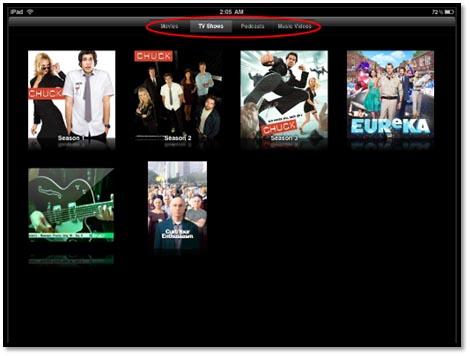
The first time you open the Videos app, this is what you will see:
However, once you add videos, it will look like this:
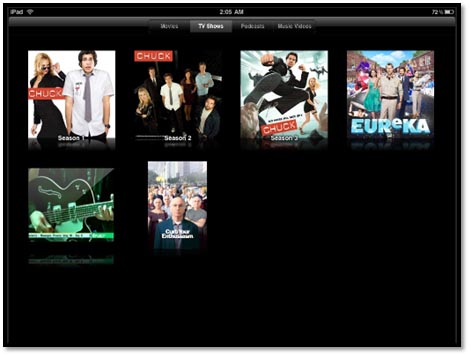
Now you can tap Movies, Postcast, or TV Shows. Tap the tab at the top for what you want to watch.
Tap an item to open it, then tap the Play button.
Your iPad gives you several controls so that you can control your video experience. These are shown below.
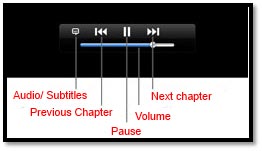
If you want to stop the video and return to the information screen, tap the Done button.
Watching videos on your iPad is awesome if it's just you watching. However, the iPad screen isn't large enough if you have two or more people watching the videos. For this reason, the iPad offers two ways that you can display the video from your iPad to a TV set.
The first way to do this is through the Airplay feature. This allows you to stream wirelessly from the iPad to an Apple TV box you connect to an HDTV. All you have to do is start watching the movie on the iPad and tap the Airplay button you'll see in the video controls. However, you can't watch on both the iPad and the TV. Tap the iPad to watch the movie on the iPad again.
The second way is by using AV adapter cables that allow you to connect your iPad to a standard or HDTV. Apple sells these cables. However, if you have an original iPad (first generation), you'll be limited to displaying videos from apps that support external video output such as Netflix. If you have a newer iPad, the Digital AV adapter lets you mirror the iPad screen on your TV. Just be warned, the digital AV adapter doesn't come with an HDMI cable, so you'll have to provide one.
NOTE: If you have a fourth generation iPad or iPad mini, you'll need a "Lightning to VGA Adapter" or the "Lightning to Digital AV Adapter."
You may find that you have so many videos that they are eating up the memory on your iPad. For that reason, you may want to delete some.
Here's how you delete videos from your iPad:
To delete a video manually, tap and hold the movie poster until a small x with a circle around it shows up on the poster. Tap the larger Delete button that you'll see appear to confirm that you want to delete it.
Remember, when you delete a movie from your iPad, it's still in iTunes. If you ever want to put the movie back on your iPad, you can do it by syncing to iTunes.
The iPad 2 was the first version of the iPad to include a camera. In fact, it had two: a front and a rear. The rear camera can record video up to 720 p and at 30 frames per second � or as full-motion video. What this means to you is that video that you shoot will play back smoothly. Since then, the cameras have just gotten even better. Starting with the third generation, you can capture 1080 p video, and you can enjoy built-in video stabilization as well, which means the iPad is ideal for shooting videos. Let's learn how to do it.
Start out by tapping the Camera icon on the Home screen.
It looks like this:

Next, go to the lower right hand side of the screen and change it from the camera position to the video camera position.
Choose if you want to use the rear camera or front camera. You can use either. The quality is just better if you want to use the rear. This button is located to the left of the Camera/Video switch.
To record, tap the red record button located on the middle right side of the screen. Tap it again to start recording.
The video you record is saved to the Camera Roll (you can tap on it in the lower left-hand corner of the video screen.)
Believe it or not, editing videos is really easy to do.
Start by tapping the camera roll and finding your footage that you want to edit.
Next, tap a video to display the controls.

Now drag the start and end points on the frame viewer at the top of the screen. Select only the video that you want to keep.
At this point, you can choose what you want to do with your trimmed video clip. You can tap Trim Original to remove scenes from the original clip forever. You can tap Save as New Clip to create a new version of the clip with your edits applied. A version of the original clip is saved too. You can also tap Cancel (located in the upper left hand corner) and start over.
FaceTime is a video chatting software that comes installed on later versions of the iPad. The FaceTime icon looks like this:

The first time you tap on the app to open it, you'll have to sign up for FaceTime using your Apple ID. If you don't have an account with them, you'll have to create one. In addition, you'll have to give an email address that callers can use to call you from their own FaceTime app.
To make a FaceTime call, tap the app to open it, then choose who you want to call. You can call contacts, people you've called recently, or favorites, which are frequent callers that you add to a favorites list. Just tap a name to make the call.
Once you're in a call, you can see what you look like to the other person by looking at a small picture-in-picture window. You can drag this to any corner of the screen and monitor how you look or if the other person can see you at all.
The other person will take up most of your screen. Again, you'll appear in a small window.
In addition to making calls with FaceTime, you can also receive them. The app does not need to be open for you to receive calls.
When a call comes in through FaceTime, the caller's name will appear on the iPad screen. You will also hear the phone ring. See the snapshot below.
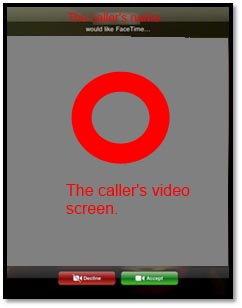
Now you can either accept or decline the call by tapping Accept to answer or Decline if you don't want to answer.