iPad Emailing and Messaging
There are two ways that you can set up email accounts on the iPad. You can add email accounts to the iPad itself, or you can use iTunes with your iPad connected to your computer.
First, let's talk about adding email accounts to the iPad itself. To do this, you'll use the iPad's Mail App that's docked to the bottom of your Home screen by default. It looks like this:

You can use this to access MobileMe, Microsoft Exchange, Yahoo! Mail, Gmail, AOL, as well as other IMAP and POP3 accounts.
For this article, we're going to assume that you don't have an email account set up on your iPad.
Tap the Mail App.
Now, tap on the account that you want to use.
Enter your account information, then tap Save.
Tap on Inbox to view the messages you've received.
Go to the iPad Home screen and tap Settings.
Tap Mail, Contacts, Calendars.
Tap Add Account.
![]()
Select the type of email account you want to add.

Enter in your account information by following the instructions on the screen.
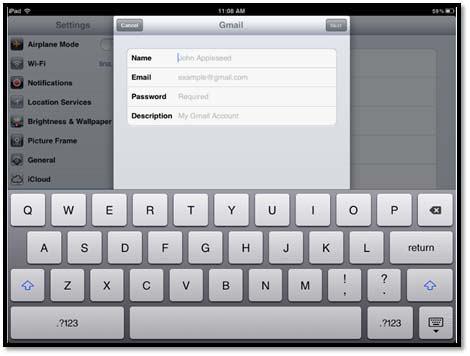
Tap Save.
You can also use iTunes to set up your email. To do this, make sure your iPad is connected to the computer and iTunes is open.
Select the iPad in the iTunes sidebar.
Next, tap on the Info tab.
Now scroll down until you see Sync Mail Accounts From, then tap the check box to activate it.
Choose the email application that you want to use to sync from.
Tap Apply when you're finished.
Your account settings will be transferred for you.
In order to send emails, you're going to want to add contacts. It's a lot easier to store the names and email addresses of people you contact regularly, than to have to enter their information in every time you email them.
To add contacts to your iPad, tap the Contacts icon on the Home screen.

Tap the plus sign at the bottom of the screen to add a contact.
![]()
Now you can enter in your contact's information.
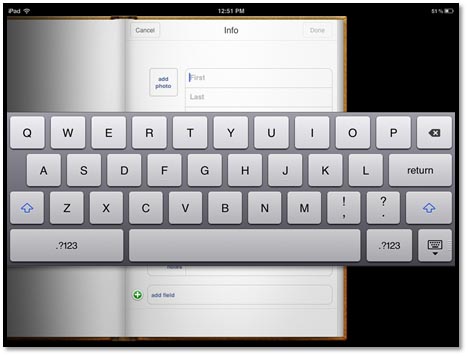
Tap the Done button when you're finished.
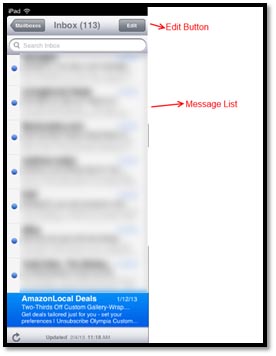
Reading Email Messages
When you open the email app on the iPad, your messages appear in a list on the left, as shown below:
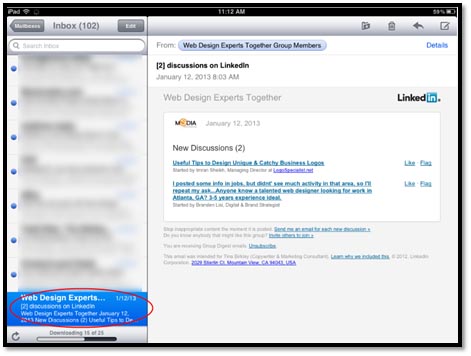
The message itself is shown on the right.
You can scroll down through a message by flicking your finger, just as you did in Safari.
The mail app on the iPad gives you two choices for your email messages. You can leave them in the inbox or delete them. You cannot create folders to organize your email. For that reason, it's okay to use your iPad to check email, but if you want to sort and organize messages, it's best to use your PC or Mac to do that.
To file a message into a folder, tap the File icon.
Now choose the folder where you want to move the message.
To move multiple messages to a folder, tap Edit above the message list, then tap in the open circle to the left of the messages to select the ones you want to move. Then tap Move and select a folder.

To delete a single message, tap the trash can button next to the File icon.
To delete multiple messages from your inbox, tap Edit above your message list.
Select the messages you want to delete by tapping in the open circle beside them.

Now, tap Delete.
To print a message, tap the Action button (the arrow) and select Print. Select the printer and the number of copies, then tap Print.

Reply to a Message
To reply to an email message, tap the Action button, then tap Reply.

Type in your message, then tap Send.
To forward an email message (or send the message to someone else), tap the Action button, then tap Forward.
Enter in the address of the person you want to forward the message to and tap Send.
![]()
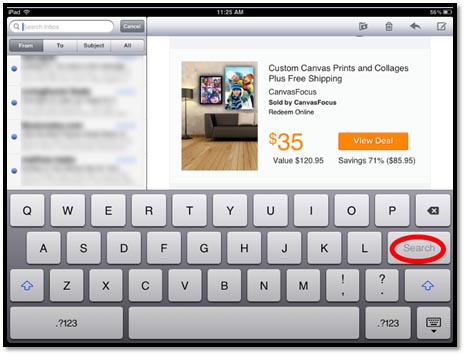
Search Emails
You can also search for emails. You can search by From (Sender), To (Recipient), Subject, or All.
To search for an email, tap in the search box above your email list, as shown below.

Type in your search criteria.
Select if you want to search by From, To, Subject, or All.
Next, tap Search on the keyboard.
To compose a new email message, tap the compose button  .
.
Enter in the recipient's email address, then compose your message.
Press Send.
![]()
Add a Picture to a Message
To add a picture or another attachment to the message, first go to your photos on the iPad.
Tap the photo to open it.
Now tap the Action button in the upper right corner.
Select Email Photo.

Next, add the recipients and type in any additional message.
Press Send.

Save Emails to Send Later
If you write an email, but don't want to send it right away, you can save it and send it later.
To do this, open a new email. Go ahead and compose your email, including adding recipients.
If you don't want to send it right away, tap Cancel instead of Send.
Tap Save Draft.
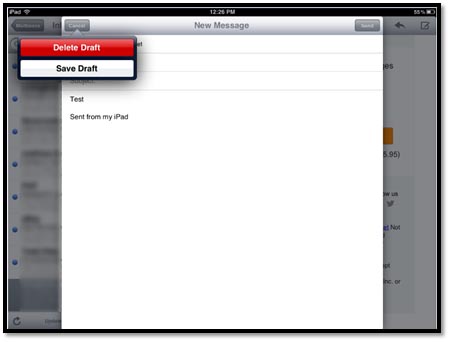
If you go to your mailboxes, you'll now see a Drafts folder where your email is stored.
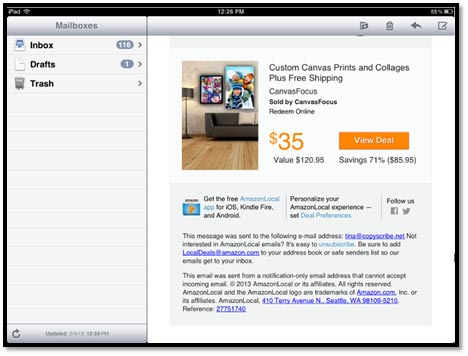
The Email app will let you know when you have unread messages in your inbox by displaying a red circle on the upper right hand corner of the Email app, as you can see in the snapshot below. This is a reminder that you have emails to sort through.

Email Settings
To view or change your email settings, go back to the Home screen and tap the Settings icon.
Tap Mail, Contacts, and Calendar on your left.
You can change your email account settings by tapping on your email account on the right.
![]()
You can also set preferences for how messages appear when you receive them.
![]()
- Show determines how many recent messages are shown.
- Preview determines the length of the preview you see for emails.
- Minimum Font Size determines the minimum font size that will be used to display emails.
- Show To/CC Label determines if you see the To/CC label when you view emails.
- Ask Before Deleting means if you turn this on, you will be asked to confirm before you can delete an email.
- Load Remote Images determines if images embedded in an email will be displayed.
You can also add a signature and customize a sort and display order for your email messages. The email settings for the iPad are self explanatory. Stick with your personal preferences for your other computers, tablets, and phones so you have uniformity across your many devices.
You'll see the iMessage icon on your iPad Home screen. It looks like this:

iMessage is an instant messenger/texting application that allows you to send text messages, documents, photos, videos, contact information, and group messages. These messages can be sent over WiFi or 3G. This serves as an alternative to SMS messages sent through cell phones or other texting apps.
Before you can start to use iMessage though, you have to set it up.
Tap the Settings button on the iPad Home screen and tap Messages on the left.
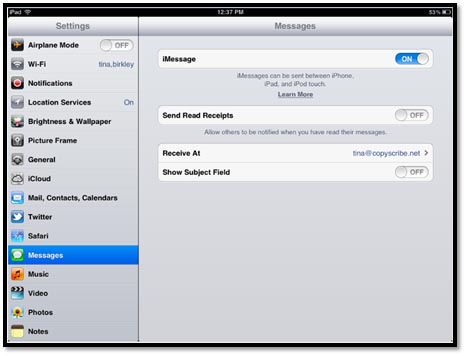
Make sure iMessage is flipped to ON. If it's not, turn it on.
Once you turn it on, you'll have to login using your Apple ID.
Now, you should see the email address that you use with your Apple ID in the Receive At field.
Once you're done with setup, go ahead and return back to the Home screen and open the iMessage app.
To send a message using iMessage, tap the compose message button shown below:
![]()
Now, enter in a recipient for the message in the TO field.
You can enter in a telephone number or someone's Apple ID email address.
Compose your message in the bar at the bottom to the left of the Send button.
When you're finished, tap Send.
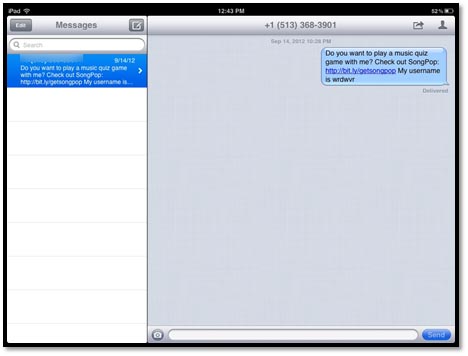
Messages will appear as bubbles, much like when you send SMS messages from your phone.
Sending Pictures and Videos in an iMessage
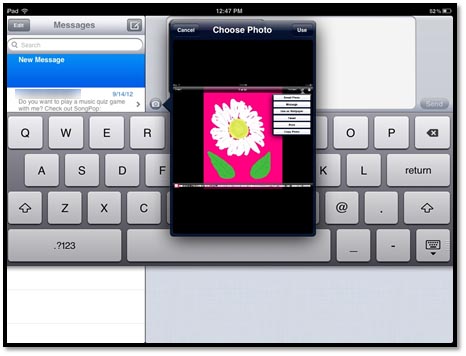
To send a picture or video with an iMessage, tap the camera button to the left of where you enter your message.
You can then go through your photos and videos and choose which you want to send.

Tap the Use button to send the photo or video.
The Maps app on your iPad allows you to do a lot of things, such as get directions from one location to another, bookmark locations, and get information about locations, including phone numbers and Web links to businesses. In this article, we're going to learn how to use the Maps app to do various things.
The Maps app looks like this:

You can find it on your Home screen.
In order to find your current location using the Maps app, you must have an Internet connection. You'll get a more exact location if you're using 3G instead of WiFi.
To find your current location, tap the Maps app.
Tap the Current Location button. It's located to the left of the button that looks like a book.
Your current location is shown on the map with a pushpin and a blue circle around it.

Double tap the screen and you can zoom into your location.
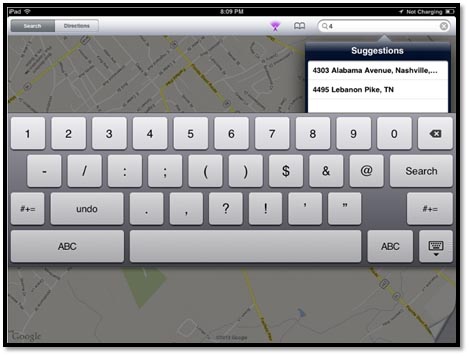
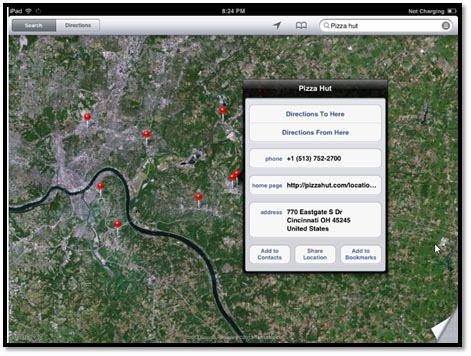
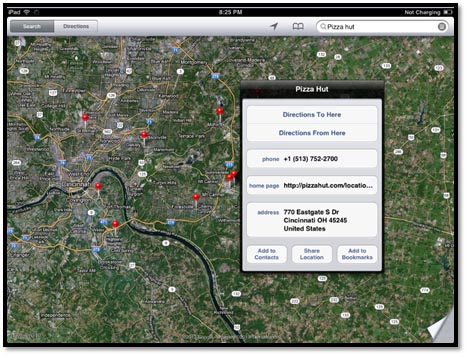
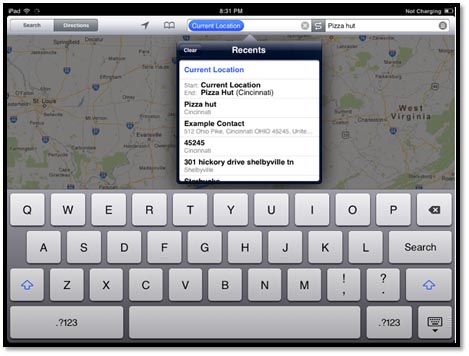
To find a person, place, or thing, tap the search field that's located in the upper right-hand corner of the Maps app.
When you tap in the search area, the keyboard will appear. Go ahead and type what you're looking for. You can search for addresses, zip codes, and businesses by category and by name. You also can search for combinations, such as the business name and zip code.
As you type, Maps will provide possible matches. If you see a match, you can tap on it.
When you're finished typing, tap Search on the keyboard.
Connect Maps and Contacts
When you connect Maps and Contacts, you can see your contacts' street addresses on a map. To connect Maps and Contacts, tap the Bookmark button (looks like a book) at the top of the Maps app.
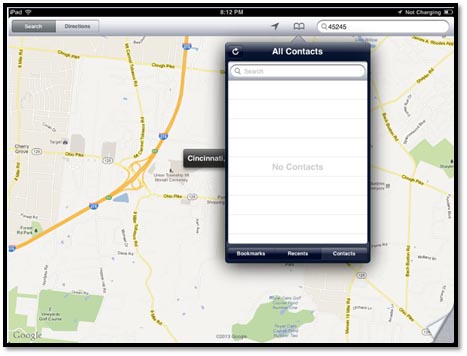
Tap the Contacts button at the bottom of the menu.
Now, tap the contact's name that you want to see on the map.
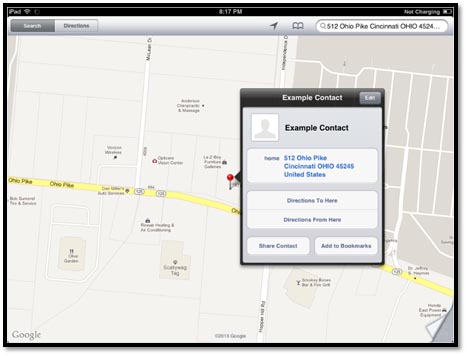
If you tap the contact's pushpin on the map, you'll see a black box with the name of the contact and a little blue circle with an "I" in it. Tap the "I."
Now you can get directions to this contact's address or bookmark the location to use again later.
You also can add addresses and places that you find to Contacts. Simply use the search field to find the address or place you're looking for.

Tap the blue "I," then tap Add to Contacts.

Adding Bookmarks
As we said in the last section, you also can add bookmarks for locations you find using Search. Simply tap the blue "I" above the location on the map (if it doesn't appear, tap the pushpin). Then tap Add to Bookmarks.

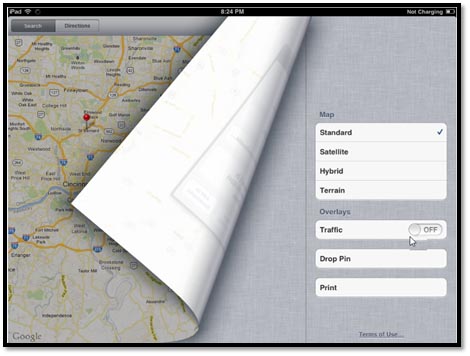
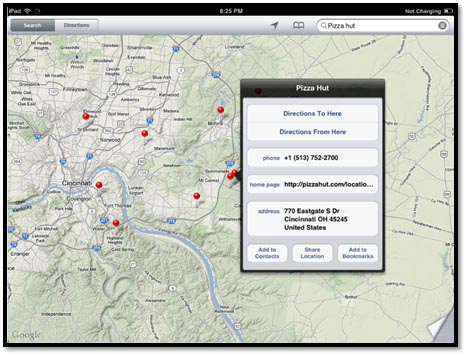
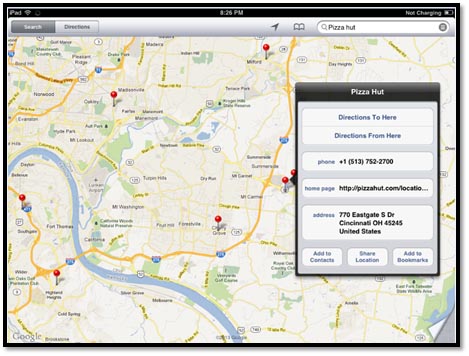
Changing Views
You can choose from four views in Maps: Classic (standard), Satellite, Hybrid, and Terrain. Classic is the view that's shown by default in iPad. If you want to change views, then swipe the bottom right corner of the screen. This "turns the page" and shows you the Maps menu.
Let's switch to Satellite.
Now, let's switch to Hybrid.
And to Terrain.
If you want to zoom in on a map to get more details, or zoom out for less details, you can do this simply by tapping the iPad screen. Simply double tap with a single finger to zoom in.
Double tap with two fingers to zoom out.

If you want better control over zooming in and out, place two fingers on the screen and use the pinching motion. Bring your fingers together to zoom in. Spread them apart to zoom out.
To move to an adjacent area on the map, slide your finger across the screen.
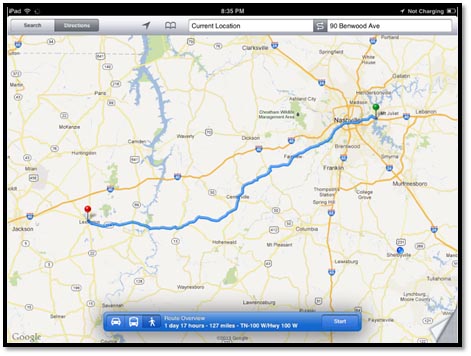
To get driving directions from one location to another, tap the Directions button at the top left of the Maps screen.
As you can see, by default, the Maps app used our current location and gave us directions to the last place we searched for. This is an easy way to get directions to one place from your current location.
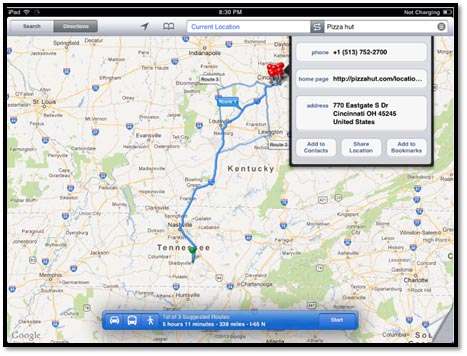
However, you also can add in a new location in the "current location" field. Simply tap on the field and start typing.
In the second field, type your destination.
The Maps app will then give you suggested routes in the blue bar at the bottom of the screen. You can choose to get directions from one location to another by foot, car, or public transportation. Simply tap the button for car, public transportation, or by foot.
Tap Start to view the directions.
Get Traffic Information
The Maps app can also provide real time traffic information. Simply swipe the bottom right side of the screen to "turn the page."
![]()
Turn Traffic on.

Now you can see traffic conditions. These are color coded.
- Green is 50 miles or more per hour
- Yellow is 25 to 50 miles per hour
- Red is under 25 miles per hour
- Gray means no data is available.
Please keep in mind that traffic info doesn't work for all areas. If you don't see the color codes, it's safe to assume it doesn't work for thatlocation.