
?

Whether you work in an office or need to manage your own data, Microsoft Excel 2019 is the most common spreadsheet software for business or personal use. Even if you choose to work with another spreadsheet solution, most software is compatible with Excel format and can export any data into an Excel spreadsheet. Spreadsheets help you manage data, perform calculations, chart information, and share data within an organization. Microsoft Excel has several benefits, but first you need to know how to work with it before you can take advantage of all that this software has to offer.
Excel 2019 and Microsoft Office 365
- Word: Word processing software used for typing letters, creating documentation and notes.
- PowerPoint: Slideshow software for presentations and marketing decks.
- Access: Database software for small businesses without infrastructure for larger database platforms.
- Outlook: Email client for storing messages on your local computer.
- OneNote: Collaboration tool for taking notes (handwritten or typed).
Getting Started
After you install Microsoft Office, the next step is to open it on your desktop. Microsoft places shortcut links in two places:
In Windows 10, go to your list of applications and open the Office folder. Double-click the Excel icon.
For older versions of Windows, a pinned Excel icon is shown in the taskbar.
The Excel icon for 2019 may look like one of these 2 icons, depending on which updated version of Excel 2019 you are running:
 or
or ![]()
Whenever you want to open Microsoft Excel, double-click this icon and a new spreadsheet automatically opens ready for you to enter data.
After you open Excel, you're presented with options to open a blank workbook or use a template. Know that Excel has several templates to get you started on common tasks such as billing, loan calculations, expense reports, personal budgeting and sales reports.
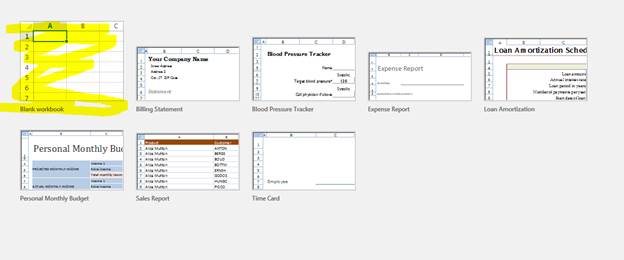
(Excel blank workbook option)
After double-clicking the blank workbook option, Excel 2019 opens a new spreadsheet for you to use.
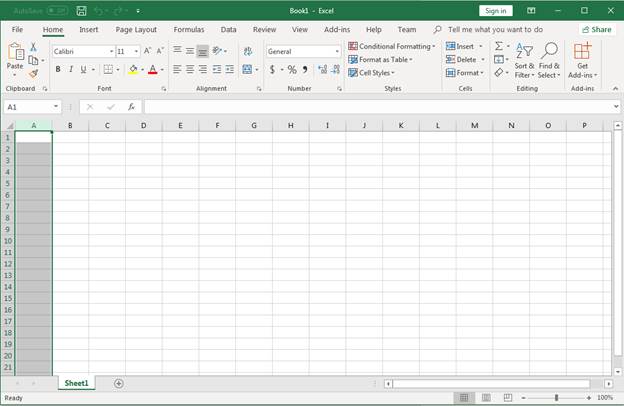
(Excel blank workbook)
If it's your first time ever looking at an Excel workbook, the numerous menu items and buttons can be overwhelming. Most standard users only work with a few options, but Excel 2019 can also do advanced charts, pivot tables and automation. Before you use any of the advanced features in Excel, the first stop is to understand navigation and where you can find the functions and buttons that you need to work with your data.
Although Excel can be used for advanced math and charting, it can also be used for basic bookkeeping and personal organization. Most of the menu items are used for basic formatting and organization, so although there are several options, you'll find that they are intuitive and easy to use once you understand how to navigate Excel.
Basic Excel Navigation
For anyone who used earlier version of Excel, you'll remember "Ribbons" and the way Microsoft organized menu items. Ribbons changed the way users interacted with Microsoft Office products. Instead of long menu items with a customized button bar, Microsoft changed its menu interface and expanded it into grouped items in different categories. With newer Microsoft Office software, ribbons have been simplified and more organized. Users can click each menu item and see a grouped list of features. The hardest part of navigating Excel is to find the group that contains the feature that you want to use. For instance, to insert a chart you might think that the features are found in the "Data" group, but it's found in the "Insert" group.
Before getting into menu items, you should first familiarize yourself with the basic layout of Excel. Excel is made up of rows and columns similar to a traditional database. The rows represent each record entered into the database. Columns represent the items that are stored. Take the following data as an example:
First Name Last Name Address
Jane Doe 111 Anywhere St
John Doe 222 Anywhere St
Notice that each column has a header to indicate the type of data stored in each field. Rows do not have any labels in this example, but if you make charts or graphs from data, you could label rows as well. For standard data storage, it's unlikely that rows will have a label, because they represent each record.
In the above example, there are two rows (excluding the column row) with data stored. The intercept between a column and a row is called a "field." Each data item is a field that can be used for charts, graphs, formulas and even linking to other data.
At the top of each column is a lettering system.

The lettering system is how Excel identifies each column. When you create formulas, you'll need to reference these letter labels. If you insert another column in between any one of these columns, Excel 2019 automatically shifts column labels to reflect the new column. For instance, if you add a column between B and C, the new column is given the label C and what was previously labeled C will shift to the new label D. All columns after D are also shifted to the next letter of the alphabet. When you work with Excel, columns are always alphabetical even if you add a new column after designing your spreadsheet.
Next to each row is a numbering system.

Rows are given numerical labels to distinguish them from column names. Rows start at one and increment by one for each new row. Just like columns, rows are always in numerical order even when a new row is added. Suppose you add a new row between 2 and 3. The new row is given the label 3, and each row following the new row 3 is given a new label that keeps each one in numerical order.
When you reference any cell in a spreadsheet, you use the column letter first and then the row number. For instance, if you want to reference the first cell in a spreadsheet, you would type "A1." If you're unsure of the cell label, you can click it with your mouse and Excel 2019 shows the label in the upper-left corner.
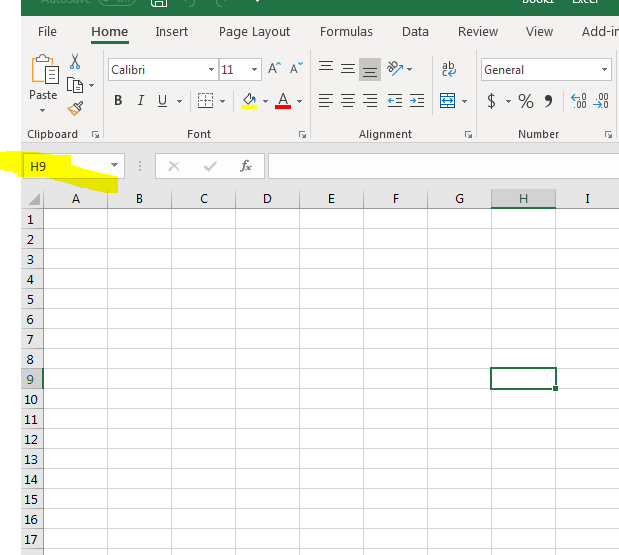
(The active, clicked cell is H9)
The column and row labels are also highlighted by changing the background color. Any time you change the active cell using either a keyboard or a mouse, Excel makes it easy to identify the active label by both displaying it in the upper-left corner and highlighting the active row and column headers.
Notice in the row image that fields in the first column are gray. When you click entire rows or column in an Excel spreadsheet, the background is given a different color (gray in this example) from the others so that you can distinguish the active cells from others.
You don't have to select only one cell. A single click on a single cell will make that one cell active. Anything you type or do within the spreadsheet will display in that cell only. Even if you reference another cell, the result displays in the active cell.
To make an entire row active, click the row label. Let's make row 9 active.
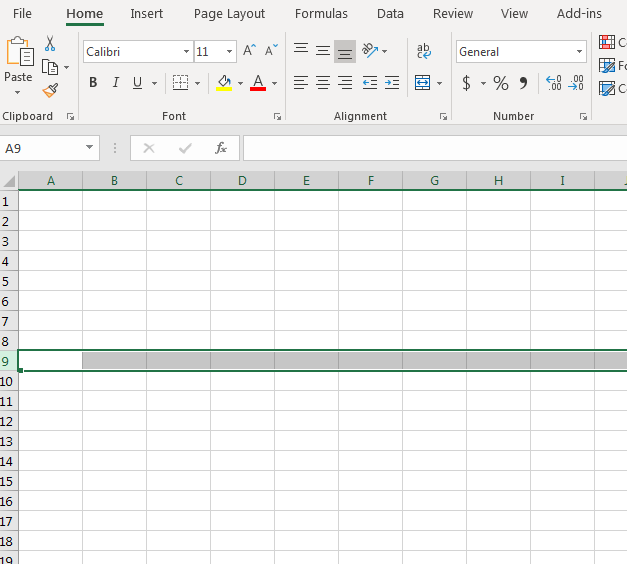
(Excel makes an active row cells gray to indicate an entire row was selected)
The same can be done with columns. Click the column header and an entire column is highlighted indicating that the column is active. Selecting an entire row or column is a way to format, delete or edit a large group of data. If you have 1000 rows, changing the format of all items in a specific column would be tedious one-by-one. By highlight an entire column, you can change all 1000 of those records.
At the top of a spreadsheet, you see a row of menu items. When you click one of them, notice that a menu doesn't open. Instead, a group of buttons and dropdown items are shown. This is the way Excel 2019 ribbons work in 2018. In the previous image, notice that the "Home" ribbon item is active. Those buttons and dropdown choices shown in the ribbon can be used to format cells within the spreadsheet. Some of these ribbons you will use more often than others. Some you might never use at all, but it's good to click through each ribbon and identify features. This will help you more quickly create and edit your spreadsheets.
The final interface item to know well is the Excel 2019 quickbar.
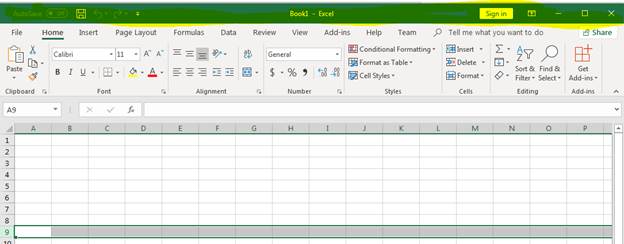
(The yellow highlight shows quickbar features)
In the upper-left corner, you see four functions. The first one displays an auto-save feature that you can turn on or off. The second item is one of the most important. You can find the "Save" feature by clicking the File ribbon, but a quicker and more convenient method is clicking the disk icon. By clicking this button, your spreadsheet is saved to disk. If it's your first time saving the spreadsheet, Excel 2019 opens a "Save" dialog window asking you to name the spreadsheet and choose a storage location.
The arrow turning to the left is the "Undo" feature. If you perform and action that you want to reverse, you can click this button to revert data and formatting back to what it was before you made those changes. You can click this button a second time to revert data back to what it was prior to two changes that you've made. The undo functionality can go back several revisions until you've removed multiple changes that you've made. This could be something as small as bolding font or large changes such as deleting an entire row.
The arrow pointing to the right is the "Redo" button. Suppose you use the undo functionality twice, but the second click was a mistake. You can click the Redo button to reapply the second undo action. The undo and redo functions make it possible to quickly remove or re-add changes that you've made as you edit your spreadsheet.
As you work with Excel, these basic features are what you'll use in almost every spreadsheet made. Knowing how to activate cells, identify labels, and make quick changes speed up your productivity and make it more convenient to work with large amounts of data. When you open Excel 2019 for the first time, click some buttons especially each ribbon to familiarize yourself with the location of each feature.


