PowerPoint has several views that you can use to change the way you review and proofread slideshows. Because PowerPoint 2019 is much different than any other Microsoft Office application, the way you view content is different than others. Excel lets you see spreadsheets as a whole regardless of the number of pages. With Word, you can see pages and breaks from within the layout. With PowerPoint, print layouts and slides are much different. A slide is usually just one page, but you often need to see the outline view to identify if you have all the material that you need for your presentation. With an outline view, you can see your presentation topic points and review it for proofing revisions.
Views and Layouts in PowerPoint
The default view in PowerPoint is a view of slides in a thumbnail view located in a left panel in the main PowerPoint window. PowerPoint has several views available. You can find all views available by clicking the "View" tab in the main PowerPoint menu.

(PowerPoint view options)
Views are separated into two sections: the "Presentation Views" section and the "Master Views" section. Normally, you will mainly use the presentation views as they are more useful when you are working with presentations as you create them and make revisions during the proofreading process.
The "Normal" view is what you see when you first create a presentation or create a new file within PowerPoint. It's the view most users work with as they create a new presentation. This view displays small thumbnails in a left panel and the main slide workspace in the central window. When you click a slide in the left panel, it becomes the active working slide that is then shown in the central working window area.
An outline view displays different views in the left panel. It displays a shortened version of the main default thumbnail view that you see when you create a new presentation. An outline view is mainly for presentation creators that need to see a presentation with only the topics highlighted in each slide. Topics are shown based on the title added to each slide.
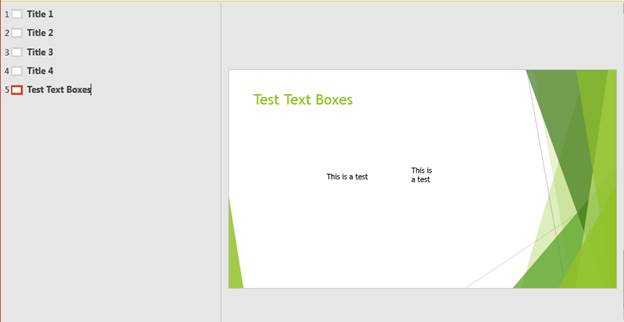
(Outline view)
Large text is automatically detected as the main title of a slide. In the image above, the text entitled "Test Text Boxes" is from the main text box created when a new slide was added to a presentation. As you can see from the text color and size different, this text stands out among the smaller text boxes. PowerPoint determines that this text is the title of a slide and determines that it's a title. This title is then used in the outline view. The outline title text is then shown in the left panel.
Just like the normal view, you can click any title in the left panel and PowerPoint will jump to that particular slide. You can also use sections with any view so that you can segment slides into categories so that you can easily identify topics as you run through your slideshow during a presentation.
The next view is the "Slide Sorter" view. This view gives you a better overall review of all slides in a presentation. For instance, you might think that the normal thumbnail view has images that are too small to proofread slides. Instead, you can use the Slide Sorter view for larger images of slides that show you the details of content. It also displays a better overall view of the way your slideshow will be presented to your viewers.

(Slide Sorter view)
The "Slide Sorter" view is a broader look at your slides so that you can identify how they will look as you execute a presentation. They provide larger thumbnails compared to the normal view, which is the default when you start a presentation. Use this view right before you complete a presentation and consider it complete for public view.
The next view is the "Notes Page" look at your slideshow. This view provides a better look at slideshows as they appear to a reviewer. You could create slides for another user or review slides that require notes and revisions. The "Notes Page" view allows you and the reviewer to get a birds-eye view of what must be done to a slideshow.
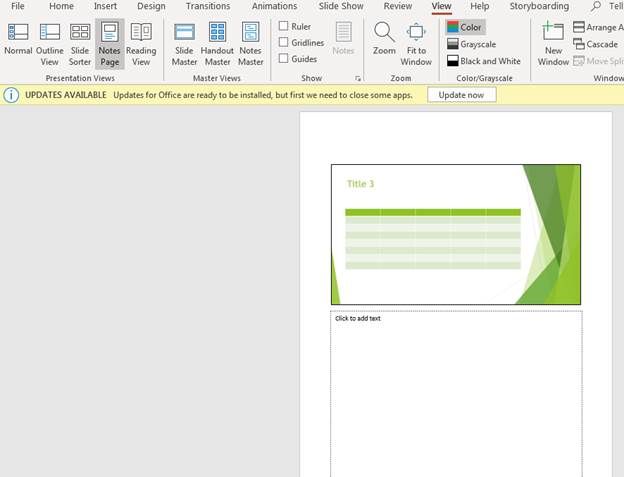
("Notes Page" view)
Should you ever need to share slides and gain insight on better ways to improve, this view is the best way to share your slides with other users within your organization.
The last view is the "Reading View" option. This view lets you see your presentation full size within your window. It's also the view that you display your presentation to your viewers. When you click this view and PowerPoint 2019 is expanded on your desktop, it displays slides in full width of your screen.
Colors and Zoom
As you review and proofread slides, you can change colors and zoom in or out. The "View" tab has zoom options where you can make text larger or smaller depending on the zoom factor. The coloring options also allow you to see what a slide will look like if you print it with a grayscale or black and white printer.

(Zoom and color features)
When you zoom on any object whether it be PowerPoint 2019 or any other application in Office, you can see a larger view of your content. When you zoom into content, you create a larger view of your content so that you can see details. When you zoom out, you provide a view similar to scaling back from content as if you are viewing slides from a much higher location. The result is that images and text are much smaller than what you see in normal view. Zoom features are beneficial when you want to view content at a larger or smaller size as you create it.
The "Color/Grayscale" menu section changes the way you view colors in your slides. By default, PowerPoint shows slides with color. This means that any color that you add to a theme or font is displayed in the interface. Images that you add to a slide are also shown in full color. The issue is that some printers do not have color capabilities. Even if you have color capabilities, you might not want to print in color but instead print to a laser printer with black and white. For instance, a legal document doesn't need color but instead can be printed in black and white.
When you want to print slides on a black-and-white printer, you need to be able to view them as they will be seen after a print job. You can do this by changing the color of slides to black and white, and you can view a representation of printed slides on your desktop.
The grayscale option is similar to black and white, only it gives you a more gradient scale of the two colors. Most printers support this type of print job, so viewing your slides in grayscale will give you a better overall look and feel of a slide should you print it on a black-and-white printer.
Views, coloration and zoom options are perfect for proofing a presentation. Use these features when you are ready to deploy presentations and use them in your meetings and conferences.