As a company, you don't just get to enjoy income coming in, you also have to deal with your expenses. One of your main expenses will be paying people who are your employees or contractors.
QuickBooks Online gives you a way to handle your payroll, however it is currently included as an add-on, much like their payments plans. So in order to use it, you need to enroll in it.
In this article, we will be looking at Payroll. We'll be looking at such topics as how you enable it, how to prepare paychecks, hot to handle payroll tax payments and returns, and how to pay contractors.
Payroll Plans
Just as when you chose a subscription level when you first signed up for QuickBooks Online, you also choose a subscription level for Payroll. The three levels are Payroll Core, Payroll Premium, and Payroll Elite.
With Payroll Core, you get the following:
- Full-Service Payroll - You can approve employee hours and run payroll in minutes, automate the filling of tax forms, give employees access to a workforce portal, and run payroll reports.
- Auto Payroll - Run payroll automatically for salaried employees on direct deposit and make changes such as bonuses or adding commissions.
- Health benefits for your team - Compare health plans and get instant quotes.
- Expert Product Support - Phone and chat support with experts as well as step-by-step help, troubleshooting, tips, and resources.
- Next-day direct deposit - Employees get paid the next day if you submit payroll by 5 PM.
With the Payroll Premium package, you get everything that's included in Payroll Core, but additionally you have access to:
- Same-day direct deposit - Submit payroll by 7 AM on the morning of payday.
- Workers' comp administration - Get quotes and pay as you go rather than in lump sums.
- HR support center - Ensure your compliance with wage laws, learn best practices on HR, hiring, onboarding and improving employee performance.
- Expert setup review - Be assured that your setup is correct because it will be reviewed by an expert.
- Track time on the go - Allow workers to clock in and clock out on their devices either manually or through GPS.
With Payroll Elite, you get all the features of the other two plans, with the additions of:
- White glove customized setup - A professional will do the setup process for you.
- 24/7 expert product support - The highest level of support with experts that will call you back rather than put you on hold.
- Track time and projects on the go - Real-time tracking of hours and labor expenses that includes geofencing alerts and activity feeds.
- Tax Penalty Protection - Intuit will pay any IRS penalties up to $25,000 per year and help resolve any issues
- Personal HR advisor - 1-on-1 support with any HR issues including custom handbooks and policies
These features may change over time, so check with Intuit's website for the latest plans and features.
Enabling Payroll
If you didn't select a Payroll plan when you started with QuickBooks Online, then you will need to turn it on first before you can use it. You can use a QuickBooks Online wizard to do this. Also, be aware that not having a Payroll subscription doesn't mean that you can't add your own employees.
To get to the wizard, click on the Payroll link in the left-side Navigation Pane and then go to Employees. At this page you will see a Get Started button that allows you to sign up for Payroll.
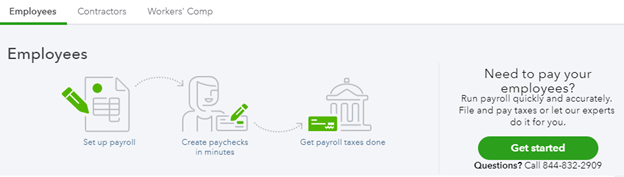
[Figure: Getting started with payroll]
You will also be prompted to enable Payroll when you start interacting with employees on the page.
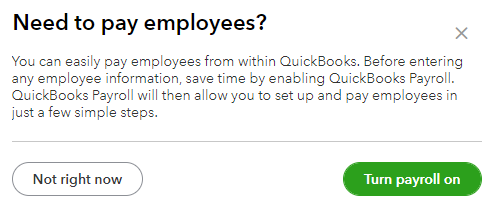
[Figure: QuickBooks Online prompting to turn on Payroll]
The wizard will walk you through the process of setting up Payroll. It will display information about your company that you entered when you first set up QuickBooks Online and ask you to confirm it.
You'll also be asked if you have already been paying employees or if you are paying them now for the first time. If you have paid them previously, you will be asked additional questions about how you paid them before. If you haven't paid them yet, you won't be asked any more questions about it.
You will then be asked if you want to add any employees. You will need to provide detailed information about the employee, including hire date, billing rate, and social security number.
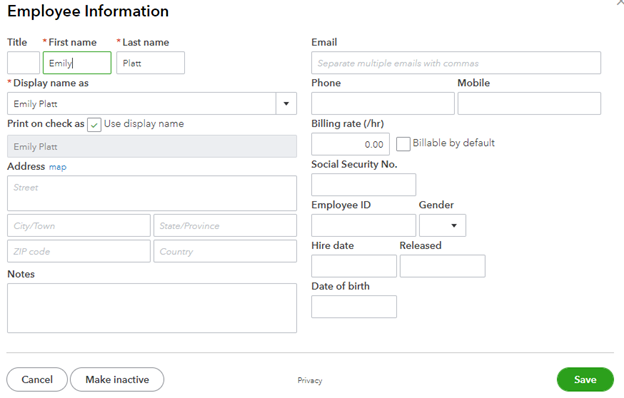
[Figure: Adding an employee]
Once you have finished with the wizard, your Employee page will be setup to run payrolls.
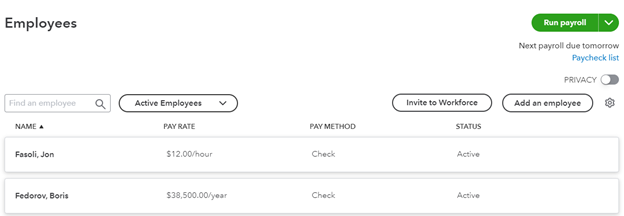
[Figure: Employees page after Payroll setup]
From this page, you can do such things as edit employee information, add more employees, and run payroll. Since this page has sensitive information, there is a Privacy toggle button near the top-right that you can turn on when you step away from the computer.
Before we start running payroll, let's first set up its preferences.
Configuring Payroll Preferences
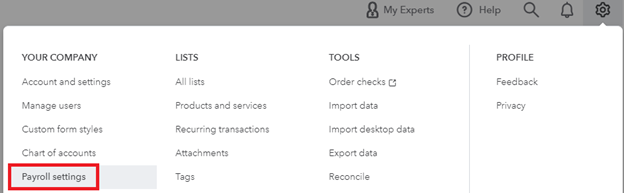
You should set up payroll preferences to make sure that you are handling things like taxes correctly. To set up your payroll preferences, click on the gear-shaped Settings icon in the Header and click on Payroll Settings under the Your Company heading.
The Payroll Preferences page has many links that you can click on to edit various settings related to payroll. It is divided into three columns: Payroll and Services, Company and Account, and Employees.
In the Payroll and Services column, there are three subheadings: Payroll, Bank Accounts, and Taxes. In Payroll, you can edit pay schedules, Vacation / Sick / PTO, and Deductions / Contributions. In Bank Accounts, you can edit company and employees. In Taxes, you can edit general tax information, federal taxes, state taxes, federal form preferences, and E-File and E-Pay.
In the Company and Account column, you can edit business information and preferences. Business information includes contact information and work locations. Preferences includes accounting, paycheck printing, form printing, emails, and reports.
From the Employees column, you can edit employees and time sheets.
Payroll Taxes
You will also want to set up your payroll taxes before doing payroll. QuickBooks Online has a wizard that will aid you in preparing this information. You will need to prepare information such as your federal Employer ID Number (EIN) and state account number, the frequency that you have to remit payroll taxes, and if you will pay electronically or automatically.
To start the wizard, go to Taxes in the left-side Navigation Pane. You should see the wizard start up if it's the first time to visit that page.
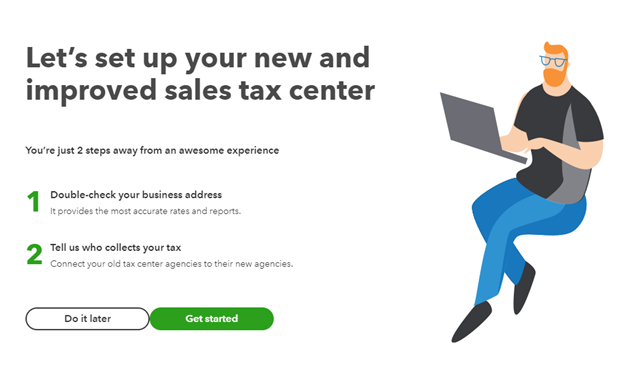
[Figure: Starting the taxes wizard]
The wizard will use your address to start gathering relevant tax information. You will also be asked to set up sales tax.
The wizard will display your business details which you can confirm or change. That includes your business address, when you will start using payroll, and when you first hired employees.
You will also be asked if you need workers' compensation insurance in your area, and if you want QuickBooks Online to provide quotes for that.
You then need to supply the wizard with information for federal and state tax details. This includes your EIN and state tax ID. You will also need to specify if your company is a non-profit.
On the next page, you will need to decide if you will pay your payroll taxes electronically or manually. For electronic payments, you will need to supply your bank account number and routing number.
Once you finish with all this information, you can move on to doing your payroll. Sales tax will be discussed in more detail in a later lesson.
Preparing Payroll
When you have configured all your settings for payroll and added all your employees, then you are ready to start processing payroll.
Processing payroll is generally done in three stages: recording paycheck information, reviewing paycheck information, and generating paychecks.
Recording Payroll Information
Start by going to the Employees page in the Payroll tab from the left-side Navigation Pane. Click on the Run Payroll button at the top of the page.
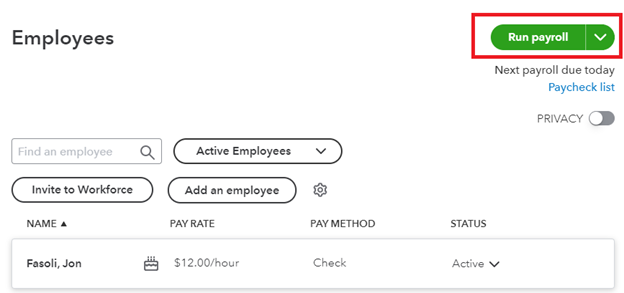
[Figure: Running Payroll]
You will then see a window which shows all your employees and how much will be paid. At the top, choose the account that you will be paying from. Double-check the pay period and pay date in their respective fields.
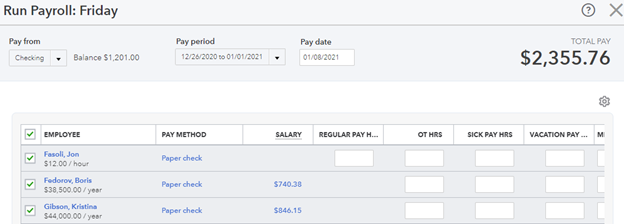
[Figure: Payroll screen]
In the employee table, you will see each employee, their payment preference, and their salary or a space for pay rate and hours. Additional editable fields include overtime hours, sick pay hours, vacation pay, and a memo. At the far right end of the table is total hours and total pay.
You can change the elements in the table by clicking the gear icon above the table. You can also show more rows on the screen at a time by checking the Compact option in the settings.
Enter the number of hours worked and the pay rate for each employee that isn't on salary. If an hourly worker has not done any work, then you must uncheck them in the left-most column. Once you are ready, you can start the next step of reviewing payroll.
Reviewing Payroll
To start reviewing payroll, click on the Preview Payroll button at the bottom of the screen. You can also click the dropdown button and go to Save for Later if you're not ready for this step yet.
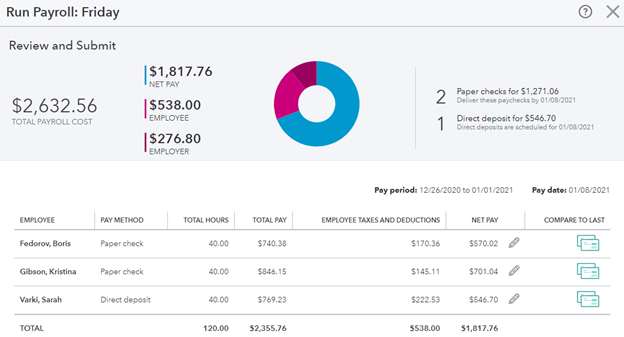
[Figure: Previewing Payroll]
The preview page shows a summary at the top of the payroll cost.
In the table below, details about each employee's pay are shown. You can see each employee's payment method, total hours, total pay, employee taxes and deductions, net pay, and also a button to compare the paycheck to their last one.
In the Net Pay column, you can change many things about each employee by clicking the pencil icon. This will take you to an edit page which has several sections of editable information.
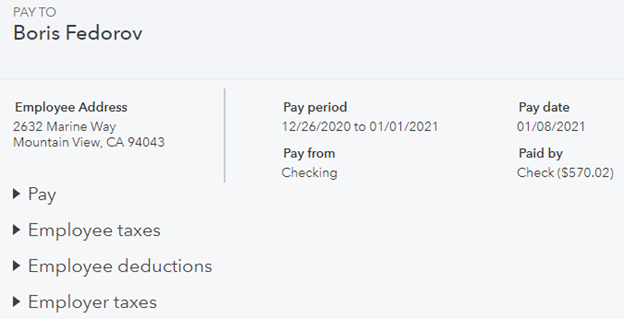
[Figure: Editing employee payroll information]
This page has four subsections: Pay, Employee Taxes, Employee Deductions, and Employer Taxes.
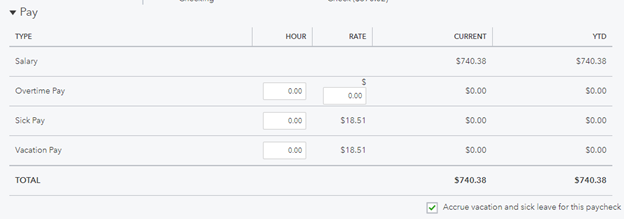 [Figure: Editing the Pay section in an employee's paycheck]
In the Pay section, you can edit the hours spent in overtime, sick pay, and vacation pay. You can also change the rate for overtime pay.

[Figure: Editing the employee taxes section in an employee's paycheck]
In the Employee Taxes section, you can edit the amounts in the Federal Income Tax and State Income Tax.

[Figure: Editing the Employee Deductions section in an employee's paycheck]
In the Employee Deductions section, you can change the amount contributed to the employee's 401K.
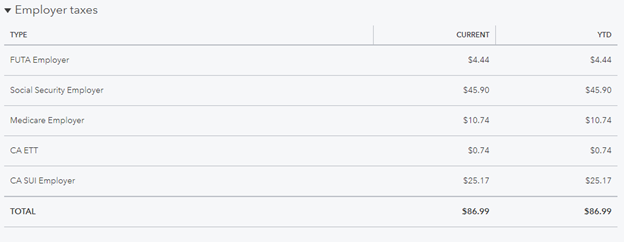
[Figure: The Employer Taxes section on an employee's paycheck]
In the Employer Taxes section, no fields are editable. You can only view the information.
Lastly, there is a memo section at the end of the paycheck where you can write anything you want.
Click the Cancel button to return to the preview page or the OK button to save changes first.
When you are ready, click the Submit Payroll button at the bottom of the screen to record the payroll information in QuickBooks Online.
Generating paychecks
Once you click Submit Payroll, QuickBooks Online will generate the paychecks and schedule direct deposits.
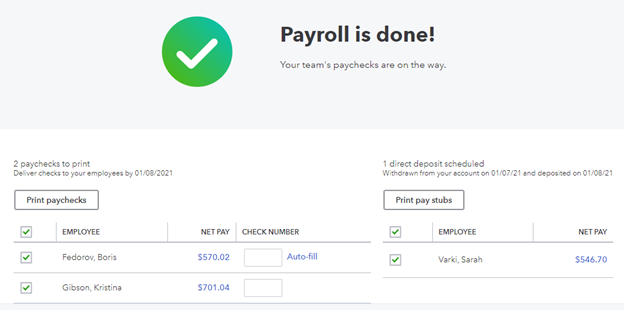
[Figure: The generated payroll]
You can print paychecks for employees that don't use direct deposit by clicking on the Print Paychecks button. Before doing that, you can specify each check number. You can also uncheck each employee that you don't want to print a check for. This will generate a PDF file that you can print onto the checks.
For employees that use direct deposits, you can print pay stubs using the Print Pay Stubs button. This also generates a PDF file.
When you are all done, you can either view payroll reports by clicking on the View Payroll Reports button at the bottom, or finish payroll by clicking on the Finish Payroll button at the bottom-right.
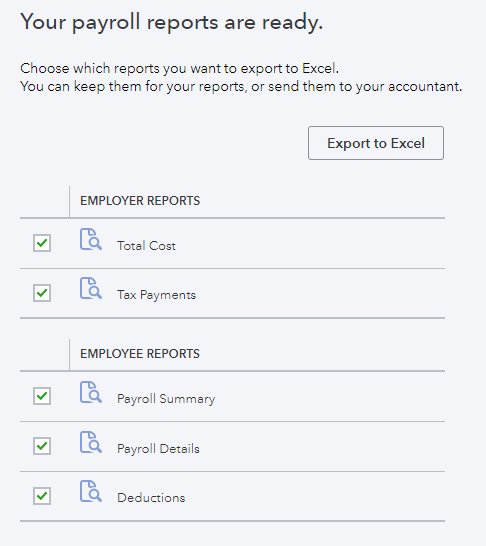
Click the Export to Excel to view the reports.
When you are finished, click Finish Payroll at the bottom of the page.
In the next section, we'll look at paying contractors.
Paying Contractors
In addition to paying employees, you can also pay contractors in QuickBooks Online. A contractor will typically send you a bill, and can be paid as such.
Contractors will also have to receive Form 1099-MISC, though, if they are paid a minimum of $600. According to the IRS, contractors are workers that are not considered employees because they don't perform work that the company could do on their own.
You can pay contractors through QuickBooks Online's Payroll system. Go to Payroll, then click on the Contractors tab. There you will see a list of contractors that you have added to your system.
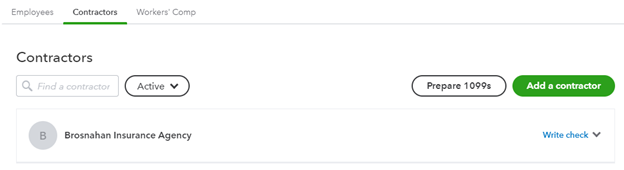
[Figure: The Contractors page in the Payroll section]
Clicking on a contractor on this page will take you to a screen with detailed information for the contractor. Three tabs on the details page will give you personal details, payment history, and documents.
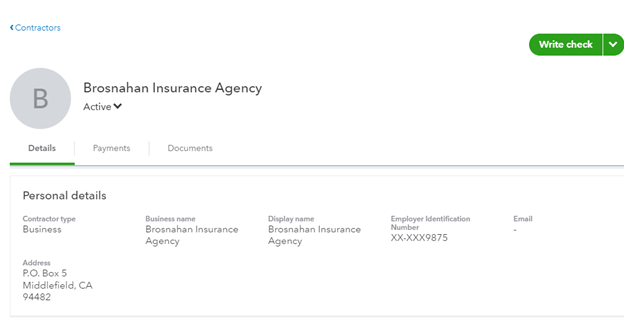
[Figure: Personal details of a contractor]
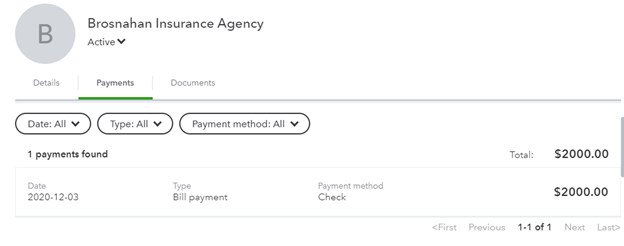
The second tab shows a history of payments that you have made to the contractor. You can filter payments by date, type, and payment method.
[Figure: A contractor's payment history]
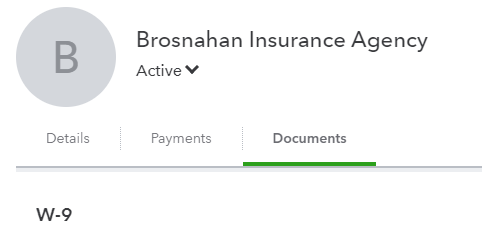
In the last tab, you can see documents such as W-9s.
[Figure: A contractor's documents]
Now that you've seen what a contractor page looks like, let's see how you can add a new contractor.
Adding a Contractor
You can add a contractor by clicking the Add a Contractor button from the Contractor page in Payroll. This will pop up a panel where you enter in information about the contractor.
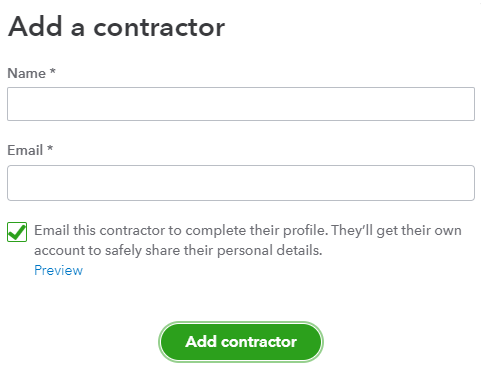
[Figure: Adding a contractor]
Clicking the Add Contractor button will then take you to a screen where you can add details. You will need to determine if the contractor is an individual or a business. If the contractor is an individual, you will need to supply their Social Security number, while if they are a business you will need to use an Employer Identification Number (EIN).
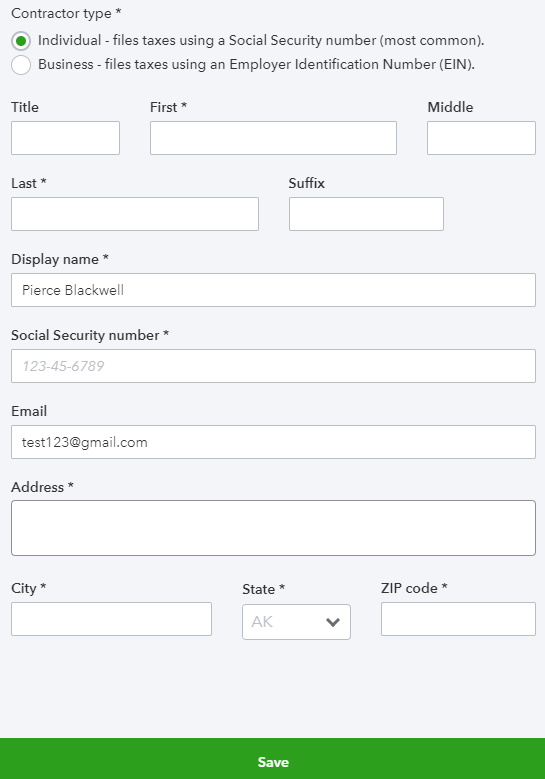
[Figure: Filling in the contractor's details]
Once you've finished filling in all the details for the contractor, click the Save button to return to the contractor list. You should see your new contractor there.
Now that you've seen how to add contractors and view their details, let's see how you can pay them.
Paying Contractors
You can pay a contractor the same way you pay bills or expenses. To start the process, click on the Write Check button in the contractor's details page. There are also shortcuts to creating an expense or bill which can be filled out like they were in the lesson on Expenses.
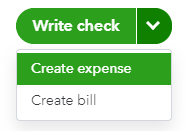
[Figure: Options for paying a contractor]
Once you have paid your contractors, you have the extra step of preparing 1099s. Let's take a look at how that's done.
Preparing 1099s
Next to the Add a Contractor button on the Contractors page is the Prepare 1099s button.

[Figure: the button to prepare 1099s]
Clicking this button will start the process to prepare 1099 forms. This is aided by a wizard.
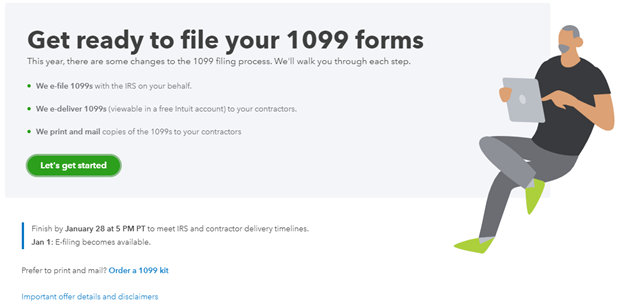
[Figure: Starting the 1099s wizard]
The wizard will take you through several steps to prepare the 1099s. You will first need to review your company information, including your tax ID number.
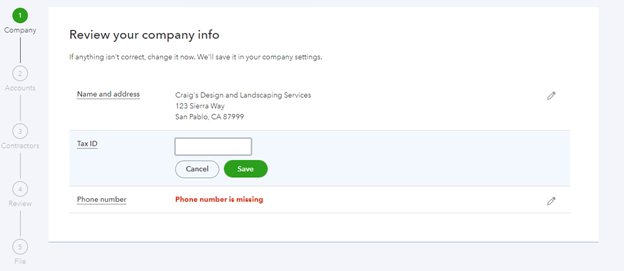
[Figure: Steps in setting up 1099s]
In the second step, you will need to categorize the payments that you made to contractors. The most common categories are listed at the top, and they are Non-employee Compensation and Rents. Some other categories include Royalties, Other Income, Medical Payments, Direct Sales, and Federal Tax Withheld.
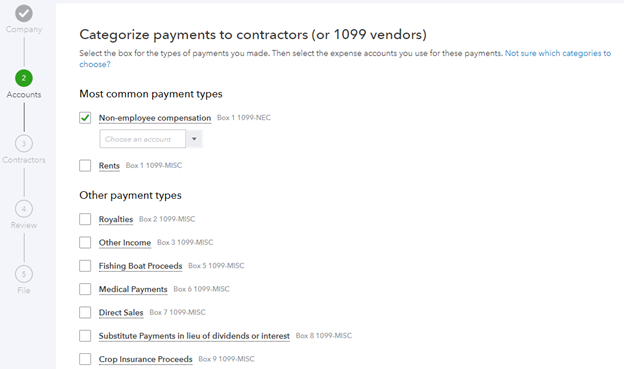
[Figure: Categorizing payments]
Once you select the category, you need to choose the account from the Chart of Accounts where those payments were assigned.
The third step shows the contractors that have been added. You can review their information and edit, if necessary, from the Edit link in the Action column.
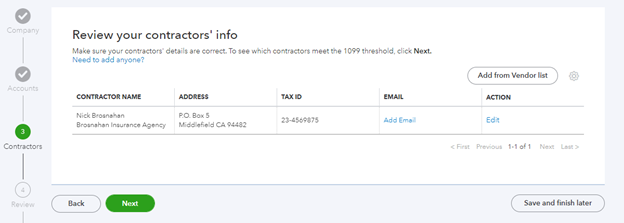
[Figure: Reviewing contractors' information]
The fourth step shows you the total payments that have been paid to each contractor. From here, you can print reports on 1099 information. If you don't need those yet, you can click the Save and Finish Later button.
You can find the report by clicking Reports in the left-side Navigation Pane and clicking Reports. From there, you can search for the 1099 Transaction Detail Report.
Conclusion
In this article, we learned all about setting up payroll to pay employees and contractors. You learned how to add new employees and contractors, generate their payments, and report 1099s.