
How to Use Tables in Microsoft Word 2019

Table Basics
Before you create a table, you should understand properties of tables which are universal across all applications. Tables are made up of rows and columns. If you look at an Excel spreadsheet, you see that columns run vertical with letters for labels. Rows run horizontally and have numerical labels. Excel's spreadsheet layout is the same as the way Word lays out its tables.
The intercept between a row and a column is called a "field" or a "cell." This is where your data is entered. You can have as many rows and columns as you need, but one limitation of Word is that a table is limited to the height and width of the document. With Excel, you can span several columns and rows, and you can just scroll through them to view data. Rows that span more than one Word document can span multiple pages, but you are limited to the number of columns by the width of the document. Any additional columns will either get cut off or shown on a new page, which makes the document hard to read. Therefore, if you have large tables, it might be better to use Microsoft Excel instead.
Inserting a Table
The table controls in Word are found in the "Insert" ribbon tab.
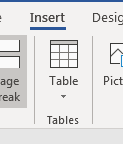
(The "Insert" tab and "Table" button)
Initially, you need to insert a table with default formatting and then you can format table cells with the colors, fonts and borders that match the aesthetics of your document content.
To insert a new table, click the "Table" button and look at the dropdown options.
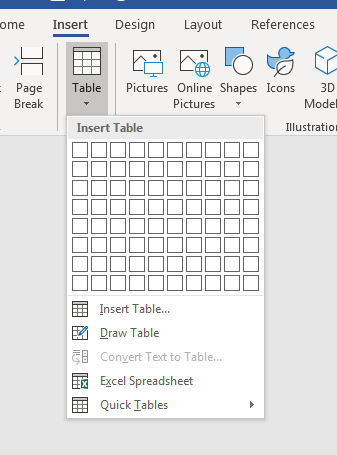
(Table dropdown options)
Notice the squares in the dropdown menu. The squares indicate the number of fields that you want to add to the table. You can always add more fields after you've inserted a table, but inserting the number of rows, columns and fields from this menu make it easier to get started when you know the number of cells that you need. In the menu, click the cells that you want to add to the table and Word creates them on the document.
In this example, a table with four columns and three rows is created. Word automatically sets the table's width to the margins on the page and evenly distributes the width and height of cells. You can format these cells after it's inserted including width and height of cells.
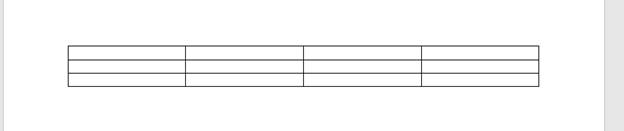
(Word's automatic table formatting default settings)
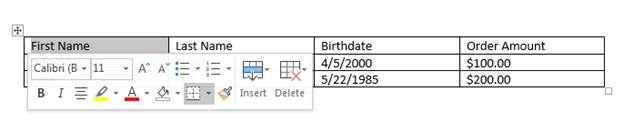
After you create table cells, you can add content to them. In this example, a list of customers is created. The first row is typically used to create headers, so they have special formatting to indicate to readers that the information stored in these cells aren't data but headings.

(Table with data filled out)
In the above example, notice that there are handles on the upper-left and lower-right corners. These handles can be used to move the table or resize the entire table size. Note that using the handles on the corners resizes the entire table's width and height, not individual cells. To resize individual columns and rows, hover your mouse over the borders shown around each cell. The cursor changes and prompts you to resize columns (if you hover the mouse over vertical borders) or resize rows (if you hover the mouse over a horizontal line).
We want to format the content in the header row, and you can do this by clicking the cell and using the automatic context window that opens when a cell is highlighted and you hover the mouse over the content.
(Format context window for a table cell)
In the context window, you'll notice that most of the options are the same "Font" controls and options covered in previous chapters. On the right side of the context window is the functions that allow you to insert a new row or column or delete the current cell. First, click the "B" button to make text in the "First Name" header cell set to bold formatting. You don't have to format cells one-by-one. You can also highlight multiple cells and click formatting controls to make changes to several cells at once.
After you change the text in each cell, you have the option to format other table properties including boarders and backgrounds. Word has several border options including styles and colors. You can find these styles by clicking the upper-left corner hand and selecting border styles.
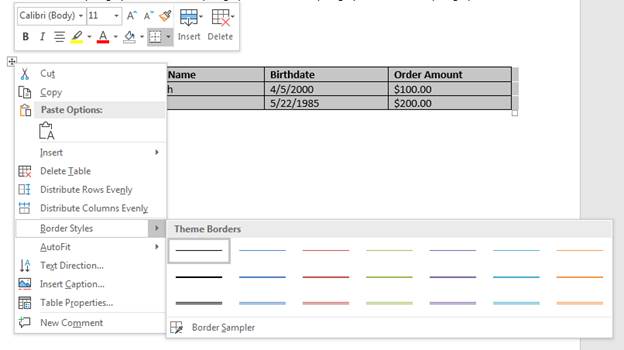
(Table border styles)
Notice that you have several color options with line thickness and double-lined borders as well. If you click the "Border Styles" option, a menu opens at the top of your Word window that displays several preset styles.

(Border styles menu)
Notice that the styles show a preview including header styles that make the first row stand out, and then preset colored borders. You can use the right side of the menu to choose your own border shading and colors, and you can adjust the thickness of the lines that surround each cell. For this example, a preset is chosen and all cells in the table are formatted.

(Purple formatted preset for a table)
After you enter data, you might decide that you need to add a new row or column to your table. When you add a new element, the new row or column takes the same styles, colors, fonts and borders as the current table, so you won't need to re-style these new cells.
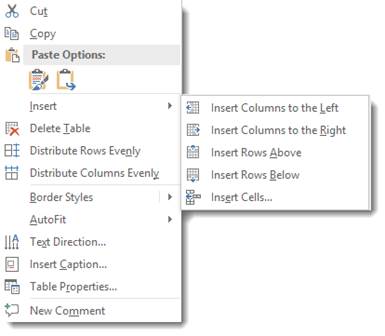
You find the context menu to add new rows and columns by right clicking the upper-left handle again.
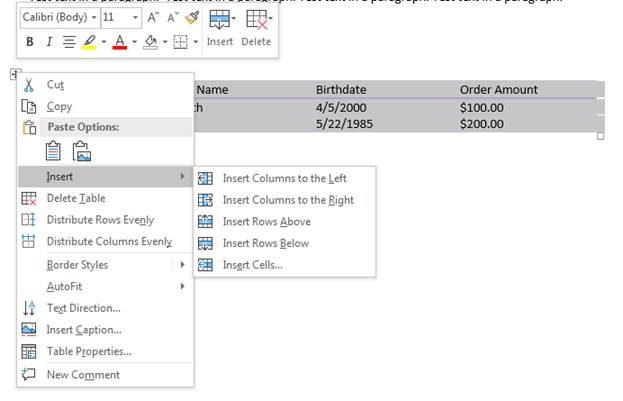
(Insert table options)
Notice that you can specify the position where the new row or table will display. For instance, if you want to insert a row below the current ones, choose "Insert Rows Below." Because three rows are highlighted in the example image, three new rows are created in the table. You'll notice that these new rows have the same color borders, and when you type any content into the cells, the same format will be applied as the previous cells.
You can use the same method to delete rows, and you'll notice that the context menu also has the option to delete the entire table. Should you delete the table and change your mind, remember that you can use the "Undo" button at the top-left of the main Word window. This will return the table to the document along with its formatting and content.
Many of the table properties available in the context menu are also available from the "Table Properties" window. Right click the table and choose "Table Properties."
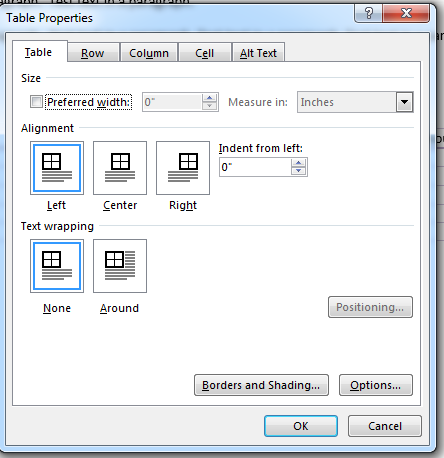
(Table properties window)
You can set the size of the table and many of the properties for rows, columns and cells in this window. The alignment option determines the way a table is formatted within a paragraph. This property is similar to the way text wraps around an image illustrated in the last chapter. You can also set alternative text that displays should the user be unable to view your table. This is done in the "Alt Text" tab.
If you find working with tables in Word too difficult, remember that you can always use Microsoft Excel and copy and paste the table to your document. Word's table controls are useful for small simple tables, but anything that requires formulas and complex calculations should be done in Excel.
Drawing a Table
If you know your table is not going to be uniform (regularly sized columns and rows), you can "draw" a table. This is particularly helpful when using tables to create complex page layouts.
To do this, click the Table button and select Draw Table. Your mouse pointer will transform into a pencil tool and you'll be able to draw individual cells anywhere in your document. You can even draw cells within cells.
Click and hold the left mouse button, drag the cell into the desired size and shape, and then release. It's that simple.
Selecting parts of tables
To select part of a table, simply click inside the upper left cell that represents the first cell you want to select. Hold the left mouse button down and drag across the remaining cells you want to select.
Adding Text to a Table
Adding text to a table is as easy as clicking into a cell and then typing. You will be able to change any attributes of that text, too, and even apply a Quick Style.
Position Text within a Cell
Just like in an ordinary document, you can choose whether to center text within a cell, or whether to align it right or left, or toward the top or the bottom. Go to the Alignment group under the Table Layout tab.
To reach the Table Layout tab, click the box above the left top corner of the table. This selects the table.

The Alignment group is pictured below.
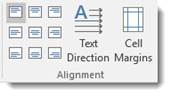
Using the graphics on the left as guides, select how you want text positioned within cell in your table.
NOTE: You can format the text position for just one cell, multiple cells (by selecting the cells), or the entire table (by selecting the table).
Converting Text into a Table
You can convert text into a table. This is especially handy if you've already written information that you think would be more effectively conveyed in a table.
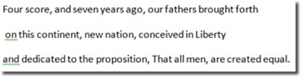
To do this, you'll have to carve up the text into columns and rows using commas and new paragraphs. That's how you tell Word to separate the text into individual cells. Simply place a comma between the text you want to put into a column and place a paragraph where you want to begin a new row. An example of the text might look like this:
Now select the text, click the Tables button under the Insert tab. From the dropdown menu, choose "Convert Text To Table."

You can now specify the number of columns, as well as how to separate text. You can separate text into cells by paragraphs, commas, tabs, etc.
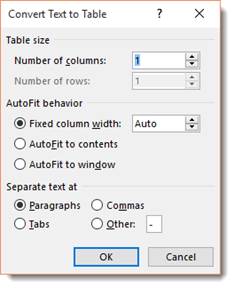
We chose two columns and to separate text at commas.
Look at the example below to see the final result.

Quick Tables
Word comes with a group of table templates for you to use and quickly customize to fit your needs. You can access them by clicking the Tables tool and choosing Quick Tables. Scroll through the templates and choose the one that best suits your needs. As with other kinds of tables, Word automatically inserts Quick Tables wherever the cursor is positioned in the document.
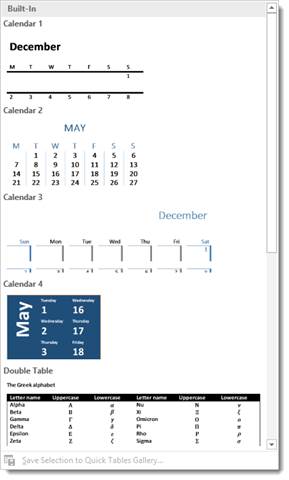
Once the Quick Table has been created, click the template text and start typing to replace it... You can also create your own Quick Tables by selecting a table that you've created and clicking the Save to Quick Table Gallery button at the bottom of the Quick Table menu.
Formatting Tables with the Table Tools
Whenever you create or select a table, the Table Tools will open automatically over the Design and Layout tabs in the tool bar. It allows you to easily apply table styles, borders, and shading attributes and more. Below is an example of the Design and Layout tools available for tables.

The Design tab (shown above) lets you customize the look and appearance of your table.
Let's look at the Table Style Options group. But first, look at our table below:

In the Table Style Options group, we see that Header Row, First Column, and Banded Rows are checked.
Let's learn what all these options mean so you can decide what you want checked � and what you don't.
-
A Header Row is the first row in a table that contains headings (labels) for all the columns, as shown our table above.
-
When First Column is checked, it means the first column is also headers or labels. Same goes for the Last Column.
-
You can also choose to have banded rows or columns. Banded Rows formats even and odd rows differently so they are easier to read. If you choose Banded Columns, it formats even and odd columns differently.
-
Total Row means to create a row for mathematical totals.
In the Table Styles group, you can pick a new table style or apply shading to your table by clicking the Shading button.
In the Borders group, you can use Border Styles add borders to rows and columns to customize the look of your table.
Now, let's click the Layout tab.

The Layout tab, when associated with the Table Tools, allows you to easily insert rows and columns, and format text and objects within cells. You can also create new margins for your cells. We'll learn all about margins in just a few lessons.
Selecting Cells, Rows, and Columns
Selecting cells, rows, and columns in Word is easy.
To select a cell, click within the cell so the mouse cursor is blinking.
Go to the table Format tab, then the Table group. Click Select>Select Cell
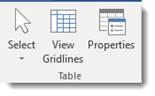
To select a row, click in the first cell in a row go to Select>Select Row.
To select a column, click the first cell in a column, then go to Select>Select Column.
The Border Painter Tool
The Border Painter tool was a feature added in Word 2013. It makes applying different widths and borders to your table easier than ever before. To find the tool, select your table and go to the Table Tools Design tab.

To use the border painter, first apply formatting to some borders in your table, then click the Border Painter button. Click on any border to apply the formatting. You can also click and drag the mouse to apply it to a whole line.
Border Sampler
The Border Sampler works with the Border Painter tool. The Border Sampler is located at the bottom of the Border Styles Gallery. To access it, click the Border Styles button in the Borders group under the Table Tools Design tab.

Simply click on Boarder Sampler. An eyedropper will appear. Click on a table border that you want to sample. Word then switches to the Border Sampler. You can apply the same formatting somewhere else in the table.
Adjusting the Width of Individual Columns
There are several ways to adjust the width of individual columns:
1. Position your mouse pointer over the edge of the column and then drag it to the desired width.
Adjusting Width of All Columns
To fix the width of all of the columns at once, select the entire table and use the Width box under the Layout tab to adjust the columns to the desired size.
You can also use the Distribute Columns button to make all of the columns the same size.
Adjust rows in the same way, except use the Height field.
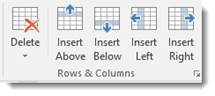
Adding Rows and Columns
There are two ways to add a new row or column to a table.
You can select a cell, row, or column and right click on it, then select Insert from the menu.
You can then choose to:
-
Insert Columns to the Left
-
Insert Columns to the Right
-
Insert Rows Above
-
Insert Rows Below
-
Insert Cells
In addition, you can also select a cell, row, or column, then go to the Table Tools Layout tab. Choose an option from the Rows & Columns group.
You can also add rows or columns simply by mousing over a row or column.
Look at the snapshot below.

When we moused over the row, look at the little plus sign that appeared.

Click the plus sign to add a row.
For columns, move to the top or bottom of the column and the plus sign will appear.
Deleting Cells, Rows or Columns
To delete a Cell, Row or Column, simply select it, navigate to the Layout tab, go to the Delete group, then select if you want to delete cells, rows, or columns, or the entire table from the dropdown menu.
You will then have the option of deleting a cell, a row, a column, or the entire table. You can also delete cells, rows and columns by right-clicking inside a cell. In the menu select Delete Cells. Click the appropriate command and click Ok.
Merging Cells and Splitting Cells
To merge cells, drag your mouse over the cells while holding the left mouse button to select them. In the Layout tab, select the Merge Cells button from the ribbon. It looks like this:

The Merge Cells button is located in the Merge group on the ribbon. Alternatively, select the cells you'd like to merge and click the right mouse button. Select the Merge Cells from the menu.
To split a cell, select it by clicking on it, then click the Split Cell button on the ribbon.

This button is also found in the Merge group. Choose the number of rows and columns you'd like to split the cell into then click OK.
Split a table by clicking the Split Table button. It looks like this:

The Split Table button is located in the Merge group under the Table Tools Layout tab.
Doing Math in a Table
You can do math in tables in much the same way that you do in spreadsheets and Excel. However, Word's math commands are simpler, so they're easier to use.
For this example, let's do a sum.
To figure out a sum of values in a table, create the table and add the values you want to add. You can put values in rows or columns. You should go ahead and do the layout and design for your table at this time. Just make sure the last cell in the row or column (wherever you're doing your values) is empty.
Now, click in the cell where you want to place the mathematical formula.
Go to the table Layout tab.
Go to the Data group. Click the Formula button.

Select Sum from the Paste Function menu, then click OK.


