

Enabling the Developer Tab in Excel 2019
To use VBA, you need the "Developer" tab enabled. The "Developer" tab has several buttons and features that enhance the way you create spreadsheets. If you don't have the "Developer" tab enabled, follow these next steps to enable it.
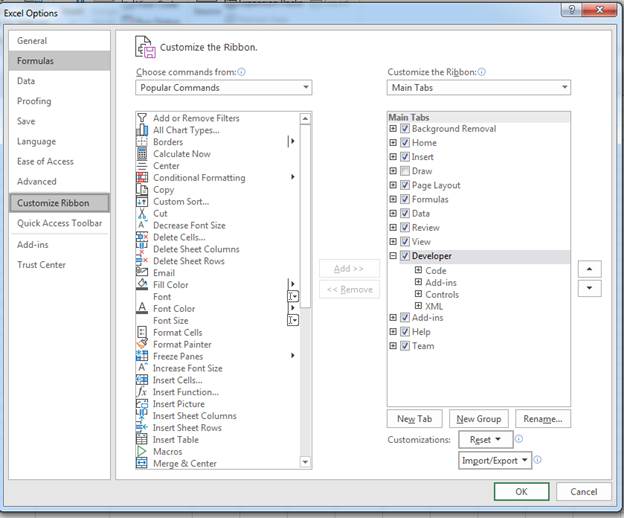
Click the "File" ribbon tab, and then click the "Options" link that shows in the bottom-left section of the Excel window. This opens a new configuration window where you can set preference for different elements of Excel. Click the "Customize Ribbon" option in the left panel.
(Excel options and configuration window)
In the image above, notice that the developer option is checked in the far right panel. This check box enables the "Developer" tab in your Excel view. Click "OK" to enable the tab and return to your Excel 2019 interface.
(VBA button location)
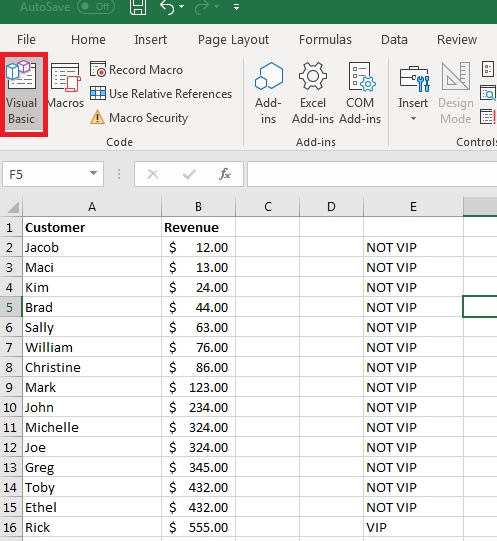
You should now see an additional tab marked "Developer" in the list of Excel 2019 menu options. Click this tab, and you'll see the VBA button available on the left side.
Creating a Button on Your Spreadsheet
When you want to use VBA on your spreadsheet, buttons are one of the most common elements that you add to your document. With a button, you can trigger an event and use it to perform an action.
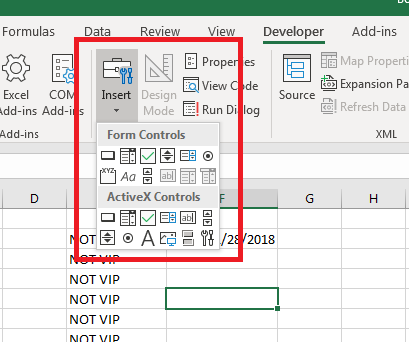
Components for VBA actions are found in the "Developer" tab in the "Insert" button dropdown.
(Form and ActiveX components for VBA)
When you click the "Insert" button, a dropdown displays all of the available components that you can add to your spreadsheets. The top-left control in the "Form Controls" section has the button control. You can hover your mouse over each of the components in the list to see what you can add to a spreadsheet. If you are familiar with HTML web page components, then you will recognize most of the available components in the dropdown.
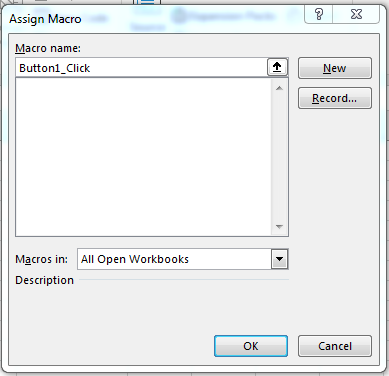
Click the button control and then you can draw the button on your spreadsheet. Drawing a button lets you make it as large as small as you want. After you draw the button, a window opens where you can assign a macro.
(Assign macro window)
Click "OK" and the window closes. Now you see a button on your spreadsheet with the label "Button 1." You can change the label on the newly created button by right-clicking the button and selecting "Edit Text." This action prompts you for the new button name. Type a new name for your button. In this example, we've used the text "My Button" for the button text.
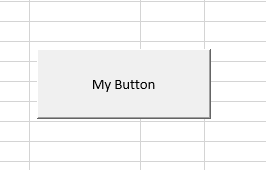
(A new button with custom text)
You can click the button if you want, and an error message with display telling you that you haven't created a macro for it yet. This is because you haven't created the code that will run when the button is clicked. The button serves no purpose, but you can create the macro that runs when it's pushed, which then removes the error when you click the button.
Right click the button and choose "Assign Macro." This action opens a Visual Basic for Applications workspace. The workspace is tied to the workbook that you have open, but you can make full applications that tie with your spreadsheet using VBA. In this workspace, you can create, test, and run any code that you assign to components in your application.
Working in the VBA Workspace
The VBA workspace looks the same whether you program macros in Word or Excel. It's a workspace where you can program the macro and view all other code that you've previously created.
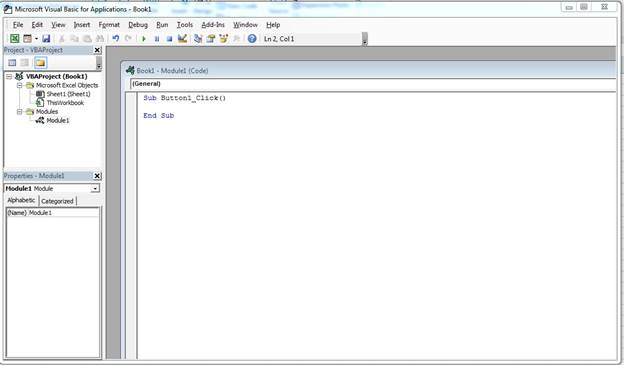
(VBA workspace)
The image above shows the VBA workspace. When you right click a component such as a button and choose "Edit Code," VBA opens to the location where code is triggered when you click the button. VBA gives names to these functions that help you identify what happens should you perform an activity on it. Since a button is usually triggered by a click event, the function is given the original name of the button, an underscore, and then the word "Click." For your first button created in your spreadsheet, the name for a click event is "Button1_Click()" and you add any code between the "Sub" and "End Sub" phrases.
The "Sub" keyword indicates that you are starting an event. The next part is the name of the event, and the last statement in a trigger event is the "End Sub" statement.
In the left panel of the workspace, you can see other objects in a tree view. The top object is always the workbook. If you recall, a workbook contains worksheet. Under the "Book1" main project header, you see "ThisWorkbook" which represents the workbook that you have opened, and the "Sheet1" represents the worksheet in the workbook. You can write VBA that works directly on a workbook or a worksheet activity such as when you open the workbook, a macro automatically runs.
The "Modules" section holds the files that you store containing VBA code. You can have several of these in your VBA code, or you can just have one file that contains all of the functions used to run macros.
Writing Some Simple VBA Code
With the VBA editor open, you now have a function ready to edit for your button. Anything you type in the "Sub" and "End Sub" statements will run when you click the Button1 component. When you start working with VBA, you want to create easy function statements so that you can follow what is going on as the code runs. In this example, we'll add some text to a cell within the current spreadsheet.
Within the sub start and end phrases, type the following code:
Sub Button1_Click()
Range("A1").Value = "My Test"
End Sub
The code above tells Excel 2019 that you want to change the value contained in the cell "A1" in the current sheet to "My Test." The "Range" indicates that you want to apply changes to a cell range set in the functions parameters. You can assign any value to a range, but in this example we apply text. Any formatting already set on the cell will also still apply, so if you have a cell set to bold text, then this value will have the bold format applied.
At the top of the VBA workspace, notice that there are three start, pause and stop buttons. You can use these buttons to test your new code. The "start" button will run the current function and apply changes to the spreadsheet, which in this example is changing content to "My Test."
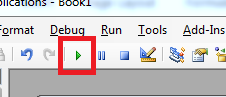
(The start button in the VBA workspace)
Click the start button and watch the text in the A1 cell change to "My Test." Should you have a long list of statements within your function, you might want to pause the procedure. The stop button stops execution, so should you resume it then execution will start where it left off. With the pause button, execution resumes where the last statement left off.
The "MsgBox" function is extremely common in any application. The MsgBox function displays a warning or a message to the user. In any software application, you've seen pop-up windows that display a message that provides information. Even web applications display messages as pop-ups and warnings. The MsgBox function in VBA is the equivalent of all of these pop-ups that you've seen across different applications.
Suppose that you want to show a confirmation to the user that the button's function completed execution. In this example, only one statement executes, but you might have hundreds of lines of code that must execute and you want to show the user that it's completed. You might have a procedure that takes an unusual amount of time to complete, so users must wait for it to complete and then you display the message to confirm when the procedure is over.
Add the next line of code to the same VBA function Button1_Click():
Sub Button1_Click()
Range("A1").Value = "My Test"
MsgBox "Cell value change finished"
End Sub
In the code above, the cell A1 has its value changed to "My Test." After the text is changed in the A1 cell, a message box opens and displays the text "Cell value change finished." This is just a small example of how you can use the MsgBox function. After you finished changing your VBA code, click the play button again. You will see the two statements run, and the program will stop.
After you are finished writing your code, you still need to save it and test it within the spreadsheet. Your users won't open the VBA workspace, so you need to make sure that the code executes outside of the VBA workspace.
Close the VBA workspace. You now need to assign the macro to the button. Right-click the button and click "Assign Macro." Choose the Button1_Click value and click "OK." Should you ever want to go back and change the statements executed by the macro. Use this screen to click the macro name, and then click "Edit" to again open the VBA workspace with the function code shown in the workspace window.
After the window closes, click the button. Notice that the text in cell A1 changes and then a window displays with a message that the procedure has completed. You've just created your first VBA macro that runs in your spreadsheet. You can create much more complex applications with VBA that run across several spreadsheets and can affect several other workbooks that aren't even open on your desktop.
One issue to remember with VBA is that it's a powerful tool that can do harm if it's used the wrong way. Malware writers use VBA macros to download malicious software and install it on your computer. When you work with macros, your recipients of any spreadsheet must give your macros permission to run on their machines. Most users are trained not to open spreadsheets with macros, so they are mostly used within the same organization.


