
Although many slideshows are made of animations, charts and sounds, simple text is also common. Text is used to display a bulleted list of items or label a chart with information. Even the simplest of presentations will have some text added to it. Text is how you communicate facts and figures to your users, but that doesn't mean you need to use plain, unattractive content to your slideshows. PowerPoint 2019 provides a way to create text with customized styles and add it to your slides.
The Types of Text Objects
When you create a new slide in PowerPoint, two objects are automatically created. The first one is a text object. The second one underneath the text object is an open space where your selection of an object can be made. PowerPoint 2019 works with rectangular objects where you can size them and move them to a location on a slide.
(Default text box)
The default text box created in a new slice is above the main object rectangle. As the text describes, just click the text box and you're prompted to enter the new text that you want to display. You can type any text in the object, but should you type too much text or the font is too large, then you will be forced to resize the text box. Resizing a text box is the same as resizing any object in PowerPoint. Circles placed on each side of the rectangular areas and in the corners can be used to make the text smaller or larger.
In the "Insert" tab, a section named "Text" contains the tools to create text objects in your presentations.
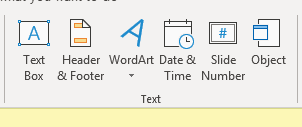
(Text menu section)
PowerPoint offers numerous text box objects. The "Text Box" button adds a basic object where any text can be added to a slide. The "WordArt" button ads clipart and text with specialized styles offered by Microsoft. You can also add a date and time text object. This one offers a dynamic date and time on your slideshows so that you can timestamp them as you run your slides.
A slide number object places a small text box object in a corner of the slide where you can identify the slide number. This is useful if you need to keep track of the number of slides that you've added to the presentation, and then as you scroll through each slide it displays on the slide itself. It can help the presenter know what slide they have reached as they work with a presentation.
Headers and footers are common with Word documents, but you can still use them in PowerPoint presentations. A header displays text at the very top of a presentation. This header is repeated with each new slide. A footer is similar, but it is displayed at the very bottom of a slide. Headers and footers are beneficial when you need to display the same information without manually typing it on each slide. For instance, if you have a title for your presentation, you could add it in a footer object. Page numbers (or slide numbers) are used in footers. Footers are beneficial for notices such as copyright where it can be placed at the bottom of the slide aside from the other critical content.
You can click any one of these text objects to add them to a slide. You should first select the slide that you want to use. In the left panel, the slide that is surrounded by a red line is the active one. You can also see the active slide in the center window.
Adding a Text Object
The procedure to add a text object is similar for all types, but we'll show you several examples. Just know that the procedures for one object is similar to these examples, so you can use them with other text objects if these samples are not the same object that you need to add.
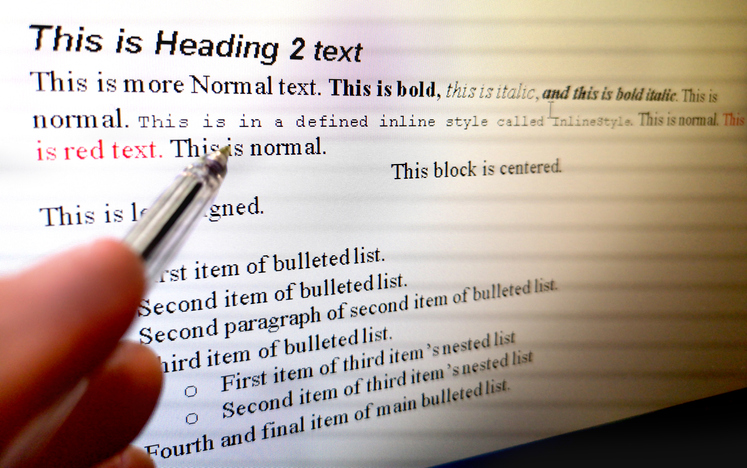
The most common text object that you'll add to a slide is basic text. This object displays text anywhere on the slide. It can be formatted as a bullet or number list.
To add the text, click "Text Box" in the "Text" menu section. A new text box with default fonts and colors is displayed where you can type new content.
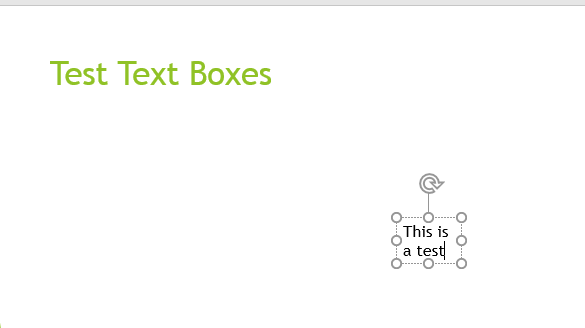
(A new text box object)
A new text box object displays an empty space as a small square. You can type text in the square, but the text is set as the default font that's a part of the theme you've implemented. In the image above, a simple "This is a test" is added to the text box. You can rotate text just like you can with images by using the arrow at the top of the box. Rotating text will change the way it displays both vertically and horizontally.
When you add text objects to a slide, new options in the main menu display. These new features let you format and style text. When you click away from a text box, these options disappear from the main menu, but you can see them in a context menu if you right-click the text box.
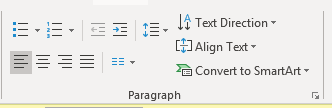
(Text style options in the main "Paragraph" menu section)
The "Text Direction" option lets you set the text layout either vertically or horizontally. By default, text is set to display horizontally. You can change the direction to vertical, and the text will display from top to bottom (vertically).
The "Align" text option is similar to aligning text in other applications. This option is useful if you have several text boxes and need to align the text in each one. Text can be aligned three ways: Top, middle and bottom. This alignment is vertical, so should you change the default option (top), then it will move text up or down. Top alignment is the default and places text at the top of the text box square. Middle alignment vertically centers content in a text box. As you increase the height of the text box area, text will still display in the center. Finally, the "bottom" option aligns text at the very bottom of the text box space.
Changing Text Font
The font used in a text box is the default set in your theme, but you can change it at any time. You can also have multiple fonts in one text box. Highlight the text that you want to change, right-click it and choose the "Font" option from the context menu.
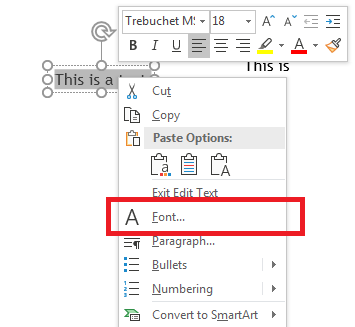
(Font selection)
When you click the "Font" menu option, a window opens with several font styles that you can choose from.

(Font options window)
In this window, you can choose an alternative font from the "Latin text font" dropdown and any special styles shown in the preference window. You can add effects such as a strikethrough or display text in all capital letters. Although your theme sets a font color, you can set an alternative font color including a color for the underline should you decide to use an underline effect.
All text can be formatted, moved, styled and customized when you add it to your slides. Your slides have themes configured, but text boxes have flexible options in PowerPoint.


