
Whenever you save something to a computer, including your Mac, you save it either to a disk or a drive. Perhaps you save files to your hard drive or use your CD/DVD ROM drive to burn files to CD or DVD. You can also save to a flash drive or an external hard drive. In this article, we're going to talk about disks and drives. To liven it up a little, we'll also talk about iTunes at the end.
Inserting and Ejecting Disks
Whenever you insert a disk, an icon will show up either on your desktop, in the Computer window, or in the Sidebar.
On your desktop, it will look like this:
If you want to see what's on the disk, all you have to do is double click on the icon.
To eject � or remove a disk, you can drag the icon to the trash or right click on the icon and choose File>Eject. You can also click the Eject  menulet in the Menu Bar or next to the disk's name in the Sidebar.
Startup Disks
Your Mac looks for a startup disk every time you boot it up. The startup disk is located in a System folder, usually as part of your internal hard drive, and contains your operating system, application, and files. However, you can also use a DVD, external hard drive, or flash drive as a startup disk for your Mac.
You can have more than one startup disk if you want. Perhaps you want to have access to two different versions of OS X, or you want to use one as a backup disk. If you want to have more than one startup disk, the only thing you need to do is tell your Mac which one you want to use to start the computer.
To do this, go to System Preferences>Startup Disk.
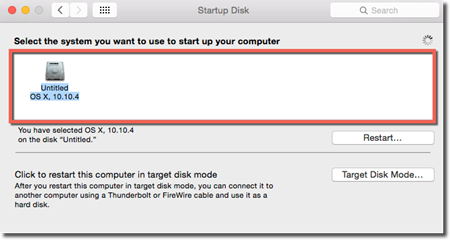
The startup disks appear in the area highlighted above.
Simply click on the disk you want to use, then press Restart to start your Mac from that disk.
Erasing Disks
If you want to erase a disk, such as a DVD, go to your Applications in the Finder window, then open the Utilities folder.
Open Disk Utility.
Click the name of the disk in the left column (labeled #1 below), then click the Erase tab (labeled #2 below).
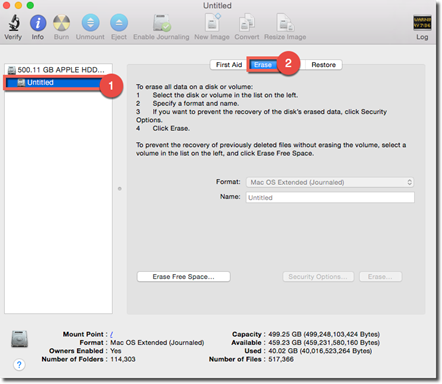
The only types of disks you won't be able to erase are standard CD-ROM's or DVD's and the startup disk that contains the current System folder.
The Difference Between iCloud and iCloud Drive
Many people get confused when it comes to the difference between iCloud and iCloud Drive. Although we are going to cover both in this article, it's important that you know the difference between the two.
iCloud is what you use to back up what is stored on your device, like the information you have in all your different applications and programs. It's also what's used to sync some of your data to other Apple devices. iCloud is not a file sharing service similar to Dropbox or OneDrive. That is iCloud Drive.
iCloud Drive allows you to save files that you create to the cloud and in your iCloud Drive. It is a file sharing service, and you can share the files you save to your iCloud drive with family, friends, co-workers, or anyone who you want to give access to a single or multiple files.
Setting up iCloud
Remember, iCloud is a cloud storage service that's used to back up and sync data. To set up iCloud, go to System Preferences, then click on iCloud.
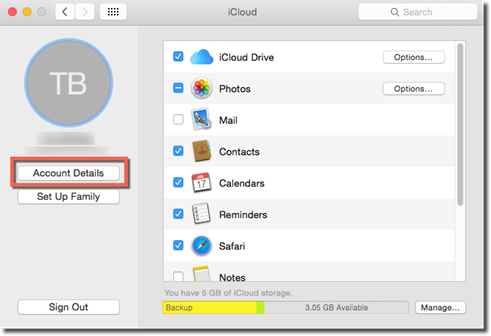
When you do that, you will then see this window:
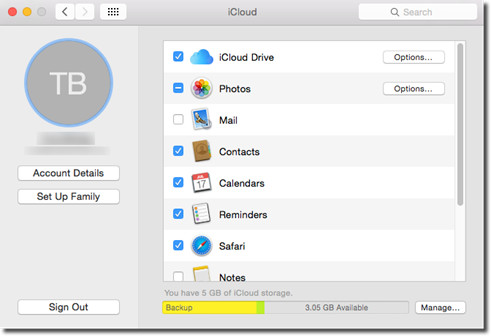
We are already signed in using our Apple ID.
If we want to view our account details, including security settings, we can click the Account Details button.
The Set Up Family button allows us to set up our iCloud to share the iTunes Store, App Store, and iBooks purchases with family. We can also share a family calendar and photos.
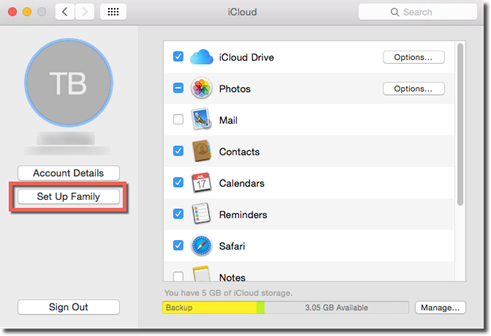
We'll talk more about family sharing later in this article.
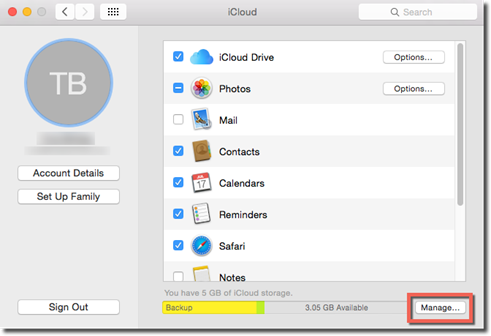
If we click the Manage button, we can manage backups and buy more storage space.
In the main part of the iCloud window, we can turn the features we want to use on or off. These features are basically the apps that iCloud will back up.
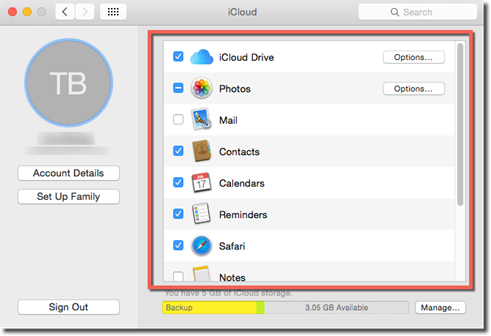
In other words, we can choose the applications on our Mac that we want to back up to iCloud and the data that will be synced to other programs.
Some applications will have an Options button that appears to the right of the application name, such as iCloud Drive.
If you click the Options button, you will see a pop up window that contains additional options for backing up the data in the application.
Below is the pop up Options window for backing up iCloud Drive.
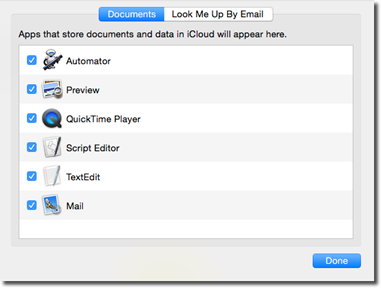
iCloud Backup will back up things like purchase history, device settings, app data, iMessage and text messages, and photos and videos. Although iCloud backs up your purchase history, it does not back up the content you've purchased. Those things should be restored to your device when you restore a backup. iCloud Backup does not back up movies, music, or TV if you did not purchase it from iTunes.
Family Sharing
By clicking on the Family Sharing button in the iCloud window, you can share things such as purchased movies, photos, and your calendar with family members.
The first time that you click on the Family Sharing button, you will see the following window which explains what you can share with family once you walk through the setup process.
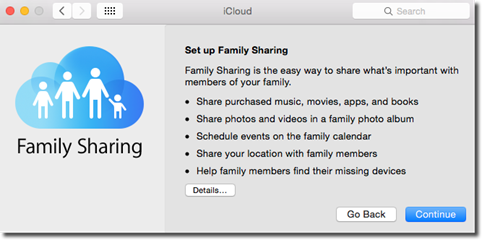
Click Continue.
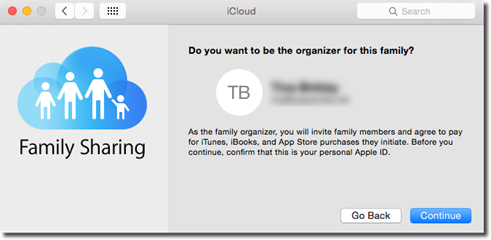
Next, you are asked if you want to be the organizer for the family. This means that you will pay for iTunes, iBooks, et cetera.

Click Continue.
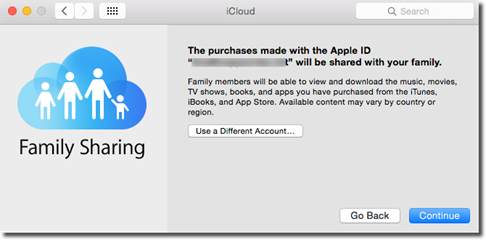
If you don't want to use the account listed in the window above, click the "Use a Different Account" button.
Otherwise, click Continue.
If you don't have a payment method on file, you will then be asked to submit one.

Click the Add button to add a payment method. If you add a payment at this point, you will be taken back to this window:
Click Continue until you reach this window:
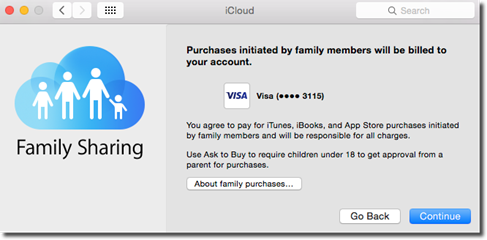
Let's click the "About family purchases button."
Safari will open to this web page that tells you all about Family Sharing.
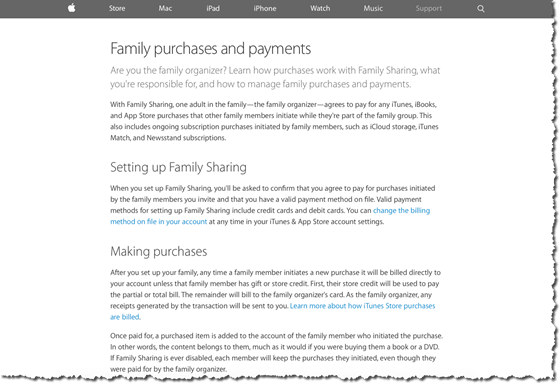
Take the time to read this if you want to review how Family Sharing works.
Let's return to the Family Sharing dialogue box, and click Continue.
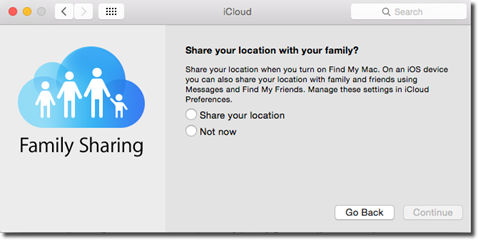
Decide if you want to share your location, then click Continue again. We are going to choose "Not Now."
Next, you can start adding family members.
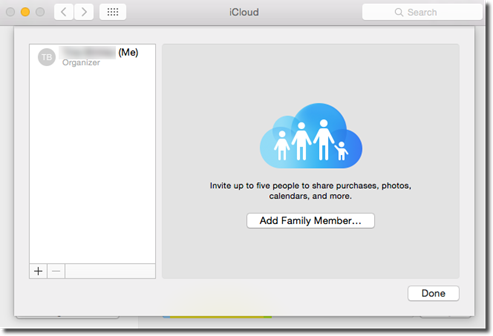
Click the Add Family Member button.
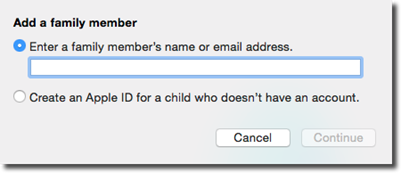
Enter the name or email address of a family member. You can also create an Apple ID for a child.
When you're finished, click Continue.
You will be asked to verify that you are the family organizer by entering the CVV code on the back of your chosen billing method � or credit card.
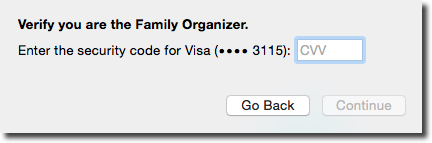
Once you enter the CVV code, click Continue again.
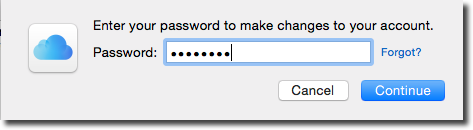
Enter your password, then click Continue.
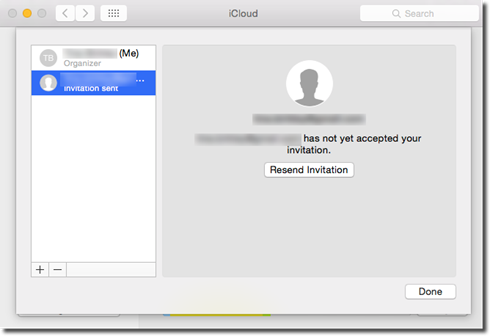
The family member will then have to accept your invitation.
iCloud Drive
iCloud Drive is Apple's version of Dropbox. You can store documents and files in a virtual hard drive and access those files and documents from any device where you have an iCloud folder installed. This includes other Macs, iPhones, iPads, and even Windows-based computers. You can also access your files at iCloud.com if you're away from your device, but need to access the information you have stored on your drive.
Your iCloud Drive holds 5 gigabytes of data for free, but you can pay more if you need extra space. At the time of writing this article, you can purchase 20 gigabytes for $1 per month.
Your iCloud Drive is found in the Finder window. You can click on iCloud Drive in the Sidebar to see the files that are saved to your drive.
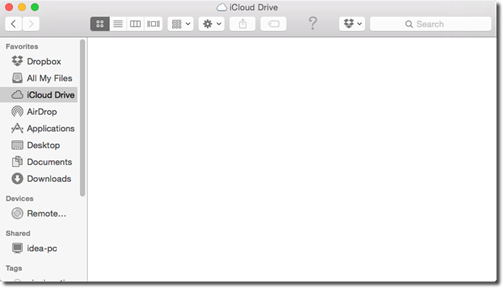
To store files in your iCloud Drive, you can drag them to the Finder window. You can also cut or copy a document or file from its original location, then paste it into your iCloud Drive.
You can also save a document or file to your iCloud Drive by going to the Menu Bar and selecting File>Save or File>Save As.
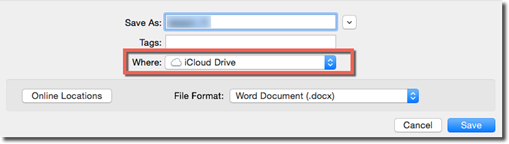
Choose iCloud Drive from the Where pop up menu.
You can open, edit, and save files stored on your iCloud Drive just as you can files saved to your Mac.
Using the Mac as a Speakerphone
If you have an iPhone, you can make and answer calls on your Mac.
Here's how it works. Whenever a call comes into your iPhone's number, you will hear the ringtone played on the Mac. It appears as a notification on your screen. You can click Accept to answer or Decline.

You can also make calls from your Mac. All you have to do is click on a phone number in Contacts, Safari, in an email message, or anywhere there is a phone number.
In order for your Mac to work as a speakerphone:
- On the phone, go to Settings>iCloud. Make sure both the Mac and your phone are signed into the same iCloud account.
- Make sure FaceTime on your phone is signed into the same iCloud account as your Mac. Open FaceTime on your Mac. Make sure you're signed into the same iCloud account as your phone, and your phone's number has a checkmark in the box beside it. Also, "iPhone Cellular Calls" should be turned on.
- Go to System Preferences>General on the Mac. Be sure that "Allow Handoff between this Mac and your iCloud" is turned on.
- Both your Mac and iPhone must be on the same Wi-Fi network.
Sending Text Messages with Your Mac
If you have an iPhone and a Mac, you can also send text messages from your Mac. The text messages you send will appear as they were sent from your iPhone when the recipient looks at them.
To use your Mac to send text messages, first make sure both your iPhone and Mac are signed into the same iCloud account and are on the same Wi-Fi network.
Next, go to Settings>Messages on your phone. Tap Text Message Forwarding. The name of your Mac should appear. Turn the switch on.
Now go to your Mac, and open Messages. When you open the app, a code should appear. You will type that code into your phone.
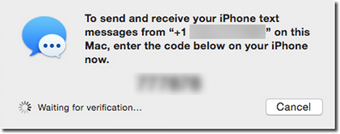
NOTE: The same code will appear on your iPad or iPod touch too. Once paired, you will be able to send and receive texts on those devices as well.
Hotspot
Hotspot enables you to use your iPhone or Android phone as a portable Wi-Fi hotspot.
NOTE: Before you can use your phone as a Wi-Fi hotspot and connect to the Internet on your Mac, you must first enable the Portable Hotspot feature on your phone. This may come with an extra fee, depending on your carrier. Follow the instructions for your phone to enable the Portable Wi-Fi Hotspot on your device.
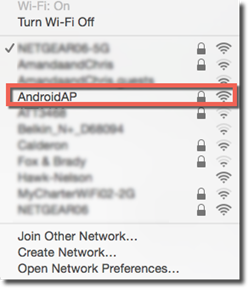
To connect to the Internet using your phone, go to the  in the Menu Bar.
Select your phone from the menu.
Enter your password.

Click Join.
EXTRA NOTE: If both your iPhone and Mac have Bluetooth turned on and are signed into the same iCloud account, you don't need to enable a portable Wi-Fi hotspot. All you have to do is go to the on your Mac and connect to your phone.
Handoff
Handoff lets you wirelessly transmit half-finished documents and other files between your Mac and iPhone.
You can transmit things such as:
-
Unfinished email messages
-
Web pages
-
A map
-
A note in Notes
-
Numbers, Pages, or Keynote documents
-
Reminders
-
Calendar entries
-
Contacts entries
To set it up, you must have both your iPhone and your Mac signed into the same iCloud account and have Bluetooth enabled. The two devices must also be within Bluetooth range of each other.
Next, go to your Mac. Go to System Preferences>General.
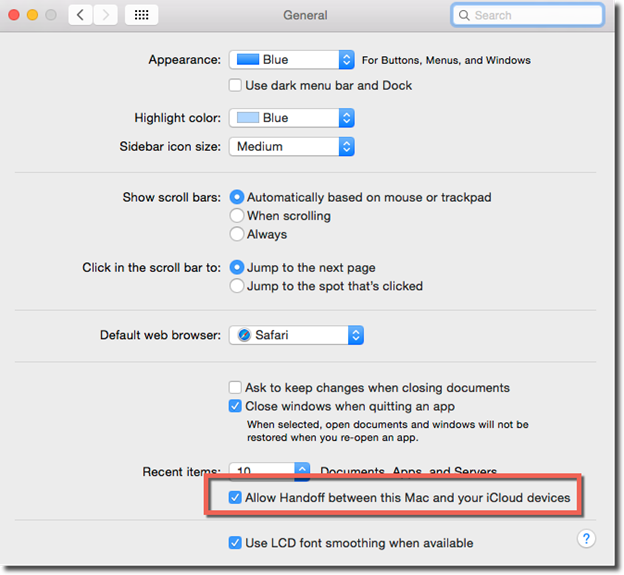
Put a checkmark before "Allow Handoff between this Mac and your iCloud devices, as highlighted above.
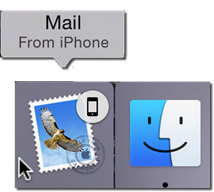
To use Handoff, start an email message on your Mac. Look at the Dock, and you will see an icon of a program that can finish the job.
In the snapshot below, you can see that Mail on our iPhone can finish the email for us.
AirDrop
AirDrop lets you wirelessly transmit Word documents, PDF files, photos, maps, videos, Contacts cards, et cetera from one Mac to another � or from an iPhone to a Mac.
From the the Mac, simply select the file in the Finder window, then click the Share button in the toolbar.
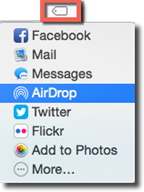
Select AirDrop, as shown above.
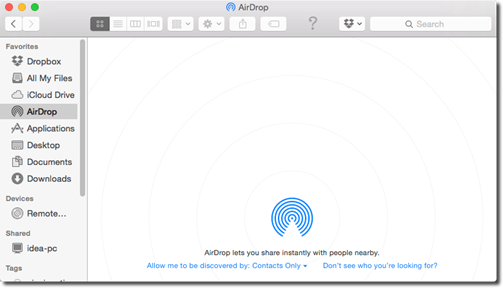
You will then see icons for any Yosemite Macs, iPhones, or iPads that are nearby. If no icons show up, but you know there is a Yosemite device nearby, you will see this message:
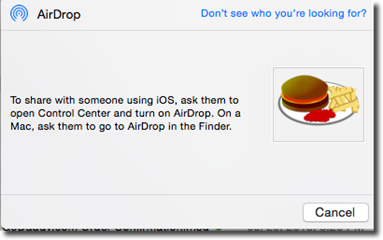
To enable AirDrop or instruct someone else on how to enable it, select AirDrop from the Sidebar of the Finder window.
You can choose to have your Mac discoverable to no one, contacts only, or everyone.
When AirDrop works, you will see a notification that lets you know you have received files from another device. You can click to open.


