
Mail merge is a great tool for creating the same document for several different recipients. For instance, suppose that you want to send a marketing email to all 200 customers stored in a database. Microsoft Word has a feature where you place template input within a document and use it to pull data to generate several of the same content for multiple different people. You can combine a Word document with data from Access, Excel or your own comma-delimited file.
Setting Up Data
Mail merge is usually used to merge a large set of data. We used 200 as an example, but you can generate thousands of letters and correspondence based on thousands of data points in an external file. We're using Microsoft Excel for this lesson's example, but it will only have two rows to illustrate the mail merge feature.
Before you perform a mail merge, you need to identify your data source. We set up an Excel spreadsheet that contains one column. The column is a "First Name" field where a list of customer first names are stored, You can have thousands of these records stored in an Excel file, but we only store two rows.
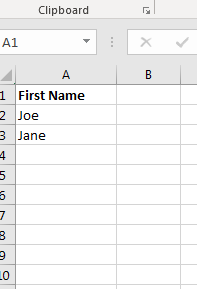
(Setup data for mail merge in Excel)
After you enter some data in the first column in Excel, save the file to a directory on your computer. You'll use this file to test the mail merge feature.
Initiate the Mail Merge Feature
After your data is set up, it's time to walk through the mail merge feature within Word. Word has an entirely separate ribbon tab for merging data and documents. You can find all features for mail merging documents and data in the "Mailings" ribbon tab.
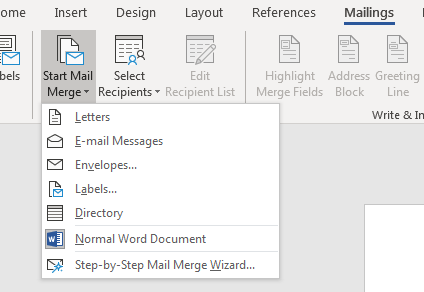
(Mail merge dropdown)
When you click the "Start Mail Merge" button, a dropdown menu is displayed. This menu gives you choices on which merge document type that you want to work with. For this example, a simple letter will be used to mail merge content. The "Letters" option lets you create a document with several versions of a letter. The only difference between each letter will be the name of the customer that will be changed in the greeting. However, from the dropdown you can see the different content types available for a mail merge action. You can use this feature for emails, envelops, labels and directory content. You aren't limited to just these content types. Mail merge can be used with any content type that you can set up in Microsoft Word.
Click the "Letters" option. When you select this option, Word goes into a mail merge mode with the "Letters" format as the main template. At this point, you need to choose a data source. This is where the Excel spreadsheet is used. The next step is to select the recipients for your mail merge action.
Selecting Data for a Merge
The next step in a mail merge operation is the select recipients. These recipients are exactly what was saved in the Microsoft Excel spreadsheet created earlier. Remember that you can use several data sources for a mail merge. Using Microsoft software is the best solution, but if you need to use a data source from another application, it's usually best to export data to a comma-delimited file (CSV). These files are a universal way to transfer data across different platforms. For instance, if you have a list of recipients in a MySQL database, you could export this data to a CSV file and then use it to import recipients in Microsoft Word.
Click the "Select Recipients" button to see a list of dropdown options:
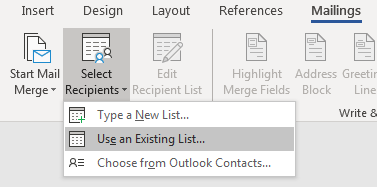
(Select recipient options for a mail merge)
You could use a new list, but we've created an Excel spreadsheet to store our list of customers. We only have one column, but you can use an existing Excel spreadsheet or any other data source that contains a list of data. For this example, we just want the first name of each of our customers. Click the "Use an Existing List" option and a window opens where you select the data source.
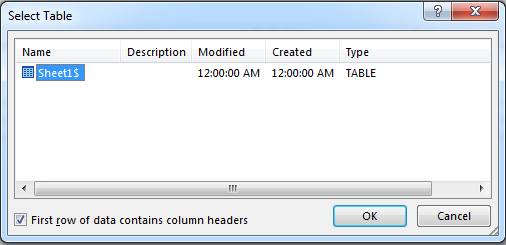
(Choosing a data source)
When you select the Microsoft Excel spreadsheet that we created early, a configuration window opens after detecting that the data source is a spreadsheet. Because spreadsheets have a "sheet" as the main table within the document, Microsoft Word asks the main table. We only created a simple spreadsheet with one sheet, so choosing the first worksheet named "Sheet1$" is the only option. If you have several sheets that contain your data, you need to choose the sheet within the Excel spreadsheet that you want to use as your data source.
The next step is to edit the recipient list. You do this by clicking the "Edit Recipient List" option in the "Mailings" ribbon tab. A new configuration window opens that displays your spreadsheet data.
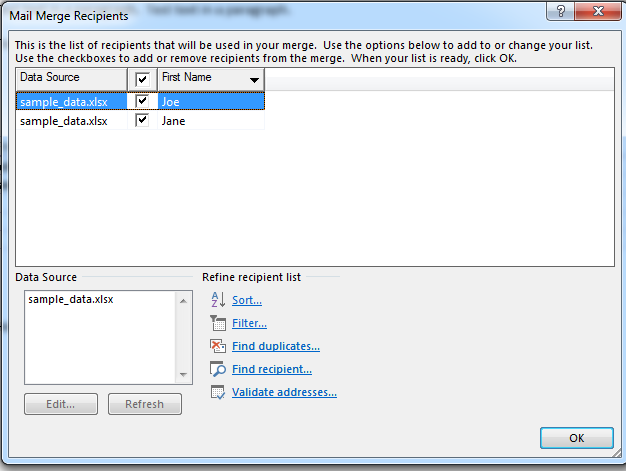
(Mail merge recipients data source)
In the image above, notice that the data source is set to the Excel file name, and then the Word mail merge feature automatically picks up the column name "First Name." This column contains the list of customer first names, but Word already knows that the first field in this column is a header row. Should you not have this header row, you will only see column letter labels. For this reason, it's important to have a header row to distinguish different columns throughout your spreadsheet. This first header row will display column names when you configure your mail merge function.
Also notice that you can refine your recipient list. This option lets you change the order of your data set, but you can also filter it. The filter lets you filter out data based on your own criteria. You can find recipients using the "Find Recipient" option. The "Find Duplicates" option will eliminate the records that are considered copies of others within the Excel spreadsheet, so you don't send the same content multiple letters.
Once you look at the list of data fields, click "OK" to confirm that it's correct. The next step is to insert a merge field into your document. Word uses the data used in your stored recipient list to create these fields. Click the "Insert Merge Field" after placing your cursor in the place where you want the data to display.
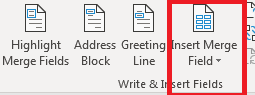
(Insert Merge Field option)
When you insert this merge field, the field displays in your document like the following:
Hello First_Name
This template tells word that a mail merge data source should be inserted into its place when you activate the mail merge feature.
In the "Mailings" ribbon tab, you have several other options to help set up your document. For instance, you can set up a greeting for your letter document. Click the "Greeting Line" option in the "Write and Insert Fields" category and the option to create a greeting with your Excel spreadsheet data is set up. These options are beneficial when you have a template document with standard material including a greeting section.
Preview Results
Before you run the mail merge function, you can preview results. This feature lets you see your document as your recipients will see it, which is a way to test and assure the end result is something that can be deployed.
Click "Review Results" in the "Preview Results" category. The first row in the "First Name" column will display using this example. Notice that the text set up in the test document now says "Hello Joe" since the first row in the spreadsheet contained the name "Joe." You can use the forward and back buttons to cycle through each record to see how it will display to your recipients.
Complete the Merge
After you've review the merge information, you can complete the merge. Word has a button that lets you finish a merge and print the documents. This is the "Finish and Merge" button.
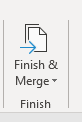
(Finish and Merge button)
This button is also in the "Mailings" ribbon tab, so click this button and choose your option. To print the documents for customers, choose the "Print Documents" option. The result is a long file with a document for each of your customers listed in the Excel spreadsheet.