Grouping is the process of grouping together parts of your report by the values located in a field. We can also group our report by cities � or the values of any other field in our report.
Throughout this article, we will discuss how to create groups and how to use them to organize and navigate through your report.
Creating a Group
To create a new group, go to Insert > Group.
You will then see the Insert Group dialogue box.
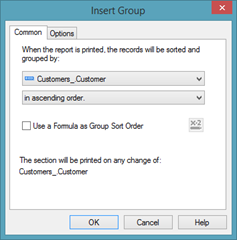
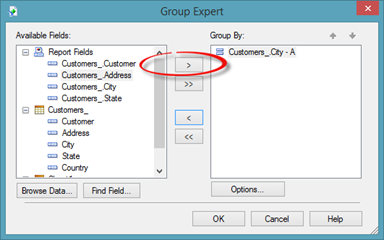
In this dialogue box, choose a field whose values you want to use to create a group. We are going to choose Customers_City.
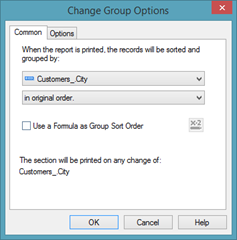
Next, choose how you want to group them, either in ascending or descending order. You can also choose a specified order or original order � or how they appear in the report. We can also use a formula as a group sort order by putting a check in the box, then clicking the button to enter in a formula.
Since we are already familiar with ascending and descending sort order, we are going to choose ascending for this example. We will talk about the other options later in this article.
Click OK.
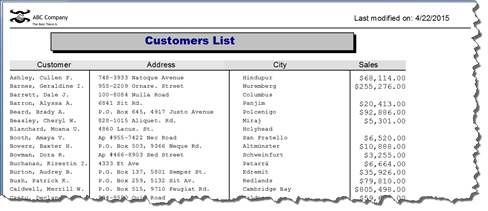
As you can see in the snapshot below, our customers are now grouped by city.
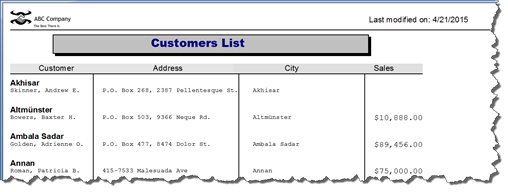
As you can see in the report above, our customers are listed under the city where they live. Using our example report, the city names that appear above the customers are called the group names.
To format a group name, select it by clicking on it as we've done below.
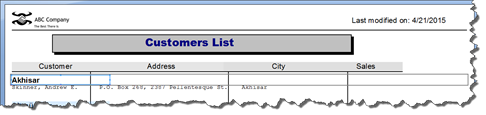
You can now change the font type, size, color, et cetera the same way as you formatted other text. Just keep in mind that when you make formatting changes to one group name, the changes are applied to all the group names.
Moving the Field Headers
We only have one customer showing per group. However, if we had dozens of rows of data, it may be helpful to move the field headers down below the group name to make the report easier to read.
We've done this in Design view in the snapshot below.

As you can see, our field headers are now located below the group name. Since the field headers are now in the Details section, they will appear below every group name and in every Details section.
Creating Groups by Date and Time
Take a look at our report below.
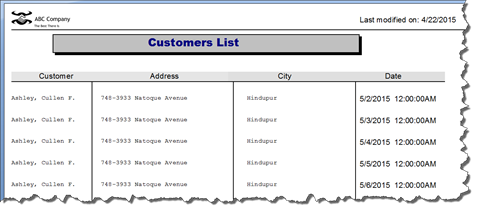
We've added a new field that displays the date and time.
To create groups by date and time, we are going select that field, then go to Insert>Group.
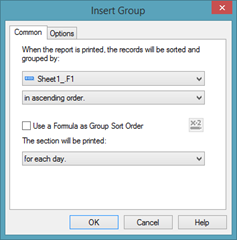
The top part of the Insert Group dialogue box allows you to choose the field and the sort order. We reviewed these options earlier in this article.
When you choose to group by date or time, however, a new option appears in the Insert Group dialogue box. It allows you to choose the time increments for the group.
Look at the dropdown menu for "The Section Will Be Printed."
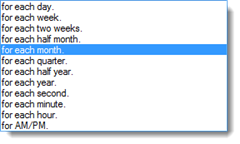
As you can see the groups can be created for each day, week, two weeks, et cetera.
We are going to group for each week.

Click OK.
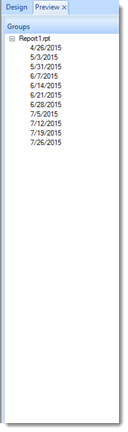
In the Groups panel on the right, you can see our groups.

Using the Groups Panel
The Groups panel is located on the right hand side of the Crystal Reports window. It shares the side panel area with Parameters and Find. If you don't see the Groups panel displayed, simply click on it.
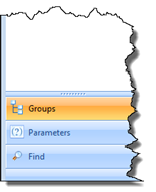
The Groups panel allows you to navigate through your report by using the groups you've created.
Take a look at our groups listed in the Groups panel.

We can go to the location of any group in the report by clicking on the group in the Groups panel.
Grouping by More than One Field
Just as you can sort by more than one field, you can also group data by more than one field.
When you group by more than one field, the first field that you choose to group will be the primary grouping. Data will be grouped by that field first.
The next field that you select to group by will be the secondary grouping.
In other words, Crystal Reports will group your data by the first field you select for grouping, then it will group your data by the second field you select for grouping.
Take a look at our report below.
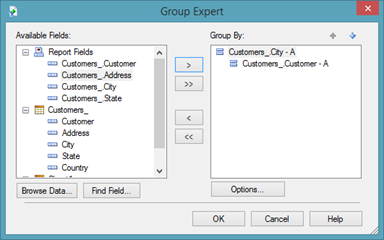
We are going to group the data first by the City field, as we did earlier in this article.
Next, we will group it by Customer.
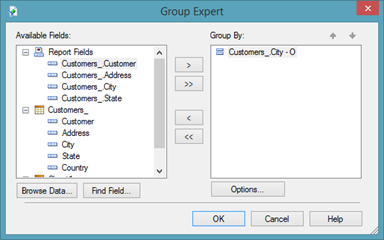
To do this, go to Report>Group Expert.
Select the first field that you want to use to group data. Click the arrow button that's pointing toward the Group By section to move it to that section.
Now select the second field that you want to use for grouping your data. Click the arrow button again.
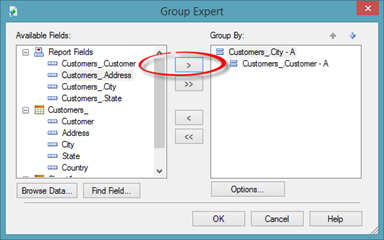
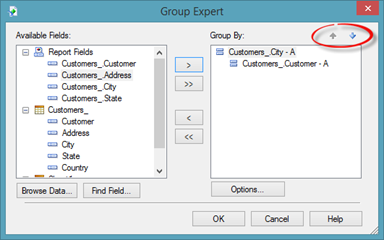
Both fields now appear in the Group By section.
The secondary field appears indented below the primary field. If you want to make the secondary field the primary field, use the arrows circled below.
Click OK.
Removing a Group
To remove a group from your report, go to Report>Group Expert.
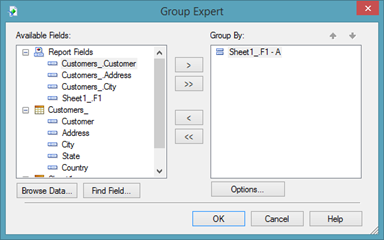
Select the grouping that you want to remove in the Group By section on the right.
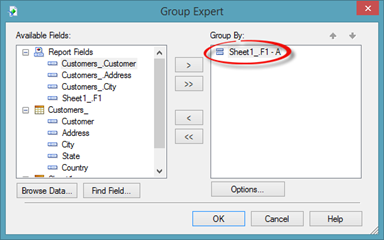
Click the arrow button that points to the Available Fields section.
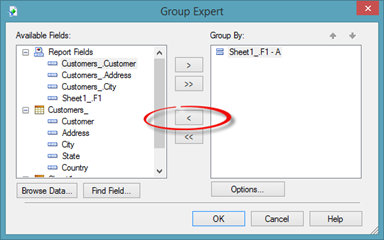
As you can see, the field is now removed from the Group By field.
Click OK.
Additional Group Sort Orders
When we learned to create a group early in this article, we talked about group sorting orders. Since we were already familiar with ascending and descending sorting orders, we chose to sort our groups in ascending order.
However, there were two other sorting order options available:
-
In Specified Order lets you determine the order that the groups appear, as we'll learn in just a minute.
-
In Original Order which will return the report to the original grouping order.
To see how In Specified Order works, go to Insert>Group.
Choose the field that you want to group by. For the sorting order, select In Specified Order.
You will then see the Specified Order tab.
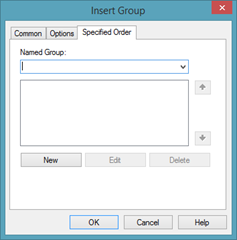
Click the downward arrow for the Named Group field. The values in the field you selected will be listed.
For this example, we are using the City field, so you will see all values in the City field.
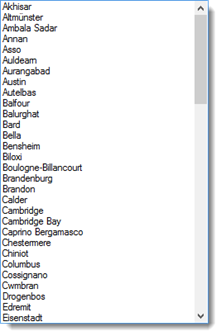
Click on the city that you want to be listed first. This city will become the first group displayed in your report.
Keep choosing cities until all the groups you want in your report appear in the text field shown below.
To change the order that they'll appear in your report, use the up and down arrows.
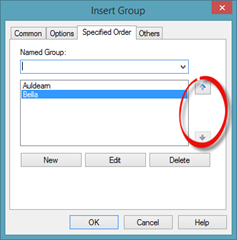
You can click the Delete button to delete a city. In the snapshot above, we have Bella. If we wanted to remove Bella, we could click Delete.
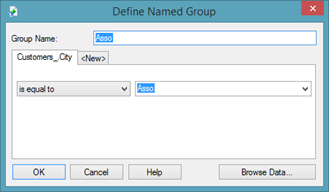
If we want to add our own custom group, we can click the New button.
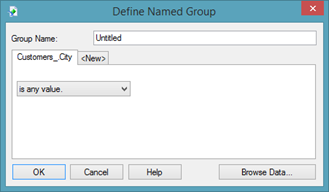
Enter a name for the group.

Next, choose a comparison operator, then choose a city.
As you can see, our group entitled "Sample" will contain all records that have Austin in the City field.
Click OK, and the new group is added (as shown below).
Select a city, then click the Edit button to edit any group.
Click OK when you're finished.
NOTE: Make sure you click OK in all of the group dialogue boxes so that the changes you make are applied.
If you ever want to edit the sorting order of groups, select a group in your report, then go to Report>Group Expert.
Click the Options button.
You can then change the data field used to group the data and/or the sorting order.
Click OK when you're finished.
Click OK again to exit the Group Expert dialogue box.
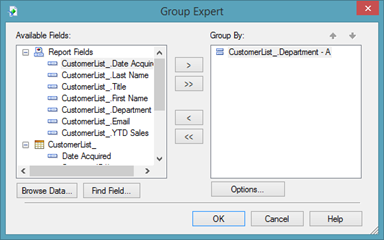
Changing the Grouping Data Field
When you create groups, you choose a data field to use as the basis for your groupings. If you ever decide that you want to change the data field that you're using to group your data, you can do that without actually deleting the original grouping from the Group Expert. Instead, you can just swap data fields. Swapping data fields allows you to keep any summary fields that you may have added.
To change the data field that you use for grouping, go to the Group Expert.
Click the Options button.
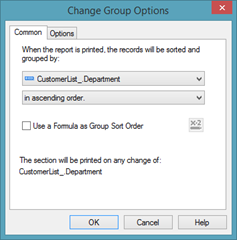
Right now, we are using the Department field for grouping.
If we want to change that, we can simply pick another field from the dropdown list.
Click OK.
Click OK again in the Group Expert dialogue box.
Group Options for Preview
The purpose of grouping data is to help you to better organize and present the data in your report. That said, we are going to take this section to show you the options available to you in Crystal Reports to help you better organize and present the data in your groups.
In our report below, we have grouped our employees by department.
Each group has its own header.
The groups make it easy to see which employees are in which department.
However, when we navigate to page two in the report, we can't see the group header.
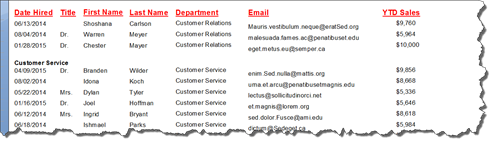
The group header is on the first page. Since there wasn't any more space on the first page to print the rest of the group, it carried over to the second page.
This is fine, but it means that we have to go back to the first page to see the header. That is, unless we tell Crystal Reports to keep the group headers and groups together. If we do that, the header will appear on the second page.
To do this, we're going to go to the Group Expert.
Click the Options button.
Click on the Options tab.
We can:
-
Keep Group Together. If we select this option, Crystal Reports will try to keep each group together (with its group header) on the same page. However, if one group spans more than one page, this might be a problem.
-
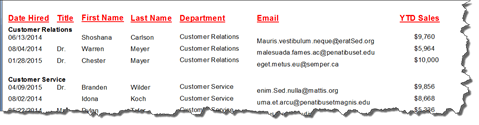
Repeat Group Header on Each Page. This is the best option. It will put a header for each group on each page. In our example, the group header would still appear on the first page, but it would also appear on the second.
We are going to choose Repeat Group Header on Each Page.
Click OK.
Click OK in the Group Expert dialogue box.
Now, take a look at the second page of our report. It now has a group header added.
Creating Your Own Groups
So far in this article, we've learned to create groups that are based on a data field in your report. However, you may not want to group by any of the data fields in your report. The data fields may not group the data the way that you need it to be presented, or you may just wish to group the data in a different way. For that reason, you can create your own groups in Crystal reports.
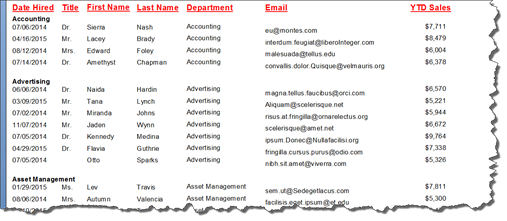
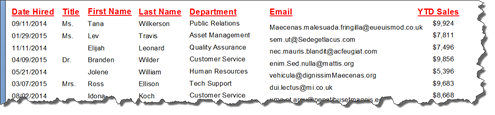
In our report, we want to group employees by the first letter of their last name.
To create your own grouping, go to the Group Expert.
Next, choose the field you want to base your grouping on. For our example, it will be the last name field.
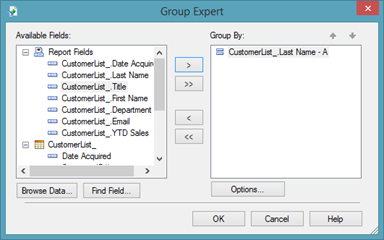
Click the Options button.

Change "in ascending order" to "in specified order."
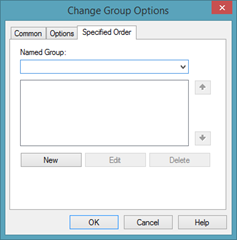
Click the New button.
Name the new group. We are going to name ours A, for all customers whose last name begins with the letter "A."
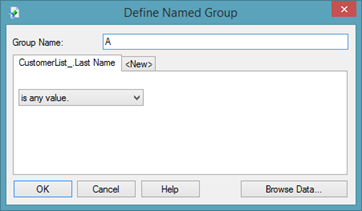
The group name will also be the group header in your report.
Change any value to "is like."
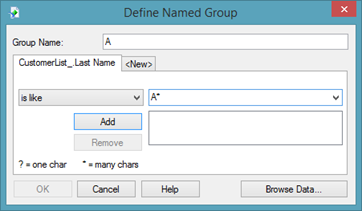
Notice that we added the asterisk, a wild card, after the letter A. This lets Crystal Reports know there are multiple characters after the letter "A."

Click Add, then click OK.
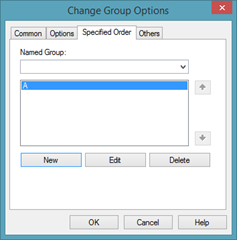
If you want to add another group, click the New button again.
We've repeated the steps and created four groups (shown below).

When you are finished creating groups, click OK in the Change Group Options dialogue box.
Click OK in the Group Expert.
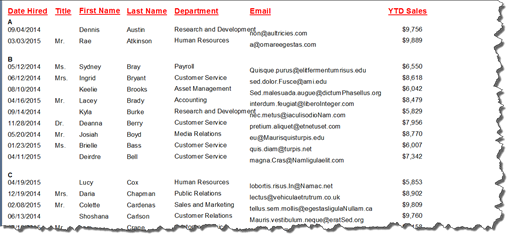
Take a look at our report above. Our report is now grouped by the first letter of the last name of each employee.