Crystal Reports is a user-friendly report creation tool created and distributed by SAP, a German software corporation. The program is run on the Windows operating system and allows users to easily create and design detailed reports from various data sources, such as Excel spreadsheets, Oracle databases, Microsoft Access databases, MySQL server databases, and even local files. Crystal Reports pulls the data from these sources, then places the data in fields created by the user. Since Crystal reports gets data from sources, but does not have the capability to send data back, there's no risk of damaging important data through user error. The data that Crystal Reports gathers can be used in a multitude of report types, including list reports, mailing label reports, customer letters, financial analysis, activity and even summaries, et cetera.
Installing Crystal Reports
The installation of Crystal Reports is not as self-explanatory as a majority of other software programs on the market. Make sure you leave yourself plenty of time to download and install Crystal Reports. You should plan to be at your computer during the download and installation. When installing Crystal Reports, you will not only be downloading an executable file (.exe). You will be downloading a large .zip file. This file contains crucial Crystal Report files. It also contains the setup file that you will use to actually install the program. Downloading the .zip file can be a slow process depending on your Internet speeds so, again, make sure you have the time to devote.
You will be required to enter in your name, job role, and contact information in order to download a free trial of Crystal Reports. Once you enter in that information, you will be taken to the download page, as shown below.
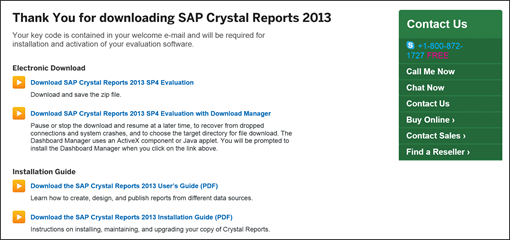
You will initiate the download from this page by one of two methods. You can download and save the .zip file immediately. If you choose this method, you will not able to stop or pause the download once it starts. If you do stop the download, you will lose all progress. If you lose connection to the Internet, or your computer crashes for whatever reason, you will lose all progress as well. As an alternative, you can use the Download Manager. By using the Download Manager, you can stop or pause the download at any time.
For the purpose of this article, we used the first option.
To start the download, go to the download page.
Click Download SAP Crystal Reports 2013 SP4 Evaluation. You will then asked to choose a location to save the .zip file.
As mentioned earlier in this article, downloading the .zip file to your computer can be a lengthy endeavor. However, when it is finished, you will see the file appear in the location where you chose to save it:

Unzip file by clicking to select the file, then right clicking.
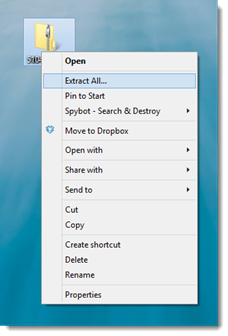
Choose Extract All from the context menu.
When all the files have been extracted, a new (uncompressed) folder will appear.

Double click on the folder.
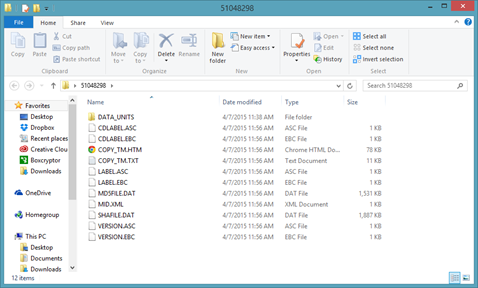
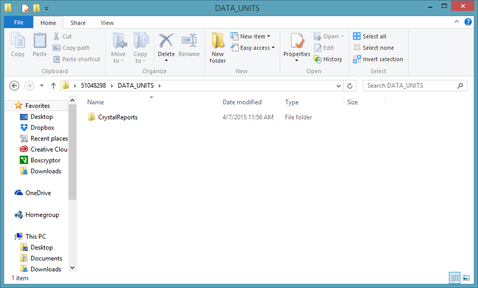
Next, double click on the DATA_UNITS folder.
Double click on the CrystalReports folder.
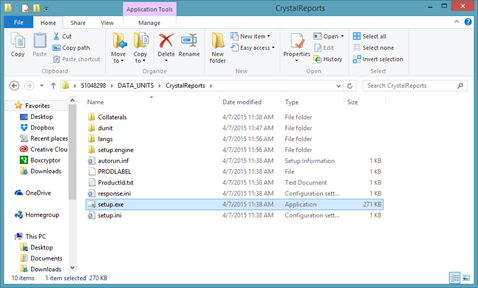
Double click on the setup.exe file (as highlighted above) to start installation of Crystal Reports.
From this point forward, installation is very similar to any other software program you may have installed in the past. Simply follow the instructions on screen to install the program.
Things to Consider Before Using Crystal Reports
Crystal Reports is a report creation and design tool. That said, there are some things to consider before you use the program to create and design a report. Even if this is your first time using the program, you want to give these things some thought before beginning. It will make getting started easier once we delve into using the program.
-
What data sources will you be using in your report? It's helpful to know what data you will need for the report and where that data is located.
-
Are the databases you will be using PC, ODBC, or SQL based?
-
Is there information that doesn't exist yet, but will need to be calculated? Is there information that needs to be created, perhaps in an Excel spreadsheet?
-
How do you want to display the data? What tables or fields will be needed?
-
Do you need totals displayed? If so, totals of what data?
-
Do you need to display all the records from a data source? Or do you just need to display records that meets certain criteria?
-
Do you need to include a company logo in the header? Do you need anything particular in the header and footer, including colors?
-
Will the people who view your report have access to a viewer for Crystal Reports? Do you need to export the report to a certain format or program?
You'll want to plan ahead for your report. Planning ahead will save you time later. It will also make your report easier to create.
Navigating Crystal Reports
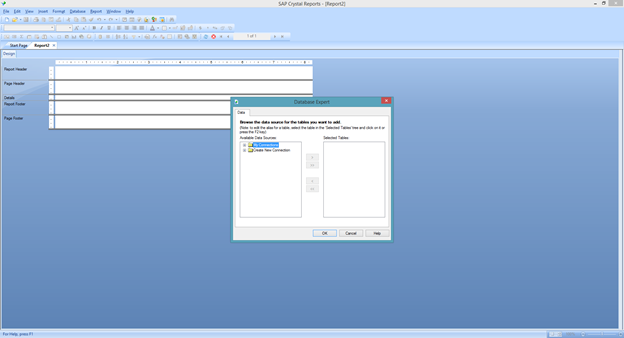
When you open Crystal Reports for the first time, you will see the Crystal Reports user interface.
![]()
At the very top of the window is the Title Bar. This contains the name of the program (SAP Crystal Reports), as well as the name of the report you currently have open.

Below the Title Bar, you have the Menu Bar that contains your menu commands.

Below the Menu Bar is the standard toolbar.

Below the standard toolbar is the formatting toolbar that you'll find you use frequently for text.

Next, below the formatting toolbar, you have three little toolbars.
There's the Insert toolbar for inserting objects into reports.

Next is the Expert toolbar, which you will use a lot in Crystal Reports.

Finally, you have the report navigation. This toolbar is only active when you're working within a report.

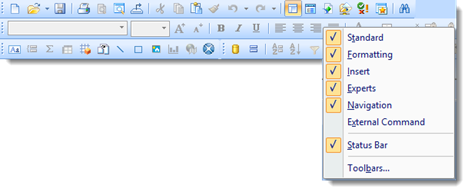
You can turn any of these toolbars off by right clicking on the toolbar, then unchecking the toolbar that you want to turn off.
Below all the toolbars, you will see tabs that represent each report you have open within the Crystal Reports program. You can click on the tab to bring up the report.

For each report that you have open in Crystal Reports, you have two different views: Design and Preview. Design is the view that you see as you design the report. Preview is a preview of how viewers will see the report in the viewer or in the chosen export format.
You can switch between Design and Preview by clicking on the appropriate tab. These tabs are located beneath the report tabs (pictured above).

You can close Preview by clicking on the X, but you cannot close the Design view without closing the report.
If you close the Preview and want to bring it back, click Refresh in the report navigation toolbar.
When you click on the Preview tab, you can also see the Preview panel.

The Preview panel has three sections: Groups, Parameters, and Find.
The Preview panel can also be turned off and on by going to the standard toolbar.

At the bottom of the Crystal Reports window, you will see the Status Bar.

On the right side of the Status Bar, you'll find Zoom to zoom in on your reports.
Getting Started in Crystal Reports
Crystal Reports does not allow you to enter data into the program. All data used to create reports with the program must be from other data sources, such as databases or Excel spreadsheets.
Creating a New Report
When you open Crystal Reports, you will see the Start page, as pictured below.
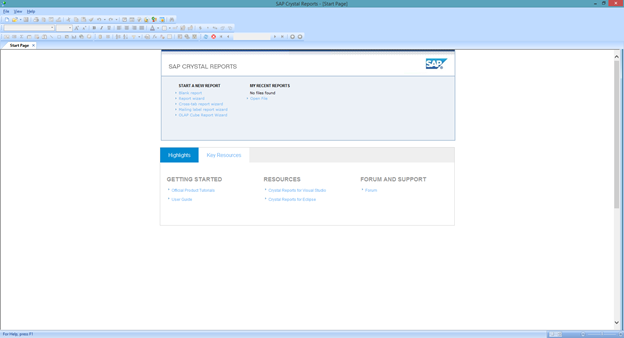
On the Start Page, you will see several shortcuts to help you get started with Crystal Reports. For example, you can start a blank report, use the report wizard, et cetera.
You can also open a recent report. Any reports that you've worked on in Crystal Reports will show in the Recent Reports list.
If you're connected to the Internet, you will also see the Highlights and Resources tabs, which contain the latest news, tips, and resources to help you as you use Crystal Reports.
For the purpose of this article, we are going to start using Crystal Reports by creating a blank report.
To do this, you can either click Blank Report on the Start Page, or you can go to the Menu Bar, then File>New>Blank Report.
NOTE: If you wanted to use the report wizard (as offered on the Start Page), you would select Standard Report.
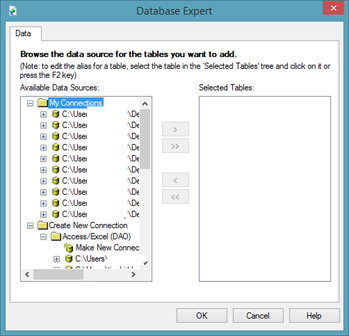
A blank report is created for you and displayed in the Crystal Reports window. You will also see the Database Expert dialogue box, as pictured below.
Connecting to an Access Database
In order to create and design a report in Crystal reports, you first need to connect to the databases and sources that contain the information you want to bring into Crystal Reports.
We are going to start by teaching you how to connect to an Access database. In order to successfully connect to an Access database, you will first need to know the version of Access used to create the database. For Access 2007 and newer, the extension used to save Access databases was .accdb. For 2003 and earlier, it was .mdb. This will be important when you connect to the database.
Let's learn why.
First, let's learn how to connect to an Access database with the .mdb extension.
We are going to need to bring back up the Database Expert dialogue box.
If you don't see the Database Experts dialogue box or you accidentally close it, go to the Experts toolbar and click the database icon, as highlighted below.

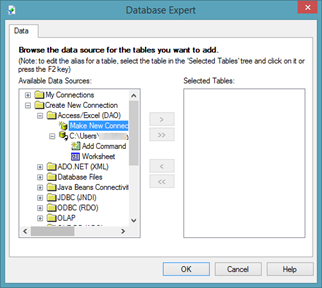
You will then see the Database Expert dialogue box.
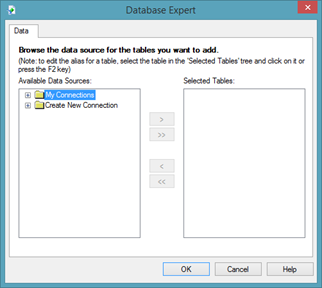
On the left side of the dialogue, you see My Connections, which is connections to databases that you already made.
You also see Create New Connection which we will use to connect to our Access Database.
Click the plus (+) sign to the right of Create New Connection.
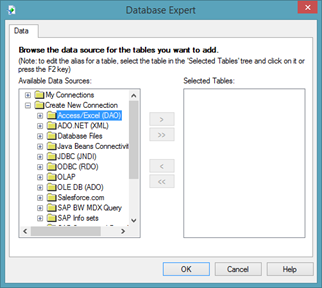
Click the plus (+) sign beside Access/Excel (DAO) since we want to connect to our Access database.

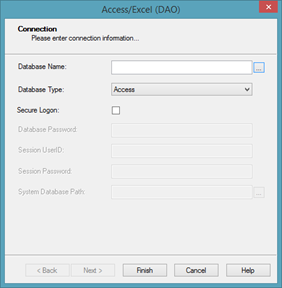
In the Database Name field (pictured above), click the button with the ellipse on it (three dots), then locate your Access database.
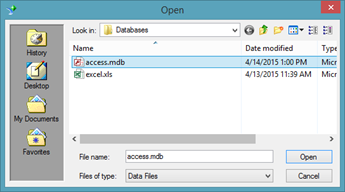
Notice that the file extension for our database is .mdb. This is for an Access database created using Access 2003 or prior. For the 2007 version and later, the extension is .accdb.
Click Open.
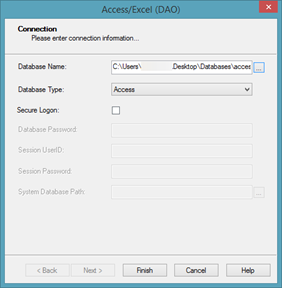
Next, in the Database Type field (pictured above), choose Access.
If the database requires secure logon, you can check the box, then enter the password, user ID, session password, and system database path that you can have supplied to you by your network administrator.
Click Finish.
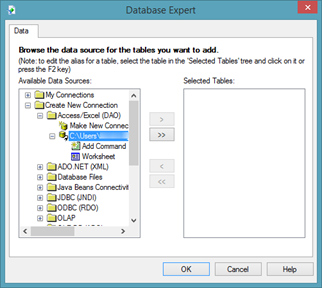
You can now see our new connection to the Access database highlighted in blue above. Below it, you can see all objects in the database.
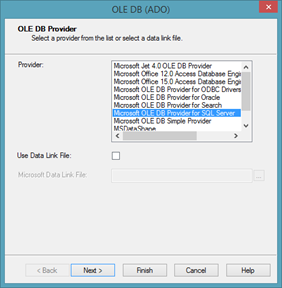
If your Access database was created using Access 2007 or later and contains the extension .accdb, you will want to go to OLE DB (ADO) to make a new connection to your database, as circled in red below.
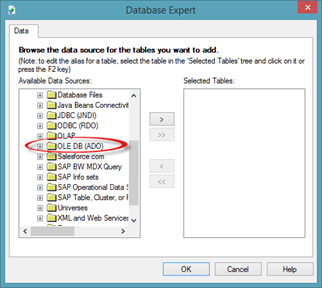
You will then see this window:
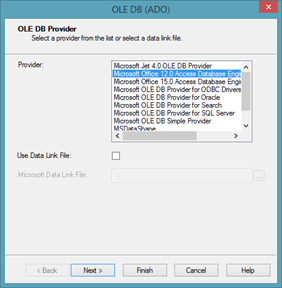
In the Provider list, select Microsoft Office 12.0 Access Database Engine.
Click Next.
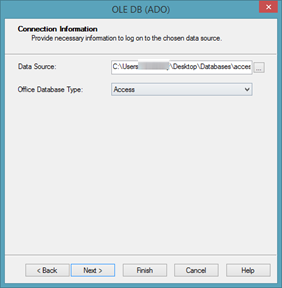
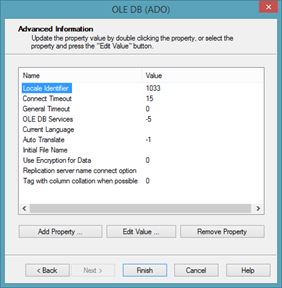
Locate your database in the Data Source field, then choose Access from the Office Database Type dropdown menu.
Click Next.

You will then see a summary, as pictured above.
Click Finish, and the new connection is formed.
Connecting to an Excel Spreadsheet
We are going to follow almost exactly the same steps to connect to an Excel spreadsheet with Crystal Reports.
To start with, bring up the Database Expert dialogue box.
If you are using Excel 2003 or prior and the extension of your spreadsheet is .xls, go to Create New Connection, then Access/Excel (DAO).
Since we already connected to an Access database, we can see that database listed. We need to double click on Make New Connection beneath Access/Excel (DAO) to connect to an Excel spreadsheet.
In the Database Name field, locate your Excel spreadsheet.
In the Database Type field, choose your version of Excel from the dropdown menu.
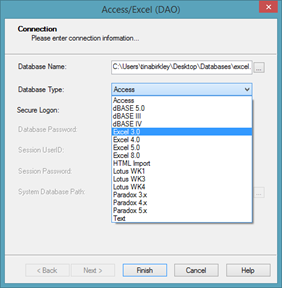
We are going to choose Excel 8.0
Click Finish.
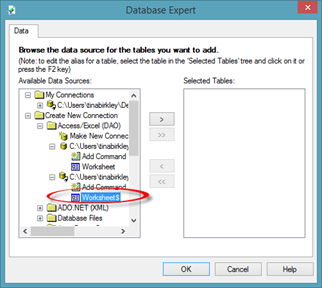
You will then see all worksheets within your workbook, as shown above.
Click OK.
If you are using Excel 2007 or newer and your file extension is .xlsx, follow the exact same steps you used to connect to an Access database that has the file extension .accdb.
In the Database Expert dialogue box, go to Make New Connection, then OLE DB (ADO), as circled in red below.
Click the plus (+) sign.
Since we already connected to an Access database, double click on Make New Connection beneath OLE DB (ADO).
In the Provider list, select Microsoft Office 12.0 Access Database Engine. Even though we want to connect to Excel, we still want to use this provider.
Click Next.
Locate your database in the Data Source field.
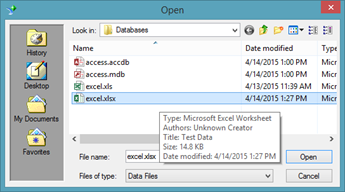
Click Open.
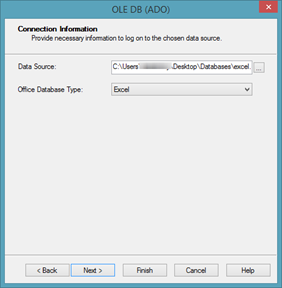
Choose Excel from the Office Database Type dropdown menu, as shown above.
Click Next.
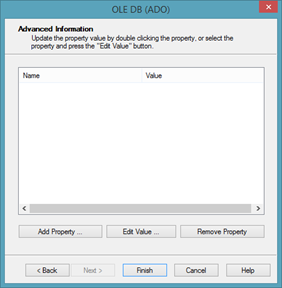
You will then see a summary, as pictured above.
Click Finish, and the new connection is formed.
Connecting to a MySQL Database
In addition to connecting to an Excel workbook or an Access database, you can also connect to a MySQL database.
To connect to a MySQL database, go to the Database Expert, selecting Create New Connection, then creating a new connection under OLE DB (ADO), as circled below.

Choose Microsoft OLE DB Provider for SQL Server as the provider.
Click Next.
Next, enter the server information. If your MySQL database is located on a remote server, you'll need to enter the IP address for the server � or its address on the web. Ours, for example, is sql3.freesqldatabase.com.
Enter your database name, as well as the login information.
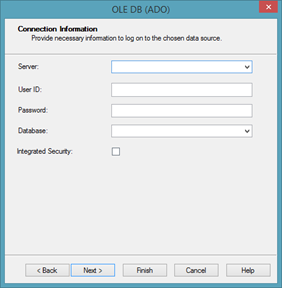
Click Next.
Click Finish.
Selecting Tables and Views
Once you've made connections to the databases that contain the information you want to include in the report, it's time to then select the tables and views.
A table is a piece of information that contains data. A table can contain multiple rows of data.
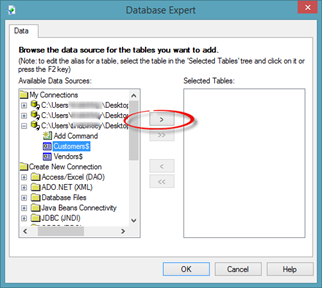
In the snapshot below, we've used the Database Expert dialogue box to connect to an Excel workbook.
As you can see, the workbook contains two tables: Customers and Vendors. The tables were worksheets in our workbook.
![]()
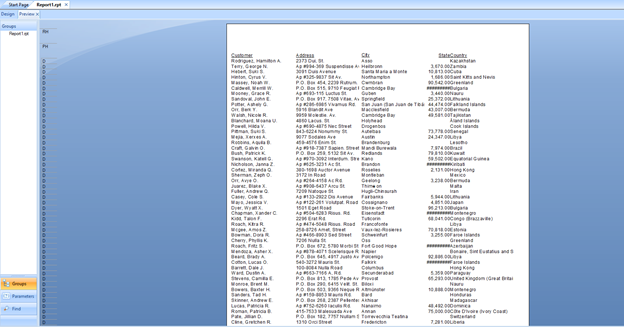
If we take a look at an Access database, we see one table.
![]()
On the other hand, views contained combined data as well as specific types of data from a database, such as the type of data gathered from a query or filter.
Both views and tables show up under the data source in the Database expert.
To add a table or a view to a report, select the table or view by clicking on it.
![]()
Click the arrow button that points toward the Selected Tables column.
You will then see the table listed in the Selected Tables column.
Click OK.
Deleting Connections
All of the data sources that you've connected to are listed in the Database Expert under My Connections in the Available Data Sources column.