
Importing from a SQL Server Database
Excel's "Get & Transform" features make it easy to import from any external source. The steps to import data from files and sources where no authentication is needed are similar except for the type of data that you import. Some data is more structured than others, so you don't need to clean the data after it's imported. Other data (such as web page data) needs more cleaning and formatting after it's imported.
Microsoft SQL Server data is structured, so you can query data and find the information that you want to import without much of the cleanup required. Since SQL Server is a Microsoft product, Excel comes with a built-in connector that automatically connects to the server without any configurations. The SQL Server can be located on your local machine, or it can be located on a network server. As long as your machine has access to the SQL Server, you can access it using Excel. The database administrator must give you permissions to access the database, so ensure that you have a username and password to access the server before attempting to access it or you will receive an "Access Denied" message.
The "Get Data" button is in the "Data" tab in the "Get & Transform Data" section of the menu. Click the button, and you see several options that are also linked to submenus.
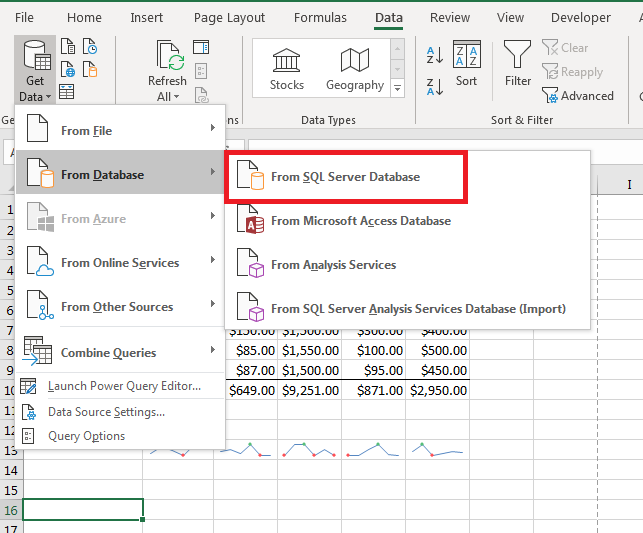
(Menu option to open SQL Server import process)
After you click the "From SQL Server Database" menu option, the first configuration window opens. The configuration window that opens depends on the type of data that you want to import. Since SQL Server is a database application that runs on a network server or the local machine, you need to tell Excel 2019 where the application is located and enter your username and password.
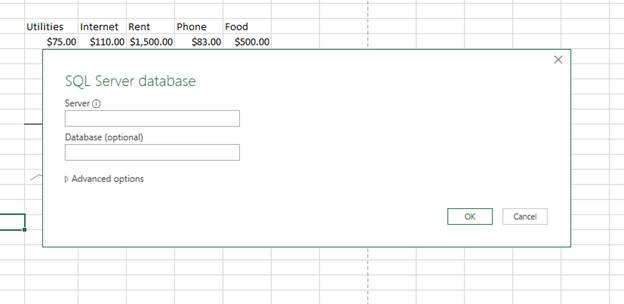
(SQL Server import configuration window)
The configuration window asks for a server name and the database. The server name is the machine name. If SQL Server is running on the local machine, you can also type "localhost" in this text box. The database name is optional, but you'll need to choose the database later when Excel detects multiple databases on the server.
Clicking the "Advanced" option will expand to a text box that lets you type an MSSQL query against the database. Understanding the SQL language will allow you to create a query that only pulls specific data from the database. For instance, the following query gets customer first and last names from the "Customer" table:
SELECT firstname, lastname FROM Customer
You can enter simple or advanced queries, but you first need to know the MSSQL language. If you don't know SQL, you can import data from tables using Excel's wizard. Click "OK" to move to the next window, which is where you enter your credentials.

(Enter SQL Server credentials)
Depending on the SQL Server configurations, you can either have access to the database using your Windows credentials (the ones you log into the network), specific database credentials (set up by the database administrator), or for cloud databases you might use a Microsoft account. If you are unsure of the credentials that you have, ask your database administrator.
After you enter your credentials, click "Connect." If your credentials are correct, then you will move to the next window. If your credentials are incorrect, you're prompted to re-enter them. Excel 2019 first attempts to connect to the database with an encrypted connection. If it cannot, it will prompt you to connect with an unencrypted connection. For small private networks where the database and your computer are behind a firewall, unencrypted connections don't pose a risk. However, if you're connecting to a database over the Internet, it's a security issue to transfer data from a database to your local Excel application. Click "OK" to connect without encryption if you're on a private network, and the next window is where you choose your data.
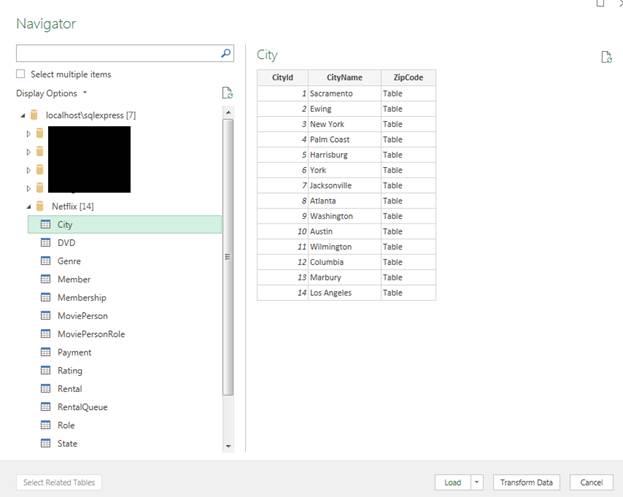
(Database and table selection)
If you did not specify the database that you want to query in the first configuration window, the final window displays a list of databases on the server. In this example, a Netflix database is chosen. When you click the database, a list of tables expands where you can review data stored in the table. If you want to import more than one table, check the box labeled "Select multiple items."
Without a written SQL query, Excel will import all data located in these tables. A small sample database won't be too many rows or columns, but very large database tables could be too much data for Excel to store. Newest versions of Excel have higher row and column limitations, but they still have much smaller limitations than what can be stored in a SQL Server database. The most recent version of Excel can hold 1,048,576 rows and 16,384 columns.
When working with imported database data that could need cleaning, it's best to choose "Load To" from the "Load" dropdown to create a new worksheet for each table that you import. After the data loads, you can identify data that must be cleaned.
This example shows you how to connect to a Microsoft SQL Server but connecting to any database from Excel has similar steps. Most databases require credentials to connect to them, and any structured database store data in tables. If you cannot directly connect to a database with Excel, you can export it to a CSV file. CSV files are universally supported by any platform, so it's a way to export and import data across incompatible systems. Excel's "Get & Transform" features can also connect directly to a CSV file and allow you to import it to your local spreadsheet.
Connecting to a Web Page
You'll find that most data imported from a database does not need to be cleaned and reformatted. However, there are other types of connections that commonly need data cleaned from mistakes and poor formatting. Excel 2019 has functionality to connect to a web page, and this data is unstructured and user-generated. A structured database such as SQL Server has rules to store and accept data but connecting to a web page means that you connect to content controlled by a third-party. Even with unstructured data in a web page, it can still be useful when you need to analyze content or collect data for a certain project.
Click the "Get Data" button and then select "From Other Sources" to view a submenu with a list of alternative sources.
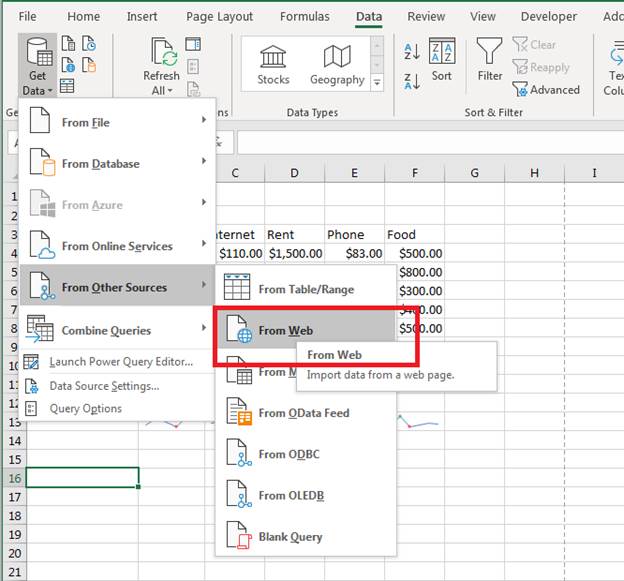
(The "From Web" data source option)
In the "From Other Sources" submenu, you can see that Excel can natively connect to several other types of sources. Click the "From Web" option to open the configuration window.
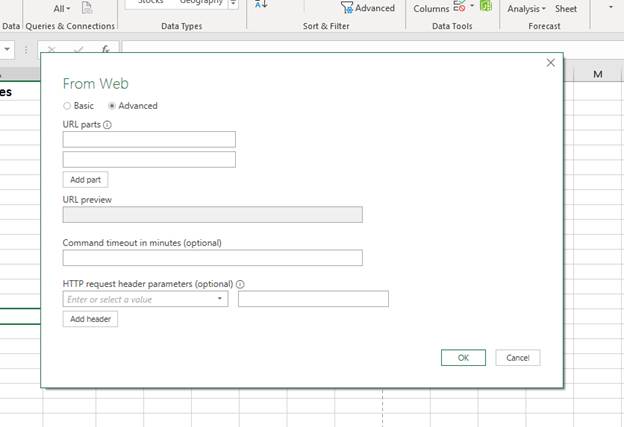
(Connect to web page configuration window)
The "Basic" configuration option only asks for a URL, which works in most cases, but you might want to add some additional settings. Click "Advanced" to see the other settings available. You can add parts, a command timeout (disconnect after a specified time passes), or HTTP headers. These options let you connect to pages that might reject connections based on header values, which some sites do to avoid scrapers and bots.
Click the "Basic" option and type a URL into the "URL" text box. Click "OK" to move to the next configuration window.
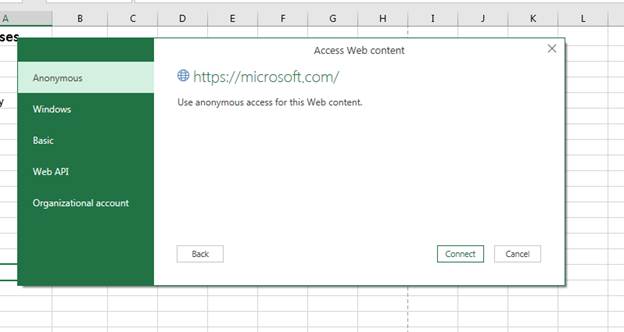
(Credentials to access the site)
Some web pages are behind authentication requirements. Standard web content allows anonymous connections, and this is the default configuration. However, you can set credentials based on the type of authenticated connection that you need to make. For instance, your network administrator might allow you to connect with your Windows credentials, so you click the "Windows" option and enter your credentials in the configuration window. Web APIs usually require keys to connect using your account, so this section asks for your keys to connect.
After you enter your credentials (or choose to stay anonymous), click the "Connect" button to see a preview of the data that you can import.
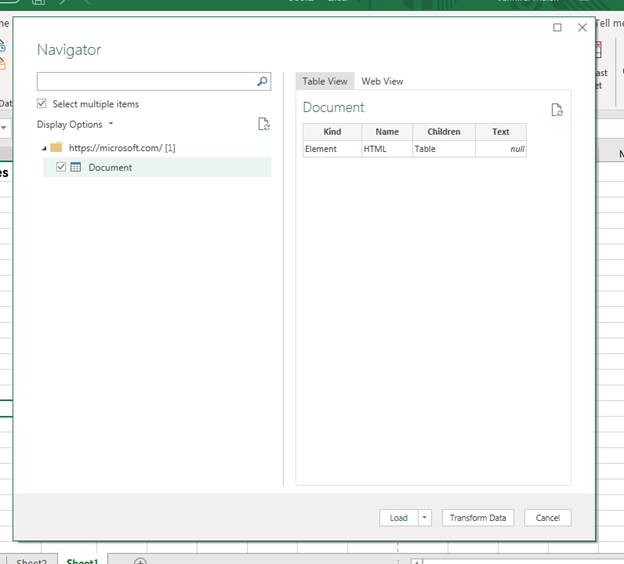
(Document preview for a web page connection)
When connecting to a web page, the top element is "Document," which is what displays as the "table" that you can import from the selected web page. The content is shown in the "Table View" tab in the preview pane. Unlike a database with structured data, viewing data in a web page is limited, but you can see a full view of the web page by clicking the "Web View" tab in the preview pane. With the "Web View" tab, you can see the content that you'll download except for the actual HTML tabs and any elements behind the web page content.
Click the "Load To" option to import the web page into a new worksheet.
The table of contents imports into your spreadsheet and you can see the HTML data in the new worksheet. With HTML data, it can be unstructured and must be cleaned. A panel on the right side of the workbook displays where you can get a preview and edit data.
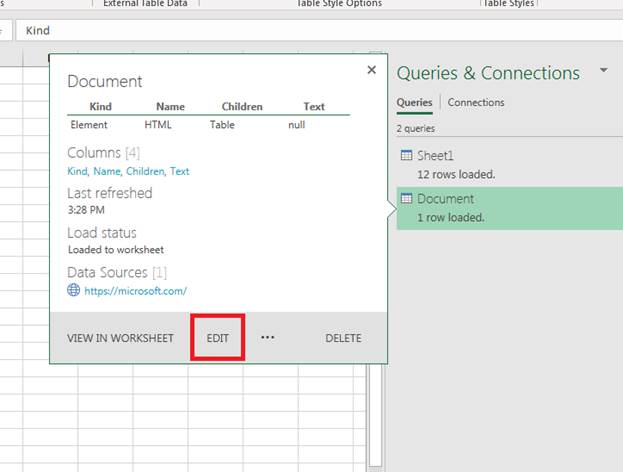
(Edit option for imported data)
Click "Edit" to see the Power Query Editor that will help you select, transform and refresh your data.
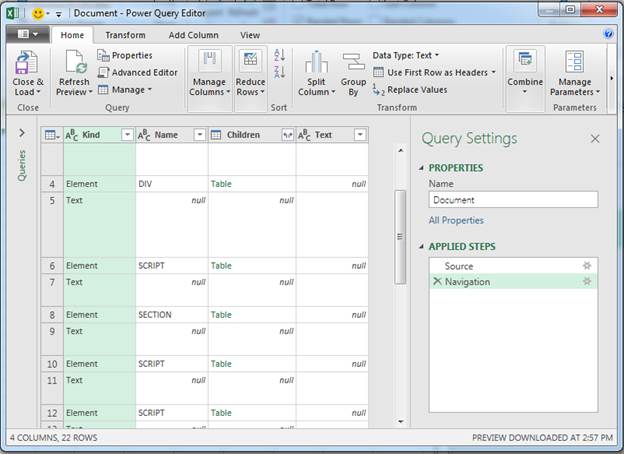
(Power Query Editor)
Click the "Table" link under "Children" for each element, and more and more data will display in the editor. Using this editor, you can manage your data, query it, transform it and combine it with other data. The Power Query Editor will help you retrieve only the data that you want and eliminate some of the unstructured elements that you don't want from imported HTML.
For instance, click the "Replace Values" button and a window opens where you can perform a global find and replace to change values to what you need to store in the spreadsheet. After you change data, you can also click the "Refresh" button to refresh what displays in the editor.
Importing unstructured data requires a bit more work after the import, but the steps to take to connect to any resources outside of the current spreadsheet are the same for every connection in Excel 2019. As long as you have the credentials, you can import data easily using Excel instead of manually pulling data using other applications.