Introduction to VBA

Opening the VBA Workspace
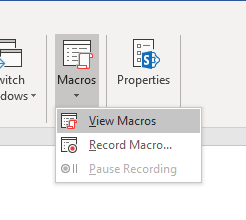
We showed you how to open macro windows, but we'll reiterate how to open a macro window again. Macro tools are found in the "View" ribbon tab. This tab has several layout views that you can use such as the way it looks as you type a document or the print view, but in the far-right side of the tab you can see a "Macros" category. This category contains the button named "Macros."
(Macros button dropdown options)
Click the "Macros" button and you see two available options. (The "Pause Recording" option is when you record a simple macro, but it's only enabled when you are actually recording a macro and grayed out when it's not a viable option.) Click the "View Macros" option to open a window that displays a list of currently recorded and saved macros.
(View a list of stored macros)
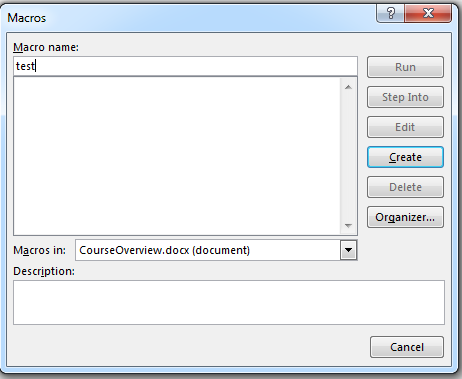
The window prompts you to name a new macro or choose one from the list to edit it. In the image above, no macros are saved, so you can only create a new one. Type a macro name into the text box and then click the "Create" button. This button will open the VBA interface where you can create a macro based on the VBA language.
The VBA Macro Interface
When you click the "Create" button, a new window opens, which is very different from the Microsoft Word interface. This interface is the VBA window that looks the same throughout any Office product. Should you decide to create a macro in Excel, for instance, the VBA window will look the same as it looks in Microsoft Word.
The window has several important sections as you create your macro.
(VBA interface)
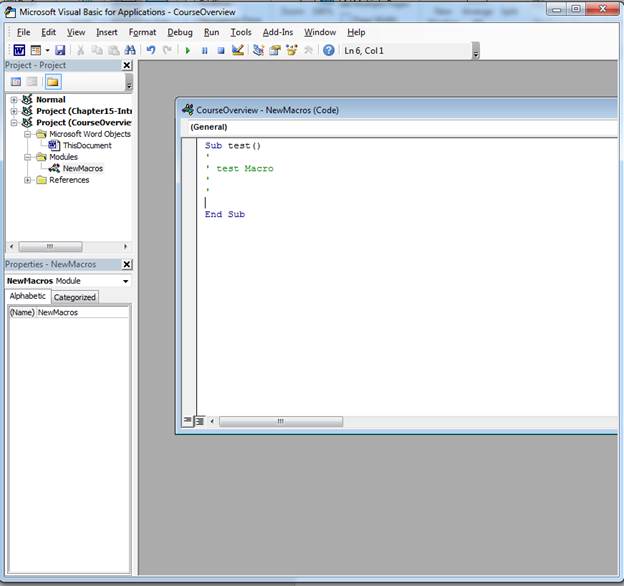
The main center area is where you type your VBA code. A subroutine (discussed later) is created based on the macro name that you enter. As you can see in the image above, the subroutine "test" was created, because the name given to the macro was "test."
In the left panel, the project is shown with a few subdirectories. The VBA interface is set up to provide a hierarchy of objects in your document. The main hierarchy is the project file. Within this file is the "document" object. This document is given the default name "ThisDocument" in a VBA project.
The "Modules" directory contains the files that contain your VBA code. Modules can be organized into different files, but the VBA interface automatically creates a new module file called "NewMacros." You can change this file name, but it's recommended for simple macros that you should leave it with the original file name. Once you better understand how to create module files that interact with each other, then you can create different file names and change the defaults to one of your own.
Anatomy of a Subroutine
VBA components are written in subroutines. Subroutines are small functions that perform an action when you call it from your Word document. These functions are the foundation for your macros. You can have one function that controls all of the commands for your macro, or you can split your macro into several functions in your Module file. The examples in this chapter use just one subroutine, but just know that you can create several to work with a macro.
All subroutines start with the keyword "Sub" in a file. When you see this word, you know that you have a subroutine. Any word following the subroutine keyword is the name. In this example (shown in the image above), the subroutine's name is "test." Remember that the subroutine's name is set to the name you enter in the macro configuration window in Word, but you can always change this name later.
Subroutines are ended using the statement "End Sub," which always terminates any statements contained within the subroutine structure. The "Sub" command starts the subroutine, and the "End Sub" statement ends it. Any content within these two statements compose the subroutine and will be executed when you call a macro.
Creating Your First Macro
Any statements created in a subroutine will run when you execute a macro. The VBA language has several functions and statements that you need to learn. Learning a language syntax is easy once you understand one language. The VBA language is easier than most, because it's closest to the standard English language. To learn how to create a macro, you must learn how to create simple ones until you increase your knowledge of the language slowly as you set up more subroutines and statements. Just a simple macro that displays a message box is one way to understand the way a macro executes.
For this example's macro, we'll create a simple popup box that will display the message "Hello World." Message boxes are common with macro, VBA an any language. They display a message to the user, and it's one of the simplest ways to illustrate the way a language and framework works for a developer.
The "MsgBox" function is what can be used to display a message to the user. You follow this keyword name with a message enclosed in quotes. If you don't use proper syntax, VBA will return an error message and the macro will not execute. Always test your macros before you distribute them. A macro that returns an error might always get halfway through each procedure and find an error. If this happens, you could have corrupted data where one half of the macro executed but the other half stopped due to a run-time error.
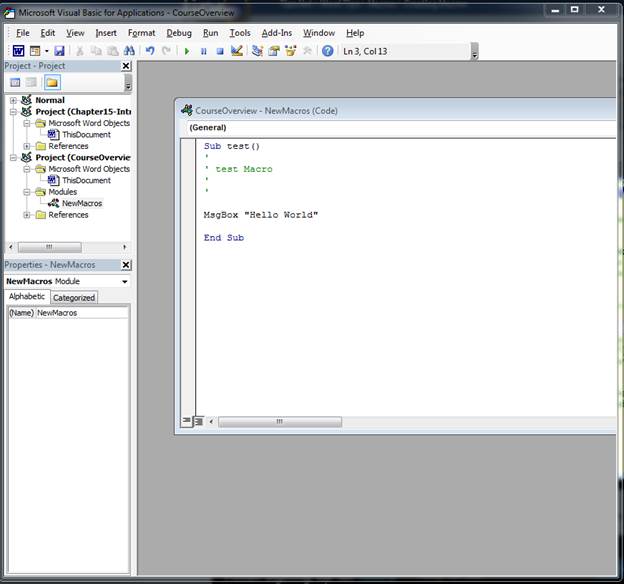
Type the following in the "test" subroutine created earlier:
MsgBox "Hello World"
Your VBA interface window should look like the following:
(Hello World example)
You can test your new subroutine by clicking the "Run" button in the main VBA menu.

The "Run" button looks like a play button, and the pause and stop buttons works when you need to control the execution of your subroutine.
Add a Macro Button
Your macro is set, but you need a way to invoke it. You can create a button that will trigger the macro function using the "Developer" ribbon tab. This tab is not enabled by default. You must add it to your interface. Click the "File" ribbon tab and then click "Options." A window opens where you can enable the tab. The image below shows the section of the window where it can be enabled. Click the "Developer" check box to enable it and click "OK."
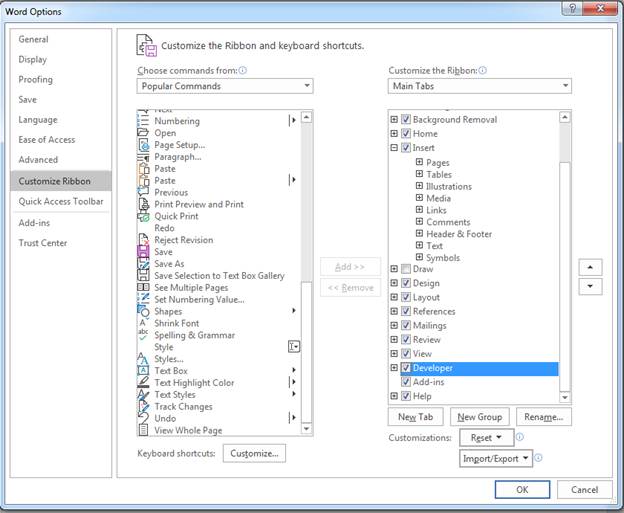
(Enable the "Developer" tab)
After the "Developer" tab is enabled, click it and look at the "Controls" category where many form controls that you recognize can be found.
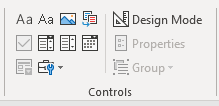
(Form controls)
Click the "Button" option and a button is created on the page. Double click the button and a new event is created. Type the code below to display a message box:
MsgBox "Hello World"
At this point, a message box is linked with the button. Close the VBA interface and click the button. A message box appears that displays "Hello World." You've officially created your first VBA macro in Word.