Adobe Photoshop Lightroom is a photo editing and management program offered by Adobe, allowing users to manage and edit multiple images at once using the Adobe Photoshop Lightroom interface. Unlike with Adobe Photoshop, Adobe Photoshop Lightroom's non-destructive behavior means that changes made to an image in Adobe Photoshop Lightroom are not made to the source image. In other words, you never destroy the original image with changes made in Adobe Photoshop Lightroom.
What's New in Adobe Photoshop Lightroom 5.5
Adobe Photoshop Lightroom 5.5 is the latest version of the Adobe Photoshop Lightroom CC program. Because updates occur so frequently with Creative Cloud programs, the new features introduced in 5.0 through 5.5 are listed below.
-
Adobe Photoshop Lightroom 5.5 can be installed on iPhone. This is the first time the program can be installed on iPhones.
-
Improvements to the mobile app in version 5.5 allow you to display images based on star rating or a custom sort order that you set from the Adobe Photoshop Lightroom desktop.
-
With version 5.4 and later, you can also install the Adobe Photoshop Lightroom mobile app to your iPad. All edits you make on mobile devices, such as the iPad are synced to your desktop.
-
A smoothness adjustment slider was added to Color Nose Reduction in version 5.2. This allows you to reduce low-frequency color mottling artifacts.
-
Improvements were made to the Spot Healing tool in version 5.2, including Feather control.
-
Auto Exposure was also improved in version 5.2 so that it is more consistent.
-
In version 5.2, the size of the Smart Preview image was updated. It is now 2560 pixels on the long edge.
-
Adjustments to the Local Adjustment Brush were made in version 5.2.
-
The new Radial Filter tool (version 5.0) gives you the power to emphasize part of your image by creating vignetted areas to highlight multiple areas.
-
The new Spot Removal tool lets you fix defects in images, even in irregular shapes (new with version 5.0).
-
The Book module was improved with version 5.0.
-
Sharing your images using publishing services became possible with version 5.0.
-
The Upright feature allows you to straighten images to gain the correct perspective (new with version 5.0).
-
And more
How Adobe Photoshop Lightroom Works
Adobe Photoshop Lightroom is a photo editing program created by Adobe, much like Adobe's other photo editing program called Photoshop. Both programs are alike in that they can be used to edit images; however, there are also some major differences.
The first major difference is something we discussed at the very beginning of this article. Adobe Photoshop Lightroom is a non-destructive program. Photoshop is. What we mean when we say a program is a non-destructive program is that the changes (or edits) you make to an image do not destroy the original image.
Here's now non-destructive editing in Adobe Photoshop Lightroom works:
1. Whenever you make changes or edits to an image, Adobe Photoshop Lightroom lists those edits or changes as instructions, per se, in the catalog file. The catalog file is a list of your images and their locations, as we will discuss in the next few paragraphs.
2. When Adobe Photoshop Lightroom lists the changes or edits, those changes or edits are not made to the image.
3. The changes are only made to the image when you export or output the image.
When you use Photoshop or similar programs, you open an image in the program typically by going to the Open command, then navigating to the place where the image is stored. You open the original image. You make edits to the original image. You forever change the original image at that point.
In Adobe Photoshop Lightroom, you must first import the images into a catalog file. You cannot just directly open an image. It must be imported into the catalog file. That said, keep in mind that Adobe Photoshop Lightroom does not actually import the image itself into the catalog file. Instead, an entry is created that logs the image's location. After that, anything you do to that image will be stored in the catalog file. If you move the image to a new location, you will need to update that location in the catalog file.
When you import images into Adobe Photoshop Lightroom, you can set import presets that will save you time down the road. For example, you can choose to leave the images in their original location, copy them to a new location with the original staying as it is, or you can move the images and delete the originals. When you copy or move images, you can also keep the file structure the same as where they were stored, or you can reorganize them into subfolders.
Learning Your Way around the Workspace
The Adobe Photoshop Lightroom workspace is pictured below:
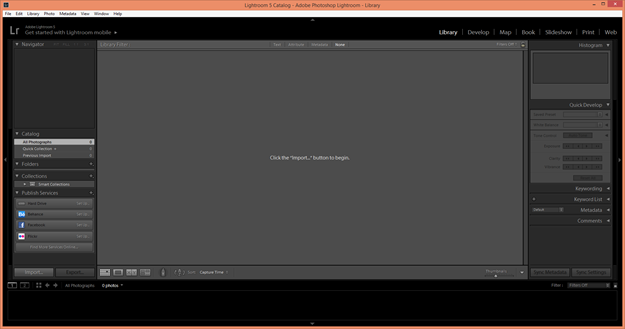
The workspace contains six main panels. If you look at the snapshot above, you will see the work area. This is the biggest area. It also contains the text, Click the 'Import' button to begin.
The left and right panel groups appear on each side of the work area. The layout of the panels is the same in each module. (We will talk about modules in just a minute). However, the content of the panels may differ from one module to the next.
Typically, you will use the left panel to find and select items. You will use the right panel to edit.
The top panel above the work area shows the identity plate on the left and the Module Picker on the right, as shown below.

You will see a toolbar below the work area. Below that is the filmstrip. The filmstrip can show every image in your library, but it can also show a filtered selection of images.
The Modules
The Adobe Photoshop Lightroom modules are listed on the right hand side of the workspace in the top panel.
They are:
-
Library
-
Develop
-
Map
-
Book
-
Slideshow
-
Print
-
Web
You will find different tools in each module that allow you to do things such as import, adjust, enhance, organize, publish, and output images for screen, print or web.
Let's talk briefly about each module so you are familiar with them as we move forward and begin to use the program.
Library Module
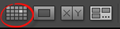
You will use the library module to view and organize the images in your library. There are different viewing modes available in the Library mode to make it easier to navigate through and select images. To switch between views, use the View Mode buttons at the bottom of the work area, as pictured below.

These view modes are Grid, Loupe, Compare, and Survey.
The toolbar can also be customized for each viewing mode. To do this, go to the far right of the Toolbar
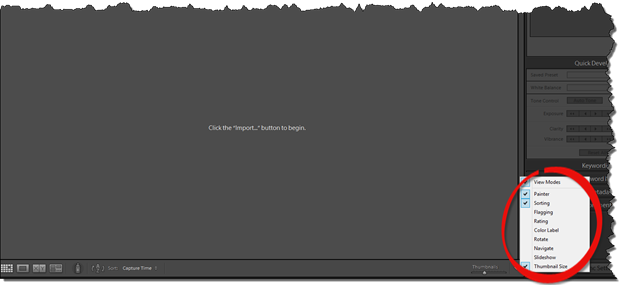
Anything with a checkmark beside it already appears in the Toolbar. Click to uncheck it. You can also click to put a checkmark beside other controls that you want to appear.
NOTE: You can follow the same steps to customize the Toolbar in any of the modules.
You can apply color corrections and tonal adjustments in addition to applying presets, editing tags and metadata, or published comments in Library mode.
Develop Module
Whenever you want to make detailed adjustments or edits to your images, you will most likely come to the Develop module. It is in this module that you can apply adjustments such as color or tone, crop and straighten, etc.
There are two different viewing modes in Develop mode: Loupe and Before/After. The Viewing Mode buttons are located below the work area just as in the Library module.
Map Module
The Map module allows you to geotag your images � or mark where each photo was taken. If your photos already have GPS coordinates, those will appear on the map. If you need to enter location details for an image by dragging an image directly onto the map.
Book Module
Just as it sounds, the Book Module helps you to create a photo book of your images. You can work with multiple pages, single pages, or spread by spread as you design your book. Once you are finished, you can upload it to Blurb for printing directly from Adobe Photoshop Lightroom, or you can save it as a PDF and print it yourself.
Slideshow Module
The Slideshow Module helps you create slideshows from collections in your library. You will see the images in the Filmstrip below the Toolbar, and you can choose the images that you want to add to your slideshow. To organize the slideshow, you can drag the thumbnails until they appear in the order you want them.
Print Module
The Print Module gives you the tools and templates that you will need to print your images. To select images from printing, go to the Filmstrip and then drag to change how they appear in the layout. In Print mode, the work area turns into the Print Editor.
Web Module
The Web module is where you will go when you want to prepare your images for export or upload to the web. You will find templates in the Web module to help you with the layout and presentation of your images.
Working in Adobe Photoshop Lightroom
Whenever you work in Adobe Photoshop Lightroom, there will be basic steps that you will take as you work with images. The steps are listed below. These are steps .
1. To start, you will import your images into Adobe Photoshop Lightroom.
2. Next, you will organize the images by using the Import dialogue box.
3. Once your images are imported, you can use the Library and Map modes to sort and tag them.
4. In the Develop mode, you will edit and adjust the images.
5. Choose from the Book, Print, Web, or Slideshow modules to create presentations from your images.
6. When you are finished, you will export or share your images and/or presentations.
Managing Images in Adobe Photoshop Lightroom
In this article, we will discuss:
-
Importing images
-
Organizing your images
-
Reviewing images
-
Finding images
-
Comparing images
-
Editing images using other programs
-
Using Help
Importing Images into Adobe Photoshop Lightroom
Images can be imported to Adobe Photoshop Lightroom from your computer, external hard disk, memory card reader, camera, and phone. All you will need to import images from an external device, such as a camera, is the appropriate hardware to connect the device to your computer.
To import images, go to File on the Menu bar, then select Import Photos and Video (File>Import Photo and Video).
This is what you will then see:
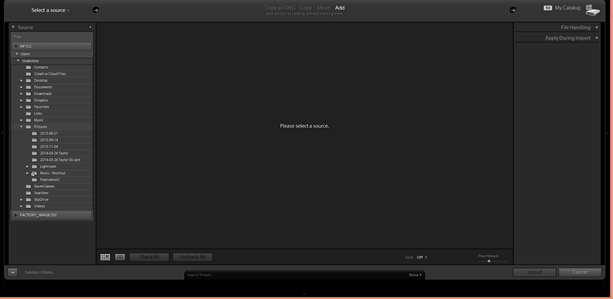
We are going to work from left to right across the top of the screen. That said, go to Select a Source. You will find this toward the top left corner.
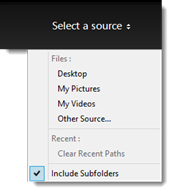
Choose the location that holds your image. You can choose Desktop, My Pictures, My Videos, or Other Source. If you are going to import from an external device, choose Other Source, as shown below.
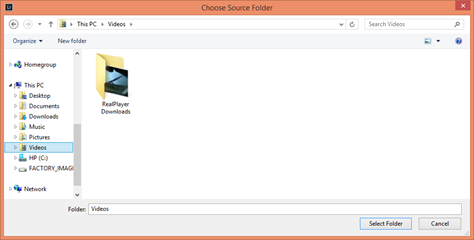
In the Choose Source Folder dialogue box, navigate to the device, then the folder that contain the images you want to import.
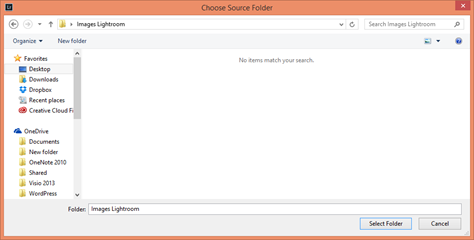
Click on the Select Folder button.
The images in the folder then appear in the work area.
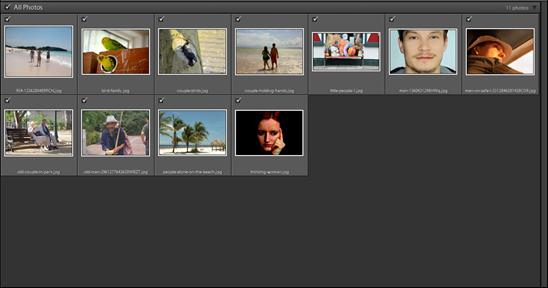
Uncheck any images that you do not want to import by clicking on the checkmark above the image.
You can also choose to click either the Check All or Uncheck All button below the work area.

Next, go to the right panel.
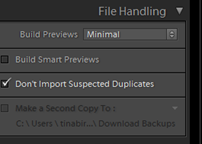
Go to the File Handling panel.
Make sure Minimal is chosen from the Build Previews. Also, make sure Do not Import Suspected Duplicates is Checked.
Now go to the Apply During Import panel (below the File Handling panel).
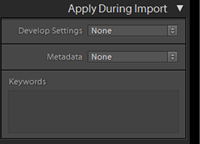
Select None for the Develop Settings and Metadata.
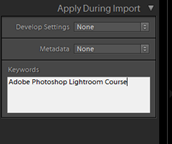
Enter any keywords you want. For this example, we are going to enter Adobe Photoshop Lightroom Course.
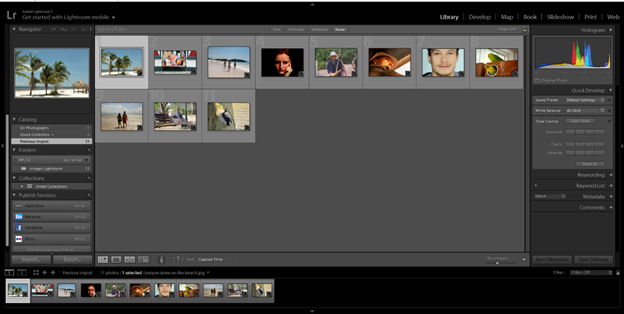
Click the Import button.

Adobe Photoshop Lightroom then opens in the Library module, as shown below.
Organizing Your Images Using Keyword Tags
In order to be able to use Adobe Photoshop Lightroom successfully, you are going to have to be able to find the images that you need when you need them. There may come a time when you have hundreds, perhaps even thousands of images, imported into Adobe Photoshop Lightroom. Therefore, you will want to keep the images organized so you can locate the ones you need as you work inside the program.
Organizing your images is easy. In fact, we already discussed one way to do it in the last section when we added a keyword tag. Adding keyword tags to images will help you to be able to easily find them. Make sure you use image specific keywords. For example, if it is a person, you can use their name as a keyword. Enter as many keywords as you need to help you identify and find pictures. Images that share keywords will then become virtual groups in your library.
Reviewing Images in Slideshow Mode
Once you import images, you may want to review them. This is especially helpful if you have imported hundreds of images from a folder and want to see what all is there.
The best way to review your images is to view them in a slideshow.
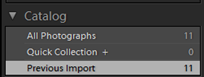
To do this, go to the Category panel (left panel) in Library mode.
You want to make sure Previous Import is selected. This is because you want to review images from the last import.
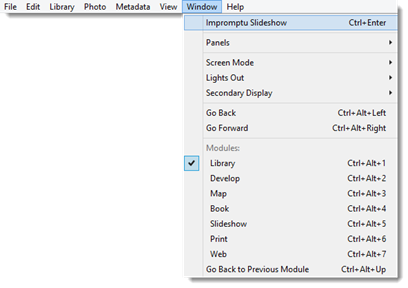
Now go to Window>Impromptu Slideshow.
Use the spacebar on your keyboard to pause the slideshow, then to resume it. The left arrow key will take you to the previous image, and the right arrow key will take you to the next done.
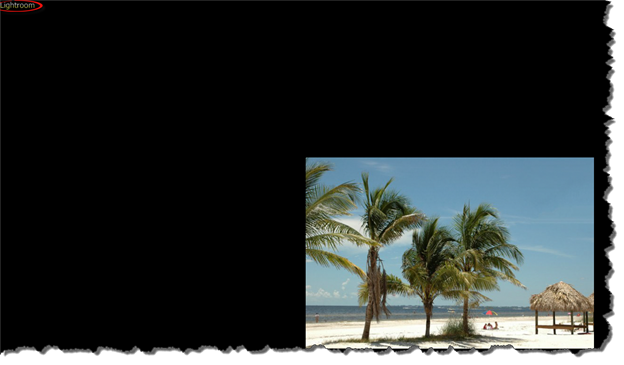
Click Adobe Photoshop Lightroom in the upper left hand corner of the slideshow to return to the program.
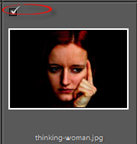
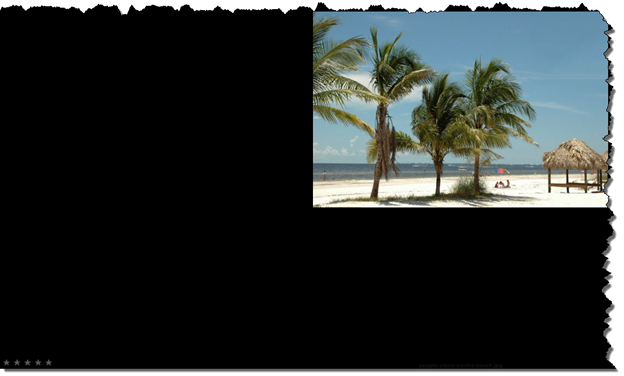
While the slideshow is playing, you can rank images with star ratings. You can also flag images or attach color labels. For now, you can assign a rating by typing a number from 1 through 5 on your keyboard as the image is displayed. This will add the matching number of stars.
As you can see in the lower left hand corner of the snapshot below, we typed a 5 to add five stars for this image.
You can press P on the keyboard to flag an image as a Pick, or X to flag it as a Reject. Press U to remove flag.
Color labels can be used to mark images for a certain project. To add a color label, press 6 for red, 7 for yellow, 8 for green, or 9 for blue.
Finding Images
In Library mode, use the Filter bar above the work area to search for images. You can search by text or metadata. In addition, you can also search by attribute, such as flags, ratings, or color labels.

We are going to search for five star images.
To do this, we go to the Filter bar and select five stars.
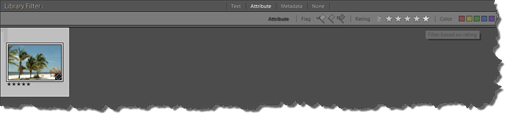
The images that match our search criteria appear in the work area.
Comparing Images
If you are not sure what image you want to use, you can compare two images side by side.
To compare images, go to Grid view by clicking the Grid View button, as shown below. This is located below the work area.
Next, go to Edit>Select None so that no images are selected.
Select the first two photos in the Filmstrip, then click Compare View in the Toolbar to switch to this view. It looks like this: 
You can also go to View>Compare.
This is what you will see in the work area when you go to Compare View:
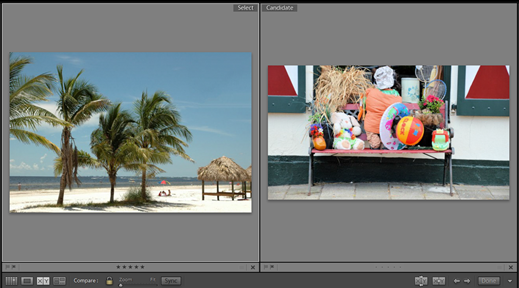
As you can see, the Select pane is active by default.
It is active for a reason. You can switch out the image in the Select pane with other images in the Filmstrip in order to compare them to the Candidate image.
To change the image in the Candidate pane, click the right arrow on your keyboard.
You can press Tab, then F5 to hide the top and side panels.
Click the Swap button in the toolbar to switch the Candidate and Select images.
Comparing Several Images
Survey view is what you will use to compare several images at the same time. You can use this to view multiple images, then narrow down those images until you find the one you want to use.
To do this, go back to Grid view, then go to Edit>Select None.
Next, go to the Filmstrip. Press CTRL+Click on any three images.

As you can see in the snapshot above, we have four images selected in the Filmstrip.
Click the Survey View button in the Toolbar. It looks like this: 
You can also go to View>Survey.
The images you selected now appear in the work area.
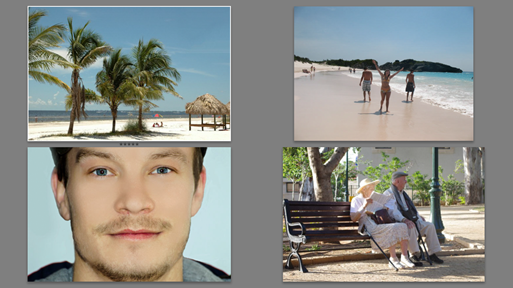
The image that is active appears with a white border. In the snapshot above, it is the image in the upper left hand corner.
If you hover your mouse over an image (or click on it to select it), you will see an "X" appear the bottom right of the image. Click on this "X" to remove the image from Survey view as you start to eliminate those images you do not want to use.
Editing Images Using another Program
Images in Adobe Photoshop Lightroom can be opened in another photo editing program when in the Library or Develop mode. You will be able to edit the original image or a copy. Plus, you can edit the image with or without the changes you have made to it in Adobe Photoshop Lightroom. Adobe Photoshop Lightroom will update the catalog for you if you change an original file. If you change a copy, it will be imported to the catalog and grouped in a stack with the original image.
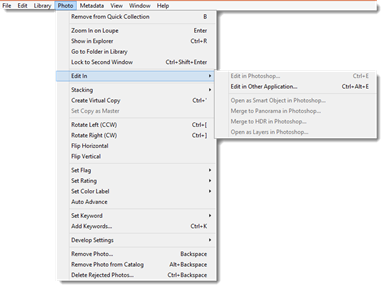
To use an external editing application, go to Photo>Edit In in Adobe Photoshop Lightroom.
If Photoshop is installed on your computer, that choice will be active.
If you do not have Photoshop or want to choose another program, click on Edit in Other Application.
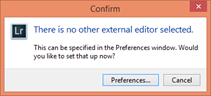
If you do not have an external editor specified for Adobe Photoshop Lightroom, you will be asked to set that up.
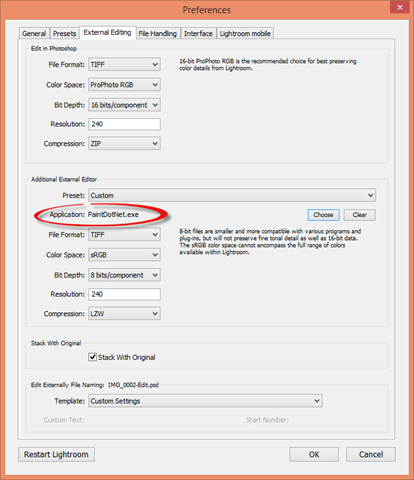
Click Preferences, as shown below.
You will then see the Preferences dialogue box.
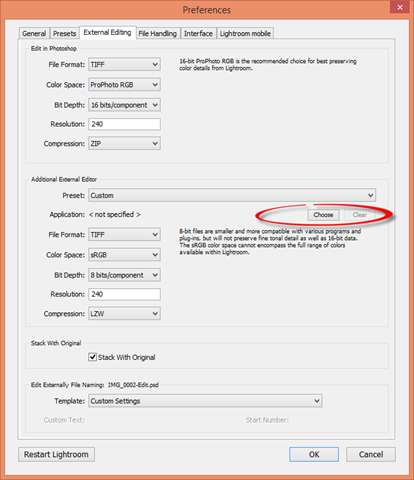
In the Additional External Editor section, choose the Application by clicking the Choose button.
Locate the program on your computer that you want to use.
Click to select it.
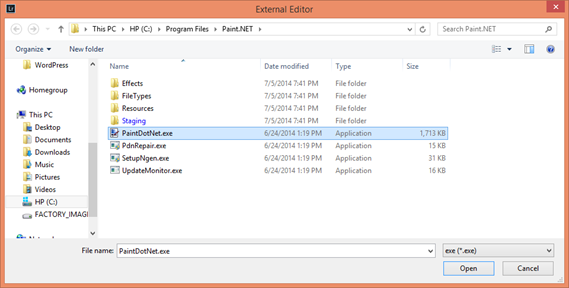
Click the Open button.
As you can see below, we have chosen Paint.net.
To edit in this application, go to Photo>Edit In. You will now see your editing application as an option.
Select your application.
You will then see this window:

We have already discussed these choices, so we are going to choose Edit Original.
Click the Edit button when you have made your choice.
Your image will then open in your chosen editing program.
Using Help
If you find yourself stuck as you use the program and need help using Adobe Photoshop Lightroom, Adobe offers you help using a few different methods.
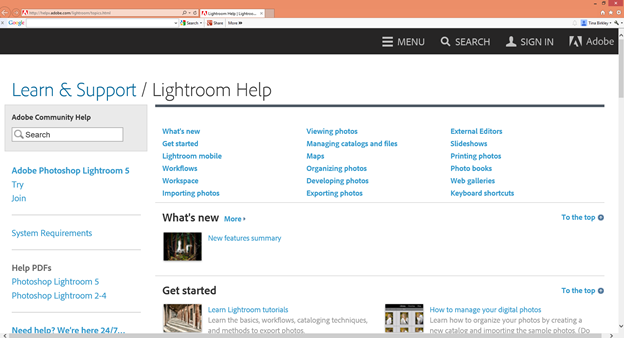
The first method is found by going to Help>Lightroom Help.
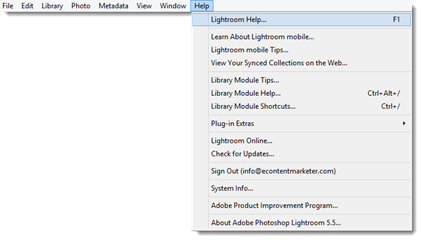
Here you will find help on the Adobe website. Just enter your search terms in the box on the left, then push Enter.
You can also get help while working in a module. The help you receive will apply to that module only. To access this kind of help, press CTRL+Alt.
To view all the keyboard shortcuts for a module, press CTRL+/.