Adobe Captivate is a responsive authoring tool that allows you to create eLearning content, such as eLearning courses, software demonstrations, branched scenarios, games, quizzes, and screencasts. The files you create in Adobe Captivate can be exported to MP4 and played in media players, as well as uploaded to websites.
ELearning courses that you create in Captivate can contain as many features and interaction as you need to create the course you want. Courses created in Captivate can include text, rollovers, clickable hotspots, quizzes, typing areas, special effects, audio, video, and the list goes on. Projects completed in Adobe Captivate can be published as Flash, HTML5, Word documents, PDF's, as well as videos. They can be viewed on Mac or Windows and can be displayed on YouTube, a private server, Vimeo, mobile devices, and Adobe Reader. What's New in Adobe Captivate
Adobe Captivate is continually growing and evolving. If you've used prior versions of Captivate in the past, you'll want to check out the notable enhancements and improvements that have been made in Adobe Captivate.
-
Enhanced rulers and guides
-
Improvements to the multi-state object feature
-
Improvements to the device capture feature
-
Enhanced effects
-
Preview projects before publishing to LMS
-
Work with svg graphics in Captivate
-
Create knowledge check slides
-
Publish to Adobe Captivate Prime
Why Adobe Captivate?
When you need to create an eLearning course or any type of video that provides instruction, you have several options. Years ago, the best way you could go was to use a screen recording program that would allow you to show viewers and students the content on your screen while you used your mouse to guide them through different aspects � and your voice to talk to and educate them. This was a primitive way to create online instructional content, and it also resulted in very large files.
There were other problems as well. The files you created on a Windows computer probably weren't compatible with the Mac. Plus, they weren't interactive. While you could show and tell things to your learners, you were not able to let them actually perform what you taught them to do. If eLearning was truly to become of value, it needed to be more interactive, in addition to being compatible with multiple operating systems and devices. It also needed to have reasonable file sizes so that they could be hosted on servers without having to wait until the next millennium for them to upload. That said, meet Adobe Captivate!
The History of Adobe Captivate
Software programs continually evolve to meet technology, but also to create new technology based on the needs of its users. Just think about word processing programs and how basic they were in the 1990's. They were nothing more than a type pad! Then look at Microsoft Word now and all it offers. Adobe Captivate is no different.
Adobe Captivate began as a little program called Flashcam in 2002. It was simply a screen capture application. It was effective enough, but still nothing capable of creating interactive learning tools like Captivate offers today. Before long, however, Flashcam was acquired by eHelp Software and was renamed RoboDemo. RoboDemo was more advanced than Flashcam. It would create more sophisticated demonstrations � and even interactive simulations.
eHelp Software created RoboDemo versions 3 through 5 before Macromedia acquired eHelp Software. Macromedia helped RoboDemo evolve by adding more features. They also changed the name from RoboDemo to what we now know as Captivate.
Adobe acquired Macromedia in 2005. Ever since then, Captivate has been known as Adobe Captivate and is now used to create eLearning courses about anything that you want.
The Key to Success with Captivate
To create a compelling, effective eLearning course, you need to plan ahead. Before using Captivate to create a project, take the time to plan using the following steps.
-
Decide why you're creating a course. Map out the entire course.
-
Determine your audience. What's the best way to teach the audience? For example, you would teach children differently than adults.
-
What are you teaching? Is eLearning the best method to use to teach the subject? If your course requires collaboration or discussion, it might not be appropriate for eLearning. E-learners usually work on their own with little or no interaction with other people.
-
Will your project contain images and background music? Determine where you will get these files. Also decide if you will use a template. If you will use a template, determine who will design or create it.
-
Decide who will write content for captions. Determine if you'll need an eLearning script or a voice-over script.
-
If your course isn't a software simulation, would it be easier to create the content in PowerPoint, then import it into Captivate?
Planning for Your Adobe Captivate Project
Creating an Adobe Captivate project isn't difficult, but it can be time-consuming. You can save time by planning ahead and getting some of the legwork, so to speak, out of the way before you ever begin. You'll want to start by determining how long you want your eLearning course to be � in minutes. Once you determine how long the course will be, you can start to figure out how much work will be involved.
Let's say that you determine your course will be 60 minutes long. You don't want to publish a course that will play for 60 nonstop minutes. Instead, you want to break down those 60 minutes into digestible chunks. It's a good idea to keep each chunk at no more than five minutes long. So, if your project is going to be 60 minutes long, you will actually have 12 Captivate projects that each play for five minutes.
Next, you will want to design and write the content for the course. For this, you'll need a script or a storyboard. You'll probably also need a voice-over script. Storyboards are rough sketches of the content of the slides in your project. Scripts are step-by-step procedures. Voice-over scripts are used as an alternative to having the narrator read the text on the screen, which is boring. You should almost always incorporate a voice-over script into your project.
Writing scripts take time. Writing a script for a five-minute lesson could take as long as three hours. For a 60-minute course, that could mean 36 hours of script writing. And remember, this is all before you even start to use Captivate so that you are prepared to use Captivate as soon as you open the program.
You will also want to have a project template for your course. A template contains placeholders, transitional slides, an introduction slide, a conclusion slide, a skin, as well as Start and End properties. You can create your own template or have someone create it for you.
In this course, you will learn to create a Captivate project from start to finish. However, just as important as learning the Adobe Captivate program is appreciating the time you will need to devote to every project you create. You should always plan on two hours of production time for each minute of the course. This gives you time for planning, as well as adding or editing content.
Let's Talk about Fonts
There's not a doubt that the courses you create will include text. That said, the fonts you use to create that text will be very important to the course itself. Certain fonts are harder than others to read. Some fonts inspire trust, whereas others take away from your credibility. The fonts you choose to use in your project are very important. It's the reason we want to discuss them here, before you ever open Captivate and get busy creating a project.
Times New Roman is arguably the most popular and used font in existence. And in fact, Times New Roman is a great font to use on printed materials. However, if one of your e-learners is accessing your course using a lower resolution monitor, Times New Roman can become hard to read when it's in digital format. The Arial font is a much better choice when pitted against Times New Roman and other fonts. The only exception is Verdana, which proved easier to read if you're using a 10 pt or smaller font size.
The most popular fonts used in eLearning are listed below.
-
Arial
-
Calibri
-
Verdana
-
Helvetica
-
Palatino
-
Century Schoolbook (for print)
-
Times New Roman (for print)
Getting Familiar with Adobe Captivate
Before you get started learning how to use Adobe Captivate, it helps if you take a few minutes to become familiar with the program's interface and become introduced to the very basic skills you'll need. Think of it as your first day at a new job. The first thing you will want to do is learn where to find everything and understand the very basics of the tasks you'll be expected to accomplish.
When You First Open Captivate
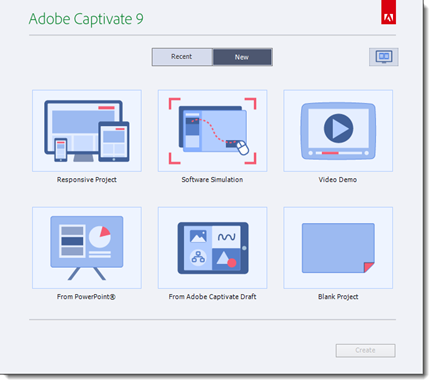
When you first open Adobe Captivate, you will see the window below.
This is the window for the Windows version of Adobe Captivate. If you're using Mac, it may look a little different, but the aspects will be the same.
In this window, you can see two tabs: Recent and New.
Under the Recent tab, you will find recent projects that you've worked on in Adobe Captivate.
The New tab will give you options to create a new project.
Let's open a new project. To do this, click the New tab, then click Responsive Project.
Click the Create button.
The Adobe Captivate Interface
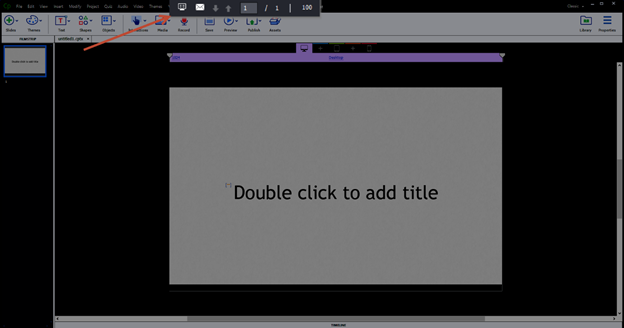
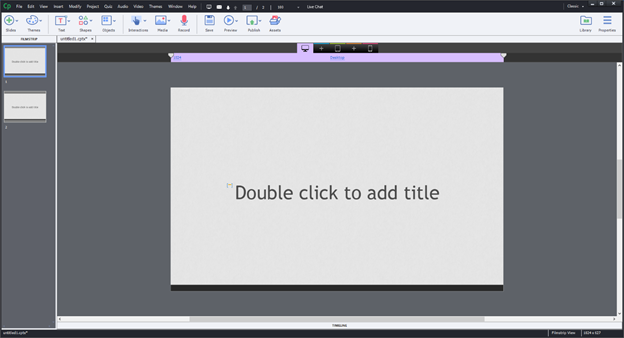
Below is a snapshot of what you see when you create a new responsive project.
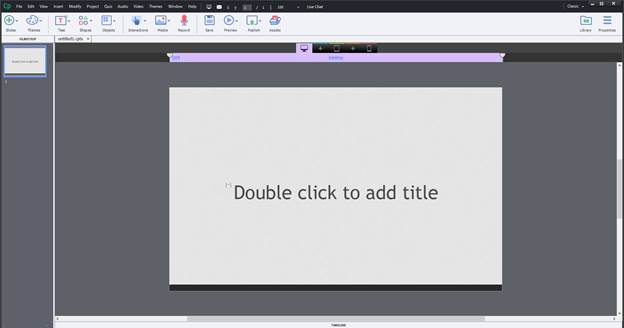
On the far left, you see the Filmstrip, which contains thumbnails of your slides.
In the center of the Captivate window, you can see our first slide. The grey area around the slide is called the Pasteboard. You can drop a slide object onto the pasteboard, and leave it there as long as you want. However, if an object is on the pasteboard, it will not appear in a published version of your project. You also won't see it in preview.
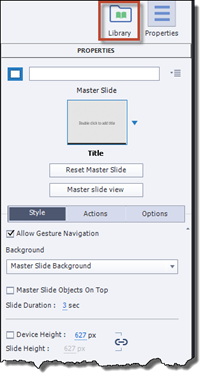
When you have a slide open in the main area of Captivate, you can manipulate any of the slide's objects, such as editing, adding/removing images, adding a button, etc. That said, you do not need to have a slide open in order to change its attributes. Instead, you can just select the slide in the Filmstrip to change its properties. The Properties panel appears on the far right side of the Captivate window. It's pictured below.

This panel is officially known as the Properties Inspector. To open the Property Inspector, double click on a slide in the Filmstrip.
Above the Properties Inspector, you will see the Library button, as highlighted below.
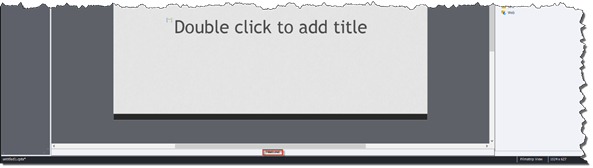
You can select slides to view in the main area by going to the Page Number field to the right of the menu bar. It is magnified in the snapshot of the Captivate window below.
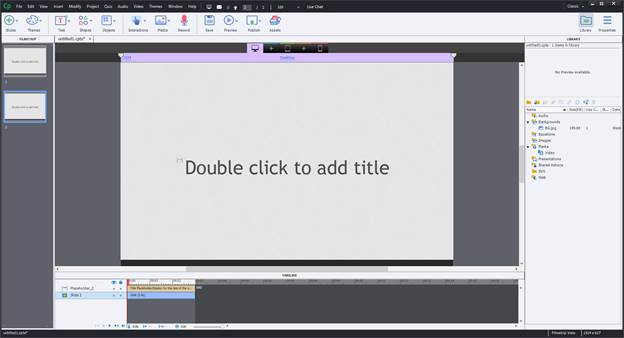
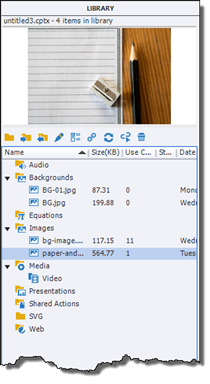
When you click the button, you will see the Library Inspector.
![]()
The Library Inspector shows your project's assets, such as images, media, audio, etc.
You can press the Page Up or Page down buttons ![]() to scroll up or down through the slides in the Filmstrip.
to scroll up or down through the slides in the Filmstrip.
The Timeline appears at the bottom of the Captivate window.
Click on the Timeline to open it.
The Menu Bar is located at the very top of the Captivate window, as highlighted below.
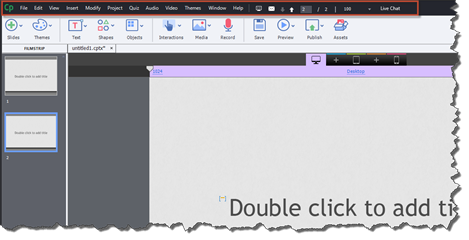
The Menu Bar is where you will find tools, commands, and views that you'll need when working in Adobe Captivate.
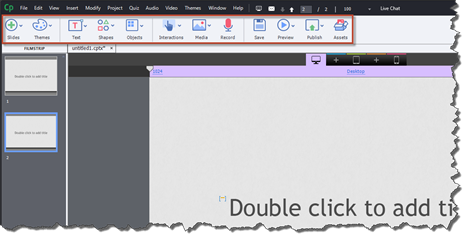
The Toolbar is located at the top of the Captivate window. It's located below the menu bar. You can see the Toolbar highlighted in the snapshot below.
Below the Toolbar, you can see tabs which tell you the projects you currently have open in Captivate.

Resetting the Workspace in Captivate
As you can see by just the few snapshots we included in the last section of this article, the Captivate window can quickly become cluttered. To reset the workspace, go to Window in the Menu Bar. Go to Workspace, then Reset �Classic'.
About Soft Skills eLearning
Adobe Captivate can be used to record actions happening on your screen. These types of recordings can be interactive -- or "Let Me Try" eLearning. They also include demos, or "Show Me" eLearning. In addition, you can use Captivate to create videos like the ones you would see in YouTube or Vimeo. Soft Skills eLearning includes anything that doesn't count as a computer recording. The best way to remember it is this: If it's a life skill that you're going to teach, it's a soft skill.
For the remainder of this article, we will start teaching you the Captivate skills you'll need to create your first soft skills project.
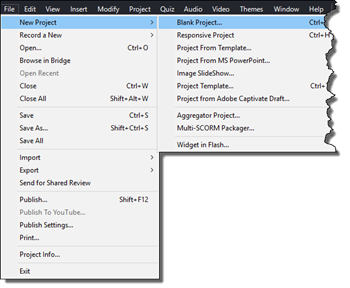
Creating a Blank Project
To create a blank project, go to File on the Menu Bar. The path you will take is File>New Project>Blank Project.
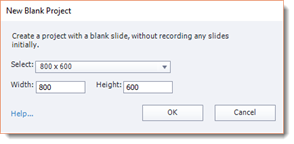
You will then see the New Blank Project dialogue box, as pictured below.
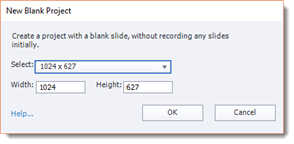
Choose a width and height for your project. We are going to select 800x600.
Click OK.
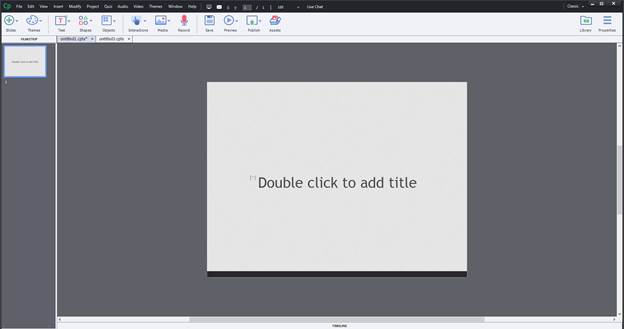
Your new blank project then opens in Captivate. It contains one slide.
Saving a Project
To save a project, go to File>Save.
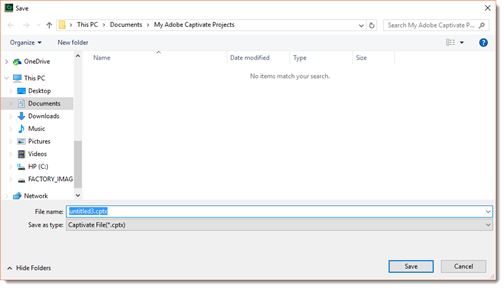
In the File Name field of the Save dialogue box (pictured above), enter a name for the file.
Click Save when you're finished.
NOTE: If you already have saved the project, but want to rename it or save it in a different format, go to File>Save As.
Applying a Theme
A theme is a collection of master slides. The master slides in a theme contain placeholders and object styles that you'll use to start to create your project. Selecting a theme is a very important first step when creating a new blank project. A theme brings consistency to your project and makes it easy for people to watch. If every slide looked totally different from the slide before and after it, it would cause too much distraction and make your project difficult to watch.
To select a theme, click the Themes dropdown arrow in the Toolbar.
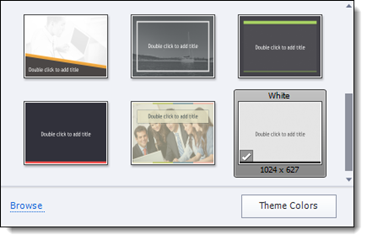
Click on the thumbnail of a theme to select it.
You will then see this dialogue box:
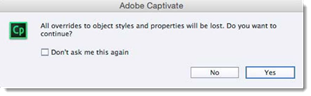
Click the Yes button.
We have chosen the Vibrant theme.
Adding New Slides that Match Your Theme
Remember, a theme creates a consistent look from one slide to the other. To add a slide that matches your theme, go to Insert>New Slide From, then select the type of slide you want to add. The type of slide you choose should reflect the content you want to add to the slide.
For example, we are adding a second slide to our project. The slide we are adding will be the second slide, slide #2, or the slide that comes after the very first slide people will see. What type of content will go on that slide? It's too early in the project for a Cycle/Process slide. We should probably choose a blank slide, an objectives slide, or even a Table of Contents.
We are going to select Table of Contents.
As you can see, the new slide is consistent with the first slide. It's design is part of the theme.
Deleting a Slide
To delete a slide, go to the Filmstrip. Select the slide you want to delete, then right click on it. Choose Delete.
You will see this warning box:
![]()
Click the OK button to delete the slide.
Adding Content to Text Placeholders
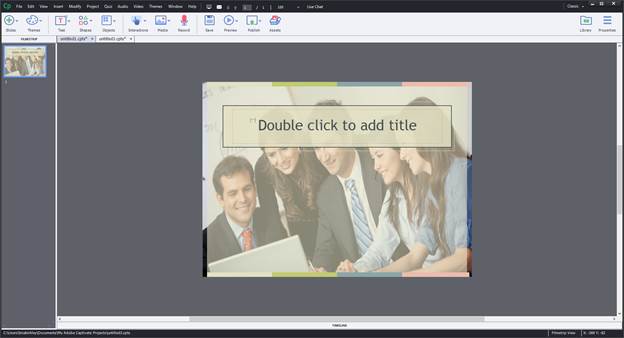
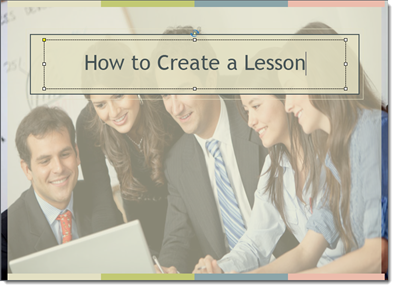
Take a look at the first slide in our project.

On this slide, you can see a placeholder for text. It says "Double click to add title".
If we double click on the placeholder, the text will become selected. We can then type our own text, as shown below.
Double click on any text placeholder to enter your own text.
Adding Content to Image Placeholders
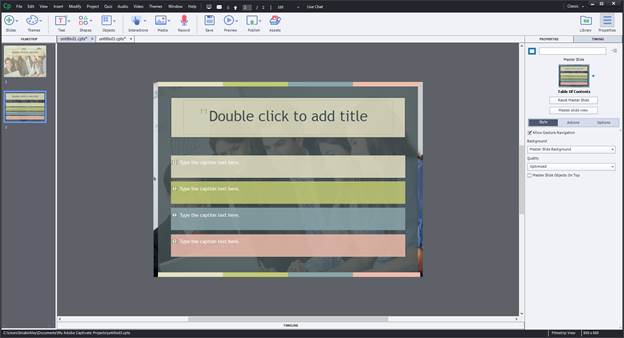
Take a look at the snapshot of one of our slides pictured below.
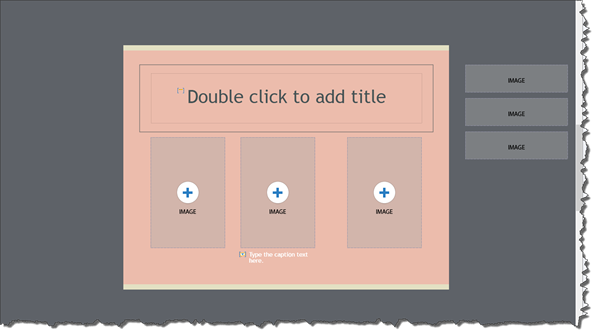
As you can see, this slide as a text placeholder, but it also has image placeholders.
To insert an image into the placeholder, click the plus (+) sign on the image placeholder.
You will then see the Select Image from Library dialoge box.

To select an image from your computer, click the Import button.
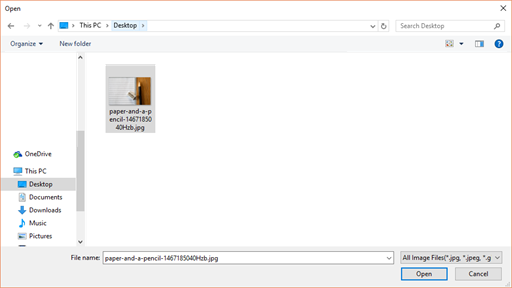
Select the image you want to use in the Open dialogue box (pictured above), then click the Open button.
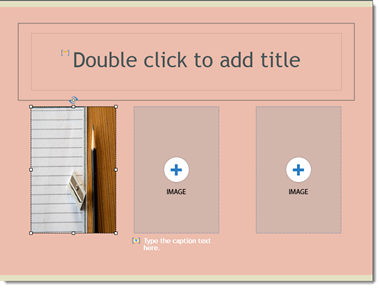
As you can see above, the image is then inserted in the placeholder. It's also resized so it matches the size of the placeholder.
Notice that the image is also listed in the Library Inspector.
Creating a Text Button
Buttons allow those who view your lesson to interact with the lesson. For example, a viewer can click a button and be taken to the next slide � or start an audio clip. In other words, buttons are a way to create interactive content on your slides.
You can add different types of buttons to your slides. These types include Shapes, Image, Transparent, and Text. For the purpose of this article, we are going to learn to add a text button.
To insert a button, go to the Toolbar and click the Interactions dropdown arrow.
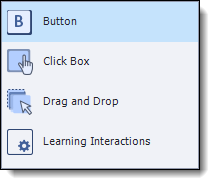
Select Button from the dropdown list (pictured above).
You'll see the new button appear in the middle of the slide.
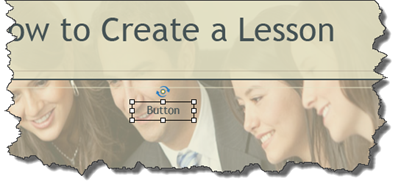
The new button has a bounding box around it. You can hover over it until you see a four-way arrow, then move the button. You can use the four white squares on the bounding box to resize the button. You can use the yellow dot with arrows that appear above the button to rotate it.
Double click on the button to open the Properties Inspector.
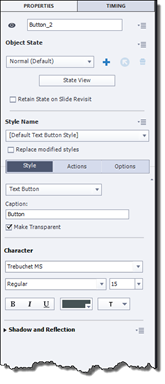
The Properties Inspector for the button has three tabs: Style, Action, and Options.
We are going to start by clicking the Styles tab to customize the text and create a style for our button.
In the caption field, enter the text that will appear on the button.
We are going to enter Next Slide. When we do this, the text on our button changes to Next Slide.
Right now, our button is transparent. We changed this by unchecking the Make Transparent box.
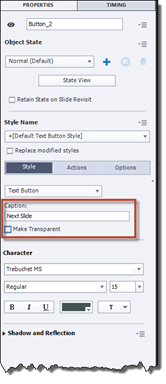
We can also change the font, font size, and font attributes for the button.
Once you've created a style for your button, click on the Actions tab.
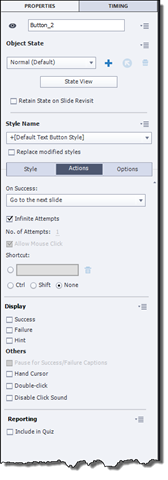
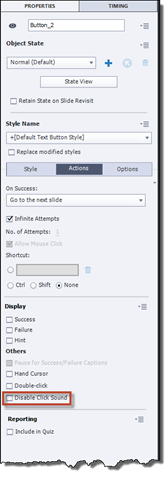
The action is what occurs when the viewer completes the required step. In this case, it's clicking the button. What you want to happen when the viewer clicks the button? Go to the On Success field and select what you want to happen.
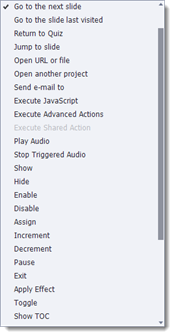
We are going to choose Go to Next Slide.
Next, we want to add a hand cursor to the button. A hand cursor looks like a hand and lets a viewer know that they're hovering over a button that can be clicked.
To add the hand cursor, go to the Others section of the Action window. Put a checkmark beside Hand Cursor.
![]()
By default, there will be a clicking sound whenever someone clicks on the button. To change this, put a checkmark beside Disable Click Sound.
Save your project when you're finished. It's a good idea to save your project as often as possible.