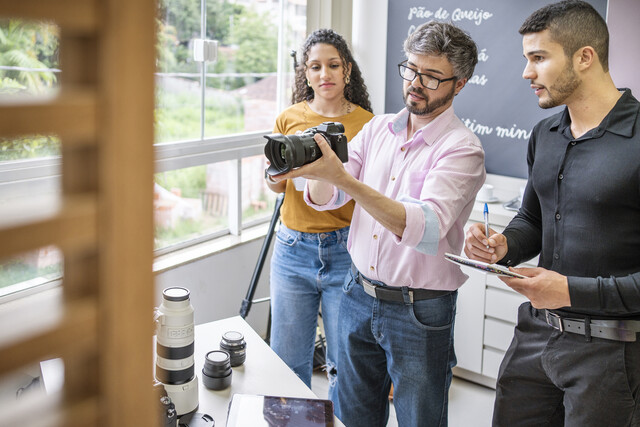
Lightroom gives you several tools and controls to edit your photos. For example, you can make color corrections, crop images, rotate images, and even remove objects from images. However, none of the changes that you make will destroy your original image. Remember, in Lightroom, all changes you make are listed with your image in the catalog, but not applied to the image until you export it. Even then, the original stays in-tact. That said, in this article, we are going to discuss:
-
Trimming video clips
-
Producing a JPEG image from a video frame
-
Adjusting tonal balance in the Library module
-
The Develop module
-
Cropping, rotating, and straightening images
-
Removing objects from images
-
Making tone and color corrections
-
Undoing and redoing changes
-
Creating a snapshot
Trimming Video Clips
If your camera shoots video as well as still images, you can use Lightroom to edit your video clips as well. You can import videos in several formats, including AVI, MOV, MPG, and MP4. Import those clips in exactly the same way as you did images.
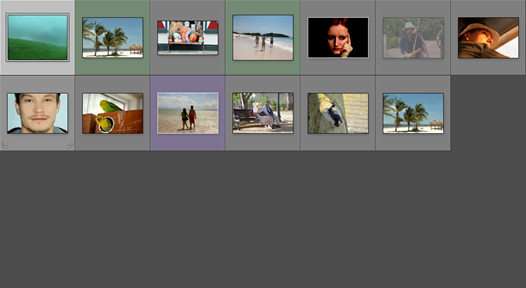
In the snapshot below, we have imported a video clip. We have the thumbnail showing in Grid view in the Library module.
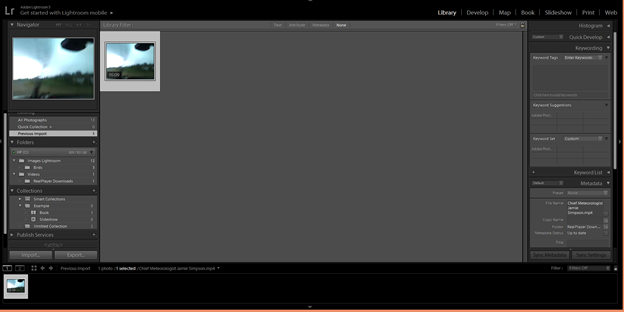
You can move your mouse pointer over the thumbnail to scrub through the video. In addition, you can double click on the thumbnail to see it in Loupe view.
To trim a video clip, click on the Trim Video button in Loupe view.
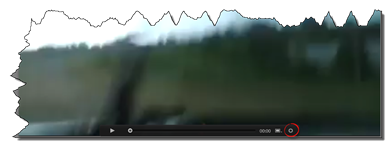
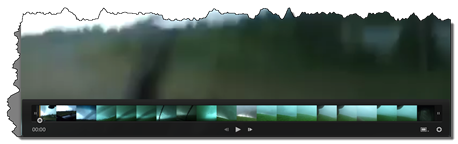
When you do this, you will see a filmstrip view of your video appear in the Control Bar, as shown below.

To get a better idea of where this appears, take a look at our thumbnail below.
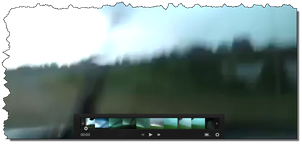
You can lengthen the bar that contains the filmstrip view by dragging in either the left or right side.
To trim the video, drag the control in the filmstrip view (shown above). You can see the time count on the left hand side. Drag to the spot where you want to start your trim.
Move the marker on the left hand side to the "start trim" location.

Next, drag the marker on the right side inward until you reach the desired "end trim" location.

Press Play to view the trimmed video.
Producing Still Frames from Video Clips
To save a frame in your video clip as a JPEG image, click the Frame button in the Control Bar. It is shown below.
Select Capture Frame from the context menu.

If you go to the Catalog panel and select All Photographs, you will see the frame appear as a JPEG with your other images in Grid view.
Adjust Tonal Balance in Images
Throughout this article, we are going to discuss how to edit and make adjustments to your images. Most of the edits and adjustments you will make will be made in the Develop module. However, some can be made in the Library module. For example, you can adjust the lighting and tonal balance of images in Library mode.
If you are following along with this Lightroom, you should already be in Library mode.
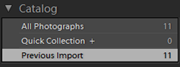
Go to the Catalog panel in the left panel group.
Make sure that Previous Import is selected. We want to make sure we are working with the most recently imported images.
Next, go to the Filmstrip.
Hold your mouse pointer over one of your images in the Filmstrip. You can select any image you wish.
When you do this, you will see the file name and details appear in a tooltip.
The file name is shown in the status bar above the Filmstrip as well.

Double click on the image (in the Filmstrip) so it opens in Loupe view.
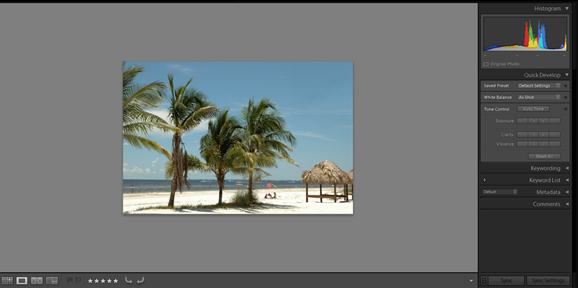
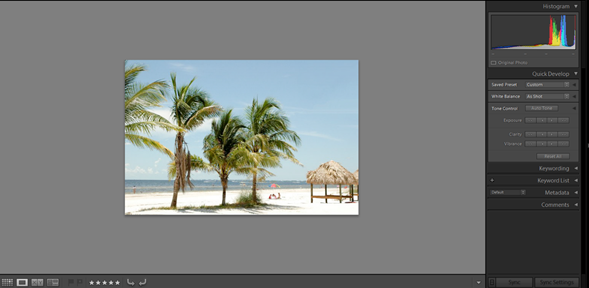
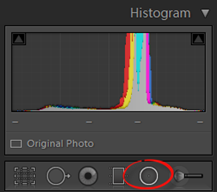
Expand both the Histogram and Quick Develop panels in the right panel group, then go to the Quick Develop panel. Any edits and adjustments that you can make in the Library module will be made in the Quick Develop panel.
Click the Auto Tune button.
As you click it, watch the tone distribution curve shift in the Histogram panel.
The following snapshot shows our image before we clicked the Auto Tune button.

This snapshot shows after. Note the difference in the Histogram panel, as well as the image.
Introducing the Develop Module
Since most of the edits and adjustments you will make to images will be made in the Develop module, let's switch to the Develop module now by clicking Develop in the top panel.
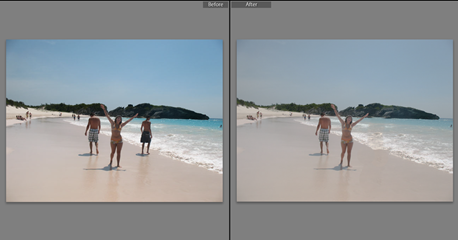
There are two views that you can use in the work area of the Develop module: Loupe view and Before/After. The Loupe view allows you to work with one image. In Before/After, you have different layout options to help you compare the original version of your image with the edited version you create.
In the right panel group, you will find your editing and adjustment tools. The panels in the right panel group are listed in the order that you will use them as you work with your images. This creates an efficient workflow and makes it easier for you to accomplish what you need to do.
Cropping, Straightening, and Rotating Images
Before you start to crop images, it helps if you create a bigger work area for yourself by hiding the Filmstrip and the left panel group.
Below is our work area.

Go into Loupe view, if you are not already.
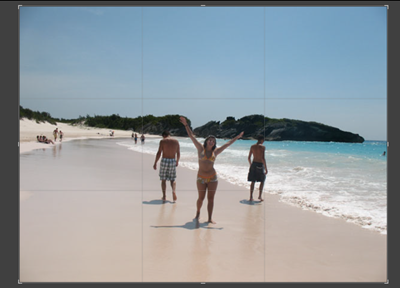
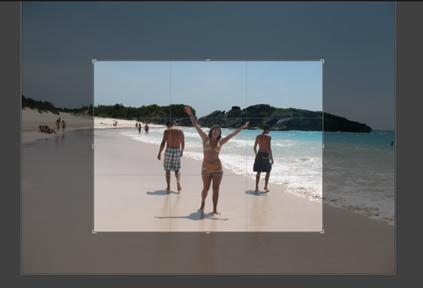
Now, click the Crop Overlay tool button. This is right below the Histogram panel.
When you click the button, you will see a crop overlay rectangle appear over your image in the work area.
If you can see the info overlay (upper right corner), disable that now by going back to Library mode, right clicking on the image in the work area, then selecting View Options from the context menu.
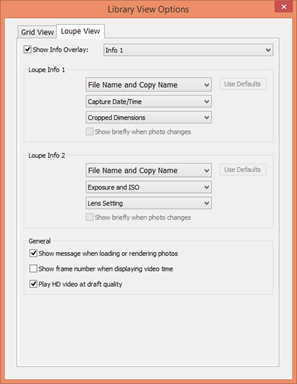
Uncheck Show Info Overlay, click the X in the upper right hand corner, then return to the Develop module. You may need to go back to Loupe view, then click on the Crop Overlay button again.
When you click on the Crop Overlay tool, you will see a control pane appear above the Basic panel.
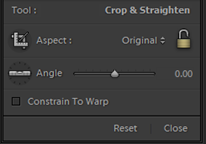
Go to the Aspect menu (shown above). Select Original. If the padlock icon is unlocked, click to close it. This constrains the aspect ratio and prevents distorting your image.
To rotate the image, drag outside of the crop rectangle. In other words, hover your mouse in the work area near the image (but not over it). You will see your pointer change to a curved two-way arrow. Click and drag your mouse to rotate the image.
To straighten the image, use the angle slider. It should be at 0.00 for a straight image.
To crop your image, click and drag inward on one of the handles. The handles appear in each of the four corners, then at top center, bottom center, left center, and right center. You can see the handles in the image below.
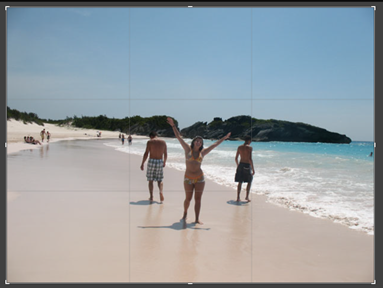
You can use different handle to crop the image.
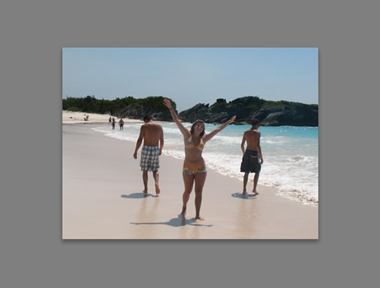
Release your mouse button when you have achieved the desired crop.
Now click the Crop Overlay tool again to finalize the crop.

Removing Objects from Images
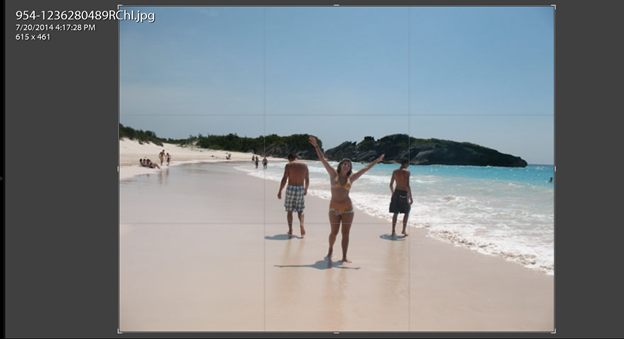
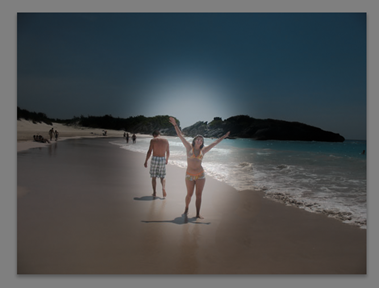
Let's say that, in the image below, we want to remove the guy on the right.
To do this, first display the left panel group. Go to the Navigator panel and select 1:2 from the zoom level menu.
Now make sure your image is in Loupe view. Go to the right panel group and click on the Spot Removal tool.
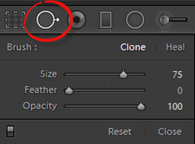
Click Clone.
Next, hover your mouse over your image. If the cross hairs are not covering the object you want to remove, you may want to increase your brush size.
Click and drag down over the object you want to remove. It will look like this when you do:
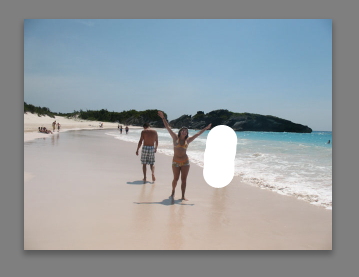
When you are finished, release your mouse button.
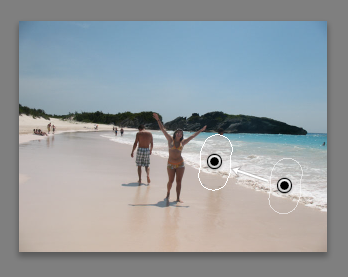
In the snapshot above, you can see our source area on the right. This is the area of the image Lightroom used to cover the object we wanted to remove. You can also see the clone (over the object). The circles in the middle are brush spot marker pins. Click H to get rid of the brush spot marker pins.
If we wanted to use a new source area, we would right click on a marker pin and select New Source from the context menu. You can also click Heal in the tool options pane to change the brush mode to adjust the active spot in your image.

Simply click on the area you want to heal.
Take time to practice using the Spot Removal tool and Healing Brush. You will find that you will use the Spot Removal tool to remove an object, then adjust the feather and opacity settings in the Healing brush tool to help blend it all together.
NOTE : If you want to remove a small area, such as a pimple on someone's face, you can simply click on the area using the Spot Remove tool. Just make sure you have the correct brush size. The brush size does not need to be larger than the area you want to remove.
Making Tone and Color Corrections
Let's talk about the different ways you can make tone and color corrections using the panels located in the right panel group in the Develop module.
-
Use the Basic panel to correct color balance and adjust the tonal range.
-
The Tone Curve panel allows you to adjust the contrast.
-
The Detail panel allows you to sharpen the image and reduce noise.
-
The Split Toning panel, as well as the Effects panel, allows you to add special effects, including vignette and simulated film grain.
-
The HSL/B&W panel allows you to adjust specific colors.
-
The Lens Corrections and Camera Calibration panels allow you to correct lens distortions.
We will talk about these things later in this article, as well as in the next.
Undoing and Redoing Changes to Images
If you make changes to an image, then decide you want to undo the changes, you have a couple options that will help you restore your image.
You can go to Edit/Undo to undo your most recent changes. If you click Edit>Undo once, it will undo the last change you made. Click it again, and it will undo the one before that, etc. By going to Edit>Redo you can achieve the opposite and redo changes that you have undone.
However, if you want to restore an image to earlier state that goes too far back for Edit>Undo to fix, you can use the History panel in the left panel group.
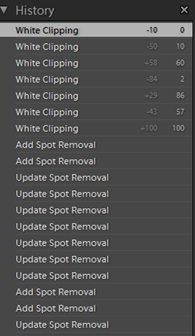
You can see our changes listed in the History panel above.
If you move your mouse over those changes and keep your eyes on the preview in the Navigator panel, you can see how your image looked at the various stages. This also helps you find the point where you want to restore the image.
Click the entry in the History panel that you want to use.
Creating a Snapshot
As you saw in the last section, the list of changes in the History panel can become quite long. For that reason, it is a good idea to save the steps that you took as you developed the image. You can save each of these steps as a snapshot. You will be able to use the snapshot as a guide.
To create a snapshot, go to the History panel and right click on the first entry.
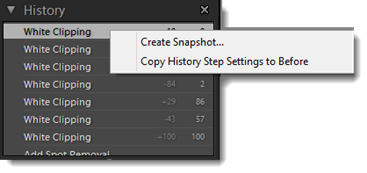
Select Create Snapshot from the context menu.
In the New Snapshot dialogue box, enter a name for the snapshot, then click OK.
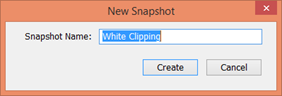
The snapshot appears in the Snapshots panel in the left panel group.

Editing and Adjusting Images Continued
Lightroom gives you several tools and controls to edit your photos. In this article, we are going to continue exploring the right panel group. You will learn even more ways to edit and adjust your images while working in Lightroom.
We will discuss:
-
Working in the Basic panel
-
Using the Radial Filter tool
-
Saving effects as presets
-
Creating virtual copies of your images for editing purposes
-
Using the Graduated Filter tool
-
Using the Adjustment Brush Tool
-
Adjusting colors in your images
-
And more
Working in the Basic Panel
You will start with the top panel in the right panel group (Basic panel) and work your way down as you edit and adjust your images. For that reason, we are going to start in the Basic panel as we discuss more ways to make changes to pictures.
The Basic panel is pictured below.
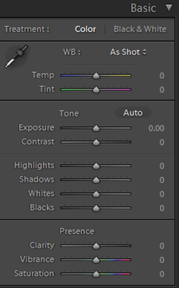
As you can see in the snapshot above, the Basic panel is comprised of different sliders. These sliders make adjusting the color and tonal range of your images easy.
To adjust exposure in an image, drag the Exposure slider in the Basic panel. Look at the Histogram panel as you do to see the effects the changes have on the curve.
Next, drag the Contrast slider. You can watch the Histogram panel again.
Take a look at what we have done below by increasing the amount of contrast.
We will use Before/After view for this.
Go ahead and experiment with Shadows and Highlights as well all the other adjustment, by dragging their respective sliders. Experiment until your image looks the way you want.
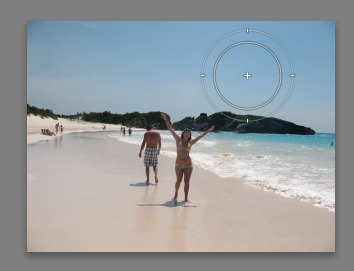
The Radial Filter Tool
The Radial Filter tool allows you to apply vignette effects to your images. You can also use it to create ellipictal masks.
To use it, go back to Loupe view, then click the Radial Filter tool. It is located below the Histogram. We have circled it in the snapshot below.
Drag an ellipse onto your image, as shown below.
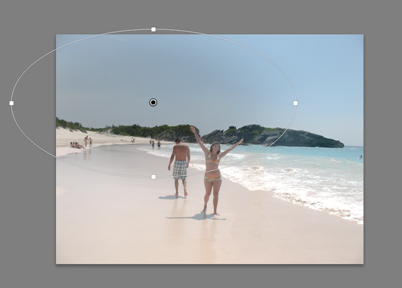
You can use the handles to resize the ellipse. Use the black dot in the center to drag and move the ellipse.
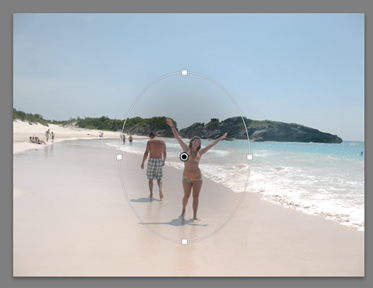
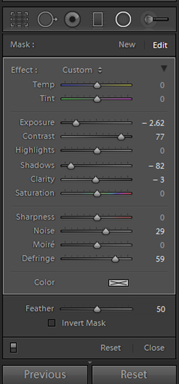
Now, go ahead and make the adjustments you want using the sliders.

Here is our image after making adjustments:
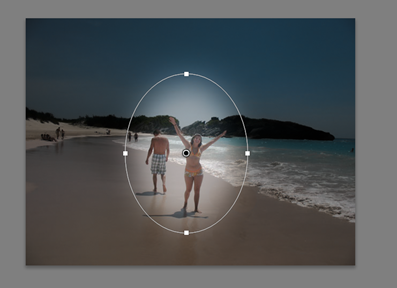
In the snapshot below, you can see our adjustments using the sliders.
Press Shift+M to deactivate the tool.
Saving Effects as a Preset
If you are following along in Lightroom, chances are you spent a lot of time adjusting the sliders in the section where we talked about the Basic panel. You did this so you could achieve exactly the effect that you want. The good news is that you can take those settings and create a preset so that you can quickly and easily apply those adjustments to other images as well.
Here is how to do it.
In Loupe view, make sure the image that has the settings you want to save it displayed in the work area.
Go to Develop>New Preset.
You will then see the Settings dialogue box.
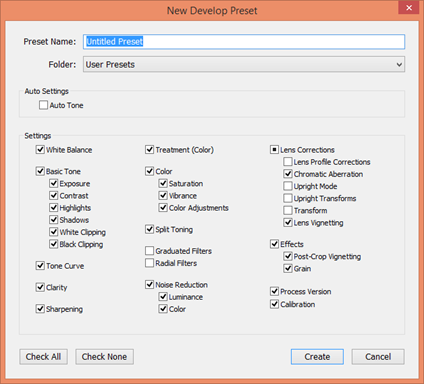
Enter a name for the new preset, then make sure that the adjustments you made that you want to save have checkmarks beside them.
When you are finished, click the Create button.
Your new preset is now listed in the Presets panel.
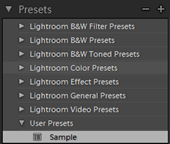
To apply the preset to another image, select an image in the Filmstrip, then click on the preset in the Presets panel.
Creating a Virtual Copy
If you want to work on an image and experiment with new changes, but do not want to destroy the change you have already made, you can do this by creating a virtual copy. You can make all the changes you want to the virtual copy. If you like the changes, you can save the virtual copy as your main catalog copy. However, if you do not, your main copy stays in-tact, as you left it.
To create a virtual copy, go back to the Library module and go to Grid view.
Right click on the image, then select Virtual copy from the context menu.
In the Filmstrip, a virtual copy has a page peel (or dog ear), as shown below.

To delete a virtual copy (or any image), right click on it in the Filmstrip, then select Remove Photo.
Working with the Tone Curve Panel
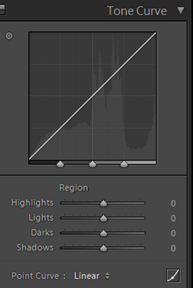
Using the Tone Curve panel, you can adjust contrast in different parts of the tonal range. The Tone Curve panel is pictured below.
To see how it works, go to the Navigator window and change the zoom to FIT.
Now, go to the Point Curve menu in the Tone Curve panel.
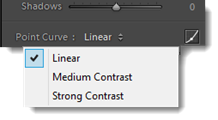
Try all three menu options to get a feel for the effect each has on the image.
Let's go with Medium Contrast for this example.
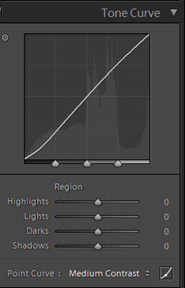
If you look at the panel, you can see a light version of the histogram in the display. This will help tell you where you need to increase contrast.
Move your mouse over the display. The region your mouse is over is highlighted.
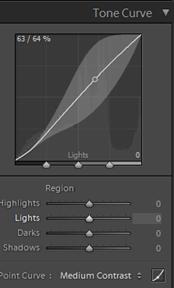
In the snapshot above, we are hovering over the Lights region.
That said, so far, we have talked about the image as a whole. However, you can also edit the tonal range for certain parts of the image.
You can also go to the display and drag on the target button (the little circle) to adjust the tonal range. Look at your image as you do this. You can see what region you are adjusting.
The Graduated Filter Tool
The Graduated Filter tool allows you to create a gradient mask so that an adjustment is stronger in one area, then fades.
To do this, go to the Histogram panel. Click on the Gradient filter.
Make sure New is selected, as shown below.
When you are finished, drag diagonally across your image.
Next, adjust settings using the sliders.
To change the angle of the gradient, hover your mouse near the pin (the black dot). You will see a two way arrow. Drag to change the angle of the gradient.
You can also drag the pin in order to make the gradient larger � or smaller.
Click the Done button on the bottom right of the work area when you are finished.
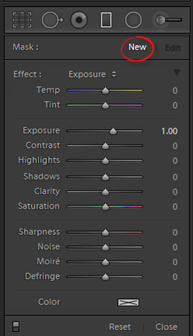
The Adjustment Brush Tool
The Adjustment Brush tool is used to edit different areas of your image by painting adjustments.
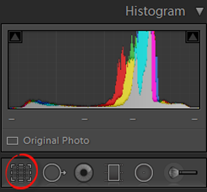
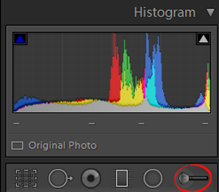
To use it, click on the Adjustment tool in the Histogram panel.
When you do, the controls will appear below it.
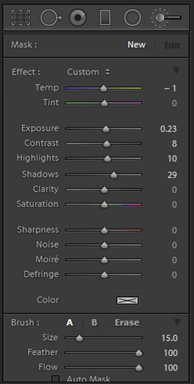
Set the Mask to New. It should be set as this by default.
Next, adjust the sliders.
Set your brush side. Put a checkmark beside Auto Mask (at the bottom) so that Lightroom will detect the edge of any area you paint and mask the parts of the image that fall outside of that area.
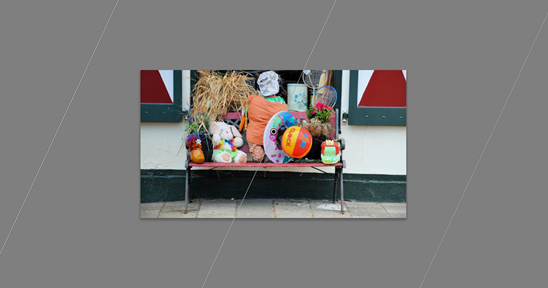
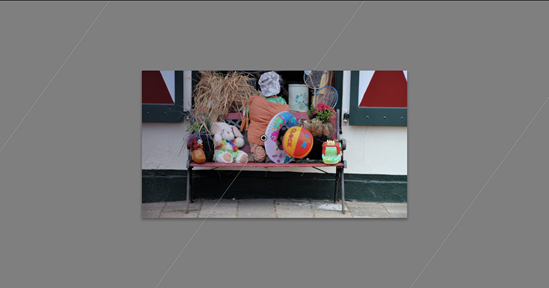
In the image below, you can see we painted the object the object on the right side of the image.
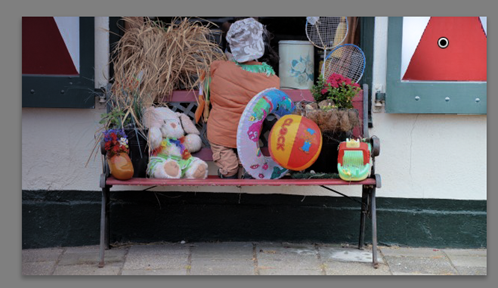
Press K when you are ready to disable the brush.
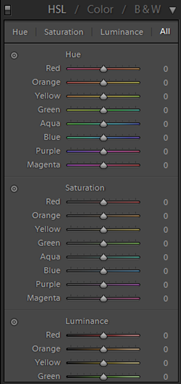
Adjusting Colors
Each pixel in your image has a color. The color of each pixels can be expressed as an RGB (Red Green Blue) value or as hue, saturation, and luminance.
Hue is the actual color of the pixel. For example, it could be blue, red, yellow, and the list goes on.
The saturation is the intensity of a hue. If you look at the color wheel below, the less saturated colors are closer to the center. These colors are usually neutral, greyed, or muted.
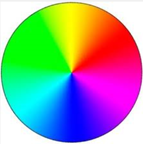
Luminance is the brightness of a color. Underexposed pictures or black images have a minimum value of luminance; whereas, overexposed pictures or white images have a maximum value of luminance.
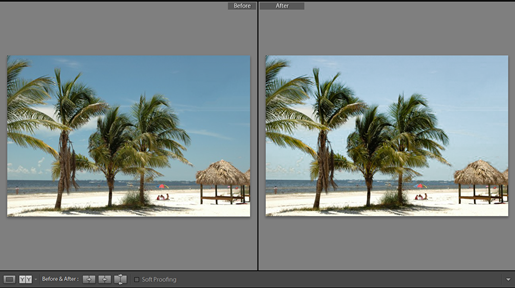
Let's lighten the sky in the picture shown below.
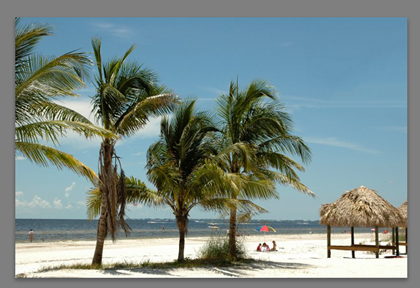
We can do this by increasing the luminance.
Here is how.
Make sure you are in the Develop mode.
Set the zoom level to FIT in the Navigation panel.
Now, go to the HSL/Color/B&W panel in the right panel group.
Put a checkmark beside HSL in the header of the panel, then click All, as shown below.
Now click the Target tool. This is located to the left of Luminance, as circled below.
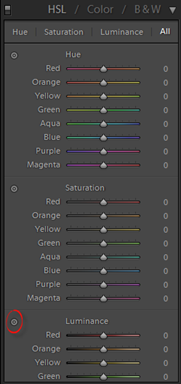
Make sure you are in Loupe view, then click on the sky. Drag upwards to increase the luminance.
Click the Done button at the bottom right of the work area when you are finished.
We have switched to Before/After view to show you the difference.
Creating a Black and White Image
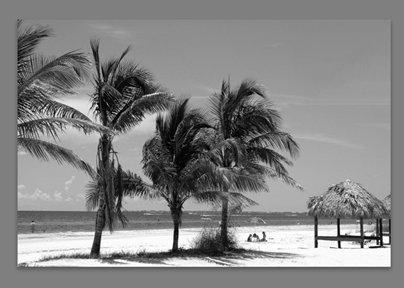
To turn one of your color images to black and white, go to the HSL/Color/B&W panel. Click on B&W in the header.
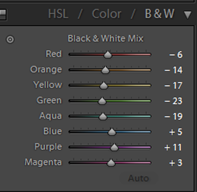
Your image is converted to black and white.
You can use the sliders to adjust the color manually if you want.
You can also use the adjustment target tool to adjust the black and white mix in different areas of the image. To do this, click on the Target button. It is circled in the snapshot below.
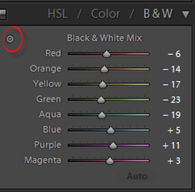
Drag upwards on an area in the image to lighten and downward to darken.
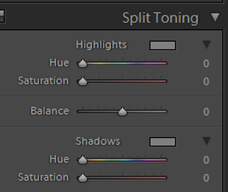
About Split Toning
Split toning is not nearly as complex as it sounds. When you apply a split toning effect to an image, you replace dark tones or shadows with shades of a color. You replace lighter tones or highlights with tints of another color.
The Split Toning panel is shown below:
Let's see how it works.
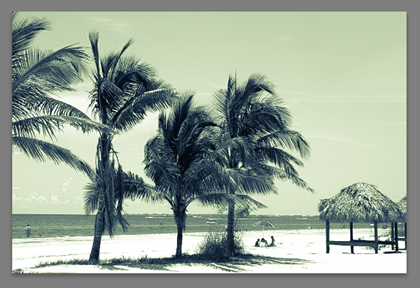
Make sure you are in Loupe view, then right click on the image.
Select Settings>Lightroom BW Toned Presets>Split Tone 2 from the context menu.

Our black and white image now looks like this:
Now you can go to the panel group and use the sliders to adjust the color if you want.
You can also use the Basic, as well as the Tone and Curve panel.
Copying Settings
You can take the settings from one image and apply them to multiple images.
To do that, select an image in the filmstrip that you have applied effects or settings to, then also select a few other images that you have not yet edited. Remember to CTRL+Click to select multiple images.
Next, click the Sync button that is located below the right panel group.
You will then see the Synchronize Setting dialogue box.
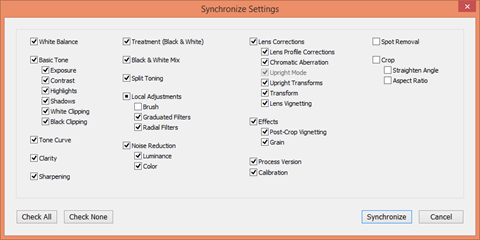
Check off the effects and/or settings you want to sync, then click the Synchronize button.
Removing Lens Distortion
To remove distortion, such as fish-eye, that can be caused by a camera lens, go to the Lens Correction panel, then click on the Manual tab, as shown below.
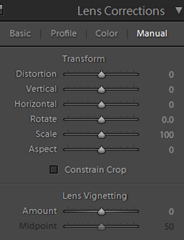
Now drag the sliders beneath Transform to see the changes it makes to your image.
Correcting Perspective
To correct the perspective in an image, to go the Basic tab in the Lens Correction panel.
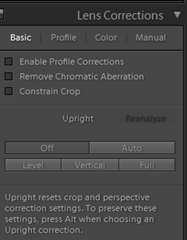
Put a checkmark beside Enable Profile Corrections.
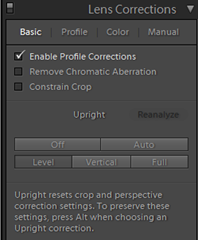
Under Upright, click Level, Vertical, and Full to see how they change the perspective of your image.
To adjust the perspective automatically, click Auto.
The Detail Panel
The Detail panel is where you will go for sharpening images and removing noise.
The Detail panel is pictured below.
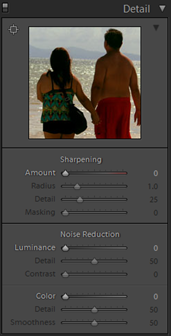
As with the other panels in the Develop mode, you can adjust the sliders to sharpen your image or reduce the noise.
Adding Effects
The Effects panel lets you add a post-crop vignette or grain effect to your images.
The Effects panel is pictured below.
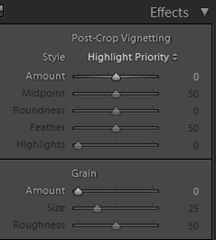
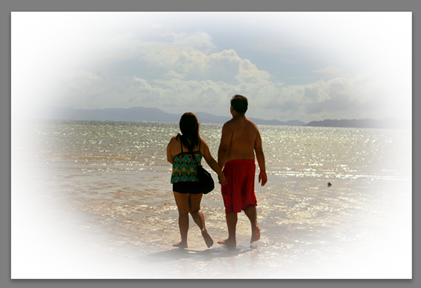
Below we have used a post-crop vignette effect to frame our image.
You can see how we adjusted the sliders to achieve it.